Page 92 of 454
�Û�Ý�Û
�Ý
�Û�Ý
�Û�Ý
CONT INUED
LANGUAGE SELECTION
ADJUST OUTSIDE TEMP.
DISPLAY
TRIP A & AVG. FUEL A RESET
with REFUEL
Here are the f our custom settings
forthemetersetup:
ELAPSED TIME RESET
While the multi-information display
is in the CUSTOMIZE GROUP
screen, select METER SETUP by
pressing the INFO ( / ) button,
and then press the SEL/RESET
button.
Each time you press the INFO ( / ) button, the screen changes as
shown in the illustration. Press the
INFO ( / ) button until you see
the setting you want to customize,
then press the SEL/RESET button
to enter your selection.
Multi-Inf ormation Display
Meter Setup
Inst rument s and Cont rols
91
Press the or button.
Press the SEL/RESET button. seepage92
seepage98
seepage96
seepage94
Page 97 of 454
�Û�Ý�Û�Ý
While the multi-information display
is in the METER SETUP of the
CUSTOMIZE GROUP, press the
SEL/RESET button. The screen
changes to CUSTOMIZE MENU.
Press the INFO ( / ) button until
you see the above display.
To cause trip A and average fuel
economy A to reset every time you
ref uel your vehicle, f ollow these
instructions:
Press the SEL/RESET button. The
screen changes as shown above.
Select ON or OFF by pressing the
INFO ( / ) button, then press the
SEL/RESET button to enter your
selection.
Multi-Inf ormation Display
T rip A & A vg. Fuel Reset wit h Ref uel
96
Page 98 of 454
�Û�Ý
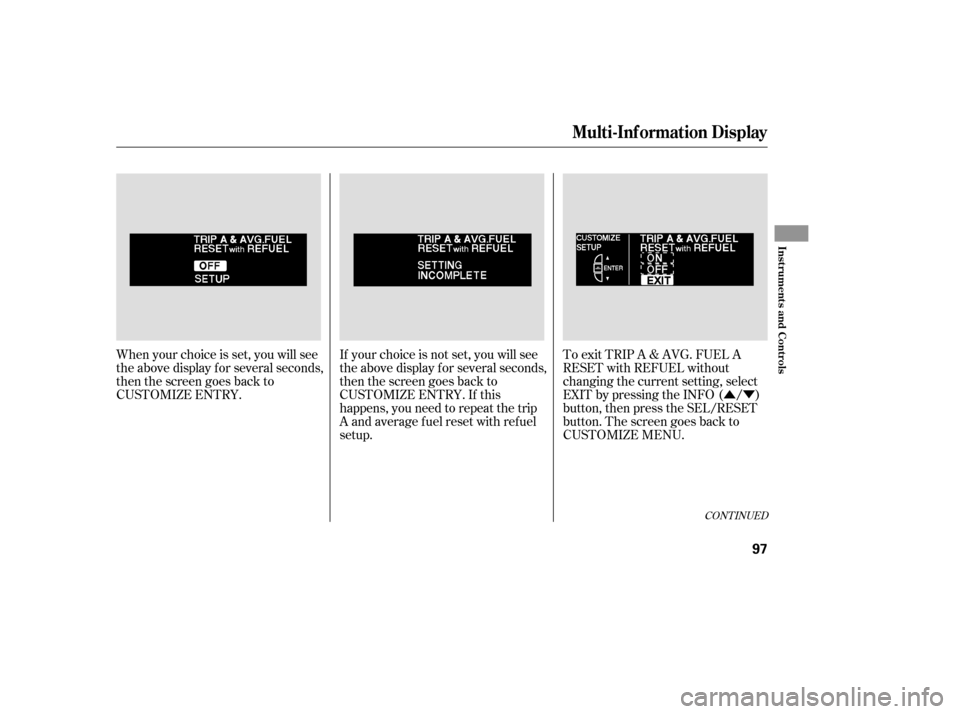
To exit TRIP A & AVG. FUEL A
RESET with REFUEL without
changing the current setting, select
EXIT by pressing the INFO ( / )
button, then press the SEL/RESET
button. The screen goes back to
CUSTOMIZE MENU.
When your choice is set, you will see
the above display f or several seconds,
then the screen goes back to
CUSTOMIZE ENTRY.
If your choice is not set, you will see
the above display f or several seconds,
then the screen goes back to
CUSTOMIZE ENTRY. If this
happens, you need to repeat the trip
A and average f uel reset with ref uel
setup.
CONT INUED
Multi-Inf ormation Display
Inst rument s and Cont rols
97
Page 296 of 454
Bef ore you begin driving your
vehicle, you should know what
gasoline to use and how to check the
levels of important f luids. You also
need to know how to properly store
luggage or packages. The
inf ormation in this section will help
you. If you plan to add any
accessories to your vehicle, please
read the information in this section
first..............................
Break-in Period . 296
.................
Fuel Recommendation . 296
.........
Service Station Procedures . 297
.....................................
Ref ueling .297
.
TIGHTEN Fuel Cap Message .298
Opening and Closing
.................................
the Hood .299
....................................
Oil Check .301
..............
Engine Coolant Check .301
...............................
Fuel Economy . 302
...
Accessories and Modif ications . 303
.............................
Carrying Cargo . 305
Bef ore Driving
Bef ore Driving
295
Page 297 of 454

Help assure your vehicle’s f uture
reliability and perf ormance by paying
extra attention to how you drive
during the f irst 600 miles (1,000 km).
During this period:Avoid full-throttle starts and rapid
acceleration.
Avoidhardbrakingforthefirst
200 miles (300 km).
Do not change the oil until the
scheduled maintenance time.
You should also f ollow these
recommendations with an
overhauled or exchanged engine, or
when the brakes are replaced. Do not tow a trailer. We recommend quality gasolines
containing detergent additives that
help prevent f uel system and engine
deposits.
In addition, in order to maintain good
perf ormance, f uel economy, and
emissions control, we strongly
recommend, in areas where it is
available, the use of gasoline that
does NOT contain manganese-based
f uel additives such as MMT.
Use of gasoline with these additives
may adversely af f ect perf ormance,
and cause the malfunction indicator
lamp on your instrument panel to
come on. If this happens, contact
your authorized dealer f or service.
Your vehicle is designed to operate
on premium unleaded gasoline with a
pump octane of 91 or higher. If this
octane grade is unavailable, regular
unleaded gasoline with a pump
octane of 87 or higher may be used
temporarily. The use of regular
unleaded gasoline can cause metallic
knocking noises in the engine and
will result in decreased engine
perf ormance. The long-term use of
regular-grade gasoline can lead to
engine damage.
Break-in Period
Fuel Recommendation
Break-in Period, Fuel Recommendation
296
Page 298 of 454
CONT INUED
Park with the driver’s side closest
to the service station pump.
Some gasoline today is blended with
oxygenates such as ethanol or
MTBE. Your vehicle is designed to
operate on oxygenated gasoline
containing up to 10% ethanol by
volume and up to 15% MTBE by
volume. Do not use gasoline
containing methanol.
If you notice any undesirable
operating symptoms, try another
service station or switch to another
brand of gasoline.
For f urther important f uel-related
inf ormation, please ref er to your
. Open the f uel f ill door by pressing
the button on the driver’s door.
(To open the f uel f ill door
manually, see page .)
1.
2.
412
Service Station Procedures
Ref ueling
Quick Start Guide
Bef ore Driving
297
FUEL FILL CAP
FUEL FILL DOOR RELEASE BUTTON
Stop the engine, and keep
heat, sparks, and flames
away.
Handle fuel only outdoors.
Wipe up spills immediately.
Gasoline is highly flammable
and explosive. You can be
burned or seriously injured
when handling fuel.
Page 299 of 454

Remove the f uel f ill cap slowly.
You may hear a hissing sound as
pressure inside the tank escapes.
Place the cap in the holder on the
fuel fill door.
Stop f illing the tank af ter the f uel
nozzle automatically clicks of f . Do
not try to ‘‘top off’’ the tank. Leave
some room f or the f uel to expand
with temperature changes.
even though the tank is not f ull,
there may be a problem with your
vehicle’s fuel vapor recovery
system. The system helps keep
f uel vapors f rom going into the
atmosphere. Consult your dealer.If your f uel cap is loose or missing, a
‘‘TIGHTEN FUEL CAP’’ message
appears on the multi-information
display af ter you turn the ignition
switch to the ON (II) position, after
you start the engine or while you are
driving. Turn the ignition switch of f
and conf irm the f uel cap is installed.
If it is, loosen the cap, then retighten
until it clicks at least once.
Screw the fuel fill cap back on
until it clicks at least once. If you
do not properly tighten the cap,
you will see a ‘‘TIGHTEN FUEL
CAP’’ message on the multi-
inf ormation display (see right
column on this page), and the
malf unction indicator lamp may
also come on (see page ).
Push the f uel f ill door closed until
it latches.
3.
4.
5.
6.
410
If the f uel nozzle keeps clicking of f
Service Station Procedures
Tighten Fuel Cap Message
298
Page 300 of 454

Park the vehicle, and set the
parking brake. Pull the hood
release lever located under the
lower lef t corner of the dashboard.
The hood will pop up slightly.
Turn the engine of f , and check or
retighten the f uel cap until it clicks at
least once. The MIL goes out af ter
several days of normal driving once
the cap is tightened or replaced. If it
does not go out, have your dealer
inspect the vehicle. For more
inf ormation, see page .
The TIGHTEN FUEL CAP message,
displayed after you turn the ignition
switch to the ON (II) position or
start the engine, should go of f af ter
tightening the f uel cap, turning the
ignition switch of f and on, then
driving over 12 mph (US) or 20
km/h (Canada) for at least 10
minutes. Due to dif f erent driving
conditions,itmaytakeafewdrive
trips to make the message go of f .
The TIGHTEN FUEL CAP message
displayed while driving should go of f
af ter tightening the f uel cap, turning
the ignition switch of f and on, then
driving over 30 mph (US) or 48
km/h (Canada) for at least 45
seconds. Due to dif f erent driving
conditions,itmaytakeafewdrive
trips to make the message go of f . If the system still detects a loose or
missing f uel cap, the malf unction
indicator lamp (MIL) comes on. If a
loose or missing f uel cap was not the
cause of the TIGHTEN FUEL CAP
message coming on, the MIL will
also come on. When the MIL comes
on, the message goes of f .
1.
410
CONT INUED
Opening and Closing the Hood
Service Station Procedures
Bef ore Driving
299
HOOD RELEASE LEVER