PERIODIC MAINTENANCE AND MINOR REPAIR
6-33
6
EAU24360
Front wheel
EAU24470
To remove the front wheel
WARNING
EWA10820
�
It is advisable to have a Yamaha
dealer service the wheel.
�
Securely support the motor-
cycle so that there is no dangerof it falling over.
1. Place the motorcycle on the cen-
terstand.
2. Loosen the front wheel axle pinch
bolt, then the wheel axle and the
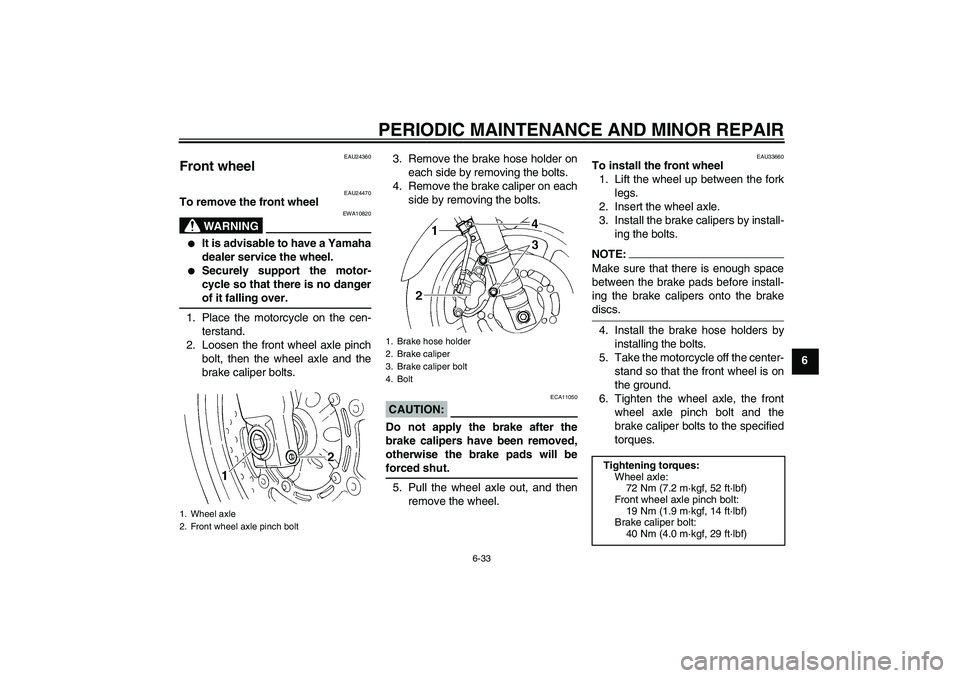
brake caliper bolts.3. Remove the brake hose holder on
each side by removing the bolts.
4. Remove the brake caliper on each
side by removing the bolts.
CAUTION:
ECA11050
Do not apply the brake after the
brake calipers have been removed,
otherwise the brake pads will beforced shut.
5. Pull the wheel axle out, and then
remove the wheel.
EAU33660
To install the front wheel
1. Lift the wheel up between the fork
legs.
2. Insert the wheel axle.
3. Install the brake calipers by install-
ing the bolts.NOTE:Make sure that there is enough space
between the brake pads before install-
ing the brake calipers onto the brakediscs.
4. Install the brake hose holders by
installing the bolts.
5. Take the motorcycle off the center-
stand so that the front wheel is on
the ground.
6. Tighten the wheel axle, the front
wheel axle pinch bolt and the
brake caliper bolts to the specified
torques.
1. Wheel axle
2. Front wheel axle pinch bolt
1. Brake hose holder
2. Brake caliper
3. Brake caliper bolt
4. Bolt
Tightening torques:
Wheel axle:
72 Nm (7.2 m·kgf, 52 ft·lbf)
Front wheel axle pinch bolt:
19 Nm (1.9 m·kgf, 14 ft·lbf)
Brake caliper bolt:
40 Nm (4.0 m·kgf, 29 ft·lbf)
U5VXE2E0.book Page 33 Wednesday, July 7, 2004 11:32 AM
PERIODIC MAINTENANCE AND MINOR REPAIR
6-34
67. Push down hard on the handlebar
several times to check for proper
fork operation.
EAU25080
Rear wheel
EAU32872
To remove the rear wheel
WARNING
EWA10820
�
It is advisable to have a Yamaha
dealer service the wheel.
�
Securely support the motor-
cycle so that there is no dangerof it falling over.
1. Loosen the axle nut.
2. Place the motorcycle on the cen-
terstand.
3. Remove the axle nut.
4. Loosen the locknut and drive chain
adjusting nut on each side of the
swingarm.5. Push the wheel forward, and then
remove the drive chain from the
rear sprocket.
1. Axle nut
2. Drive chain slack adjusting nut
3. Locknut
U5VXE2E0.book Page 34 Wednesday, July 7, 2004 11:32 AM