2005 VOLVO S80 transmission
[x] Cancel search: transmissionPage 12 of 123

bush), or a rigid, fixed object at a low speed, the SRS system will not necessarily deploy. Front airbags do not
normally deploy in a side impact collision, in a collision from the rear or in a rollover situation. The amount of
damage to the bodywork does not reliably indicate if the airbags should have deployed or not.
Seat belts - the heart of the Volvo safety system
The heart of the Volvo safety system is the three-point seat belt (a Volvo invention)! In order for the SRS system to
provide the protection intended, seat belts must be worn at all times by everyone in the car. The SRS system is a
supplement to the seat belts.
pg. 9 Front airbags - SRS
WARNING!
If your car has been subjected to flood conditions (e.g. soaked carpeting/standing water on the floor of the vehicle)
or if your car has become flood-damaged in any way, do not attempt to start the vehicle or put the key in the ignition
before disconnecting the battery (see below). This may cause airbag deployment which could result in personal
injury. Have the car towed to an authorized Volvo retailer for repairs.
Automatic transmission:
Before attempting to tow the car, use the following procedure to override the shiftlock system to move the gear
selector to the neutral position.
Switch off the ignition for at least 10 minutes and disconnect the battery
Wait at least one minute
Insert the key in the ignition and turn it to position II
Press firmly on the brake pedal.
Move the gear selector from (P)ark to the (N)eutral position.
WARNING!
Never drive with the airbags deployed. The fact that they hang out can impair the steering of your car. Other safety
systems can also be damaged. The smoke and dust formed when the airbags are deployed can cause skin and eye
irritation in the event of prolonged exposure.
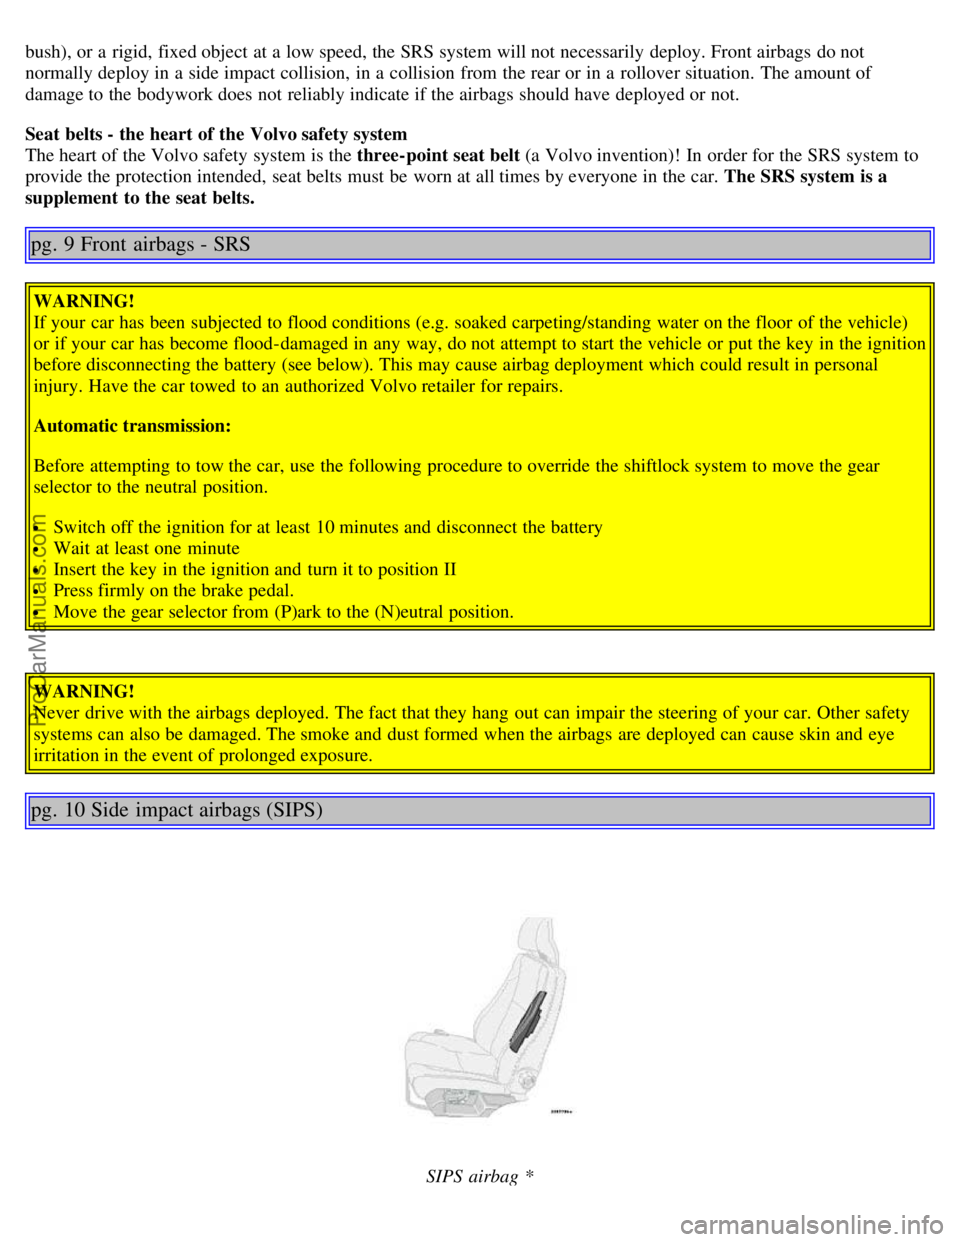
pg. 10 Side impact airbags (SIPS)
SIPS airbag *
ProCarManuals.com
Page 17 of 123

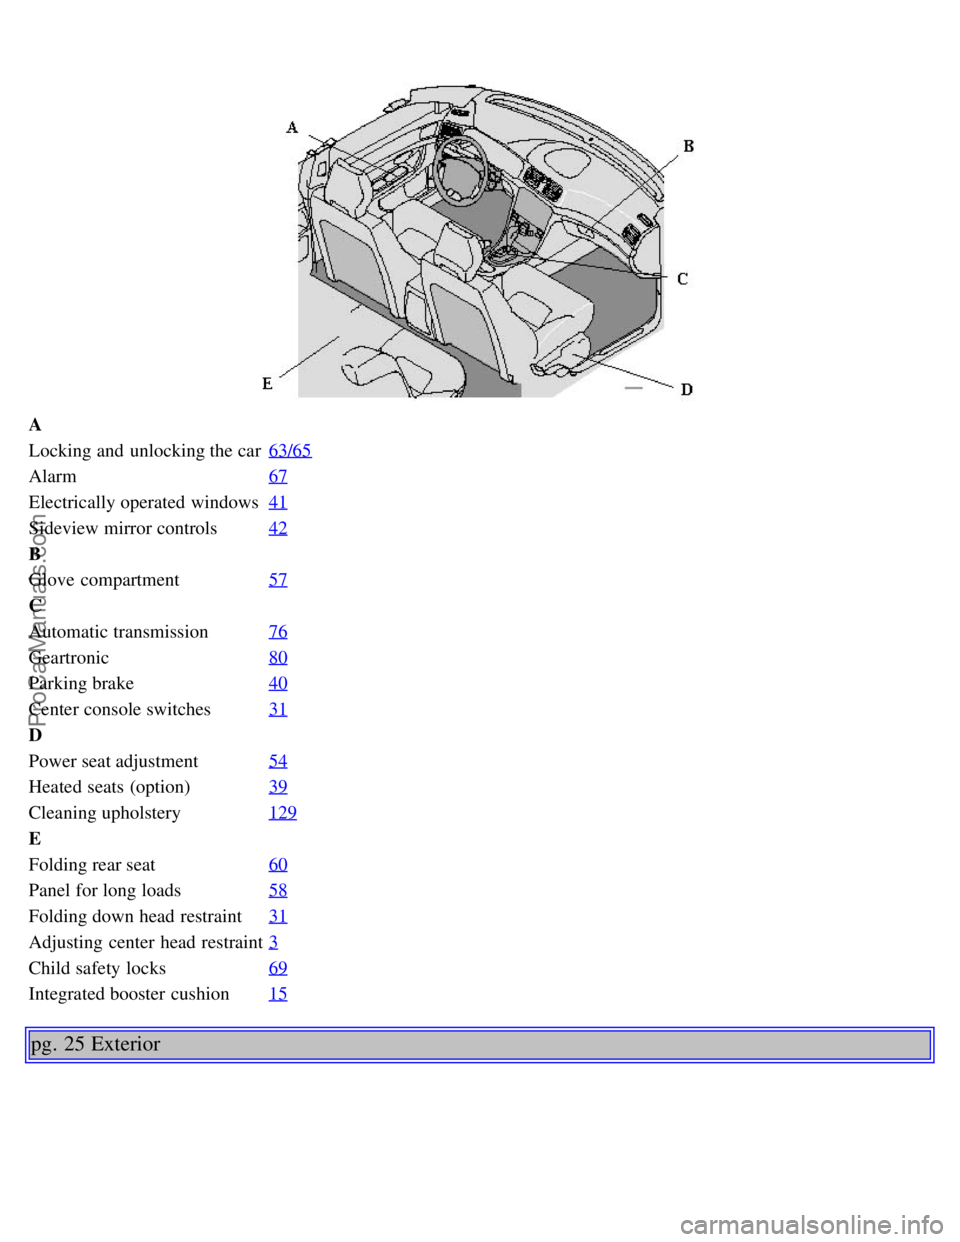
A
Locking and unlocking the car63/65
Alarm67
Electrically operated windows41
Sideview mirror controls42
B
Glove compartment57
C
Automatic transmission76
Geartronic80
Parking brake40
Center console switches31
D
Power seat adjustment54
Heated seats (option)39
Cleaning upholstery129
E
Folding rear seat60
Panel for long loads58
Folding down head restraint31
Adjusting center head restraint3
Child safety locks69
Integrated booster cushion15
pg. 25 Exterior
ProCarManuals.com
Page 20 of 123

Instrument panel lighting34
Button to unlock fuel filler door34
pg. 27 Instrument panel
1 Turn signals
2 Text window
3 Temperature gauge
The pointer should be approximately midway on the gauge when driving.
Do not drive the car if the warning light is on. The text window will provide you with additional information.
If the engine temperature remains high, check coolant level - see page 132
.
4 Trip odometer/reset button
The trip odometer is used for measuring shorter distances. The last digit indicates 1/10 mile/kilometer. Press the button
quickly to toggle between trip odometers 1 and 2. Hold in the button for more than 2 seconds to reset.
5 Odometer
6 Speedometer
7 General warning light (see page 28
).
8 High beam indicator light
9 Tachometer
Indicates engine speed in thousands of rpm. Do not drive for long with the needle in the red section. The engine has an
built-in function preventing too high an engine speed. When this function operates, you may discern some pulsation,
which is normal.
10 Gear and driving mode indicator
The currently selected driving mode is displayed here. If you use the Geartronic function on the automatic
transmission, the currently selected gear will be displayed.
11 Ambient temperature indicator
This sensor indicates the air temperature outside your car. A "snowflake" symbol in the text window is displayed when
the temperature is in the range of 23 - 36° F (-5 - +2° C).
Please note that this symbol does not indicate a fault with your car.
At low speeds or when the car is not moving, the temperature readings may be slightly higher than the actual ambient
temperature.
12 Clock/reset button
Turn the button to adjust the clock.
ProCarManuals.com
Page 22 of 123

Canadian models are equipped with this warning light:
Oil pressure warning light
If the light comes on while driving, stop the car and then stop the engine immediately and check the engine oil
level . See page 137
. If the light stays on after restart, have the car towed to the nearest authorized Volvo retailer. After
hard driving, the light may come on occasionally when the engine is idling. This is normal, provided it goes off when
the engine speed is increased.
Generator warning light
If the light comes on while the engine is running, have the charging system checked.
* Rear fog light, if used, and trailer turn signal, if towing a trailer, will go on while driving.
pg. 29 Indicator and warning lights
Rear fog light
This light indicates that the rear fog light is on.
CHECK
ENGINE
Malfunction indicator lamp
On-Board Diagnostic II (OBDII): As you drive, a computer called "OBDII" monitors your car's engine, transmission,
electrical and emission systems. The CHECK ENGINE light will light up if the computer senses a condition that
potentially may need correcting. When this happens, please have your car checked by a Volvo retailer as soon as
possible.
A CHECK ENGINE light may have many causes. Sometimes, you may not notice a change in your car's behavior.
Even so, an uncorrected condition could hurt fuel economy, emission cleanliness, and driveability. Extended driving
without correcting the cause could even damage other components in your car.
Canadian models are equipped with this warning light:
NOTE : If the fuel filler cap is not closed tightly or if the engine is running when the car is refueled, the Malfunction
Indicator Lamp may indicate a fault. However, your vehicle's performance will not be affected. Use only Volvo
original or approved fuel filler caps.
Anti-lock Brake System ABS
If the warning light comes on, there is a malfunction of the ABS system (the standard braking system pwill however
function). The vehicle should be driven to a Volvo retailer for inspection. See page 19
for additional information.
Stability Traction Control (STC) system (option), or Dynamic Stability and Traction Control (DSTC) system
(option)
This indicator light will flash with STC or DSTC is actively working to stabilize the car. See pages 20-21
for more
detailed information.
ProCarManuals.com
Page 39 of 123

Backrest controls (on opposite sides of trunk)
Folding rear seat backrest
The rear seat backrest is split into two sections. Each section can be folded independently to allow you to transport
long objects.
To fold down the backrest(s):
Pull the release control handle(s) in the trunk to release the backrest(s) (see illustration above). If the outboard rear
head restraints are folded down, they should be returned to the upright position before folding the backrest down. It
may be necessary to manually adjust the center head restraint.
Fold the backrest down.
WARNING!
All S80 cars feature 60/40 split fold-down rear seats. This function is performed by handles inside the trunk, and
also provides a means for children and adults to enter the passenger compartment in the event they become locked
inside the trunk.
Adults are advised to familiarize themselves with the operation and location of the release handles.
To fold down the rear seats from inside the trunk, pull the release control handles located on either side of the trunk.
WARNING!
Keep vehicle doors and the luggage compartment locked and keep keys out of a child's reach. Unsupervised
children could lock themselves in an open trunk and risk injury. Children should be taught not to play in vehicles.
On hot days, the temperature in the trunk or vehicle interior can rise very quickly. Exposure of people to these
high temperatures for even a short period of time can cause heat-related injury or death. Small children are
particularly at risk.
WARNING!
When the backrest is returned to the upright position, check that it is properly locked in place. Return the head
restraints to the upright position.
Long loads should always be securely anchored to help avoid injury in the event of a sudden stop.
Always turn the engine off and apply the parking brake when loading/unloading the vehicle.
Place the transmission in the P (PARK) position to help prevent inadvertent movement of the gear selector.
ProCarManuals.com
Page 50 of 123

2 0 0 5
VOLVO S80
Chapter 6 - Starting and driving
pg. 71 Starting and driving
Fuel requirements72
Refueling74
Starting the engine75
Automatic transmission76
Four-C active chassis system82
Front/rear park assist83
Driving economy84
Points to remember85
Roof racks/load carriers86
Emergency towing87
Vehicle towing information88
Towing a trailer89
Detachable trailer hitch90
Jump starting92
Winter driving93
Long distance trips94
Three-way catalytic converter95
All Wheel Drive (AWD)96
pg. 72 Fuel requirements
Fuel requirements
ProCarManuals.com
Page 53 of 123

CAUTION:
Do not refuel with the engine running *. Turn the ignition off or to position I. If the ignition is on, an incorrect
reading could occur in the fuel gauge.
After refueling, close the fuel filler cap by turning it clockwise until it clicks into place *.
Allow for fuel expansion by not overfilling the tank. Overfilling could also cause damage to the emission control
systems.
Avoid spilling gasoline during refueling. In addition to causing damage to the environment, gasolines containing
alcohol can cause damage to painted surfaces, which may not be covered under the New Vehicle Limited Warranty.
Do not use gasolines containing methanol (methyl alcohol, wood alcohol). This practice can result in vehicle
performance deterioration and can damage critical parts in the fuel system. Such damage may not be covered under the
New Vehicle Limited Warranty.
* If the fuel filler cap is not closed tightly or if the engine is running when the car is refueled, the Check Engine
Light (malfunction indicator lamp) may indicate a fault.
However, your vehicle's performance will not be affected. Use only Volvo original or approved fuel filler caps.
pg. 75 Starting the engine
Starting the engine
1. Fasten the seat belt.
WARNING!
Before starting, check that the seat, steering wheel and mirrors are adjusted properly. Make sure the brake pedal can
be depressed completely. Adjust the seat if necessary. See page 54
.
2. Apply the parking brake, if not already set. The gear selector is locked in the (P)ark position (SHIFTLOCK).
3. Without touching the accelerator pedal, turn the ignition key* to the starting position. Allow the starter to operate
for up to 5 seconds (turbo: 10 seconds). Release the key as soon as the engine starts. If the engine fails to start, repeat
this step.
NOTE: On certain models, when the car is started, idle speed may be noticeably higher than normal for a short period,
depending on the temperature of the engine.
This has been done to help bring components in the emission control system to their normal operating temperature as
quickly as possible, which enables them to function normally.
For cold starts at altitudes above 6000 ft (1800 meters), depress the accelerator pedal halfway and turn the key to the
starting position. Release the pedal slowly when the engine starts.
4. To release the gear selector from the (P)ark position, the engine must be running (or the ignition key must be in
position II) and the brake pedal must be depressed. While keeping firm pressure on the brake pedal, release the parking
brake.
5. Select the desired gear. The gear engages after a very slight delay which is especially noticeable when selecting R.
NOTE:
Your car is equipped with a KEYLOCK system. When the engine is switched off, the gear selector must be in the
( P )ark position before the key can be removed from the ignition switch.
When starting in cold weather, the transmission may shift up at slightly higher engine speeds than normal until the
automatic transmission fluid reaches normal operating temperature.
ProCarManuals.com
Page 54 of 123

CAUTION:
The engine should be idling when you move the gear selector. Never accelerate until after you feel the transmission
engage! Accelerating immediately after selecting a gear will cause harsh engagement and premature transmission wear.
Selecting P or N when idling at a standstill for prolonged periods of time will help prevent overheating of the
automatic transmission fluid.
Do not race a cold engine immediately after starting. Oil flow may not reach some lubrication points fast enough to
prevent engine damage.
WARNING!
Always place the gear selector in Park and apply the parking brake before leaving the vehicle. Never leave the car
unattended with the engine running.
Always open the garage doors fully before starting the engine inside a garage to ensure adequate ventilation. The
exhaust gases contain carbon monoxide, which is invisible and odorless but very poisonous.
* Your car is equipped with an electronic start inhibitor (immobilizer). The keys you received with your car are
specially coded. The code in the key is transmitted to an antenna in the ignition switch where it is compared to the
code stored in the start inhibitor module. The car can only be started if a properly coded key is used.
If two of the keys to your car are close together, e.g., on the same key ring, when you try to start the car, this could
cause interference in the immobilizer system and result in the car not starting. If this should occur, remove one of the
keys from the key ring before trying to start the car again.
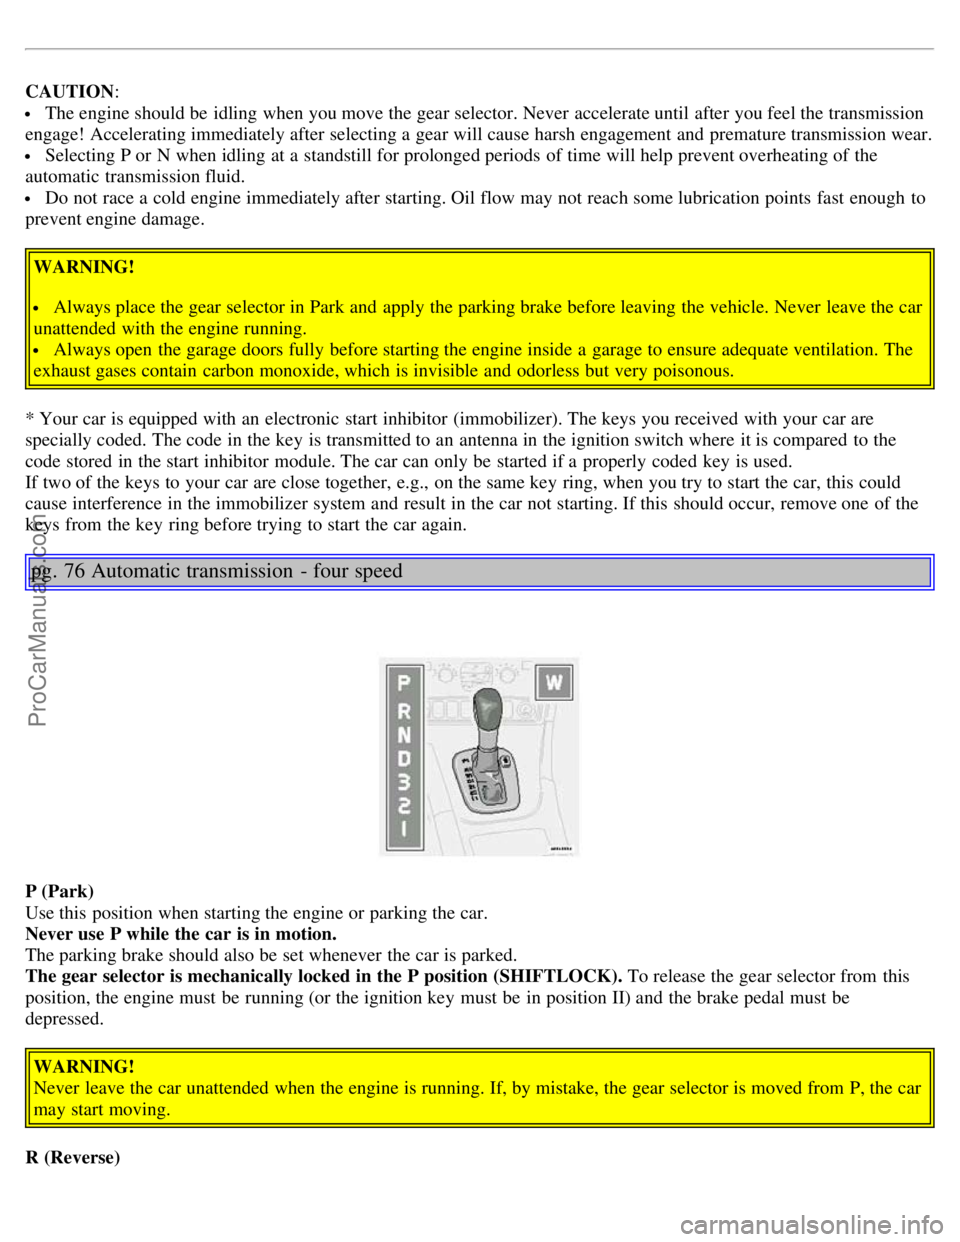
pg. 76 Automatic transmission - four speed
P (Park)
Use this position when starting the engine or parking the car.
Never use P while the car is in motion.
The parking brake should also be set whenever the car is parked.
The gear selector is mechanically locked in the P position (SHIFTLOCK). To release the gear selector from this
position, the engine must be running (or the ignition key must be in position II) and the brake pedal must be
depressed.
WARNING!
Never leave the car unattended when the engine is running. If, by mistake, the gear selector is moved from P, the car
may start moving.
R (Reverse)
ProCarManuals.com