2005 VOLVO S40 instrument panel
[x] Cancel search: instrument panelPage 22 of 127

pg. 41 Symbols on the right side of the instrument panel
Symbols - right side of instrument panel
1. Turn signal indicator for trailer (certain models)
If you are towing a trailer, this light will flash simultaneously with the turn signals on the trailer. If the light
does not flash when signaling, one of the turn signals on the trailer or on the car are not functioning properly.
2. Parking brake applied
This light is on when the parking brake (hand brake) is applied. The parking brake lever is situated between
the front seats.
Canadian models are equipped with this symbol
.
3. Safety system warning light
If this light comes on while the car is being driven, or remains on for longer than approximately 10 seconds
after the car has been started, the safety system's diagnostic functions have detected a fault in a seat belt lock, SRS,
SIPS, and/or VIC system. Drive to an authorized Volvo retailer to have the system(s) inspected.
4. Oil pressure warning light
If the light comes on while driving, stop the car, stop the engine immediately, and check the engine oil level.
See if the oil level is normal and the light stays on after restart, have the car towed to the nearest authorized Volvo
retailer. After hard driving, the light may come on occasionally when the engine is idling. This is normal, provided it
goes off when the engine speed is increased.
5. Seat belt reminder
This symbol (and the seat belt reminder light above the rear view mirror) will light up if either front seat
occupant has not buckled his/her seat belt. If the car is not moving, the symbols will go out after approximately 6
seconds.
ProCarManuals.com
Page 23 of 127

6. Generator warning light
If the light comes on while the engine is running, have the charging system checked by an authorized Volvo
workshop.
7. Brake failure warning light
If this light comes on while driving or braking, stop the car as quickly as possible in a safe place, open the
hood, and check the brake fluid level in the reservoir. See page 148
for the location of the reservoir.
Canadian models are equipped with this symbol .
WARNING!
If the fluid level is below the MIN mark in the reservoir or if a "Brake failure - Service urgent" message is displayed
in the information display: DO NOT DRIVE. Have the car towed to an authorized Volvo retailer and have the brake
system inspected.
pg. 42 Symbols on the right side of the instrument panel
If the BRAKE and ABS warning lights come on at the same time, this could indicate a fault in the brake system.
In this case:
1. Stop the car in a suitable place and switch off the engine.
2. Restart the engine.
3. If both warning lights go off, no further action is required and the car can be driven.
4. If both lights remain on after the engine has been restarted, switch off the engine again and check the brake fluid
level. See page 148
for the location of the reservoir.
Door open warning
The driver will be alerted if one of the doors, the hood, or the trunk lid are open or ajar.
At low speeds
If the car is moving at a speed of less than approximately 4 m.p.h. (7 km/h), the Information symbol in the
instrument panel will light up and a message will be shown in the information display indicating which door(s), etc is
not completely closed.
At higher speeds
If the car is moving at a speed above approximately 4 m.p.h. (7 km/h), the Warning symbol in the
instrument panel will light up and a message will be shown in the information display indicating which door(s), etc is
not completely closed.
Hood and trunk
If the hood and/or trunk lid is not completely closed, the Information symbol in the instrument panel will
light up and a message will be displayed, regardless of the vehicle's speed.
pg. 43 Information display
ProCarManuals.com
Page 24 of 127

Messages
When an indicator or warning light in the instrument panel comes on, a message is also shown in the information
display. To read a message:
Press the READ button (A).
Pressing READ repeatedly enables you to scroll to any other messages that may be stored.
NOTE: If a message is displayed when e.g. you are using the trip computer, this message must be read before you can
access the trip computer.Message Meaning
STOP
SAFELY Stop and switch off the engine to help prevent the risk of serious damage.
STOP
ENGINE Stop and switch off the engine to help prevent the risk of serious damage.
SERVICE
URGENT Take your car to an authorized Volvo retailer for inspection as soon as possible.
SEE
MANUAL Refer to your owner's manual. For additional information, please contact your Volvo retailer.
SERVICE
REQUIRED Take your car to an authorized Volvo retailer for inspection at your convenience (but preferably
before the next scheduled maintenance service).
TIME FOR
REGULAR
SERVICE This message is affect by the number of miles/km driven, by the number of months, or by the
number of hours the engine has been run since the service function was reset at the most recent
regularly scheduled service.
pg. 44 Center console controls
ProCarManuals.com
Page 26 of 127

1. Headlights and parking lights
All lighting off.
Models with daytime running lights:
Low beam headlights will automatically come on if the ignition key is in position II. Front and rear parking lights
and license plate lights will also be on. Volvo recommends the use of daytime running lights. If, however, you would
prefer to have these lights turned off (USA only), please consult your Volvo retailer. Please note that the use of
daytime running lights is mandatory in Canada.
NOTE: Bi -Xenon headlights (option): Turn the headlight switch to position 0 to activate a daylight sensor, which
automatically switches the low beams on or off, depending on ambient light conditions. When driving in daylight, the
headlights will switch off and the daytime running lights will come on. In darkness, the daytime running lights will
switch off and the Bi -Xenon headlights will switch on.
Parking lights
When the switch is in this position, the front and rear parking lights, license plate lights, and instrument panel
lighting will be on. The parking lights should be switched off when you leave the car to help avoid battery drain.
High/low beam headlights
The headlights, front and rear parking lights, license plate lights, and instrument panel lighting will be on if
the ignition key is in position II. If the headlight switch is in this position, all lights will go out when the ignition is
switched off.
NOTE: The headlight switch must be in position
before the high beams will function (this also applies on models
equipped with the optional Bi -Xenon headlights).
Switch from high to low beams and vice versa by pulling the turn signal switch lever on the left side of steering
column toward you.
2. Instrument panel lighting
Move the thumb wheel up to increase brightness or down to decrease brightness.
There is also an instrument panel illumination sensor that automatically adjusts the level of illumination.
The background of the center console's display automatically becomes lighter or darker, depending on the amount of
ambient light.
3. Front fog lights (option)
ProCarManuals.com
Page 29 of 127

based on average fuel consumption during the last 20 miles (30 km) of driving and the amount of fuel remaining in the
tank when the reading was taken. When the driving distance on current fuel reserve is less than 12 miles (20 km), "---"
will be displayed in the information display.
Average fuel consumption
This value indicates fuel consumption since the last time the trip computer was reset (by pressing RESET, button C).
When the engine is switched off, information on fuel consumption is stored and remains in system memory until the
RESET (button C) is pressed again.
Current fuel consumption
This value indicates the current fuel consumption, based on readings taken once per second. When the car is not
moving, "---- " will be displayed.
Average speed
This value indicates average speed since the last time the trip computer was reset (by pressing RESET, button C).
When the engine is switched off, information on average speed is stored and remains in system memory until the
RESET (button C) is pressed again.
Current speed in m.p.h. (Canadian models only)
This function provides the driver with an instantaneous conversion of the car's current speed from km/h to m.p.h.
NOTE: Trip computer readings may vary slightly depending on the circumference of the tires on the car or on tire
inflation.
pg. 49 Cruise control (option)
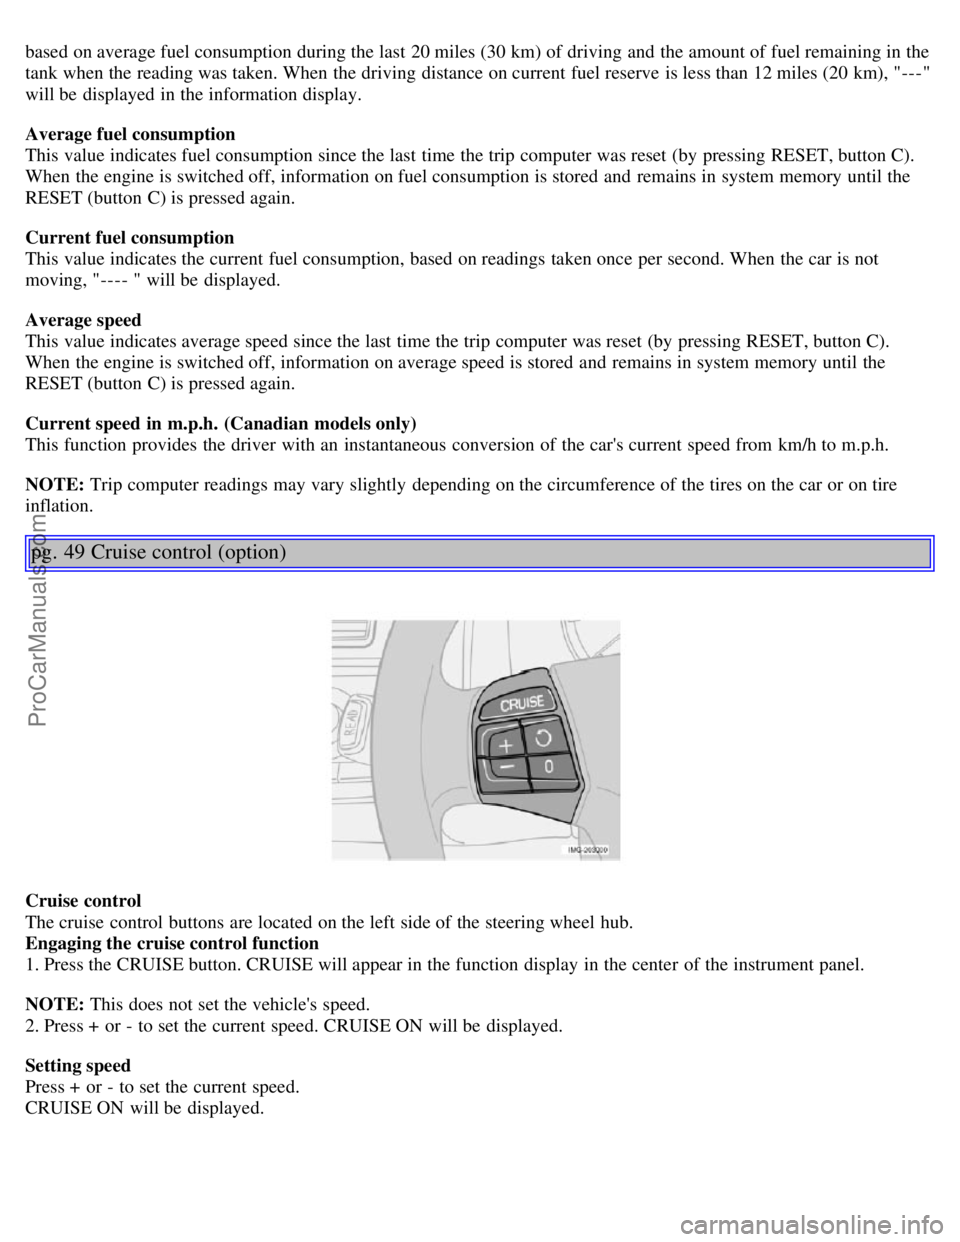
Cruise control
The cruise control buttons are located on the left side of the steering wheel hub.
Engaging the cruise control function
1. Press the CRUISE button. CRUISE will appear in the function display in the center of the instrument panel.
NOTE: This does not set the vehicle's speed.
2. Press + or - to set the current speed. CRUISE ON will be displayed.
Setting speed
Press + or - to set the current speed.
CRUISE ON will be displayed.
ProCarManuals.com
Page 47 of 127

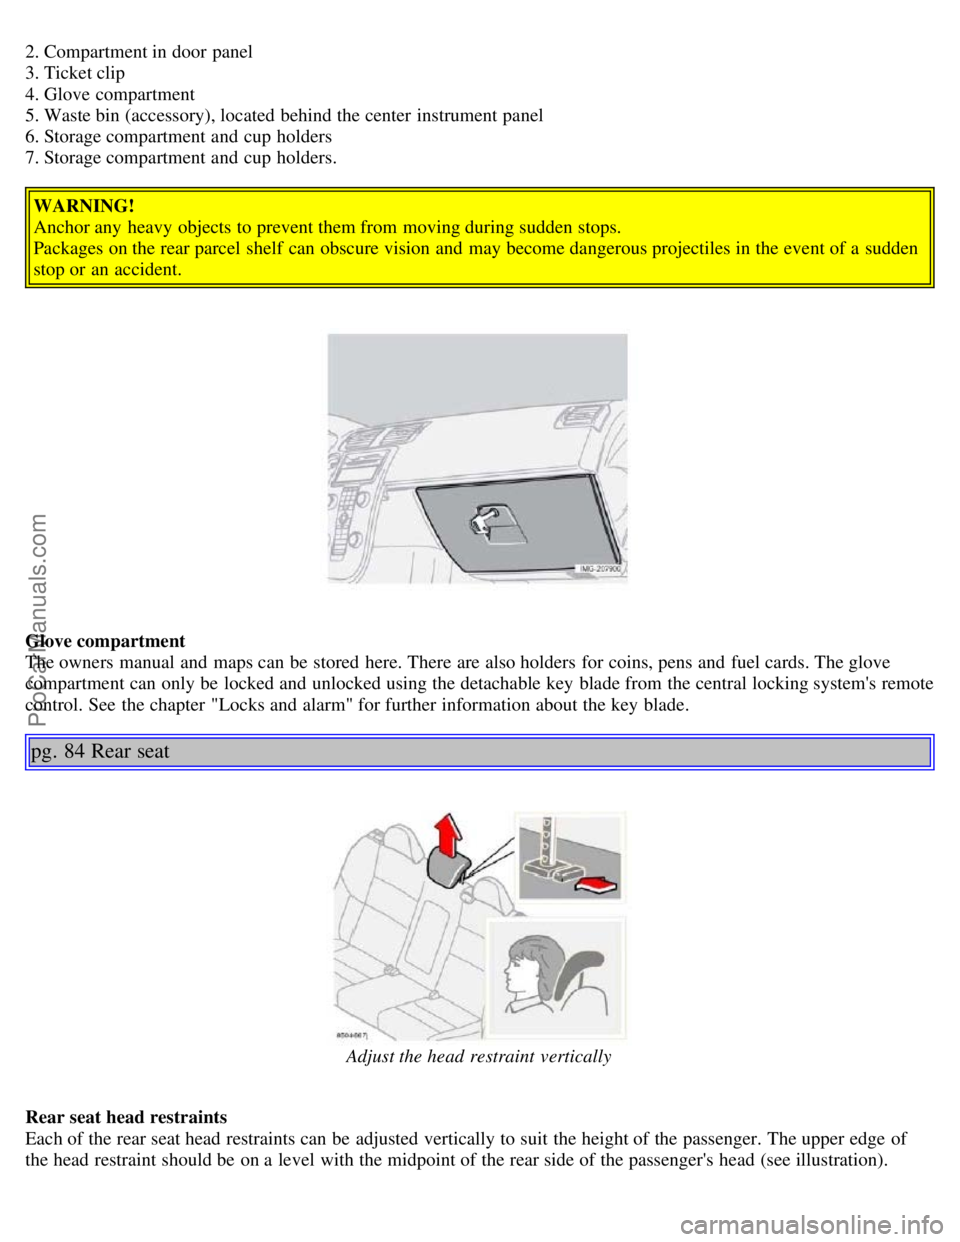
2. Compartment in door panel
3. Ticket clip
4. Glove compartment
5. Waste bin (accessory), located behind the center instrument panel
6. Storage compartment and cup holders
7. Storage compartment and cup holders.WARNING!
Anchor any heavy objects to prevent them from moving during sudden stops.
Packages on the rear parcel shelf can obscure vision and may become dangerous projectiles in the event of a sudden
stop or an accident.
Glove compartment
The owners manual and maps can be stored here. There are also holders for coins, pens and fuel cards. The glove
compartment can only be locked and unlocked using the detachable key blade from the central locking system's remote
control. See the chapter "Locks and alarm" for further information about the key blade.
pg. 84 Rear seat
Adjust the head restraint vertically
Rear seat head restraints
Each of the rear seat head restraints can be adjusted vertically to suit the height of the passenger. The upper edge of
the head restraint should be on a level with the midpoint of the rear side of the passenger's head (see illustration).
ProCarManuals.com
Page 54 of 127

Turn the key in the driver's door lock once to unlock the driver's door only.
Turn the key again (within 10 seconds) to unlock the other doors and the trunk.
One turn with the key toward lock in the driver's door locks all doors and the trunk.
Valet or service locking
By utilizing the remote control with the key blade removed, the valet locking feature enables you to block access to the
trunk and glove compartment for e.g. valet parking or when the car is brought to the retailer for service.
pg. 91 Remote control and key blade
With the valet locking function activated:
The vehicle's doors can be locked or unlocked
The engine can be started
The glove compartment cannot be unlocked
Access to the trunk is blocked (the trunk lid cannot be unlocked or opened, and the rear seat backrests are locked in
the upright position)
To activate the valet locking function:
1. Remove the key blade from the remote control
2. Turn the key blade 180° clockwise in the glove compartment lock to activate the function. (A message appears in
the information display.)
3. Give the parking attendant or service personnel only the remote control (with the key blade removed)
Turn the key blade 180° counterclockwise in the glove compartment lock to deactivate valet locking.
Weak battery in the remote control
When the battery begins to lose its charge, the Information symbol in the instrument panel (see page 39
) lights up and
REMOTE BATTERY LOW VOLTAGE is shown in the information display.
Replacing the battery in the remote control
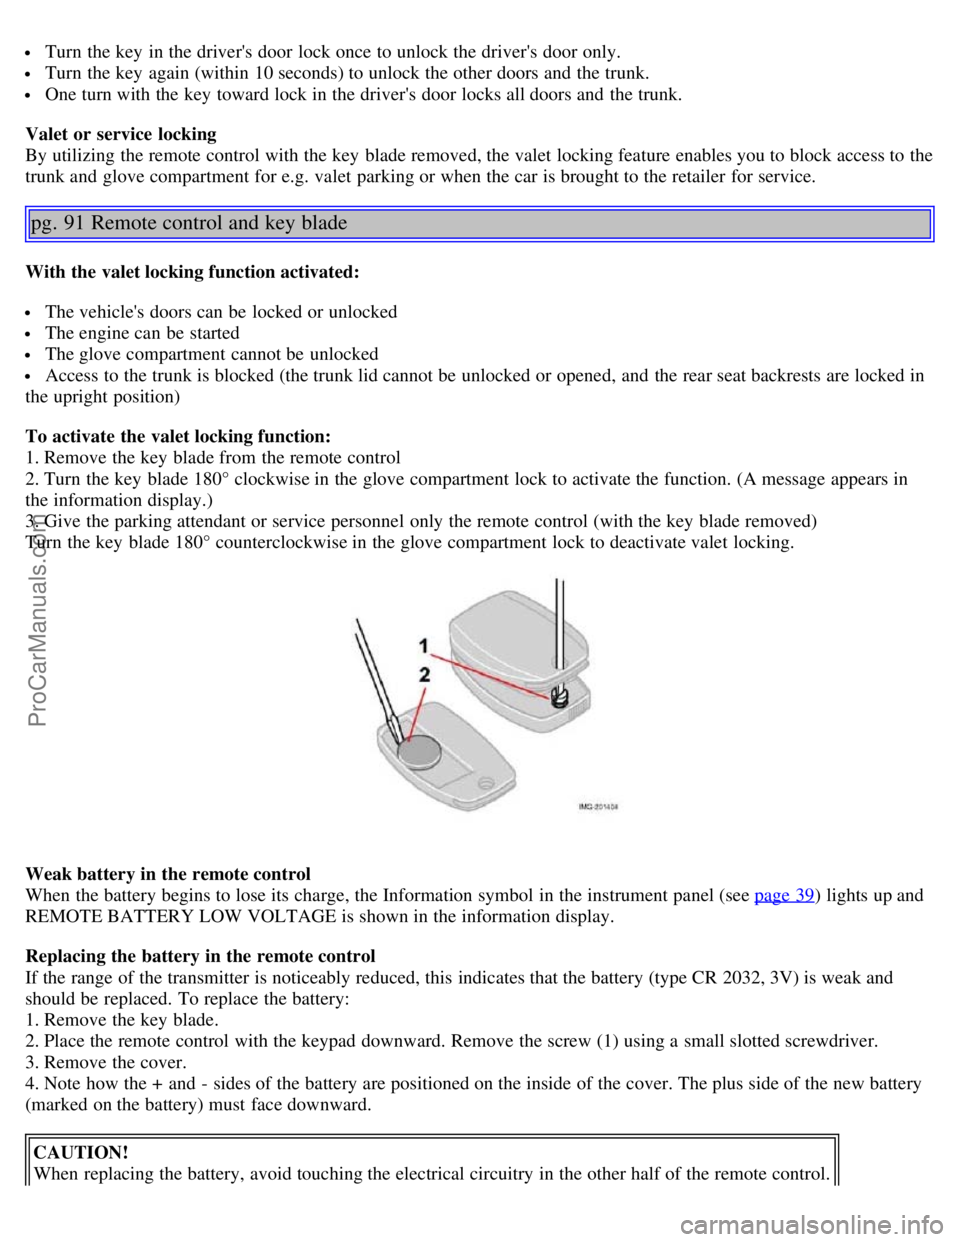
If the range of the transmitter is noticeably reduced, this indicates that the battery (type CR 2032, 3V) is weak and
should be replaced. To replace the battery:
1. Remove the key blade.
2. Place the remote control with the keypad downward. Remove the screw (1) using a small slotted screwdriver.
3. Remove the cover.
4. Note how the + and - sides of the battery are positioned on the inside of the cover. The plus side of the new battery
(marked on the battery) must face downward.
CAUTION!
When replacing the battery, avoid touching the electrical circuitry in the other half of the remote control.
ProCarManuals.com
Page 61 of 127

Try to keep the fuel tank well filled - this prevents the formation of condensation in the tank. In addition, in
extremely cold weather conditions it is worthwhile to add fuel line de -icer before refueling.
The viscosity of the engine oil is important. Oil with low viscosity (thinner oil) improves cold-weather starting as
well as decreasing fuel consumption while the engine is warming up. For winter use, 5W -30 oil, particularly the
synthetic type
1 , is recommended. Be sure to use good quality oil but do not use cold-weather oil for hard driving or in
warm weather. See page 187
for more information.
The load placed on the battery is greater during the winter since the windshield wipers, lighting, etc. are used more
often. Moreover, the capacity of the battery decreases as the temperature drops. In very cold weather, a poorly charged
battery can freeze and be damaged. It is therefore advisable to check the state of charge more frequently and spray an
anti-rust oil on the battery posts.
Volvo recommends the use of snow tires on all four wheels for winter driving - see the chapter "Wheels and tires."
To prevent the washer fluid reservoir from freezing, add washer solvents containing antifreeze (see page 148 for the
location of the washer fluid reservoir). This is important since dirt is often splashed on the windshield during winter
driving, requiring the frequent use of the washers and wipers. Volvo Washer Solvent should be diluted as follows:
Down to 14° F (-10° C): 1 part washer solvent and 4 parts water, Down to 5° F (-15° C): 1 part washer solvent and 3
parts water, Down to 0° F (-18° C): 1 part washer solvent and 2 parts water, Down to -18° F (-28° C): 1 part washer
solvent and 1 part water.
Use Volvo Teflon Lock Spray in the locks.
NOTE: Avoid using de -icing sprays as they can cause damage to the locks.
1. Synthetic oil is not used when the oil is changed at the normal maintenance intervals except at owner request and at
additional charge. Please consult your Volvo retailer.
Conserving electrical current
Keep the following in mind to help minimize battery drain:
When the engine is not running, avoid turning the ignition key to position II. Many electrical systems (the audio
pg. 100 General information
system, the optional navigation system, power windows, etc) will function with the ignition key in position I. This
position reduces drain on the battery.
Please keep in mind that using systems, accessories, etc that consume a great deal of current when the engine is not
running could result in the battery being completely drained.
The optional 12 volt socket in the trunk provides electrical current even with the ignition switched off, which drains
the battery.
NOTE: If the ignition is switched on, a warning message will be displayed in the text window in the instrument panel
when the battery charge is low.
An energy conserving function designed into the vehicle's electrical system will switch off certain functions or reduce
the load on the battery by, e.g., reducing the audio system's volume.
W Winter/Wet driving mode- enhanced vehicle traction
Mode W will only function if the gear selector is in the (D)rive position.
Press the button at the base of the gear selector to engage/disengage this driving mode.
An LED in the button will light up to indicate that W is engaged.
This mode may be selected for starting/moving off on slippery roads.
Before a long distance trip
It is always worthwhile to have your vehicle checked at a Volvo retailer before driving long distances. Your retailer
will also be able to supply you with bulbs, fuses, spark plugs and wiper blades for your use in the event that problems
ProCarManuals.com