2005 VOLKSWAGEN GOLF instrument cluster
[x] Cancel search: instrument clusterPage 262 of 444

to
s hift.
-
Move the s e lector lever back
downs hift.
Shifting with
-right paddle+
page
fig. 86.
-
l e ft paddle-towards th e steerin g
w h
eel ch ange dow n.
If the paddles on the steering w heel no t used. the auto m atic tra nsm ission switch es back to the previously sele cted D or afte r a delay of about
to with
s hiftin g into a lower gear, the downs h ift only when the re is no
bilit y of overrevving.
If
the i s sele cted while th e ve hicl e is
i n motion and the automatic tra n smissio n is in the 3 rd gear in selector leve r posit ion D. the then also be in the 3rd
86
w hile in Normal mode or mode, it switches tempo raril y to yo u would like to exi t mode agai n. press th e right rocke r switch+
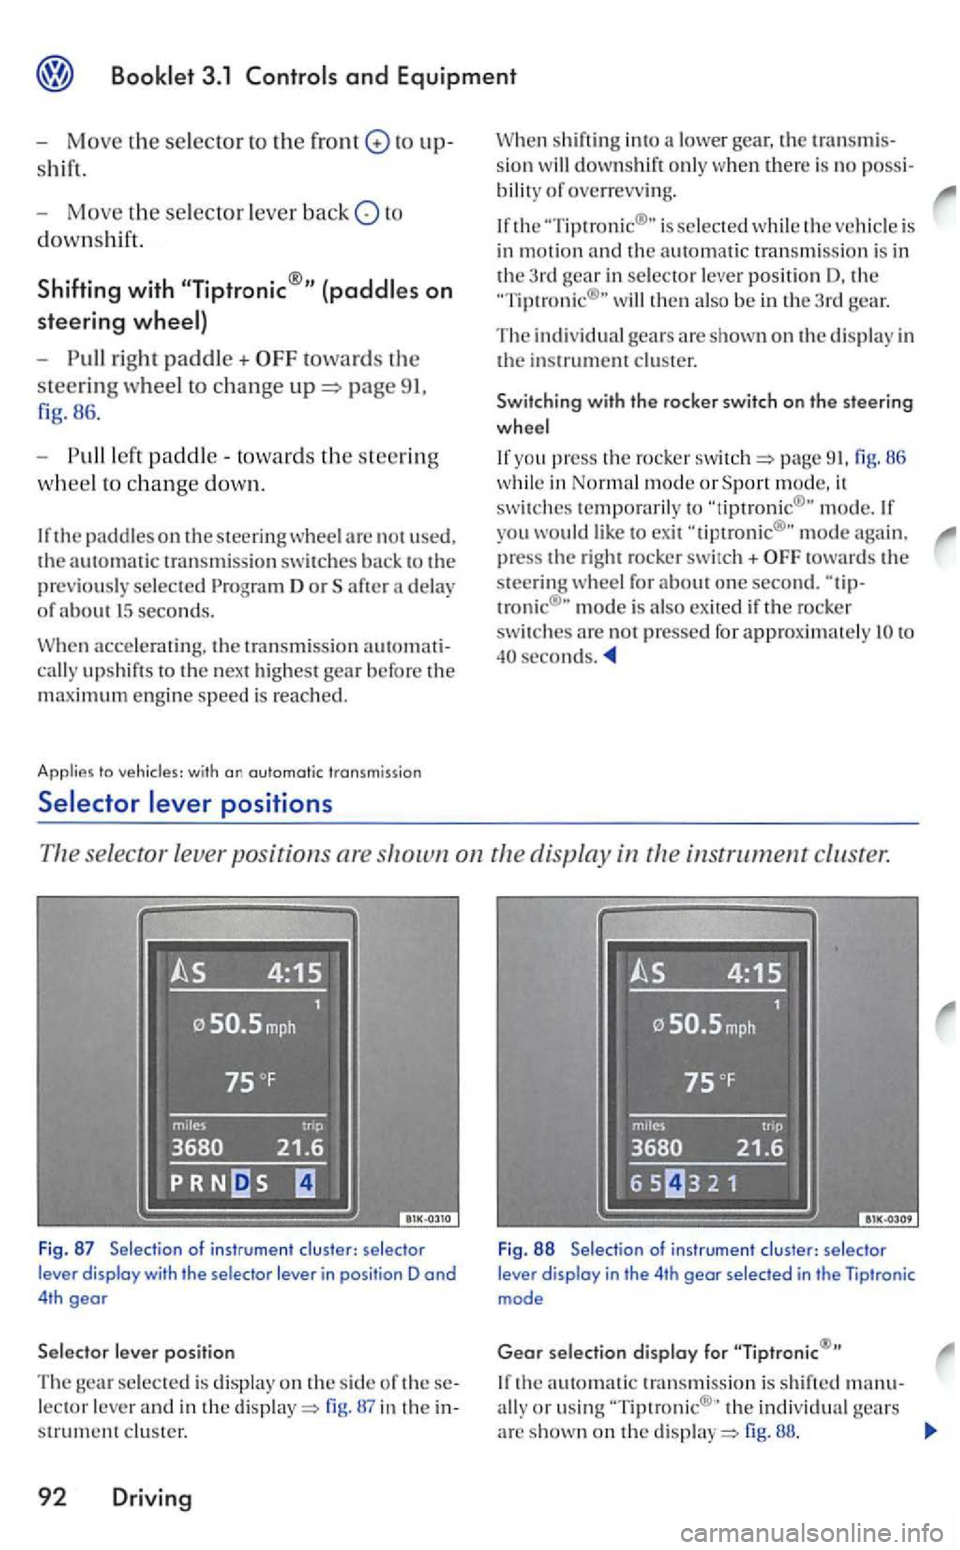
se lector leve r po sition s are instrument cluster.
Fig . 87 Selection of instru ment clus ter: se lecto r
lever display with the selector lever in posi tion D and 4th gear
lever position
The selected is displa y on the side of lector lever and in the display=> in the s trument clus ter.
92 Driving
Fig . 88 Selectio n of ins trumen t clu ster: selec tor lever display in the 4th gear selec ted in the Tiptronic mode
Gear selection display for
th e automatic transmissio n is s hift ed manu-
ally o r usin g th e in di vidual gears arc shown on the di sp la y=> fig. 88.
Page 320 of 444

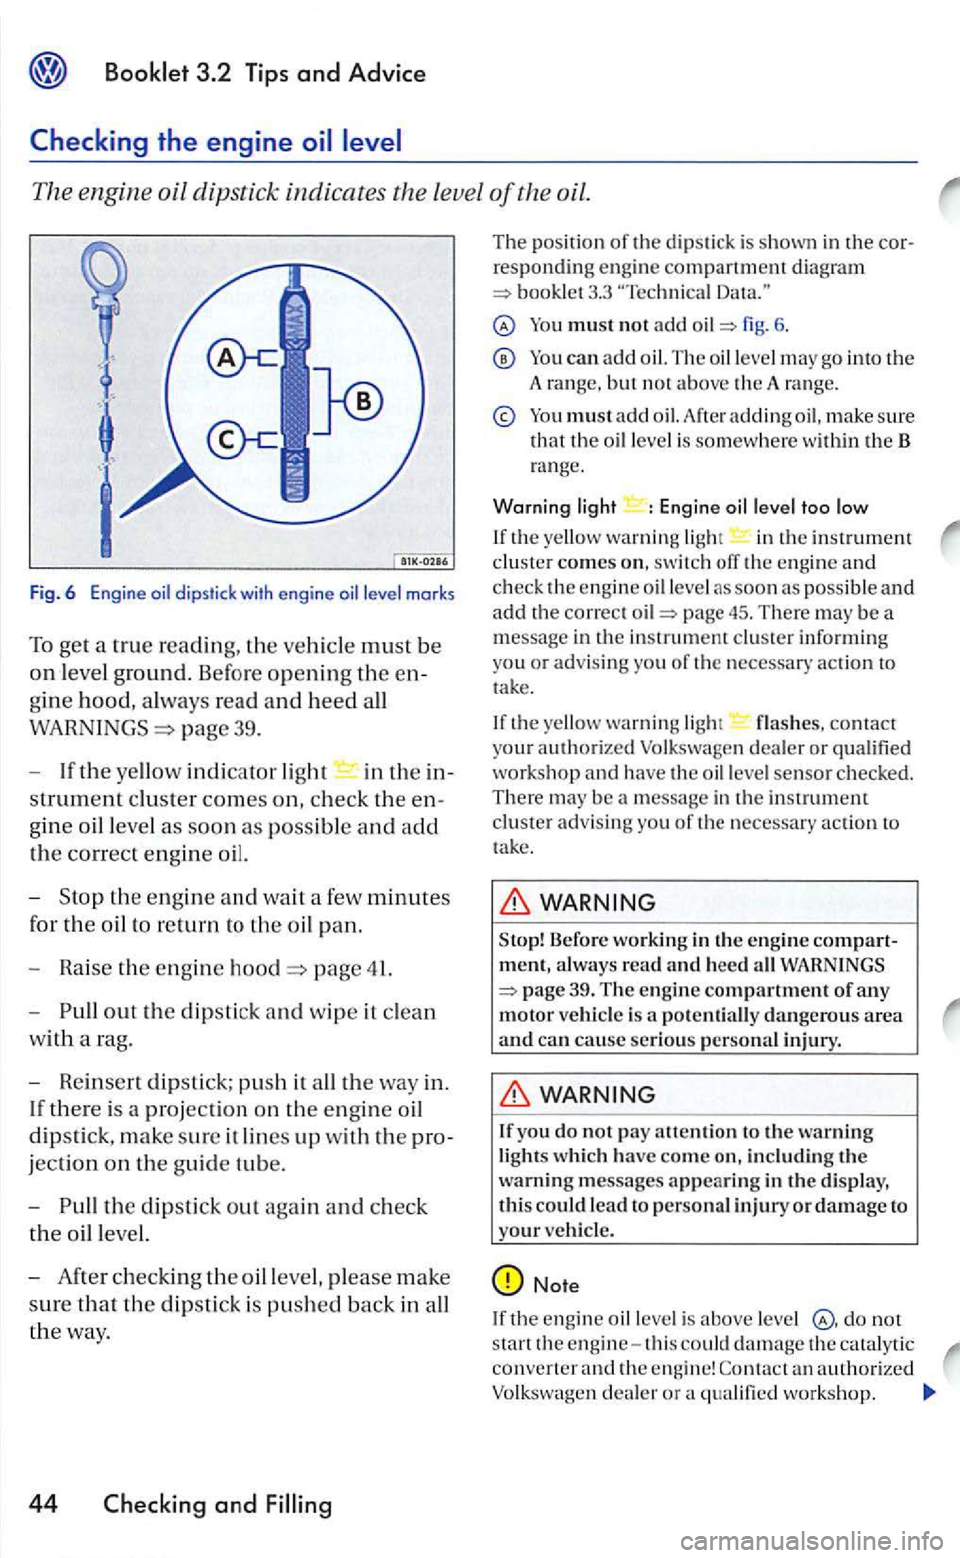
The engine oil dipstick indicates the leve l of the oil.
Fig. 6 E ngine level marks
To get a true reading, the ve hicl e must be
on leve l ground. Before opening the en
gine hood, always read and heed all
page 39.
If the yellow indicator light in th e in-
s
trument cluster comes on, check the e n
gine o
il leve l as soon as possible and add
the correct engin e oil.
the eng in e and wait a few minutes
for
the oil to return to the o il pan.
p a ge 41.
out the dipstic k and w ip e it clean
w ith a rag.
Rein se rt dips tick; push it all the way in.
If
ther e is a projection on the en gin e oi l
dipstick, make sure it lines up with the pro
jection on the guide tube.
the dipsti ck out aga in and ch eck
the o il l evel.
You must not add fig. 6 .
You can add
You m ust add oil. adding oil, make sure the level is somewhere within t h e B range.
Warning light : Engin e oi l level too low
If the yellow warn in g ligh t in the instrument cluster comes on, switc h ofT the engine and check the engine level as soon as possible and add the correct page 45. There may be a message in the instrumem cluste r informing you or advis ing you of the necessary action to
take.
If the yello w
warning ligh t flashes, contact your authorized Volkswa gen dealer or qualified workshop and have the oil leve l sensor checked. There be
WARN IN G
Before workin g in th e e ng in e compartm ent, always read and heed 39. T he engin e compartment of any motor vehicl e is potentiall y dangerous are a and can cause serio us personal injury.
WARN ING
If you do not pay attentio n to the warning light s which ha ve com e o n, incl ud in g the warning messages appearing in the d isplay, this could lead t o personal in juryordamage to
your ve hicle.
Note
If the engine oil is above level not
start the engine-this could damage the catal ytic converter and the engi ne!
Page 339 of 444

syste m is not operating properly. When the malfunct ion telltale (warning light) is illuminat ed, the system may not be able to detect or signal
low tire pressure as intended. malfunc
tions may occur for a var iety of reasons, including the installation of incompatible replacement tires on the vehicle. Always check the
and warns the driver in the event of a lo ss of pressu re by means of symbols in the instrument cluster dis plays.
Descri
ption
The system uses sensors at th e whee ls . Rad io
signals from the sensors are transmitted to the tire pressure monitoring system Th e sensors are parts of the air valve.
A visua l
and audio warning will signal a rapid or other significant loss of pressure while the ve
hicle is moving .
The tir e pressure monitorin g system
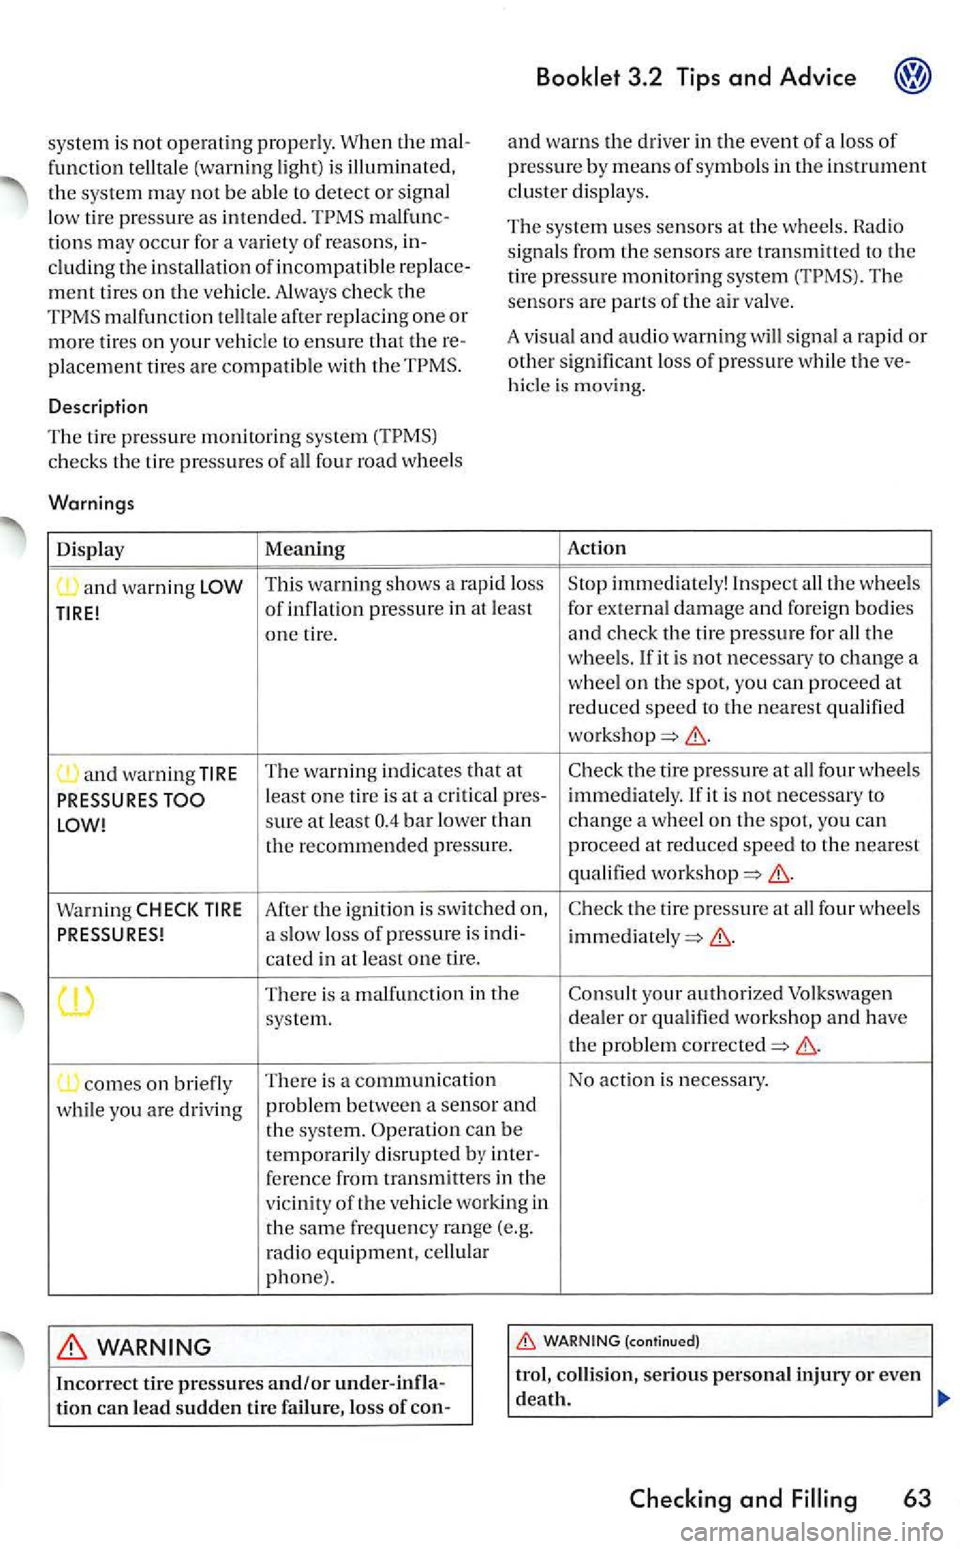
This warning shows a rapid loss Stop immediately! Inspect all the wheels
T
IRE! of i nflation pressure in at least for e
xt ernal damage and for eign bodies
one tire. and check the tire pressure for all the wheels. If it is not necessary to change a
w heel on th e spot, you can proceed at reduced speed the nearest qualified
and warnin g TIRE The warn ing indicates that at Chec
k the tire pressure at all fou r whee ls leas t one tire is at a criti ca l pres- immediately. If it is not necessary to sure at least
Warning CHECK TIRE After the ig n it ion is switched Check the tire pressure at all fou r wheels a slow loss of pressure is indi-
There is a malfunct ion in the Consult your a uthorized Volkswagen
system. dealer or qualified workshop and have
the p ro ble m corrected
comes on briefly There is a communica tion No action i
s necessaty.
while you are
driving problem between a sensor and the system. Operation can be temporarily di srupted by inter-
f ere nce from transmitters in the
v icinity of the vehicl e working in
t h e same frequency range (e.g.
rad io equipment, cell ula r phone).
WARNING
Checking and 63
Page 340 of 444

the instrument cluster, stop and insp ec t th e
tir es.
can also lead t o sudden tire failur e, in
cluding a blowout and sudden deflati on, causing loss of ve hicle control.
The driv er i s responsible for the correct tire pressures fo r all tire s on the vehicl e. Th e appli
cable pressure valu es are locat ed on a sticker on the driver' s sid e page 61, fig . 15 .
w hen all on the ve hicl e are filled
to the correct pressure, th e can work
corre ctly.
A lways inflat e tire s to the recomme nd ed
and correct tire pres sure before driving off.
in tread separa tion, sudden
Excess ive speed and/overloadin g can
ca use heat build-up , sudden tir e failur e and lo ss of control.
If th e tire is no t flat and you do not have to change a w hee l immediate ly , drive at reduce d
s peed to tJ1e neares t se rvic e statio n to ch ec k the tir e press ure and add air as req uired.
Whe n r epl acing tir es or wheel rim s on ve
hicles equipped with always read and heed the information and all repage 57, and
Note
M iss in g va lve stem caps can result in damage
to the valve and senso rs in the tire pressure
monitor ing sys tem. To preve nt thi s. a lways drive
wit h valve stem caps that are th e equiva le nt of
64
tho se installed
When switc hin g to diff erent tires, make cer
tain that the valves and the se nsors are not dam
ag ed .
For the sake of environment
Unde r-inflated tires will a lso in crease the fu el
consumption.
Tips
The tir e press ure mon itoring system ch ecks
th e tir es for the fac to ry recommend ed in flat ion pressures. The recommended val ues are on th e sticker on the o pen edge of th e driver's door
61, fig.
you are driving on tires other than those in
s talled at th e factory, have the inflati on pres
s ure s entered in the press ure monitor ing sys tem
by an authorized Vol kswage n dea ler or qua lified
works hop if they are different.
Th e tire pressure monitor ing system sh uts itself off if a set of tir es without whee l sensors is
mounted on th e veh icle and it cannot receive senso r sig nals. As soon as the syste m rece ives at
lea st one se nsor signa l, it switches itself on
again.
tir e pressures at regu lar int ervals, even
though you have the monitoring system. In spec t
th e
tires for damage (punctu res , cuts, t ea rs a nd
blis ter s). He move foreig n bodi es from the tir e
tread.
senso rs have to be rep laced, have the valves ch anged at th e sa me tim e.
Disc repancies may occur between the pres
sures read on the press ure ga uge when inflating the tires and th e pressures read by the tire pressu re sensors. The electro nic tire pressure monitoring system is m ore accurate.
When deter min es tha t the air pres
s u re in o ne or more tires is too low, ch eck the tire
pressure thoroughly using a pressu re Low pressure in a tire often cannot be determi ned by
looking at the tire. This applies especially for low
profile tires.
When there is a rap id or excessi ve loss of pressure while driving. you are immediately
g iven vis u a l and aud ible warn ing .