Page 105 of 351
95
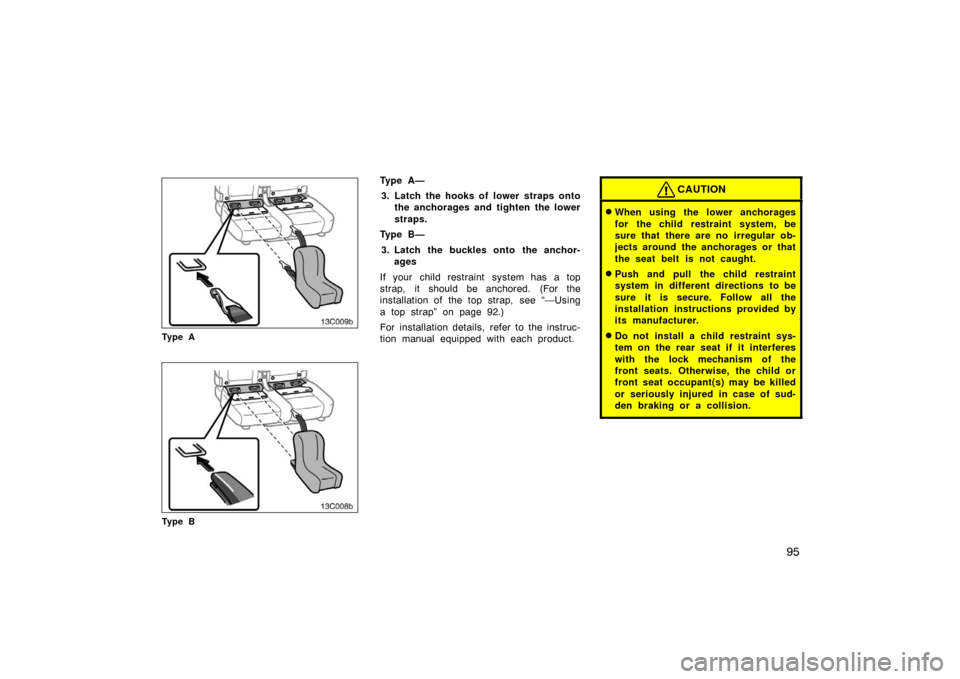
13C009b
Ty p e A
13C008b
Ty p e B
Ty p e A —3. Latch the hooks of lower straps onto the anchorages and tighten the lower
straps.
Ty p e B —
3. Latch the buckles onto the anchor- ages
If your child restraint system has a top
strap, it should be anchored. (For the
installation of the top strap, see “—Using
a top strap” on page 92.)
For installation details, refer to the instruc-
tion manual equipped with each product.CAUTION
�When using the lower anchorages
for the child restraint system, be
sure that there are no irregular ob-
jects around the anchorages or that
the seat belt is not caught.
�Push and pull the child restraint
system in different directions to be
sure it is secure. Follow all the
installation instructions provided by
its manufacturer.
�Do not install a child restraint sys-
tem on the rear seat if it interferes
with the lock mechanism of the
front seats. Otherwise, the child or
front seat occupant(s) may be killed
or seriously injured in case of sud-
den braking or a collision.
Page 114 of 351
104
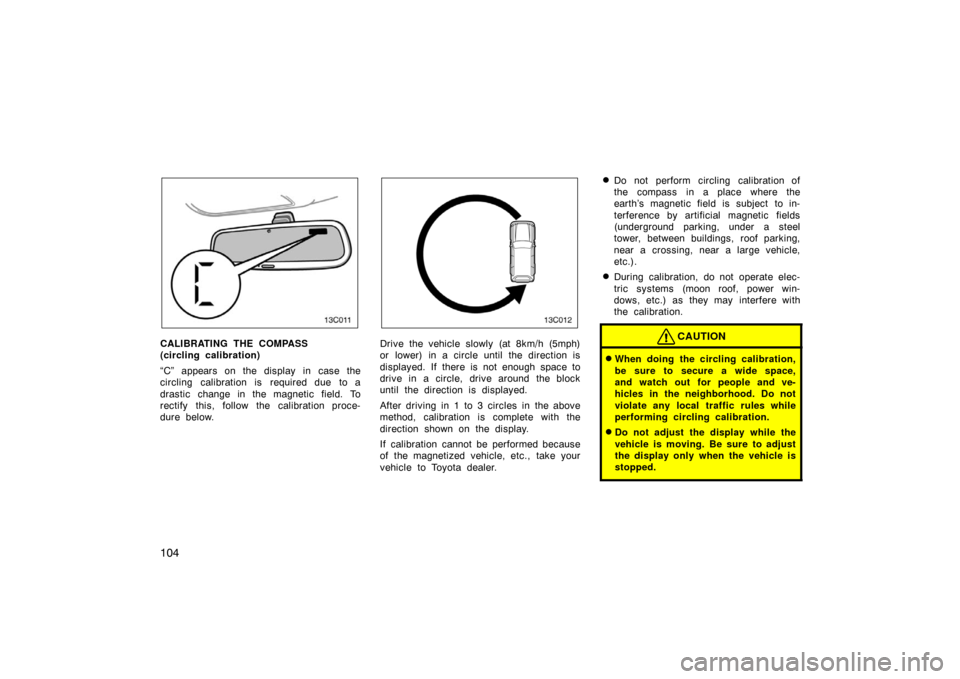
13C011
CALIBRATING THE COMPASS
(circling calibration)
“C” appears on the display in case the
circling calibration is required due to a
drastic change in the magnetic field. To
rectify this, follow the calibration proce-
dure below.
13C012
Drive the vehicle slowly (at 8km/h (5mph)
or lower) in a circle until the direction is
displayed. If there is not enough space to
drive in a circle, drive around the block
until the direction is displayed.
After driving in 1 to 3 circles in the above
method, calibration is complete with the
direction shown on the display.
If calibration cannot be performed because
of the magnetized vehicle, etc., take your
vehicle to Toyota dealer.
�Do not perform circling calibration of
the compass in a place where the
earth’s magnetic field is subject to in-
terference by artificial magnetic fields
(underground parking, under a steel
tower, between buildings, roof parking,
near a crossing, near a large vehicle,
etc.).
�During calibration, do not operate elec-
tric systems (moon roof, power win-
dows, etc.) as they may interfere with
the calibration.
CAUTION
�When doing the circling calibration,
be sure to secure a wide space,
and watch out for people and ve-
hicles in the neighborhood. Do not
violate any local traffic rules while
performing circling calibration.
�Do not adjust the display while the
vehicle is moving. Be sure to adjust
the display only when the vehicle is
stopped.
Page 115 of 351
105
Sun visors—
To block out glare, move the sun visor.
To block out glare from the front—Swing
down the main sun visor.
To block out glare from the side—Swing
down the main sun visor, remove it from
the hook and swing it to the lateral side.
You can adjust its position as shown.To block the glare from the front when the
main sun visor is swung down, swing
down the second sun visor.
CAUTION
Slide the main sun visor only when
it is swung down to the lateral side.
It can cover the anti�glare inside rear
view mirror and obstruct the rear
view.
—Vanity mirror
To use the vanity mirror, swing down
the main sun visor and open the cover.
The vanity light comes on when you open
the cover.
Page 118 of 351
108
Headlight and turn signals
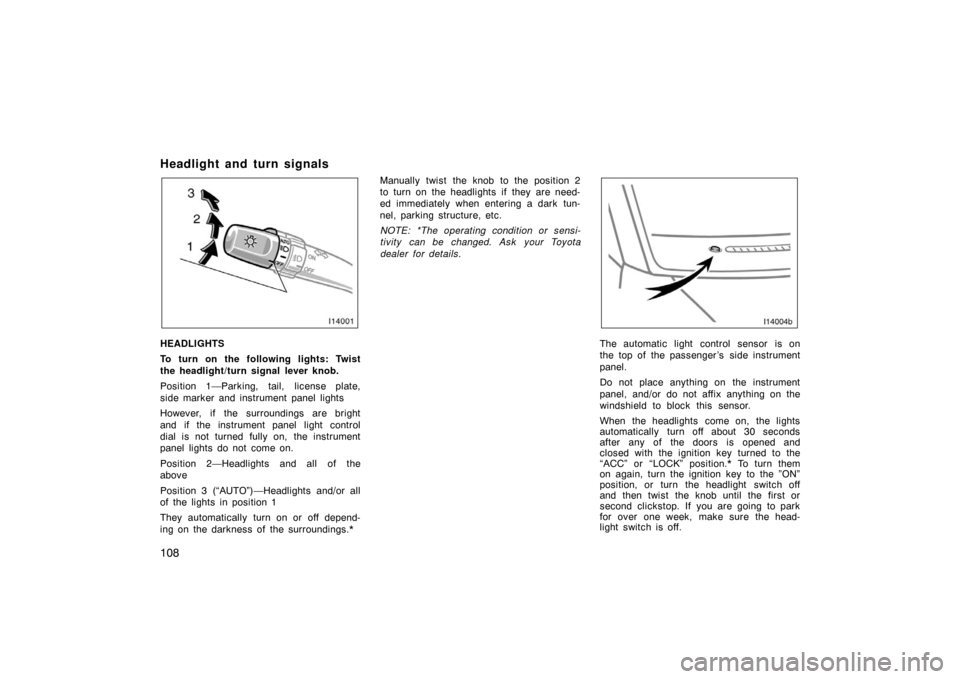
HEADLIGHTS
To turn on the following lights: Twist
the headlight/turn signal lever knob.
Position 1—Parking, tail, license plate,
side marker and instrument panel lights
However, if the surroundings are bright
and if the instrument panel light control
dial is not turned fully on, the instrument
panel lights do not come on.
Position 2—Headlights and all of the
above
Position 3 (“AUTO”)—Headlights and/or all
of the lights in position 1
They automatically turn on or off depend-
ing on the darkness of the surroundings.*Manually twist the knob to the position 2
to turn on the headlights if they are need-
ed immediately when entering a dark tun-
nel, parking structure, etc.
NOTE: *The operating condition or sensi-
tivity can be changed. Ask your Toyota
dealer for details.The automatic light control sensor is on
the top of the passenger ’s side instrument
panel.
Do not place anything on the instrument
panel, and/or do not affix anything on the
windshield to block this sensor.
When the headlights come on, the lights
automatically turn off about 30 seconds
after any of the doors is opened and
closed with the ignition key turned to the
“ACC” or “LOCK” position.* To turn them
on again, turn the ignition key to the ”ON”
position, or turn the headlight switch off
and then twist the knob until the first or
second clickstop. If you are going to park
for over one week, make sure the head-
light switch is off.
Page 119 of 351
109
When the headlight switch is on with all
the doors locked, pushing the “LOCK” but-
ton on the wireless remote control key
turns off the headlights.
NOTE: *The time before turning off the
lights can be changed. Ask your Toyota
dealer for details.
NOTICE
To prevent the battery from being dis-
charged, do not leave the lights on
for a long period when the engine is
not running.
Daytime running light system
The headlights turn on at reduced intensi-
ty when the parking brake is released with
the engine started, even with the light
switch in the “OFF” position. They will not
go off until the ignition switch is turned
off.
To turn on the other exterior lights and
instrument panel lights, twist the knob to
the position 1.
Twist the knob to the position 2 to turn
the headlights to full intensity for driving
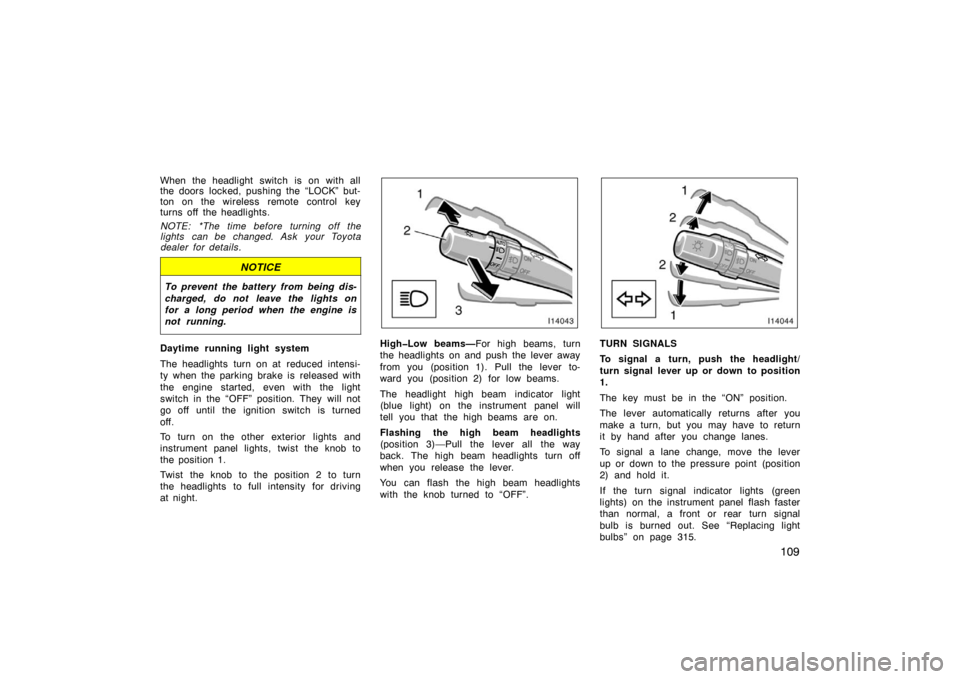
at night.High�Low beams—For high beams, turn
the headlights on and push the lever away
from you (position 1). Pull the lever to-
ward you (position 2) for low beams.
The headlight high beam indicator light
(blue light) on the instrument panel will
tell you that the high beams are on.
Flashing the high beam headlights
(position 3)—Pull the lever all the way
back. The high beam headlights turn off
when you release the lever.
You can flash the high beam headlights
with the knob turned to “OFF”.TURN SIGNALS
To signal a turn, push the headlight/
turn signal lever up or down to position
1.
The key must be in the “ON” position.
The lever automatically returns after you
make a turn, but you may have to return
it by hand after you change lanes.
To signal a lane change, move the lever
up or down to the pressure point (position
2) and hold it.
If the turn signal indicator lights (green
lights) on the instrument panel flash faster
than normal, a front or rear turn signal
bulb is burned out. See “Replacing light
bulbs” on page 315.
Page 122 of 351
11 2
ILLUMINATED ENTRY SYSTEM
Center—
With the switch in the “DOOR” position,
the light comes on when either side or
back door is opened. After all the doors
are closed, the light remains on for a
certain time and then goes out.*
However, in the following cases, the light
goes out immediately:
�All the doors are closed when the igni-
tion key is in “ACC” or “ON” position.
�The ignition key is turned to “ACC”,
“ON” or “START” when the light is still
on.
�All the doors are locked when the light
is still on.
�One front door will be closed with the
lock knob pushed forward while the
other doors are locked.
NOTE: *The interior lights can be set not
to come on or the duration of lighting can
be changed. Ask your Toyota dealer for
details. INTERIOR LIGHTS CUT OFF OPERATION
When the ignition switch is “OFF” and any
interior lights in the vehicle stay lighting
on, the lights will cut off automatically
after 30 minutes.
You can cancel the cut off operation by:
�Turning the key to the “ACC” position.
�Opening or closing any of side doors
and back door.
All the lights are cut off when any of the
doors are locked or unlocked by key or
wireless remote control key.
Personal lights
Front
Center
Page 123 of 351
11 3
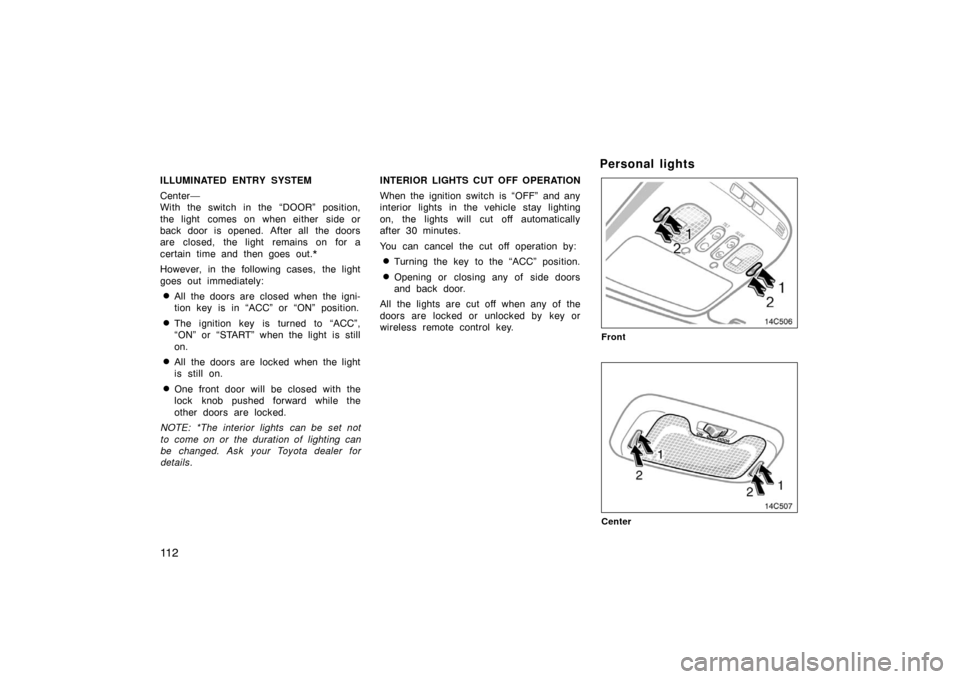
To turn on the personal light, push the
switch on 1 side. To turn the lights off,
push the switch on 2 side.
PERSONAL LIGHTS CUT OFF OPERA-
TION
When the ignition switch is “OFF” and any
personal lights in the vehicle stay lighting
on, the lights will cut off automatically
after 30 minutes.
You can cancel the cut off operation by:
�Turning the key to the “ACC” position.
�Opening or closing any of side doors
and back door.
All the lights are cut off when any of the
doors are locked or unlocked by key or
wireless remote control key.
Ignition switch light
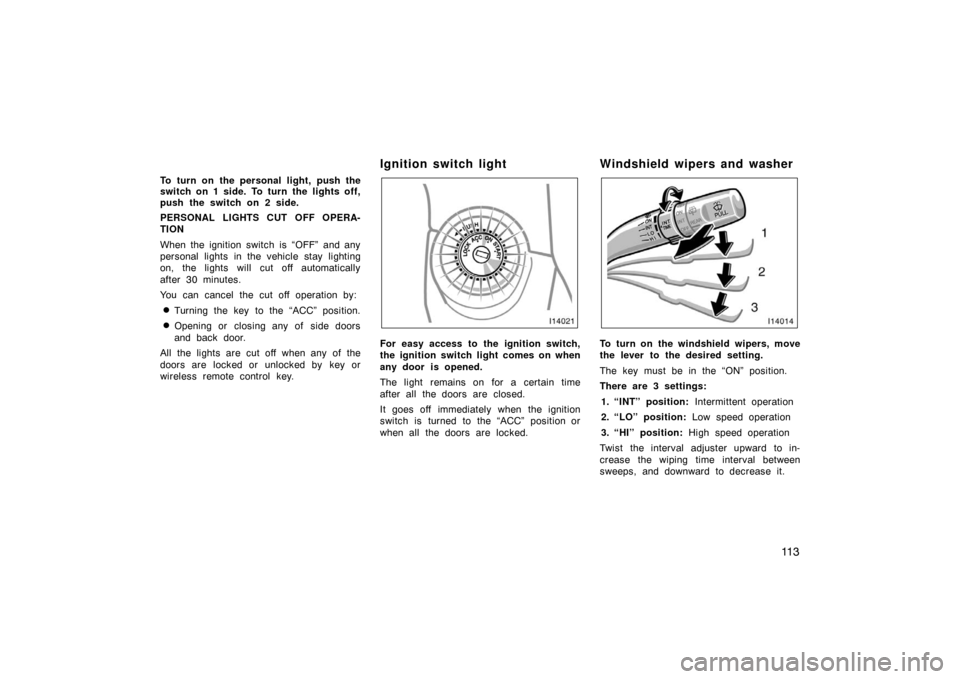
For easy access to the ignition switch,
the ignition switch light comes on when
any door is opened.
The light remains on for a certain time
after all the doors are closed.
It goes off immediately when the ignition
switch is turned to the “ACC” position or
when all the doors are locked.
Windshield wipers and washer
To turn on the windshield wipers, move
the lever to the desired setting.
The key must be in the “ON” position.
There are 3 settings:
1. “INT” position: Intermittent operation
2. “LO” position: Low speed operation
3. “HI” position: High speed operation
Twist the interval adjuster upward to in-
crease the wiping time interval between
sweeps, and downward to decrease it.
Page 124 of 351
11 4
To squirt washer fluid, pull the lever
toward you.
If the windshield wipers are off, they will
operate a couple of times after the washer
squirts.
For instructions on adding washer fluid,
see “Adding washer fluid” on page 315.
In freezing weather, warm the windshield
with the defroster before using the washer.
This will help prevent the washer fluid
from freezing on your windshield, which
can block your vision.
NOTICE
Do not operate the wipers if the wind-
shield is dry. It may scratch the
glass.
When waxing your vehicle, make sure that
the washer nozzles do not become
blocked. If a nozzle becomes blocked,
contact your Toyota dealer to have the
vehicle serviced.
NOTICE
If a nozzle becomes blocked, do not
try to clear it with a pin or other
object. The nozzle will be damaged.
Rear window wiper and washer
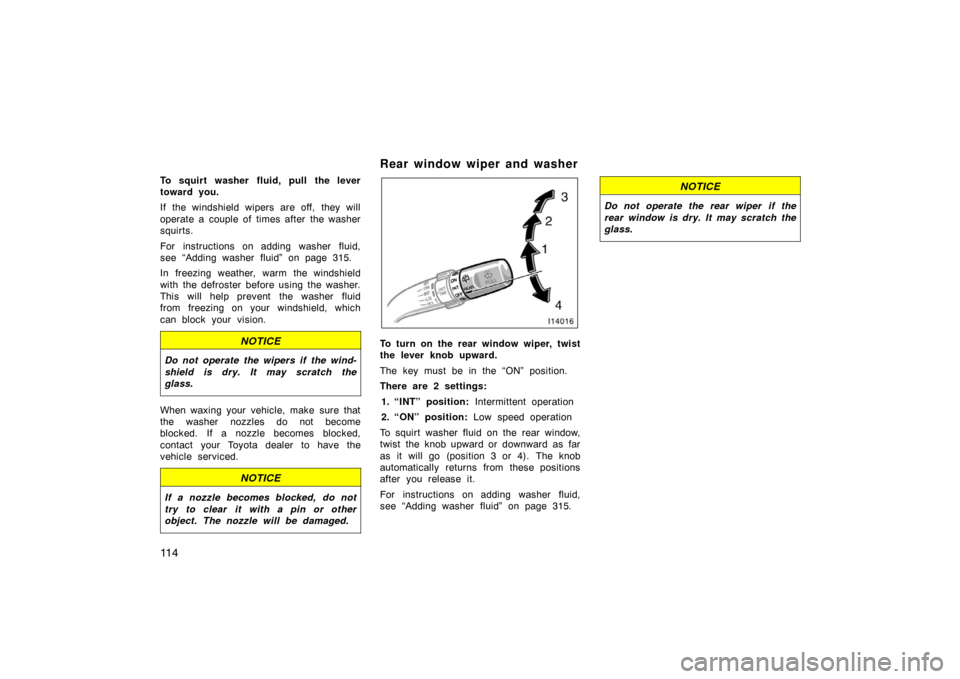
To turn on the rear window wiper, twist
the lever knob upward.
The key must be in the “ON” position.
There are 2 settings:1. “INT” position: Intermittent operation
2. “ON” position: Low speed operation
To squirt washer fluid on the rear window,
twist the knob upward or downward as far
as it will go (position 3 or 4). The knob
automatically returns from these positions
after you release it.
For instructions on adding washer fluid,
see “Adding washer fluid” on page 315.
NOTICE
Do not operate the rear wiper if the
rear window is dry. It may scratch the
glass.