Page 85 of 351
75
If any of the following conditions occurs,
this indicates a malfunction of the airbags
or seat belt pretensioners. Contact your
Toyota dealer as soon as possible.
�The light does not come on when the
ignition key is turned to the “ON” posi-
tion or remains on for more than 6
seconds or flashes.
�The light comes on or starts flashing
while driving.
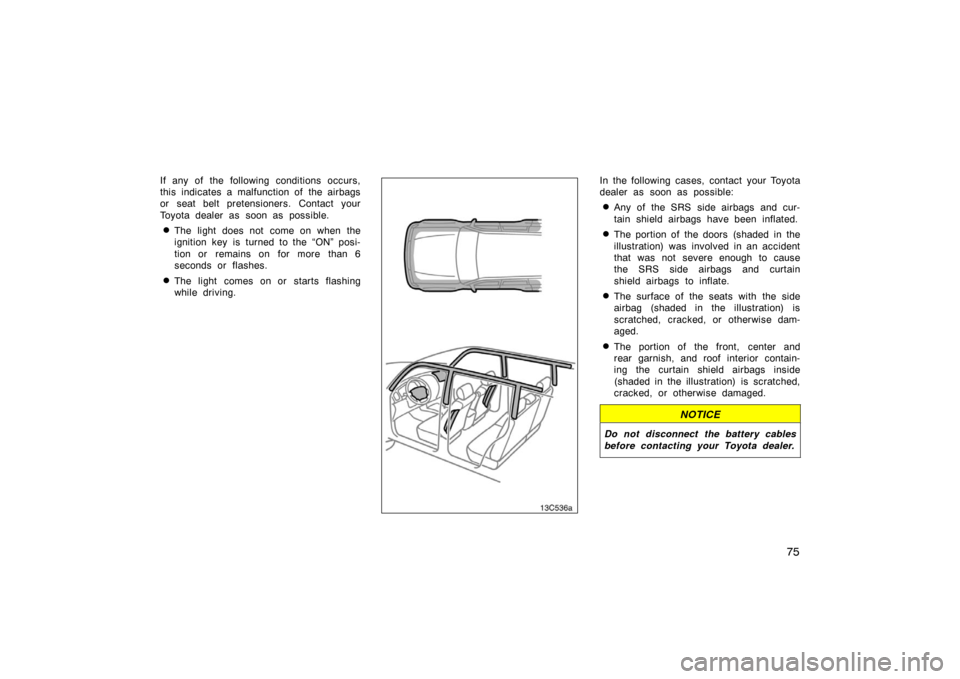
In the following cases, contact your Toyota
dealer as soon as possible:
�Any of the SRS side airbags and cur-
tain shield airbags have been inflated.
�The portion of the doors (shaded in the
illustration) was involved in an accident
that was not severe enough to cause
the SRS side airbags and curtain
shield airbags to inflate.
�The surface of the seats with the side
airbag (shaded in the illustration) is
scratched, cracked, or otherwise dam-
aged.
�The portion of the front, center and
rear garnish, and roof interior contain-
ing the curtain shield airbags inside
(shaded in the illustration) is scratched,
cracked, or otherwise damaged.
NOTICE
Do not disconnect the battery cables
before contacting your Toyota dealer.
Page 108 of 351
98
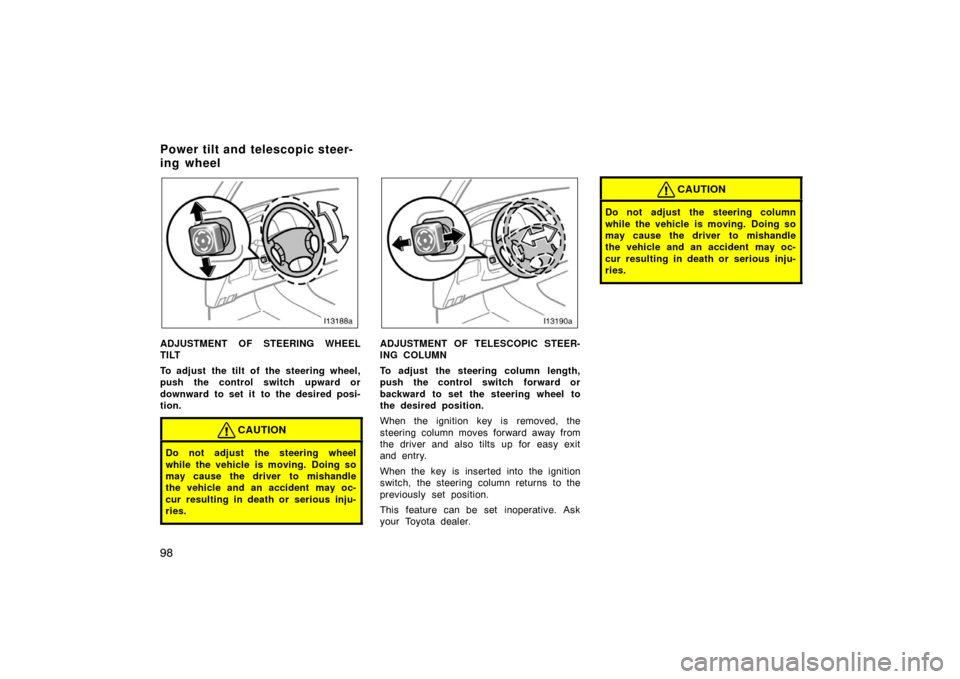
ADJUSTMENT OF STEERING WHEEL
TILT
To adjust the tilt of the steering wheel,
push the control switch upward or
downward to set it to the desired posi-
tion.
CAUTION
Do not adjust the steering wheel
while the vehicle is moving. Doing so
may cause the driver to mishandle
the vehicle and an accident may oc-
cur resulting in death or serious inju-
ries.
ADJUSTMENT OF TELESCOPIC STEER-
ING COLUMN
To adjust the steering column length,
push the control switch forward or
backward to set the steering wheel to
the desired position.
When the ignition key is removed, the
steering column moves forward away from
the driver and also tilts up for easy exit
and entry.
When the key is inserted into the ignition
switch, the steering column returns to the
previously set position.
This feature can be set inoperative. Ask
your Toyota dealer.
CAUTION
Do not adjust the steering column
while the vehicle is moving. Doing so
may cause the driver to mishandle
the vehicle and an accident may oc-
cur resulting in death or serious inju-
ries.
Power tilt and telescopic steer-
ing wheel
Page 109 of 351
99
Outside rear view mirrors—
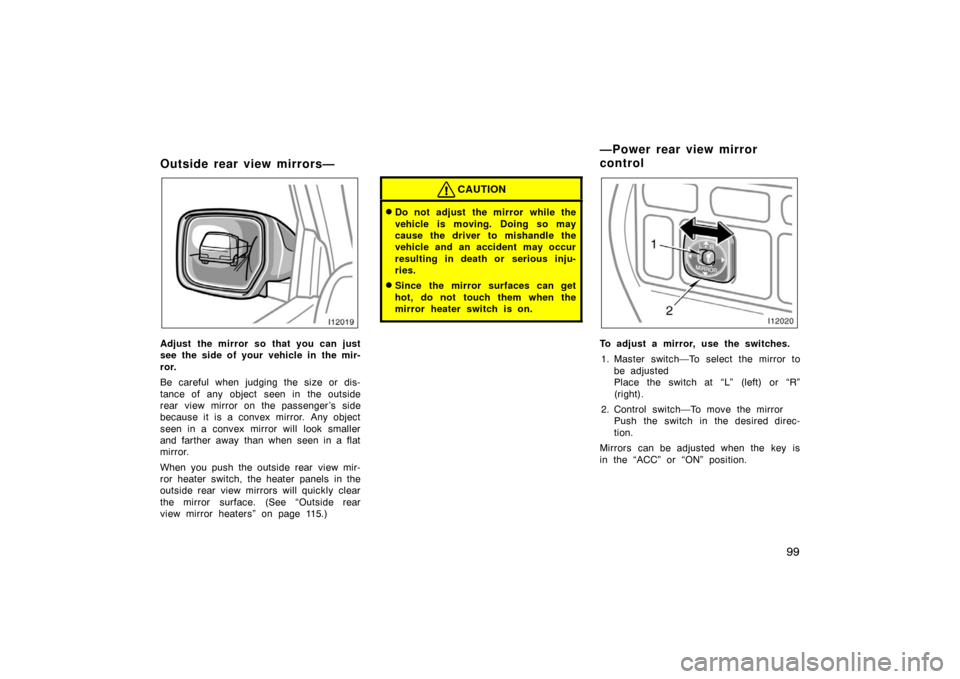
Adjust the mirror so that you can just
see the side of your vehicle in the mir-
ror.
Be careful when judging the size or dis-
tance of any object seen in the outside
rear view mirror on the passenger ’s side
because it is a convex mirror. Any object
seen in a convex mirror will look smaller
and farther away than when seen in a flat
mirror.
When you push the outside rear view mir-
ror heater switch, the heater panels in the
outside rear view mirrors will quickly clear
the mirror surface. (See “Outside rear
view mirror heaters” on page 115.)
CAUTION
�Do not adjust the mirror while the
vehicle is moving. Doing so may
cause the driver to mishandle the
vehicle and an accident may occur
resulting in death or serious inju-
ries.
�Since the mirror surfaces can get
hot, do not touch them when the
mirror heater switch is on.
To adjust a mirror, use the switches.1. Master switch—To select the mirror to be adjusted
Place the switch at “L” (left) or “R”
(right).
2. Control switch—To move the mirror Push the switch in the desired direc-
tion.
Mirrors can be adjusted when the key is
in the “ACC” or “ON” position.
—Power rear view mirror
control
Page 111 of 351
101
When the ignition key is inserted and
turned on, the inside rear view mirror al-
ways turns on in the “AUTO” mode.
When the outside air temperature is low,
it may take a little longer for the mirror
to darken in response to the detection of
headlights.
CAUTION
Do not adjust the mirror while the
vehicle is moving. Doing so may
cause the driver to mishandle the ve-
hicle and an accident may occur re-
sulting in death or serious injuries.
13c570
To ensure correct functioning of anti−glare
mirror sensors located on both sides of
the mirror, do not touch or cover the sen-
sors with your finger or a piece of cloth,
etc.
—Compass
13C013
The compass indicates the direction in
which the vehicle is heading. The illustra-
tion shown above indicates the vehicle is
heading north.
Displays
Directions
N
NE E
SE
S
SW W
NWNorth
Northeast East
Southeast
South
Southwest West
Northwest
Page 118 of 351
108
Headlight and turn signals
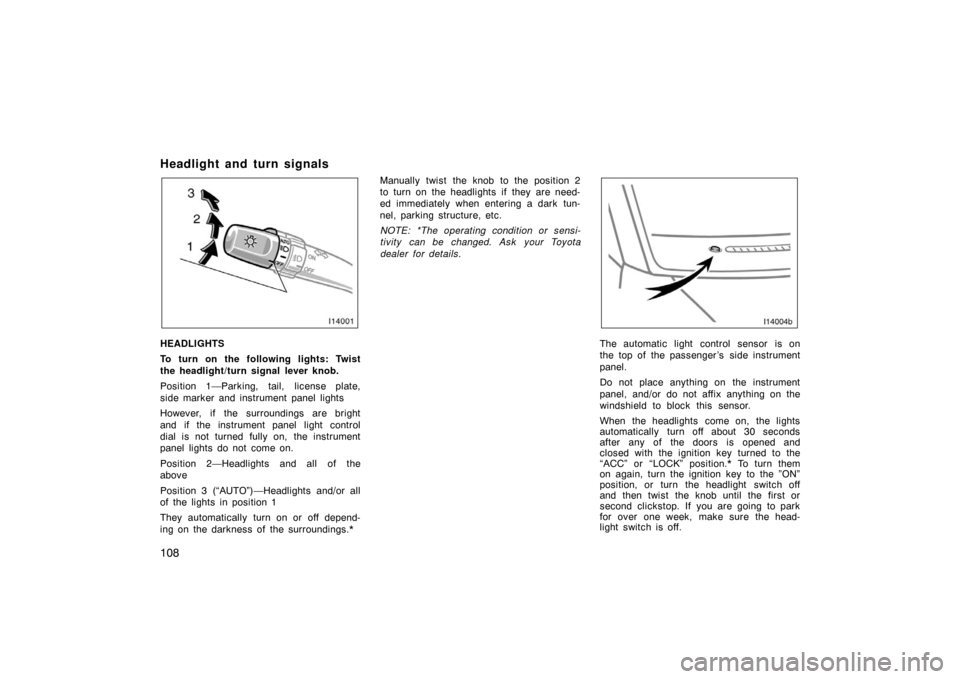
HEADLIGHTS
To turn on the following lights: Twist
the headlight/turn signal lever knob.
Position 1—Parking, tail, license plate,
side marker and instrument panel lights
However, if the surroundings are bright
and if the instrument panel light control
dial is not turned fully on, the instrument
panel lights do not come on.
Position 2—Headlights and all of the
above
Position 3 (“AUTO”)—Headlights and/or all
of the lights in position 1
They automatically turn on or off depend-
ing on the darkness of the surroundings.*Manually twist the knob to the position 2
to turn on the headlights if they are need-
ed immediately when entering a dark tun-
nel, parking structure, etc.
NOTE: *The operating condition or sensi-
tivity can be changed. Ask your Toyota
dealer for details.The automatic light control sensor is on
the top of the passenger ’s side instrument
panel.
Do not place anything on the instrument
panel, and/or do not affix anything on the
windshield to block this sensor.
When the headlights come on, the lights
automatically turn off about 30 seconds
after any of the doors is opened and
closed with the ignition key turned to the
“ACC” or “LOCK” position.* To turn them
on again, turn the ignition key to the ”ON”
position, or turn the headlight switch off
and then twist the knob until the first or
second clickstop. If you are going to park
for over one week, make sure the head-
light switch is off.
Page 119 of 351
109
When the headlight switch is on with all
the doors locked, pushing the “LOCK” but-
ton on the wireless remote control key
turns off the headlights.
NOTE: *The time before turning off the
lights can be changed. Ask your Toyota
dealer for details.
NOTICE
To prevent the battery from being dis-
charged, do not leave the lights on
for a long period when the engine is
not running.
Daytime running light system
The headlights turn on at reduced intensi-
ty when the parking brake is released with
the engine started, even with the light
switch in the “OFF” position. They will not
go off until the ignition switch is turned
off.
To turn on the other exterior lights and
instrument panel lights, twist the knob to
the position 1.
Twist the knob to the position 2 to turn
the headlights to full intensity for driving
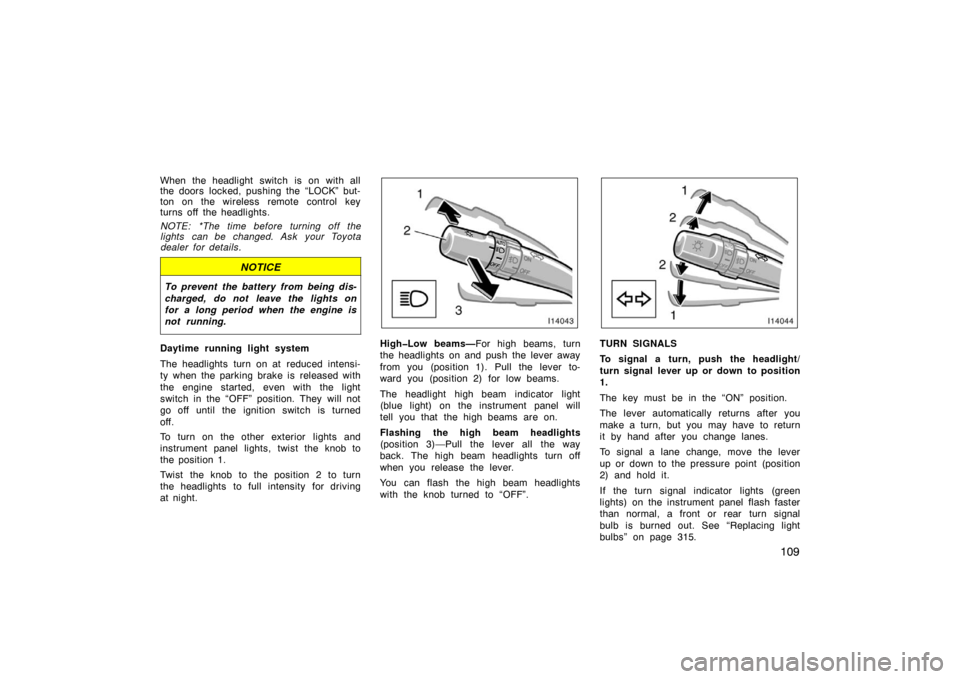
at night.High�Low beams—For high beams, turn
the headlights on and push the lever away
from you (position 1). Pull the lever to-
ward you (position 2) for low beams.
The headlight high beam indicator light
(blue light) on the instrument panel will
tell you that the high beams are on.
Flashing the high beam headlights
(position 3)—Pull the lever all the way
back. The high beam headlights turn off
when you release the lever.
You can flash the high beam headlights
with the knob turned to “OFF”.TURN SIGNALS
To signal a turn, push the headlight/
turn signal lever up or down to position
1.
The key must be in the “ON” position.
The lever automatically returns after you
make a turn, but you may have to return
it by hand after you change lanes.
To signal a lane change, move the lever
up or down to the pressure point (position
2) and hold it.
If the turn signal indicator lights (green
lights) on the instrument panel flash faster
than normal, a front or rear turn signal
bulb is burned out. See “Replacing light
bulbs” on page 315.
Page 122 of 351
11 2
ILLUMINATED ENTRY SYSTEM
Center—
With the switch in the “DOOR” position,
the light comes on when either side or
back door is opened. After all the doors
are closed, the light remains on for a
certain time and then goes out.*
However, in the following cases, the light
goes out immediately:
�All the doors are closed when the igni-
tion key is in “ACC” or “ON” position.
�The ignition key is turned to “ACC”,
“ON” or “START” when the light is still
on.
�All the doors are locked when the light
is still on.
�One front door will be closed with the
lock knob pushed forward while the
other doors are locked.
NOTE: *The interior lights can be set not
to come on or the duration of lighting can
be changed. Ask your Toyota dealer for
details. INTERIOR LIGHTS CUT OFF OPERATION
When the ignition switch is “OFF” and any
interior lights in the vehicle stay lighting
on, the lights will cut off automatically
after 30 minutes.
You can cancel the cut off operation by:
�Turning the key to the “ACC” position.
�Opening or closing any of side doors
and back door.
All the lights are cut off when any of the
doors are locked or unlocked by key or
wireless remote control key.
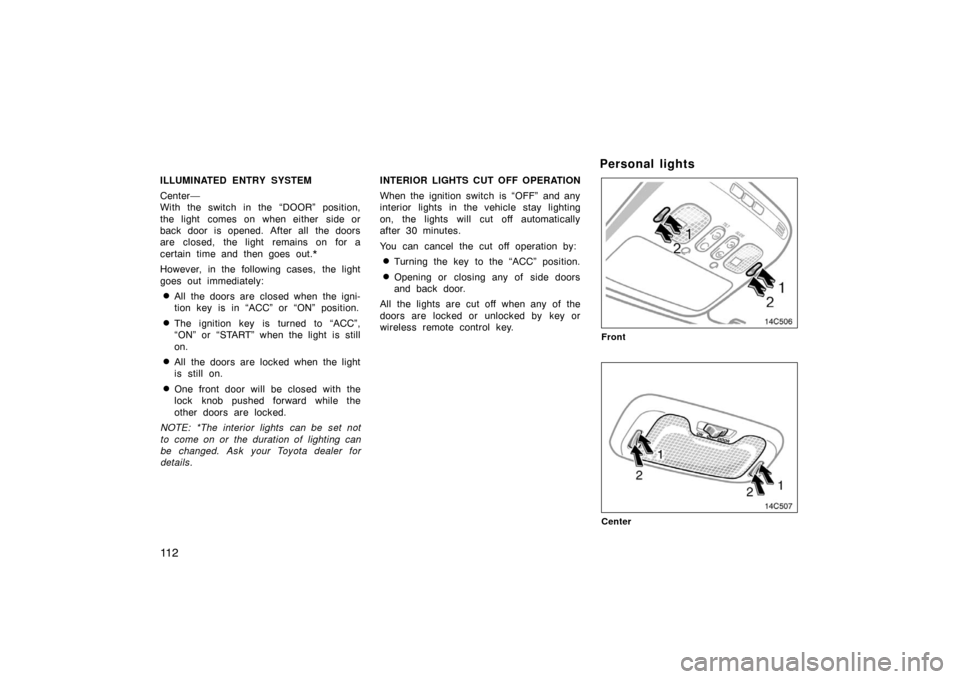
Personal lights
Front
Center
Page 123 of 351
11 3
To turn on the personal light, push the
switch on 1 side. To turn the lights off,
push the switch on 2 side.
PERSONAL LIGHTS CUT OFF OPERA-
TION
When the ignition switch is “OFF” and any
personal lights in the vehicle stay lighting
on, the lights will cut off automatically
after 30 minutes.
You can cancel the cut off operation by:
�Turning the key to the “ACC” position.
�Opening or closing any of side doors
and back door.
All the lights are cut off when any of the
doors are locked or unlocked by key or
wireless remote control key.
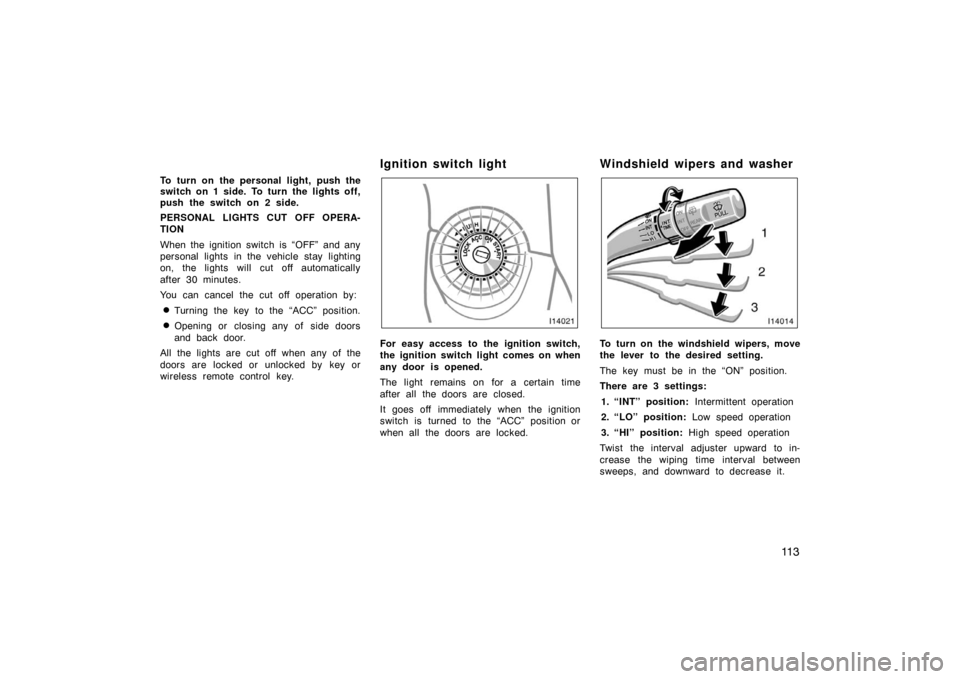
Ignition switch light
For easy access to the ignition switch,
the ignition switch light comes on when
any door is opened.
The light remains on for a certain time
after all the doors are closed.
It goes off immediately when the ignition
switch is turned to the “ACC” position or
when all the doors are locked.
Windshield wipers and washer
To turn on the windshield wipers, move
the lever to the desired setting.
The key must be in the “ON” position.
There are 3 settings:
1. “INT” position: Intermittent operation
2. “LO” position: Low speed operation
3. “HI” position: High speed operation
Twist the interval adjuster upward to in-
crease the wiping time interval between
sweeps, and downward to decrease it.