Page 96 of 352

88
2005 CAMRY from Sep. ’04 Prod. (OM33684U)
�On vehicles with side airbags and
curtain shield airbags, do not allow
the child to lean his/her head or
any part of his/her b")
’05Camry_U (L/O 0409)
88
2005 CAMRY from Sep. ’04 Prod. (OM33684U)
�On vehicles with side airbags and
curtain shield airbags, do not allow
the child to lean his/her head or
any part of his/her body against the
door or the area of the seat, front
or rear pillar or roof side rail from
which the side airbags or curtain
shield airbags deploy even if the
child is seated in the child restraint
system. It is dangerous if the side
airbag and curtain shield airbag in-
flate, and the impact could cause
death or serious injury to the child.
1. Sit the child on a booster seat. Runthe lap and shoulder belt through or
around the booster seat and across the
child following the instructions provided
by its manufacturer and insert the tab
into the buckle taking care not to twist
the belt.
Make sure the shoulder belt is correctly
across the child’s shoulder and that the
lap belt is positioned as low as possible
on the child’s hips. See “Seat belts” on
page 47 in this Section for details.
CAUTION
�Always make sure the shoulder belt
is positioned across the center of
child’s shoulder. The belt should be
kept away from child’s neck, but
not falling off child’s s houlder.
Otherwise, the child may be killed
or seriously injured in case of sud-
den braking or a collision.
�Both high�positioned lap belts and
loose�fitting belts could cause
death or serious injuries due to
sliding under the lap belt during a
collision or other unintended event.
Keep the lap belt positioned as low
on a child’s hips as possible.
�For child’s safety, do not place the
shoulder belt under child’s arm.
�After inserting the tab, make sure
the tab and buckle are locked and
that the lap and shoulder portions
of the belt are not twisted.
Page 99 of 352

91
2005 CAMRY from Sep. ’04 Prod. (OM33684U)
3. Securely fasten the child restraintsystem with the seat belt.
Latch the hook onto the anchor
bracket and tighten the top strap")
’05Camry_U (L/O 0409)
91
2005 CAMRY from Sep. ’04 Prod. (OM33684U)
3. Securely fasten the child restraintsystem with the seat belt.
Latch the hook onto the anchor
bracket and tighten the top strap.
For instructions to install the child re-
straint system, see “Child restraint” on
page 76 in this Section.
CAUTION
Make sure the top strap is securely
latched, and check that the child re-
straint system is secure by pushing
and pulling it in different directions.
Follow all the installation instructions
provided by its manufacturer.
4. Replace the head restraint and lift it up to the uppermost lock position.Lower anchorages for the child restraint
systems complying with the FMVSS225
or CMVSS210.2 specifications are
installed in the rear seat.
The anchorages are installed in the gap
between the seat cushion and seatback of
both outside rear seats.
Child restraint systems complying with the
FMVSS213 or CMVSS213 specification
can be fixed to these anchorages. In this
case, it is not necessary to fix the child
restraint system with a seat belt on the
vehicle.
—Installation with child
restraint lower anchorages
Page 101 of 352
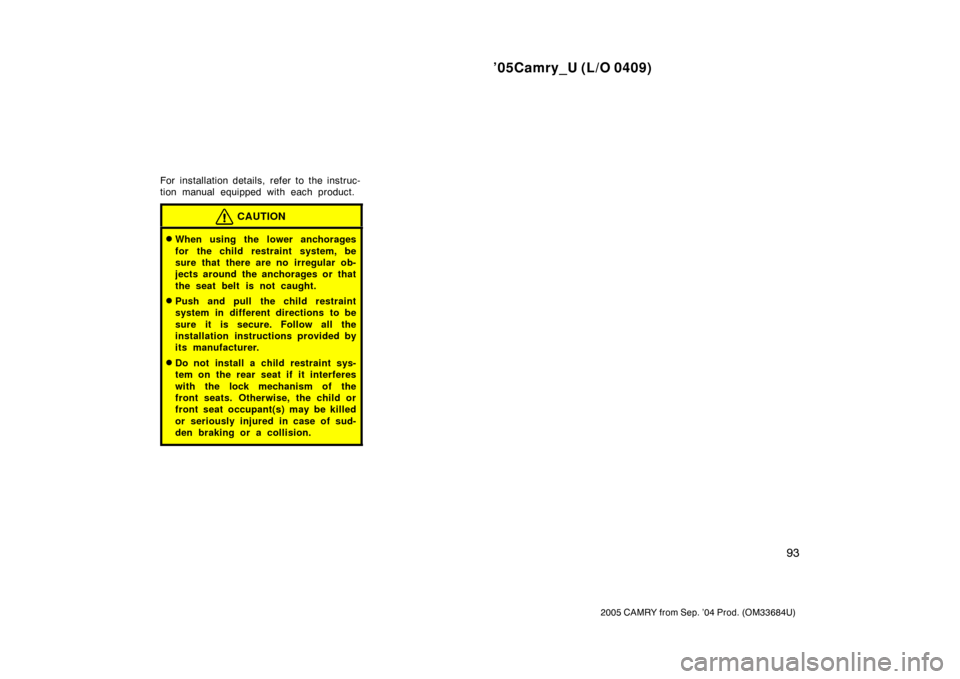
’05Camry_U (L/O 0409)
93
2005 CAMRY from Sep. ’04 Prod. (OM33684U)
For installation details, refer to the instruc-
tion manual equipped with each product.
CAUTION
�When using the lower anchorages
for the child restraint system, be
sure that there are no irregular ob-
jects around the anchorages or that
the seat belt is not caught.
�Push and pull the child restraint
system in different directions to be
sure it is secure. Follow all the
installation instructions provided by
its manufacturer.
�Do not install a child restraint sys-
tem on the rear seat if it interferes
with the lock mechanism of the
front seats. Otherwise, the child or
front seat occupant(s) may be killed
or seriously injured in case of sud-
den braking or a collision.
Page 104 of 352

96
2005 CAMRY from Sep. ’04 Prod. (OM33684U)
To change the steering wheel angle,
hold the steering wheel, push down the
lock release lever, tilt the steering
wheel to the des")
’05Camry_U (L/O 0409)
96
2005 CAMRY from Sep. ’04 Prod. (OM33684U)
To change the steering wheel angle,
hold the steering wheel, push down the
lock release lever, tilt the steering
wheel to the desired angle and return
the lever to its original position.
CAUTION
�Do not adjust the steering wheel
while the vehicle is moving. Doing
so may cause the driver to mishan-
dle the vehicle and an accident may
occur resulting in death or serious
injuries.
�After adjusting the steering wheel,
try moving it up and down to make
sure it is locked in position.
To adjust the position of the accelerator
and brake pedals, push the switch.
The ignition key must be in the “ON” posi-
tion with the automatic transmission selec-
tor lever in the “P” position.
To move the pedals toward the front of
the vehicle: Push the “�” side of the
switch.
To move the pedals back toward you:
Push the “ �” side of the switch.
The accelerator and brake pedals will
move simultaneously as long as you hold
the switch.
Tilt steering wheel Power adjustable pedals
(some models with an
automatic transmission)
Page 110 of 352

102
2005 CAMRY from Sep. ’04 Prod. (OM33684U)
HEADLIGHTS
Manual operation—
To turn on the following lights: Twist
the headlight/turn signal lever knob.
Position 1—Parking")
’05Camry_U (L/O 0409)
102
2005 CAMRY from Sep. ’04 Prod. (OM33684U)
HEADLIGHTS
Manual operation—
To turn on the following lights: Twist
the headlight/turn signal lever knob.
Position 1—Parking, tail, license plate,
side marker and instrument panel lights
Position 2—Headlights and all of the
above
The headlight low beam indicator light
(green light) on the instrument panel will
tell you that the low beams are on.Automatic operation—
To turn on or off the lights automatical-
ly, twist the headlight/turn signal lever
knob to the “AUTO” position when the
ignition key is in the “ON” position.
The headlights and/or all of the lights in
position 1 automatically turn on or off de-
pending on the darkness of the surround-
ings.
Manually twist the knob to the position 2
to turn on the headlights if they are need-
ed immediately when entering a dark tun-
nel, parking structure, etc.The automatic light control sensor is on
the top of the driver’s side instrument
panel.
Do not place anything on the instrument
panel, and/or do not affix anything on the
windshield to block this sensor.
Headlights and turn signals
( f o r th e U.S.A .)
Page 111 of 352

103
2005 CAMRY from Sep. ’04 Prod. (OM33684U)
Automatic light cut off system
Position 1 or “AUTO” position with the
tail lights on—
The lights automatically turn off wh")
’05Camry_U (L/O 0409)
103
2005 CAMRY from Sep. ’04 Prod. (OM33684U)
Automatic light cut off system
Position 1 or “AUTO” position with the
tail lights on—
The lights automatically turn off when the
driver ’s door is opened with the ignition
key in the “ACC” or “LOCK” position.
Position 2 or “AUTO” position with the
headlights on—
The lights automatically turn off after 30
seconds when any of the doors or trunk
lid is opened and closed with the ignition
key in the “ACC” or “LOCK” position.
With wireless remote control—If you want
to turn off the lights immediately, push the
“LOCK” button on the wireless remote
control transmitter twice. The lights also
can be turned off immediately by pushing
the “LOCK” button on the wireless remote
control transmitter with all the doors
locked and the trunk lid closed.
If any of the doors or trunk lid is kept
open, the lights automatically turn off after
20 minutes.
To turn on the lights again, turn the igni-
tion key to the “ON” position or actuate
the headlight switch. If you are going to
park for over one week, make sure the
light switch is in the “DRL OFF” position.NOTICE
To prevent the battery from being dis-
charged, do not leave the lights on
for a long period when the engine is
not running.
Daytime Running Light (DRL) system
The Daytime Running Light (DRL) system
can make it easier for others to see the
front of your vehicle during the day. The
DRL system can be helpful in many differ-
ent driving conditions, but they can be
especially helpful in the short periods after
dawn and before sunset.
The DRL system will make your headlights
come on at a reduced brightness when:
�The ignition is on with the engine run-
ning.
�The light switch is in the “AUTO” posi-
tion or position 1.
�The parking brake is released.
To turn on the other exterior lights and
instrument panel lights, twist the knob to
position 1.
Twist the knob to position 2 to turn the
headlights to full intensity for night driving.
To turn off the DRL system, twist the knob
to the position 3 (“DRL OFF”) or turn the
ignition switch off.
Page 113 of 352

105
2005 CAMRY from Sep. ’04 Prod. (OM33684U)
Manually twist the knob to the position 2
to turn on the headlights if they are need-
ed immediately when entering a dark tun-")
’05Camry_U (L/O 0409)
105
2005 CAMRY from Sep. ’04 Prod. (OM33684U)
Manually twist the knob to the position 2
to turn on the headlights if they are need-
ed immediately when entering a dark tun-
nel, parking structure, etc.
The automatic light control sensor is on
the top of the driver’s side instrument
panel.
Do not place anything on the instrument
panel, and/or do not affix anything on the
windshield to block this sensor.Automatic light cut off system
Position 1 or position 3 with the tail
lights on—
The lights automatically turn off when the
driver ’s door is opened with the ignition
key in the “ACC” or “LOCK” position.
Position 2 or position 3 with the head-
lights on—
The lights automatically turn off after 30
seconds when any of the doors or trunk
lid is opened and closed with the ignition
key in the “ACC” or “LOCK” position.
If you want to turn off the lights immedi-
ately, push the “LOCK” button on the wire-
less remote control transmitter twice. The
lights also can be turned off immediately
by pushing the “LOCK” button on the wire-
less remote control transmitter with all the
doors locked and the trunk lid closed.
If any of the doors or trunk lid is kept
open, the lights automatically turn off after
20 minutes.
To turn on the lights again, turn the igni-
tion key to the “ON” position or actuate
the headlight switch. If you are going to
park for over one week, make sure the
light switch is in the “OFF” position.
Page 117 of 352

109
2005 CAMRY from Sep. ’04 Prod. (OM33684U)
ILLUMINATED ENTRY SYSTEM
When the switch is in the “DOOR” posi-
tion and any door is opened, the light will
come on. After a")
’05Camry_U (L/O 0409)
109
2005 CAMRY from Sep. ’04 Prod. (OM33684U)
ILLUMINATED ENTRY SYSTEM
When the switch is in the “DOOR” posi-
tion and any door is opened, the light will
come on. After all the doors are closed,
the light remains on for about 15 seconds
before fading out.
However, in the following cases, the light
go off immediately.
�All the doors are closed when the igni-
tion key is in the “ACC” or “ON” posi-
tion.
�The ignition key is turned to the “ACC”
or “ON” position after all the side doors
are closed.
�All the doors are closed and locked.
When all the doors are unlocked using
either the key or the wireless remote con-
trol transmitter simultaneously, the interior
light will come on and remain on for about
15 seconds before fading out.
To prevent the battery being discharged,
the light will automatically turn off when
the key is removed and the door is left
opened with the switch at the “DOOR”
position for 20 minutes or more.
For easy access to the ignition switch,
the ignition switch light comes on when
any of the doors are opened.
The light remains on for about 15 seconds
after all the doors are closed.
However, in the following cases, the light
goes off immediately.
�All the doors are closed when the igni-
tion key is in the “ACC” or “ON” posi-
tion.
�The ignition key is turned to the “ACC”
or “ON” position after all the side doors
are closed.
�All the doors are closed and locked. When all the doors are unlocked using
either the key or the wireless remote con-
trol transmitter simultaneously, the ignition
switch light will come on and remain on
for about 15 seconds before fading out.
To prevent the battery being discharged,
the light will automatically turn off when
the key is removed and the door is left
opened for 20 minutes or more.
Ignition switch light