Page 118 of 426
’05 4Runner_U (L/O 0504)
108
2. To remove the booster seat, press the
buckle release button and allow the
belt to retract.Follow the procedure below for a child
restraint system that requires the use
of a top strap.
Anchor brackets
Symbol
Use the anchor brackets behind the rear
seatbacks to attach the top strap.
Anchor brackets are installed for each
rear seating position.
This symbol indicates the location of the
anchor brackets.
— U sin g a to p st rap
(vehicles without third seats)
Page 119 of 426
’05 4Runner_U (L/O 0504)
109
TO USE THE ANCHOR BRACKET:
1. Remove the head restraint.2. Raise the anchor bracket.3. Fix the child restraint system with the seat belt.
Latch the hook onto the anchor
bracket and tighten the top strap.
For instructions to install the child re-
straint system, see “Child restraint” on
page 95 in this Section.
CAUTION
Make sure the top strap is securely
latched, and check that the child re-
straint system is secure by pushing
and pulling it in different directions.
Follow all the installation instructions
provided by its manufacturer.
Page 122 of 426

’05 4Runner_U (L/O 0504)
11 2
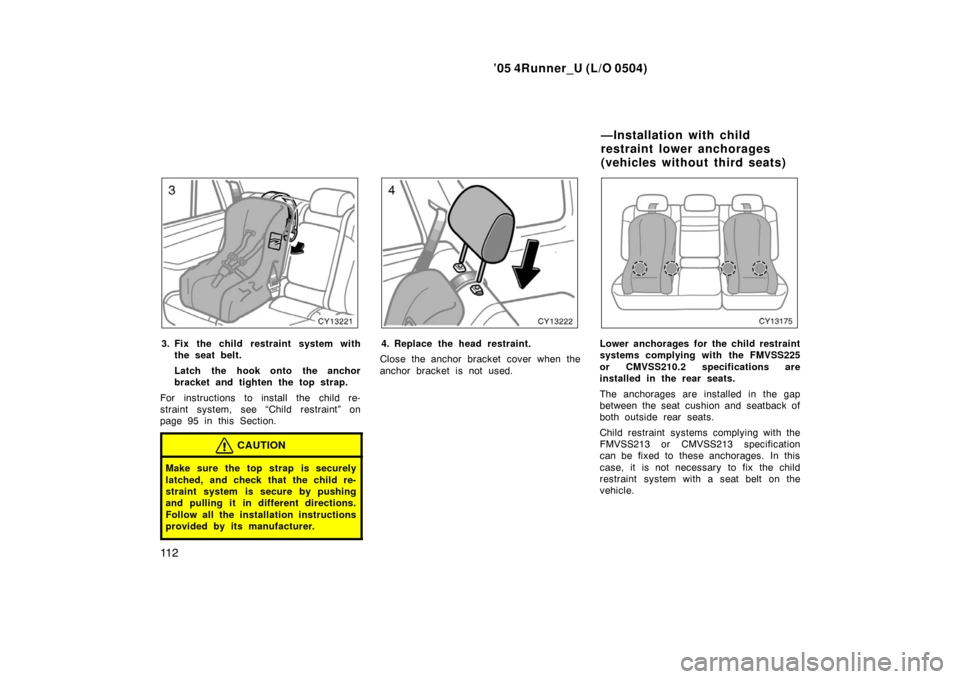
3. Fix the child restraint system with
the seat belt.
Latch the hook onto the anchor
bracket and tighten the top strap.
For instructions to install the child re-
straint system, see “Child restraint” on
page 95 in this Section.
CAUTION
Make sure the top strap is securely
latched, and check that the child re-
straint system is secure by pushing
and pulling it in different directions.
Follow all the installation instructions
provided by its manufacturer.
4. Replace the head restraint.
Close the anchor bracket cover when the
anchor bracket is not used.Lower anchorages for the child restraint
systems complying with the FMVSS225
or CMVSS210.2 specifications are
installed in the rear seats.
The anchorages are installed in the gap
between the seat cushion and seatback of
both outside rear seats.
Child restraint systems complying with the
FMVSS213 or CMVSS213 specification
can be fixed to these anchorages. In this
case, it is not necessary to fix the child
restraint system with a seat belt on the
vehicle.
—Installation with child
restraint lower anchorages
(vehicles without third seats)
Page 124 of 426

’05 4Runner_U (L/O 0504)
11 4
CAUTION
�When using the lower anchorages
for the child restraint system, be
sure that there are no irregular ob-
jects around the anchorages or that
the seat belt is not caught.
�Push and pull the child restraint
system in different directions to be
sure it is secure. Follow all the
installation instructions provided by
its manufacturer.
�Do not install a child restraint sys-
tem on the rear seat if it interferes
with the lock mechanism of the
front seats. Otherwise, the child or
front seat occupant(s) may be killed
or seriously injured in case of sud-
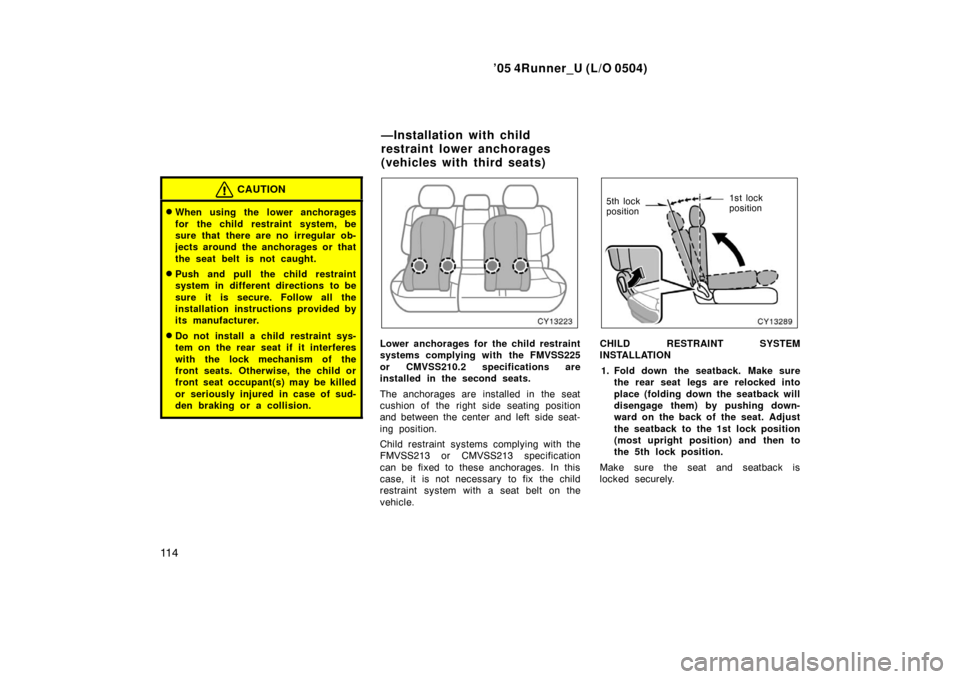
den braking or a collision.Lower anchorages for the child restraint
systems complying with the FMVSS225
or CMVSS210.2 specifications are
installed in the second seats.
The anchorages are installed in the seat
cushion of the right side seating position
and between the center and left side seat-
ing position.
Child restraint systems complying with the
FMVSS213 or CMVSS213 specification
can be fixed to these anchorages. In this
case, it is not necessary to fix the child
restraint system with a seat belt on the
vehicle.
1st lock
position
5th lock
position
CHILD RESTRAINT SYSTEM
INSTALLATION
1. Fold down the seatback. Make sure the rear seat legs are relocked into
place (folding down the seatback will
disengage them) by pushing down-
ward on the back of the seat. Adjust
the seatback to the 1st lock position
(most upright position) and then to
the 5th lock position.
Make sure the seat and seatback is
locked securely.
—Installation with child
restraint lower anchorages
(vehicles with third seats)
Page 126 of 426

’05 4Runner_U (L/O 0504)
11 6
3. Widen the slits of the seat cushion
slightly and confirm the position of
the lower anchorages near the but-
ton on the seatback.
4. Type A—Latch the hooks of lower straps onto the anchorages and
tighten the lower straps.
Type B—Latch the buckles onto the
anchorages.
For owners in Canada— The symbol on
a child restraint system indicates the pres-
ence of a lower connector system.
If your child restraint system has a top
strap, it should be anchored. (For the
installation of the top strap, see “—Using
a top strap” on page 110 in this Section.)
For installation details, refer to the instruc-
tion manual equipped with each product.CAUTION
�When using the lower anchorages
for the child restraint system, be
sure that there are no irregular ob-
jects around the anchorages or that
the seat belt is not caught.
�Push and pull the child restraint
system in different directions to be
sure it is secure. Follow all the
installation instructions provided by
its manufacturer.
�After securing the child restraint
system, never recline the seat.
�Do not install a child restraint sys-
tem on the second seat if it inter-
feres with the lock mechanism of
the front seats. Otherwise, the child
or front seat occupant(s) may be
killed or seriously injured in case
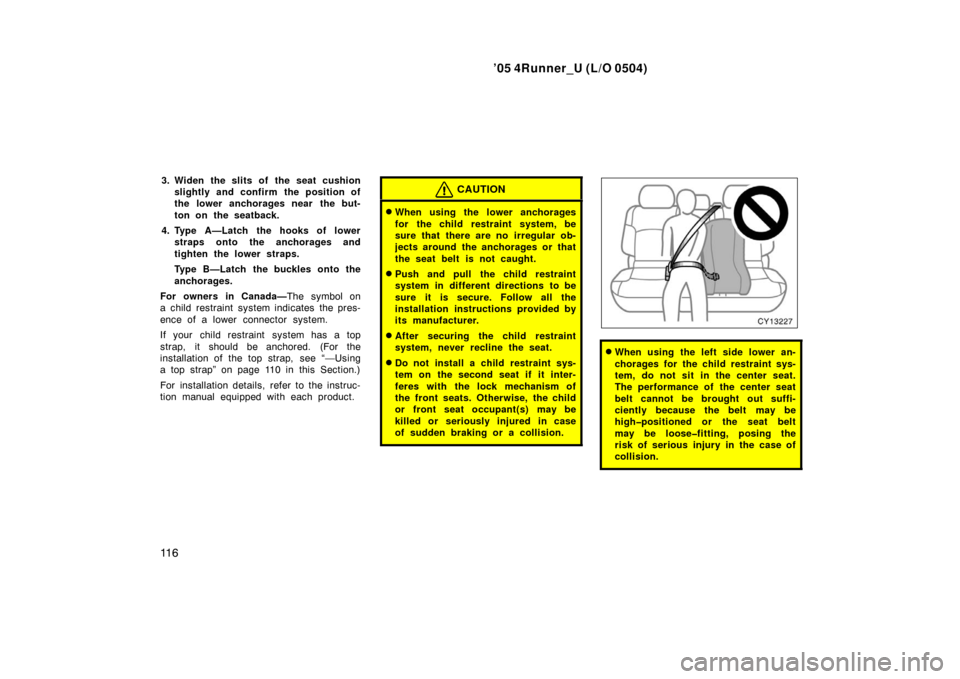
of sudden braking or a collision.�When using the left side lower an-
chorages for the child restraint sys-
tem, do not sit in the center seat.
The performance of the center seat
belt cannot be brought out suffi-
ciently because the belt may be
high�positioned or the seat belt
may be loose�fitting, posing the
risk of serious injury in the case of
collision.
Page 155 of 426
’05 4Runner_U (L/O 0504)
145
If the indicator or buzzer comes on...Do this.
(a)
(indicator and buzzer)
If parking brake is off, stop immediately and contact Toyota dealer.
(b)
(indicator and buzzer)
Fasten driver ’s seat belt.
(c)Fasten front passenger ’s seat belt.
(d)Stop and check.
(e)Stop and check.
(f)Take vehicle to Toyota dealer.
(g)Low fuel level warning lightFill up tank.
Service reminder indicators and warning buzzers
Page 159 of 426

’05 4Runner_U (L/O 0504)
149
(b) Driver’s Seat Belt Reminder Light
and Buzzer
The light and buzzer act as a reminder to
buckle up the driver’s seat belt.
Once the ignition key is turned to “ON” or
“START”, the reminder light flashes and
buzzer come on if the driver’s seat belt
is not fastened. Unless the driver fastens
the belt, the light continues flashing and
the buzzer sounds for about 4 to 8 se-
conds.
(c) Front Passenger ’s Seat Belt Reminder Light
The light acts as a reminder to have the
front passenger buckle up the seat belt.
Once the ignition key is turned to “ON” or
“START”, the reminder light flashes if a
passenger sits in the front passenger seat
and does not fasten the seat belt.
If luggage or other load is placed on the
front passenger seat, depending on its
weight, the reminder light may flash. (d) Discharge Warning Light
This light warns that the battery is being
discharged.
If it comes on while you are driving, there
is a problem somewhere in the charging
system.
The engine ignition will continue to oper-
ate, however, until the battery is dis-
charged. Turn off the air conditioning,
blower, radio, etc., and drive directly to
the nearest Toyota dealer or repair shop.
NOTICE
Do not continue driving if the engine
drive belt is broken or loose.
(e) Low Engine Oil Pressure Warning
Light
This light warns that the engine oil pres-
sure is too low.
If it flickers or stays on while you are
driving, pull off the road to a safe place
and stop the engine immediately. Call a
Toyota dealer or qualified repair shop for
assistance.
The light may occasionally flicker when
the engine is idling or it may come on
briefly after a hard stop. There is no
cause for concern if it then goes out when
the engine is accelerated slightly.
The light may come on when the oil level
is extremely low. It is not designed to
indicate low oil level, and the oil level
must be checked using the level dipstick.
NOTICE
Do not drive the vehicle with the
warning light on—even for one block.
It may ruin the engine.
Page 163 of 426

’05 4Runner_U (L/O 0504)
153
(l) SRS Warning Light
This light will come on when the igni-
tion key is turned to the “ON” position.
After about 6 seconds, the light will go
off. This means the system of the air-
bag and front seat belt pretensioner are
operating properly.
This warning light system monitors the
airbag sensor assembly, front airbag sen-
sors, side and curtain shield airbag sen-
sors, curtain shield airbag sensors, driv-
er ’s seat position sensor, driver ’s seat belt
buckle switch, front passenger occupant
classification system and indicator light,
front passenger ’s seat belt buckle switch,
seat belt pretensioner assemblies, inflat-
ors, warning light, “RSCA OFF” indicator
light, interconnecting wiring and power
sources.
If either of the following conditions occurs,
this indicates a malfunction somewhere in
the parts monitored by the warning light
system. Contact your Toyota dealer as
soon as possible to service the vehicle.
�The light does not come on when the
ignition key is turned to the “ON” posi-
tion or remains on for more than 6
seconds or flashes.
�The light comes on or flashes while
driving. (m) Automatic Transmission Fluid
Temperature Warning Light
(four�wheel drive models)
This light warns that the automatic trans-
mission fluid temperature is too high.
If this light comes on while you are driv-
ing, slow down and pull off the road. Stop
the vehicle at a safe place and put the
selector lever in “P”. With the engine id-
ling, wait until the light goes off. If the
light goes off, you may start the vehicle
again. If the light does not go off, call a
Toyota dealer or qualified repair shop for
assistance.
NOTICE
Continued driving with the warning
light on may damage the automatic
transmission.
(n) Low Tire Pressure Warning Light
This light warns that the tire pressure of
one or more of your tires (including the
spare tire) is low. The light comes on
when the ignition key is turned to the
“ON” position. It goes off after a few sec-
onds. This indicates that the tire pressure
warning system is functioning properly.
If the warning light comes on, stop your
vehicle in a safe place as soon as pos-
sible and check that the inflation pressure
of all tires (including the spare tire) is as
specified on the tire and loading informa-
tion label. (See “Checking tire inflation
pressure” on page 381 in Section 7− 2.)
The light should go off a few minutes after
the tire pressure is adjusted.
If the warning light blinks, the tire pres-
sure warning system may be malfunction-
ing. Contact your Toyota dealer.
For details, see “Tire pressure warning
system” on page 188 in Section 1 −7.