Page 82 of 477
1-49
Seat, seatbelt and SRS airbags
– CONTINUED –
2. While following the instructions supplied by the
child restraint system manufacturer, connect the lower
hooks onto the lower anchorages located at “ ”
marks on the bottom of the rear seatback. When the
hooks are connected, make sure the adjacent seat-
belts are not caught. 3. [If your child restraint system is of a flexible attach-
ment type (which uses tether belts to connect the child
restraint system properly to the lower anchorages)]
While pushing the child restraint into the seat cushion,
pull both left and right lower tether belts up to secure
the child restraint system firmly by taking up the slack
in the belt.
4. Connect the top tether hook to the tether anchor-
age and firmly tighten the tether.
For information on how to set the top tether, read the
following “Top tether anchorages”.
US1588CAUG1098BA
Page 83 of 477
1-50
Seat, seatbelt and SRS airbags
5. Before seating a child in the child restraint system,
try to move seat back and forth and left and right to
verify that it is held securely in position.
6. To remove the child restraint system, follow the re-
verse procedures of installation.
If you have any question concerning this type of child
restraint system, ask your SUBARU dealer. �„
Top tether anchorages
Your vehicle is equipped with three top tether anchor-
ages so that a child restraint system having a top teth-
er can be installed in the rear seat. When installing a
child restraint system using top tether, proceed as fol- lows, while observing the instructions by the child re-
straint system manufacturer.
Since a top tether can provide additional stability by of-
fering another connection between a child restraint
system and the vehicle, we recommend that you use
a top tether whenever one is required or available.
US1113BA
Page 85 of 477
1-52
Seat, seatbelt and SRS airbags
2. Open the cover flaps to use the anchorages. Fas-
ten the top tether hook of the child restraint system to
the appropriate top tether anchorage.
3. Tighten the top tether securely.
Always remove the head restraint when mount-
ing a child restraint system with a top tether.
Otherwise, it may not be possible to fasten the
top tether tightly.
US1593BAUS1594BA
Page 88 of 477

1-55
Seat, seatbelt and SRS airbags
– CONTINUED –
es) sit in the REAR seat properly restrained at
all times in a child restraint device or in a seat-
belt, whichever is appropriate for the child’s
age, height and weight.
Secure ALL types of child restraint devices (in-
cluding forward facing child seats) in the REAR
seats at all times.
According to accident statistics, children are
safer when properly restrained in the rear seat-
ing positions than in the front seating posi- tions.
For instructions and precautions concerning
the child restraint system, see the “Child re-
straint systems” section in this chapter. �yNEVER INSTALL A REARWARD FACING
CHILD SEAT IN THE FRONT SEAT. DOING SO
RISKS SERIOUS INJURY OR DEATH TO THE
CHILD BY PLACING THE CHILD’S HEAD TOO
CLOSE TO THE SRS AIRBAG. �y Never allow a child to stand up, or to kneel on
the front passenger’s seat, or never hold a child
on your lap or in your arms. The SRS airbag de-
ploys with considerable force and can injure or
even kill the child.
�y When the SRS airbag deploys, some smoke
will be released. This smoke could cause
breathing problems for people with a history of
asthma or other breathing trouble. If you or
your passengers have breathing problems after
SRS airbag deploys, get fresh air promptly. �y A deploying SRS airbag releases hot gas. Oc-
cupants could get burnt if they come into direct
contact with the hot gas.
NOTE
When you sell your vehicle, we urge you to explain
to the buyer that it is equipped with SRS airbags
by alerting him to the applicable section in this
owner’s manual.
Page 112 of 477

2-1
2
Keys and doors
Keys ............................................................... 2-2 Key number ....................................................... 2-3
Immobilizer (if equipped) ............................. 2-3 Security ID plate ................................................ 2-4
Security indicator light ..................................... 2-5
Key replacement ............................................... 2-5
Door locks ..................................................... 2-6 Locking and unlocking from the outside ........ 2-6
Locking and unlocking from the inside .......... 2-7
Power door locking switches ...................... 2-8
Remote keyless entry system (if equipped) .............................................. 2-9Locking the doors ............................................. 2-10
Unlocking the doors ......................................... 2-10
Illuminated entry ............................................... 2-11
Vehicle finder function ..................................... 2-11
Sounding a panic alarm ................................... 2-11
Selecting audible signal operation .................. 2-11
Replacing the battery ....................................... 2-11
Replacing lost transmitters .............................. 2-13
Security system (if equipped) ..................... 2-17 System operation .............................................. 2-17
Arming the system ............................................ 2-17
Disarming the system ....................................... 2-19
Valet mode ......................................................... 2-20
Passive arming .................................................. 2-20
Child safety locks ......................................... 2-23
Windows ........................................................ 2-24 Power windows ................................................. 2-24
Rear gate ....................................................... 2-27 Moonroof (if equipped) ................................. 2-28
To open the moonroof ...................................... 2-28
To close the moonroof ..................................... 2-29
Anti-entrapment function ................................. 2-29
Page 113 of 477
2-2
Keys and doors
Keys and doorsKeys
Vehicle with immobilizer system
A) Master key (Black)
B) Submaster key (Black)
C) Valet key (Gray)
D) Key number plate
E) Security ID plate Vehicle without immobilizer system
A) Master key
B) Submaster key
C) Valet key
D) Key number plate
Three types of keys are provided for your vehicle:
Master key, submaster key and valet key.
The master key and submaster key fit all locks on your vehicle. �y Ignition switch
�y Driver’s door
�y Glove box
AB C
DE
UG2044BD
AB
C
D
HS2011BC
Page 115 of 477

2-4
Keys and doors
and (2) this device must accept any interference
received, including interference that may cause
undesired operation.
Changes or modifications not expressly approved
by the party responsible for compliance could
void the user’s authority to operate the equipment.
NOTE
To protect your vehicle from theft, please pay
close attention to the following security precau-
tions: �y
Never leave your vehicle unattended with its
keys inside. �y Before leaving your vehicle, close all windows
and lock the doors and rear gate. �y Do not leave spare keys or any record of your
key number in the vehicle.
�y Do not place the key under direct sunlight or
anywhere it may become hot. �y Do not get the key wet. If the key gets wet,
wipe it dry with a cloth immediately. �„
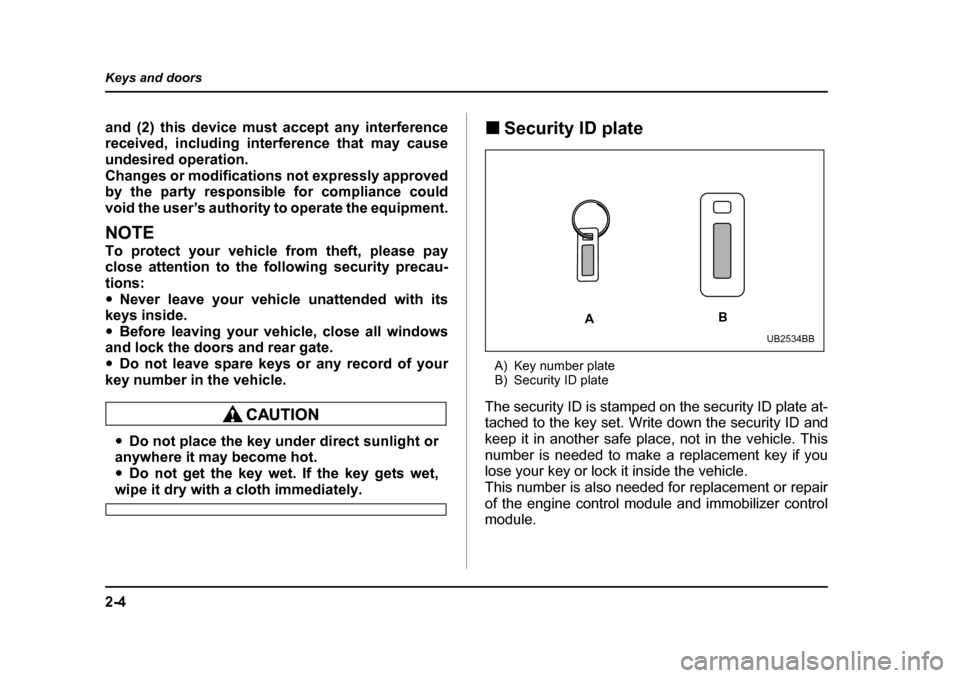
Security ID plate
A) Key number plate
B) Security ID plate
The security ID is stamped on the security ID plate at-
tached to the key set. Write down the security ID and
keep it in another safe place, not in the vehicle. This
number is needed to make a replacement key if you
lose your key or lock it inside the vehicle.
This number is also needed for replacement or repair
of the engine control module and immobilizer control module.
A B
UB2534BB
Page 116 of 477

2-5
Keys and doors
– CONTINUED –
�„Security indicator light
The security indicator light deters potential thieves by
indicating that the vehicle is equipped with an immobi-
lizer system. It begins flashing about 60 seconds after
the ignition switch is turned from the “ON” position to
the “ACC” or “LOCK” position or immediately after the
key is pulled out.
If the security indicator light does not flash, the immo-
bilizer system may be faulty. If this occurs, contact
your SUBARU dealer as soon as possible.
In case an unauthorized key is used (e.g. an imitation
key), the security indicator light comes on.
NOTE
Even if the security indicator light flashes irregu-
larly or its fuse blows (the light does not flash if its
fuse is blown), the immobilizer system will func-
tion normally. �„ Key replacement
Your key number plate and security ID plate will be re-
quired if you ever need a replacement key made. Any
new key must be registered for use with your vehicle’s
immobilizer system before it can be used. Up to four
keys can be registered for use with one vehicle.
For security, all the keys registered with your vehicle’s immobilizer system will have their ID codes erased
and re-registered when a new key is made. Therefore,
all of your vehicle’s keys must be presented when a
new key is registered. Any key that is not re-registered
when a new key is made cannot be used after the oth-
er keys are re-registered. For information on replace-
ment keys and on the registration of keys with your im-
mobilizer system, contact your SUBARU dealer.