2005 Seat Toledo display
[x] Cancel search: displayPage 19 of 50

Navigation
18Destination entryStarting destination entry
Two addresses can be entered for the route calculation; the
address of the destination and the address of the stopover
destination.
– Press the key to display the main Menu of the nav igation
system ⇒
page 4, fig. 1 .
– Press or in the navigation main menu
⇒ page 17, fig. 13 to select one of the two options. You will see a message that states that a destination h as not yet been defined
if the destination is being entered for the first time . The last used destination
will be displayed if a destination has already be en entered.
There are various methods of entering a destination or a s topover destina-
tion. The procedure for entering the stopover dest ination is the same as for
the destination.
– Enter the destination using town and street names
⇒ page 19, “Entering a new address (town, street, h ouse number)”.
or – Select a destination from a list of desti-
nations that have already been stored ⇒
page 20, “Last destinations”.
Fig. 14 Destination
Fig. 15 Stopover destina-
tion
NAVI
A13Destination
Stopover.
New direction.Last destinations.
From dst.mem.
radionaving Seite 18 Mittwoch, 30. März 2005 12 :26 12
Page 21 of 50

Navigation
20
– Enter the letters or numbers by turning and pressing the me nu
knob.
– A list of names or numbers is seen on the lower part of the screen. Press to go to the list.
– Select a name from the list by turning and pushing the menu
knob. You can scroll through several pages of the list u sing the
scroll markers , , and and confirm your selection by
pressing .
– Press to select a special destination close to
the destination address (town, str eet etc.) that you have already
entered. and mark characters and deleted characters.
will display language-specific characters as necessary.
The term “Town” is used regardless of how many peopl e live there. Both a
village of 100 inhabitants and a city with 1 million are named as towns. A list
of names to choose from will appear for town name s which are used more
than once. The system will automatically switch to str eet entry after town
entry and then to house number entry. The centre of the town will be offered
as a destination if the town is so small that none of the streets have been
digitally mapped.
The keys and will not be active if a town name has not
been entered.
Note
Enter an intersection and house number as described.
Last destinations
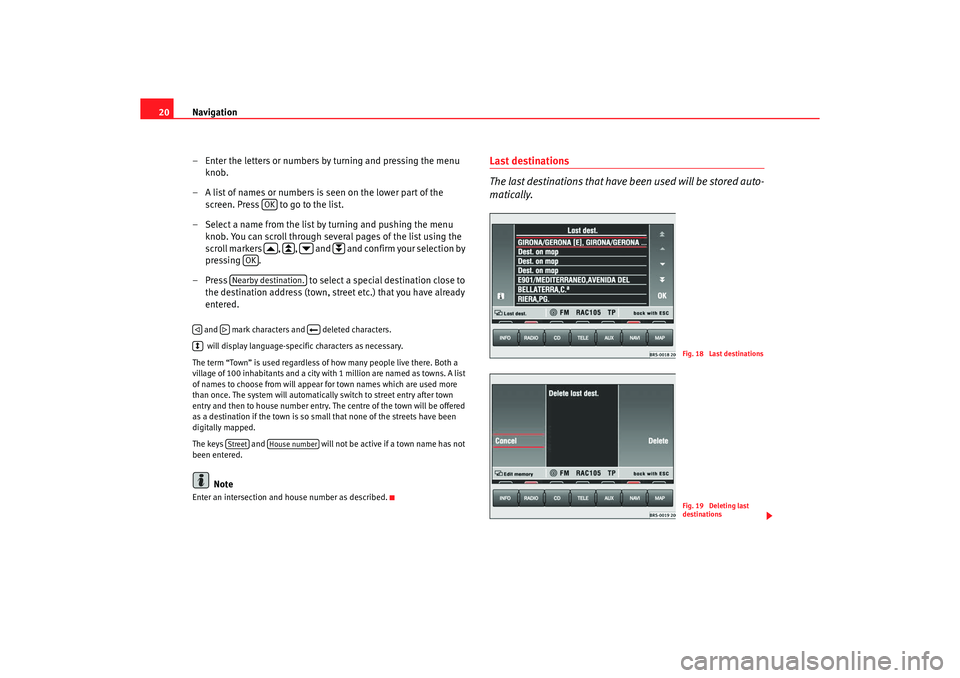
The last destinations that have been used will be stored auto-
matically.
OK
OK
Nearby destination.
Street
House number
Fig. 18 Last destinationsFig. 19 Deleting last
destinations
radionaving Seite 20 Mittwoch, 30. März 2005 12 :26 12
Page 22 of 50

Navigation21
Making a selection from the last destinations
–Press ⇒page 18, fig. 14 to make a selection
from the list of the last destinations stored ⇒
page 18.
–Turn the menu knob to make a sele ction from the list of the last
used destinations ⇒
page 20, fig. 18 . Press to make an
address fully visible, if it cannot be read fully.
– Press the menu knob to select the address marked in red . The
Navigation main menu will appear with your selected address
after a few seconds.
Deleting the list of last destinations
– Starting in the Navigation main menu ⇒
page 17, fig. 13 press
the following function keys in the order indicated: ,
and .
– Select or when confirmation is asked for. If you
select , all
of the last destinations, including the current
destination, will be deleted.
The addresses collected in the Last dest.
memory can only be deleted all at
once, not individually.
A total of 14 last destinations can be st ored in the memory. A destination will
not be stored in Last dest. until route guidance has started. If you are not able
to store any more destinations, the destination memor y is full. Delete either
the last destinations memory or destinations fr om the destination memory
⇒ page 26.
Addresses from the destination memory– Press ⇒
page 18, fig. 14 to display the stored
destination list.
– You can move the red bar ,by turning the menu knob. Press to
make an address marked in this way fully visible, if it cannot be
read fully.
– The address marked in red will be activated if the menu knob is
pressed. The Navigation main menu will appear with your
selected address after a few seconds.You will be shown a message if the dest ination memory is full. Some of the
destinations should then be deleted manually.
Last destinations.
Destination
Edit memory
Delete last dest.
Cancel
Delete
Delete
Fig. 20 Complete desti-
nation address
From dst.mem.
radionaving Seite 21 Mittwoch, 30. März 2005 12 :26 12
Page 23 of 50

Navigation
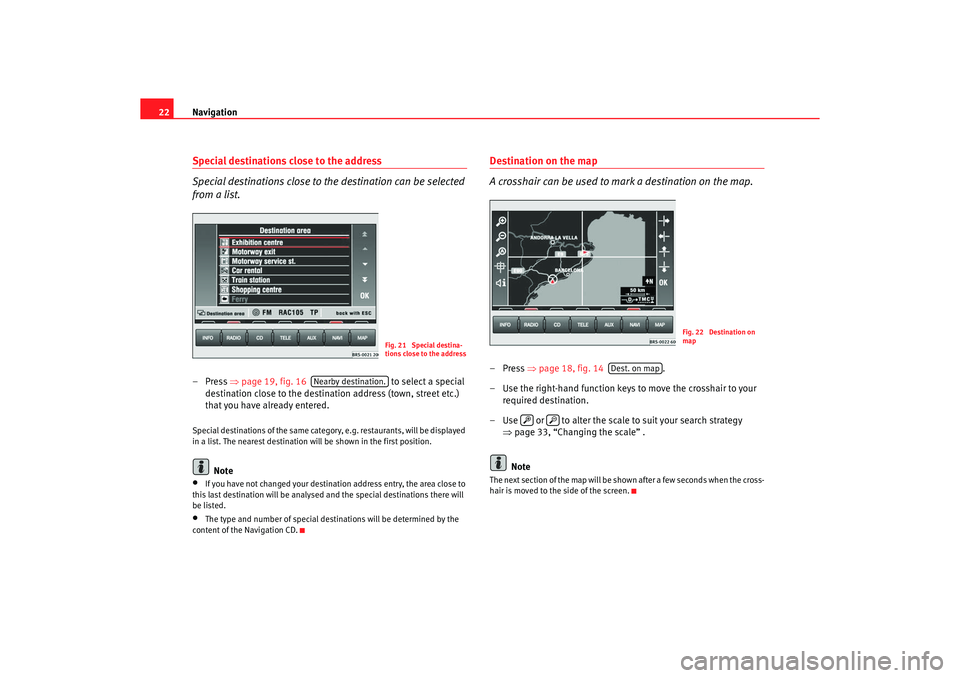
22Special destinations close to the address
Special destinations close to the destination can be selected
from a list.– Press ⇒
page 19, fig. 16 to select a special
destination close to the destination address (town, street etc.)
that you have already entered.Special destinations of the same category, e.g. restaur ants, will be displayed
in a list. The nearest destination will be shown in the firs t position.
Note
•
If you have not changed your destination address entry, the area close to
this last destination will be analysed and the spec ial destinations there will
be listed.
•
The type and number of special destinations will be det ermined by the
content of the Navigation CD.
Destination on the map
A crosshair can be used to mark a destination on the map.–Press ⇒
page 18, fig. 14 .
– Use the right-hand function keys to move the crossh air to your
required destination.
– Use or to alter the scale to suit your search strate gy
⇒ page 33, “Changing the scale” .
NoteThe next section of the map will be shown after a few sec onds when the cross-
hair is moved to the side of the screen.
Fig. 21 Special destina-
tions close to the address
Nearby destination.
Fig. 22 Destination on
map
Dest. on map
radionaving Seite 22 Mittwoch, 30. März 2005 12 :26 12
Page 31 of 50

Navigation
30
– The MFD2 radio navigation system will now travel along the rout e
virtually from start to finish if the route guidance function is
started. You can listen to announcements and look at di splays.The navigation system will need some time for an exact definition of your
position if you have transported your vehicle using the tr ain or a ferry. Your
position can be entered manually if the automatic defi nition is not
successful.
The manual position input can be used to calculate a route between any two
points regardless of where the vehicle is actually loca ted.Manually excluding stretches of the journey
Stretches of the journey ahead and/or parts of the route list
can be blocked manually.
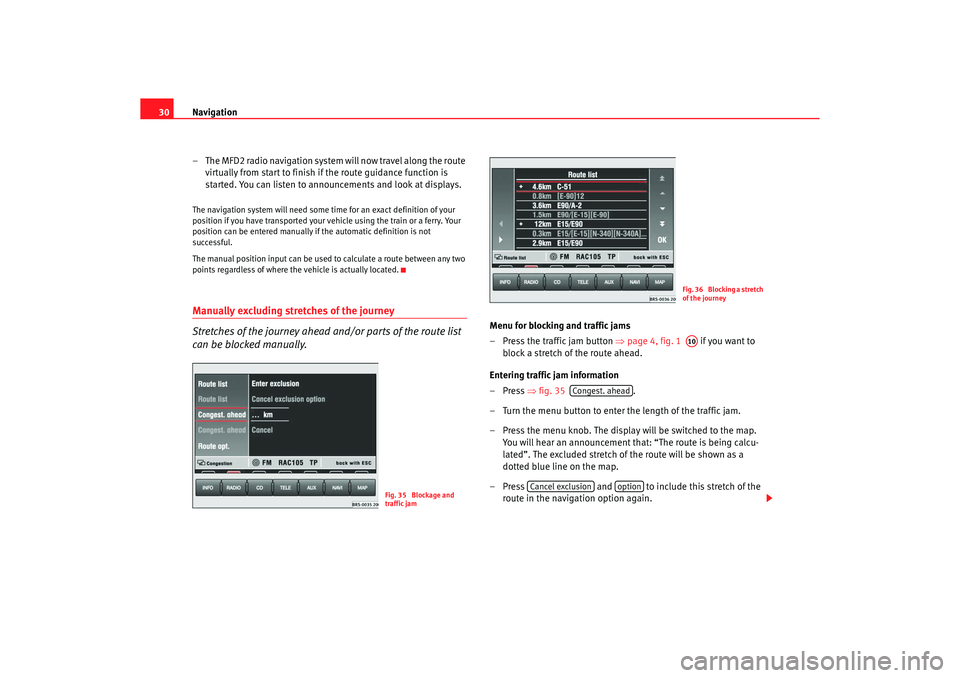
Menu for blocking and traffic jams
– Press the traffic jam button
⇒
page 4, fig. 1 if you want to
block a stretch of the route ahead.
Entering traffic jam information
–Press ⇒fig. 35 .
– Turn the menu button to enter the length of the traffic jam.
– Press the menu knob. The display will be switched to th e map.
You will hear an announcement that: “The route is being ca lcu-
lated”. The excluded stretch of the route will be shown as a
dotted blue line on the map.
– Press and to include this stretch of the
route in the navigation option again.
Fig. 35 Blockage and
traffic jam
Fig. 36 Blocking a stretch
of the journeyA10
Congest. ahead
Cancel exclusion
option
radionaving Seite 30 Mittwoch, 30. März 2005 12 :26 12
Page 32 of 50

Navigation31
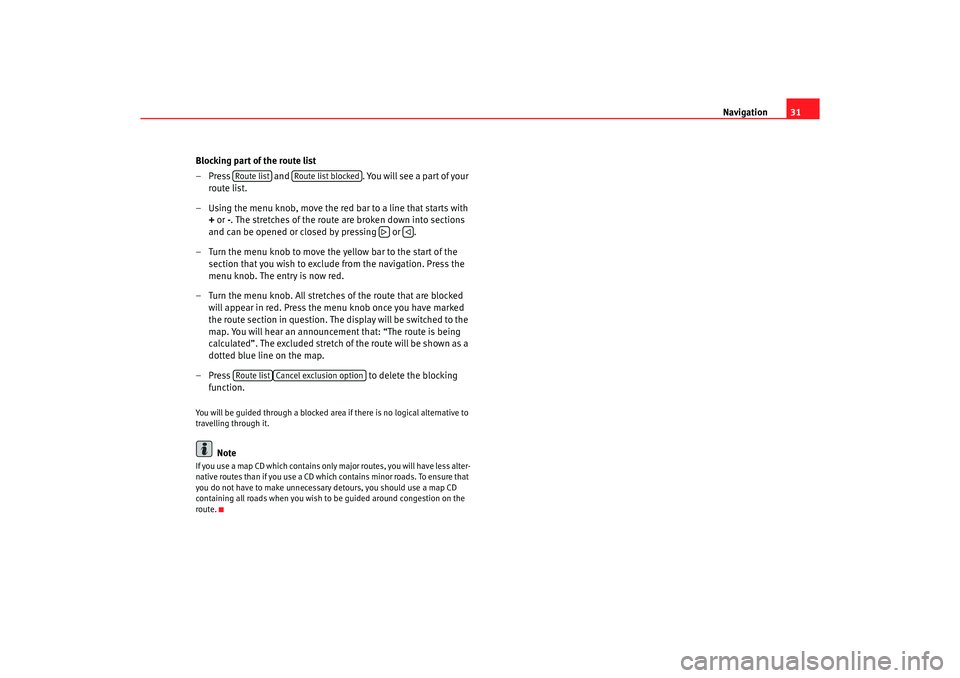
Blocking part of the route list
– Press and . You will see a part of your
route list.
– Using the menu knob, move the red bar to a line that starts with
+ or -
. The stretches of the route are broken down into sections
and can be opened or closed by pressing or .
– Turn the menu knob to move the yellow bar to the start of the section that you wish to exclude from the navigation. Press the
menu knob. The entry is now red.
– Turn the menu knob. All stretches of the route that are blocked
will appear in red. Press the menu knob once you have mar ked
the route section in question. The display will be switched to the
map. You will hear an announcement that: “The route is being
calculated”. The excluded stretch of the route will be shown a s a
dotted blue line on the map.
– Press to delete the blocking
function.
You will be guided through a blocked area if there is no logical alternative to
travelling through it.
Note
If you use a map CD which contains only major routes, y ou will have less alter-
native routes than if you use a CD which contains minor r oads. To ensure that
you do not have to make unnecessary detours, you sh ould use a map CD
containing all roads when you wish to be guided arou nd congestion on the
route.
Route list
Route list blocked
Route list
Cancel exclusion option
radionaving Seite 31 Mittwoch, 30. März 2005 12 :26 12
Page 33 of 50

Navigation
32Map and symbol displaysInformation in the map and symbol displays
Information on the route will be shown in the map or symbol
displays if the route guidance function is active.
– Press the button ⇒
page 4, fig. 1 . The screen will
switch between map and symbol displays.Map display
Autozoom active (
in red). The scale of the map will, for example, be
larger for motorway driving and more detailed when making a turn.
Journey time or arrival time.
Distance to destination or stopover.
Road name.
Vehicle position. The red arrow points in the direction of travel. The route
ahead is shown as a blue line.
Route options and “ TMC
”.
− If the dynamic route guidance option is active, the horiz ontal arrow is
shown with a D
, and blocked roads are shown as
.
− “TMC ”: The number of “ TMC
” reports received is shown by the white
dots.
Map scale
North.
Fig. 37 Map display
Fig. 38 Symbol display
MAP
A12
AAABACADAEAFAGAH
radionaving Seite 32 Mittwoch, 30. März 2005 12 :26 12
Page 34 of 50

Navigation33
Traffic problems are indicated by a symbol on the ma p: slow-moving traffic traffic jam closed road
Symbol display The number of GPS satellites.
Route option (in this example dynamic route guid ance
D).
Arrival time or journey time.
Distance to destination or stopover.
Turn arrow, above it the name of the street you are turning into.
Current road
The proximity bar shows how far away the turning po int is. The distance
to the next change of direction will be shown in the display after you have
turned.
Changing the scale
You can choose from a total of 13 different scales.– Press or .
– More details. A scale display appears in the top left -hand corner when
the button is pressed ⇒fig. 39
– Large overview. A scale display appears in the top le ft-hand corner when
the button is pressed.
The selected scale will be shown once the menu knob is pressed or after 3
seconds.
AAABACADAEAFAG
Fig. 39 Changing the
scale
radionaving Seite 33 Mittwoch, 30. März 2005 12 :26 12