2005 SATURN VUE battery
[x] Cancel search: batteryPage 141 of 384

Your vehicle will not pass this inspection if the OBD
(on-board diagnostic) system determines that critical
emission control systems have not been completely
diagnosed by the system. The vehicle would be
considered not ready for inspection. This can happen if
you have recently replaced your battery or if your
battery has run down. The diagnostic system is
designed to evaluate critical emission control systems
during normal driving. This may take several days
of routine driving. If you have done this and your vehicle
still does not pass the inspection for lack of OBD
system readiness, your retailer can prepare the vehicle
for inspection.
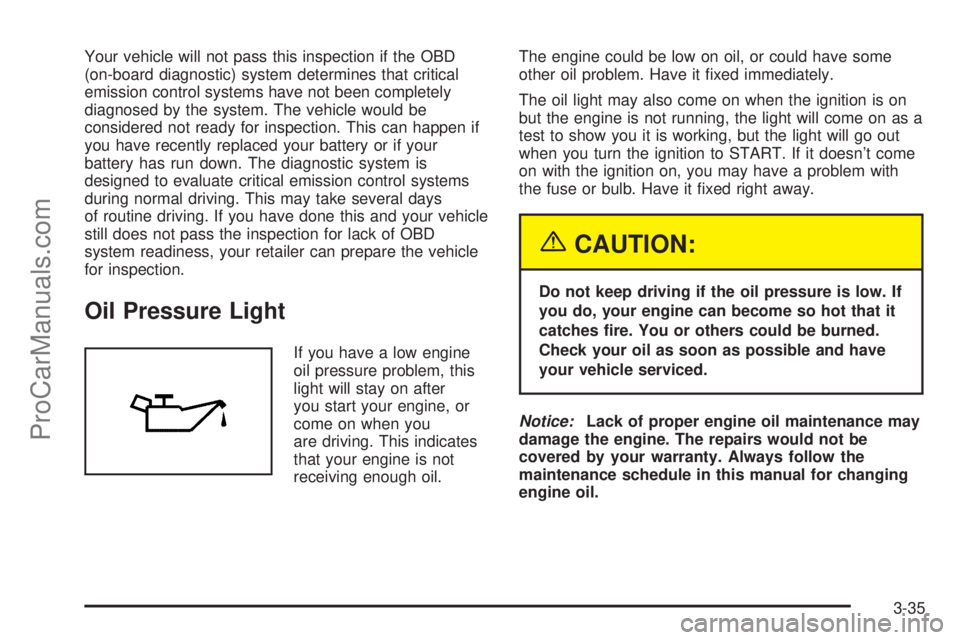
Oil Pressure Light
If you have a low engine
oil pressure problem, this
light will stay on after
you start your engine, or
come on when you
are driving. This indicates
that your engine is not
receiving enough oil.The engine could be low on oil, or could have some
other oil problem. Have it �xed immediately.
The oil light may also come on when the ignition is on
but the engine is not running, the light will come on as a
test to show you it is working, but the light will go out
when you turn the ignition to START. If it doesn’t come
on with the ignition on, you may have a problem with
the fuse or bulb. Have it �xed right away.
{CAUTION:
Do not keep driving if the oil pressure is low. If
you do, your engine can become so hot that it
catches �re. You or others could be burned.
Check your oil as soon as possible and have
your vehicle serviced.
Notice:Lack of proper engine oil maintenance may
damage the engine. The repairs would not be
covered by your warranty. Always follow the
maintenance schedule in this manual for changing
engine oil.
3-35
ProCarManuals.com
Page 147 of 384

Finding a Station
AM FM:Press this button to switch between FM1,
FM2, or AM. The display will show the selection.
RTUNEQ:Press either arrow to select radio
stations.
RSEEKQ:Press and hold the up or the down
arrow to go to the next or to the previous station and
stay there.
The radio will only seek stations with a strong signal
that are in the selected band.
SCN (Scan):Press this button to scan stations. The
radio will go to a station, play for a few seconds, then go
on to the next station. Press this button again to stop
scanning.
The radio will only scan stations with a strong signal
that are in the selected band.
Setting Preset Stations
Up to 18 stations (six FM1, six FM2, and six AM) can be
programmed on the six numbered pushbuttons, by
performing the following steps:
1. Turn the radio on.
2. Press AM FM to select FM1, FM2, or AM.3. Tune in the desired station.
4. Press and hold one of the six numbered
pushbuttons until you hear a beep. Whenever that
numbered pushbutton is pressed, the station
that was set will return.
5. Repeat the steps for each pushbutton.
If the battery has been disconnected or a radio fuse has
been removed, the preset stations and time of day
will need to be reset.
Using Automatic Set
Use this feature to automatically save the radio preset
pushbuttons with the stations with the strongest
radio signals.
A.SET (Automatic Set):Press the AM FM button to
have the radio automatically select the �rst 12 strongest
radio stations for FM and the six strongest radio
stations for AM.
To select the stations, perform the following:
1. Press AM FM to select FM1, FM2, or AM.
2. Press and hold AM FM until you hear a beep.
The radio will begin to search the current band.
The radio will store the stations, starting from the
lowest frequency, to each preset pushbutton. A.SET
will appear on the display when the radio is
�nished storing the stations.
3-41
ProCarManuals.com
Page 149 of 384

Finding a Station
AM FM:Press this button to switch between FM1,
FM2, or AM. The display will show the selection.
RTUNEQ:Press the up or down arrow to select
radio stations.
RSEEKQ:Press and hold the up or the down
arrow to go to the next or to the previous station and
stay there.
The radio will only seek stations with a strong signal
that are in the selected band.
SCN (Scan):Press this button to scan stations. The
radio will go to a station, play for a few seconds, then go
on to the next station. Press this button again to stop
scanning.
The radio will only scan stations with a strong signal
that are in the selected band.
Setting Preset Stations
Up to 18 stations (six FM1, six FM2, and six AM), can
be programmed on the six numbered pushbuttons,
by performing the following steps:
1. Turn the radio on.
2. Press AM FM to select FM1, FM2, or AM.3. Tune in the desired station.
4. Press and hold one of the six numbered
pushbuttons until you hear a beep. Whenever that
numbered pushbutton is pressed, the station
that was set will return.
5. Repeat the steps for each pushbutton.
If the battery has been disconnected or a radio fuse has
been removed, the preset stations and time of day
will need to be reset.
Using Automatic Set
A.SET (Automatic Set):Press the AM FM button to
have the radio automatically select the �rst 12 strongest
radio stations for FM and the six strongest radio
stations for AM.
To select the stations, perform the following:
1. Press AM FM to select FM1, FM2, or AM.
2. Press and hold AM FM until you hear a beep.
The radio will begin to search the current band.
The radio will store the stations, starting from the
lowest frequency, to each preset pushbutton. A.SET
will appear on the display when the radio is
�nished storing the stations.
3-43
ProCarManuals.com
Page 155 of 384

Setting Preset Stations
Up to 30 stations (six FM1, six FM2, and six AM,
six XM1 and six XM2 (if equipped), can be programmed
on the six numbered pushbuttons, by performing the
following steps:
1. Turn the radio on.
2. Press AM FM to select FM1, FM2, or AM. Press
the AUX button to select XM1 or XM2.
3. Tune in the desired station.
4. Press the right or left AUTO EQ button to select the
equalization.
5. Press and hold one of the six numbered
pushbuttons. Preset X Stored will appear on the
display and you will hear a beep. Whenever
that numbered pushbutton is pressed, the station
that was set will return and the equalization that was
selected will be stored for that pushbutton. If the
equalization of a preset is changed while listening to
that station, the radio will save the new equalization.
6. Repeat the steps for each pushbutton.
If the battery has been disconnected or a radio fuse has
been removed, the preset stations and time of day
may need to be reset.
Using Automatic Set
A.SET (Automatic Set):Press and hold the AM FM
button to have the radio automatically select the �rst
12 strongest radio stations for FM and the six strongest
radio stations for AM.
To select the stations, perform the following:
1. Press AM FM to select FM1, FM2, or AM.
2. Press and hold AM FM until you hear a beep.
The radio will begin to search the current band.
The radio will store the stations, starting from the
lowest frequency, to each preset pushbutton. A.SET
will appear on the display when the radio is
�nished storing the stations.
Cancelling Automatic Set
The radio retains the previously stored stations so they
can be recalled when automatic set is canceled.
Press and hold AM FM until you hear a beep. A.SET
will no longer appear on the display.
3-49
ProCarManuals.com
Page 167 of 384

Before You Drive
The RSE is designed for rear seat passengers only.
The driver cannot safely view the video screen
while driving and should not try to do so.
In severe or extreme weather conditions the RSE
system may or may not work until the temperature is
within the operating range. The operating range for the
RSE system is above−4°F (−20°C) or below
140°F (60°C). If the temperature of your vehicle is
outside of this range, heat or cool the vehicle until the
temperature is within the operating range of the
RSE system.
Headphones
The RSE system includes two sets of wireless
headphones. The headphones are used to listen to the
DVD radio or an auxiliary device connected to the
RCA jacks. The wireless headphones have an ON/OFF
switch and a volume control.
To use the headphones, turn the switch to ON. An
indicator light located on the headphones will illuminate.
If the light does not illuminate, the batteries may
need to be replaced. See “Battery Replacement” later in
this section for more information. Switch the headphones
to OFF when not in use.The transmitters are located in the display above the
video screen. The headphones will shut off automatically
to save the battery power if the DVD system is shut
off or if the headphones are out of range of the
transmitters for more than three minutes. If you move
too far forward or step out of the vehicle, the
headphones will lose the audio signal.
To adjust the volume on the headphones, use the
volume control located on the right side.
Notice:Do not store the headphones in heat or
direct sunlight. This could damage the headphones
and repairs would not be covered by your warranty.
Keep the headphones stored in a cool, dry place.Battery Replacement
To change the batteries, do the following:
1. Slide open the battery door located on the left side
of the headphones.
2. Replace the two AAA batteries in the compartment.
Make sure that they are installed correctly, using
the diagram on the inside of the battery
compartment.
3. Slide the battery door shut.
If the headphones are to be stored for a long period of
time, remove the batteries and keep them in a cool,
dry place.
3-61
ProCarManuals.com
Page 172 of 384

Playing an MP3 CD
The CD player has the ability to recognize up to
20 directories, and up to 99 �les per directory to a
maximum of 254 total MP3 selections on a CD. Mixed
media CD’s are not supported.
Stopping and Resuming Playback
To stop playing a disc, press the stop button on the
remote control.
To resume playback, press the play/pause button on
the remote control. The movie should resume play from
where it last stopped if the disc has not been ejected
and the stop button has not been pressed twice on the
remote control. If the disc has been ejected or the
stop button has been pressed twice on the remote
control, the disc will resume playing at the beginning of
the disc.
Ejecting a Disc
Press the eject button on the radio to eject the disc. If a
disc is ejected from the radio, but not removed, the
radio will reload the disc after a short period of time. The
disc will be stored in the radio. The radio will not
resume play of the disc automatically.
Remote Control
To use the remote control, aim it at the transmitter
window below the video screen and press the desired
button. Direct sunlight or very bright light may affect the
ability of the RSE transmitter to receive signals from
the remote control. If the remote control does not seem
to be working, the batteries may need to be replaced.
See “Battery Replacement” later in this section. Objects
blocking the line of sight may also affect the function
of the remote control.
The DVD player can only be turned on by pressing the
RSE button on the radio.
Notice:Storing the remote control in a hot area or
in direct sunlight may damage it, and the repairs
would not be covered by your warranty. Keep
the remote control stored in a cool, dry place.
3-66
ProCarManuals.com
Page 175 of 384

Battery Replacement
To change the remote control batteries, do the following:
1. Remove the battery compartment door located on
the bottom of the remote control.
2. Replace the two AA batteries in the compartment.
Make sure that they are installed correctly, using
the diagram on the inside of the battery
compartment.
3. Close the battery door securely.
If the remote control is to be stored for a long period of
time, remove the batteries and keep them in a cool,
dry place.
DVD Display Error Messages
The video screen may display one of the following:
Disc Format Error:This message is displayed when a
disc is inserted upside down, not readable, or if the
disc format is not compatible. The disc will be
automatically ejected from the radio.
Region Code Error:This message will be displayed, if
the disc is not a Region Code 1. The disc will be
automatically ejected from the radio.
No Disc:This message will be displayed, if no disc is
present when the eject, RSE, or AUX button is
pressed on the radio.
DVD Radio Error Messages
No Disc:This message will be displayed, if no disc is
present when the eject, RSE, or AUX button is
pressed on the radio.
DVD Distortion
Video distortion may occur when operating cellular
phones, scanners, CB radios, Global Position Systems
(GPS)*, two-way radios, mobile fax, or walkie talkies.
It may be necessary to turn off the DVD player
when operating one of these devices in or near the
vehicle.
*Excludes the OnStar
®System.
Cleaning the DVD Player
When cleaning the outside DVD faceplate and buttons,
use only a clean cloth dampened with clean water.
Cleaning the Video Screen
When cleaning the video screen, use only a clean cloth
dampened with clean water. Use care when directly
touching or cleaning the screen, as damage may result.
3-69
ProCarManuals.com
Page 176 of 384

Theft-Deterrent Feature
The Radio with Single CD (MP3), the Radio with
Six-Disc CD (MP3), and the DVD Radio have a theft
deterrent feature.
The theft deterrent feature is designed to discourage
theft of your vehicle’s radio. It works by using a secret
code to disable all radio functions whenever battery
power is interrupted.
The theft deterrent feature for the radio may be used or
ignored. If ignored, the radio plays normally and the
radio is not protected by the feature. If the theft deterrent
feature is activated, the radio will not operate if stolen.
When the theft deterrent feature is activated. LOCK
will appear on the radio display to indicate a locked
condition anytime battery power has been removed. If
the battery loses power for any reason, you must unlock
the radio with the secret code before it will operate.
Activating the Theft-Deterrent Feature
The instructions which follow explain how to enter
your secret code to activate the theft deterrent feature.
Read through all 10 steps before starting the
procedure.
If you allow more than 15 seconds to elapse between
any steps, the radio automatically reverts to time
and you must start the procedure over at Step 4.
1. Write down any four-digit number from 0000 to
9999 and keep it in a safe place separate from
the vehicle.
2. Turn the ignition to RUN.
3. Turn the radio off.
4. Press the 5 and 6 pushbuttons at the same time for
�ve seconds. -- -- -- -- will appear on the display.
Next you will use the secret code number which you
have written down.
3-70
ProCarManuals.com