2005 PONTIAC BONNEVILLE ignition
[x] Cancel search: ignitionPage 130 of 438
Entry Lighting
If it is dark enough outside and you press the unlock
button on the remote keyless entry transmitter, if
equipped, the interior courtesy lamps will come on and
stay on for about 25 seconds. The lamps will turn
off immediately by pressing the lock button on the
remote keyless entry transmitter, by turning the ignition
key to ON or by activating the power door locks.
If a door is left ajar, your interior lamps will turn off after
10 minutes to save your battery.
Delayed Entry Lighting
When you open the door to enter your vehicle, the
interior lamps will come on if it is dark enough outside.
When you close the door with the ignition off, the
interior lamps will stay on for 25 seconds or until the
ignition is turned on. Locking the doors with the power
door lock switch, or with the lock button on the
remote keyless entry transmitter, if equipped, will
override the delayed entry lighting and the lamps will
turn off immediately.
Theater Dimming
This feature allows for a three to �ve-second fade out of
the courtesy lamps instead of immediate turn off after
you remove the key from the ignition.
Delayed Exit Lighting
This feature will turn on the interior lamps for 25 seconds
after you remove the key from the ignition while the
doors are closed and it is night. This will give you time
to �nd the door handle or lock switches as you exit
the vehicle.
This lighting will only be deactivated if the key is
reinserted into the ignition switch or the power door
locks are activated.
Perimeter Lighting
When the unlock button on the remote keyless entry
transmitter, if equipped, is pressed, the DRL headlamps,
parking lamps and back-up lamps will turn on if it is
dark enough outside.
3-18
Page 131 of 438
Personal Choice Programming
This feature can be programmed in the on or off mode
for each transmitter.
If your vehicle is equipped with the Driver Information
Center (DIC), you must program this feature through the
DIC. SeeDIC Vehicle Personalization on page 3-64.
To turn the feature off, do the following:
1. Keep all doors closed, the vehicle in PARK (P) and
the ignition on throughout this procedure.
2. Press and hold LOCK on the power door lock
switch throughout this procedure. All the doors
will lock.
3. Press the remote alarm button on the transmitter.
Perimeter lighting remains on at this time and the
horn will chirp twice.
4. Press the remote alarm button again. Perimeter
lighting is disabled and the horn will chirp once.
5. Release the door lock switch. The perimeter lighting
feature is now off.To turn the feature on, do the following:
1. Keep all doors closed, the vehicle in PARK (P) and
the ignition on throughout this procedure.
2. Press and hold LOCK on the power door lock
switch throughout this procedure. All the doors
will lock.
3. Press the remote alarm button on the transmitter.
Perimeter lighting remains off at this time and the
horn will chirp once.
4. Press the remote alarm button again. Perimeter
lighting is now enabled and the horn will chirp twice.
5. Release the door lock switch. The perimeter lighting
feature is now on.
This procedure only changes the mode for the
transmitter used to change this setting.
Parade Dimming
To activate the instrument panel backlighting during the
day, turn the exterior lamp switch to the parking lamp or
headlamp position. Dimming of the instrument panel
display is not possible during daylight hours. The
instrument panel display can only be adjusted when the
parking lamps or headlamps are on and it is dark outside.
3-19
Page 133 of 438
Inadvertent Power Battery Saver
This feature is designed to protect your vehicle’s battery
against drainage from the interior lamps, trunk lamp
or glove box lamp. When the ignition is turned off, the
power to these features will automatically turn off
after 10 minutes. Power will be restored for an additional
10 minutes if any door is opened, the trunk is opened
or the courtesy lamps are turned on.
Head-Up Display (HUD)
{CAUTION:
If the HUD image is too bright, or too high in
your �eld of view, it may take you more time to
see things you need to see when it is dark
outside. Be sure to keep the HUD image dim
and placed low in your �eld of view.
If you have the optional Head-Up Display (HUD), you
can see some of the driver information also available on
your instrument panel cluster. The information maybe displayed in English or metric units and appears as
an image focused out toward the front of your vehicle.
The HUD shows the following:
Speedometer Reading
Turn Signal Indicators
High-beam Indicator Symbol
CHECK GAGES Message (for low oil pressure,
high coolant temperature, low oil level, high/low
battery, brake, ABS and air bag)
Low Fuel Warning Symbol
Radio Frequency and Playback Mode (with the
exception of the XM™ radio)
3-21
Page 134 of 438
HUD shows these images when they are lighted on the
instrument panel.
The speedometer may display a difference of 1.5 mph
(2.4 km/h) from the HUD image. This is normal.
When the ignition key is turned to ON, all possible HUD
images will come on, then the HUD will operate
normally.
If you never look at your instrument panel cluster, you
may not see something important, such as a warning
light. So be sure to scan your displays and controls and
the driving environment just as you would in a vehicle
without HUD.
Notice:If you try to use the HUD image as a
parking aid, you may misjudge the distance and
damage your vehicle. Do not use the HUD image as
a parking aid.The HUD controls are located to the left of the steering
column.
1. Start your engine and turn the HUD INTENSITY
knob all of the way clockwise to MAX (Maximum).
The brightness of the HUD image is determined
by ambient light, and where you have set the HUD
INTENSITY knob.
3-22
Page 135 of 438

2. Adjust the seat, if necessary, before setting the
height using the IMAGE switch.
Press and hold the top of the IMAGE switch, raising
the HUD image as far as possible. Then press on
the bottom of the HUD IMAGE switch to move
the image down, so the image is as low as possible,
but in full view.
3. Turn the INTENSITY knob counterclockwise until
the HUD image is no brighter than necessary. To
turn the HUD off, turn the HUD INTENSITY knob all
the way counterclockwise.
If the sun comes out, or it becomes cloudy, or if you
turn on your headlamps, you may need to adjust
the HUD brightness using the HUD INTENSITY knob.
Polarized sunglasses could make the HUD image
harder to see.
Clean the inside of the windshield as needed to remove
any dirt or �lm that reduces the sharpness or clarity
of the HUD image.Spray household glass cleaner on a soft, clean cloth.
Wipe the HUD lens gently, then dry it. Do not spray
cleaner directly on the lens, because the cleaner �uid
could leak inside the unit.
If you cannot see the HUD image when the ignition is
on, check to see if:
The HUD unit is covered.
The HUD INTENSITY knob is adjusted correctly.
The HUD image is adjusted to the proper height.
A fuse in the fuse panel may have blown. See
Fuses and Circuit Breakers on page 5-111.
If the HUD image is not clear, it could be too bright.
Move the HUD INTENSITY knob counterclockwise. You
may need to clean the windshield and HUD lens.
Your windshield is part of the HUD system. If you ever
have to have a new windshield, be sure to get one
designed for HUD. If you do not, the HUD image may
look blurred and out of focus.
3-23
Page 144 of 438
Outlet Adjustment
Use the knob located in the center of each outlet to
change the direction of the air�ow. Use the thumbwheel
located between the outlets to turn them on and off.
In vehicles equipped with rear seat outlets, you
can adjust the direction of the air�ow using the knob in
the center of each outlet. Use the thumbwheel
located between the outlets to turn them on and off.
Operation Tips
Clear away any ice, snow or leaves from the air
inlets at the base of the windshield that may
block the �ow of air into your vehicle.
Use of non-GM approved hood de�ectors may
adversely affect the performance of the system.
Keep the path under the front seats clear of objects
to help circulate the air inside of your vehicle more
effectively.
Climate Controls Personalization
If your vehicle is equipped with this feature, up to two
drivers are able to store and recall climate control
settings for the temperature, the fan speed and the
direction of the air�ow.Memory buttons 1 and 2 are located on the driver’s
door panel and correspond to the numbers 1 or 2 found
on the back of each remote keyless entry transmitter.
To store settings, do the following:
1. Select the desired temperature, fan speed and
air�ow mode. If desired, a separate temperature
setting may also be selected for the front seat
passenger. For information on how to do this, see
Automatic Climate Control System on page 3-28.
2. Locate memory buttons 1 and 2 on the driver’s door
panel.
3. Press the memory button on the door panel that
corresponds to the number on the back of the
transmitter you are programming, until you hear two
beeps. The beeps con�rm that your selection has
been saved and can now be recalled. For more
information on the memory feature, seeMemory
Seat and Mirrors on page 2-46.
Follow these steps each time you want to change the
stored settings.
To recall the climate control settings last stored on your
transmitter, press the unlock button on your remote
keyless entry transmitter and put the ignition in ACC
or ON.
3-32
Page 151 of 438
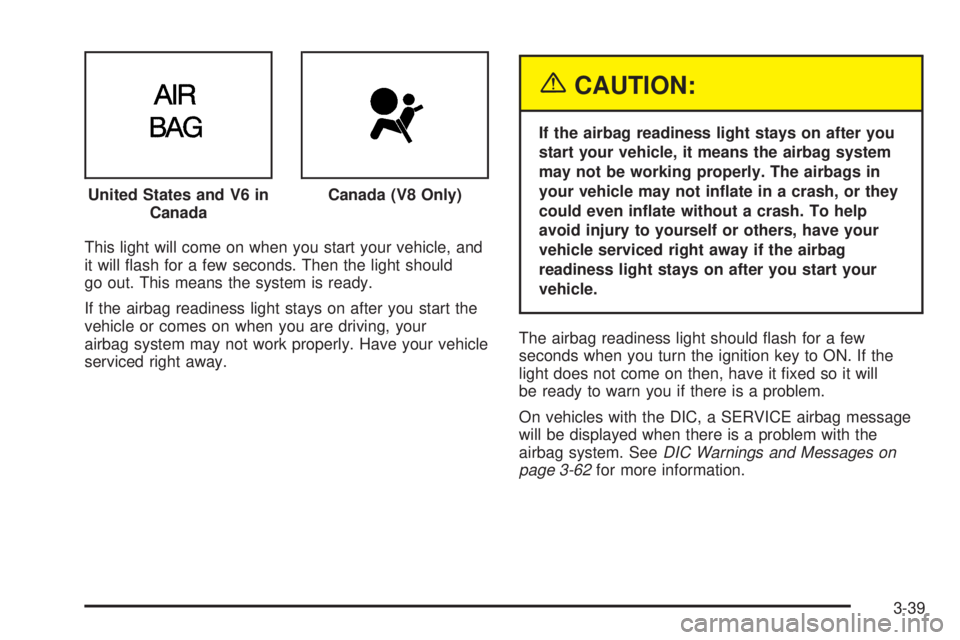
This light will come on when you start your vehicle, and
it will �ash for a few seconds. Then the light should
go out. This means the system is ready.
If the airbag readiness light stays on after you start the
vehicle or comes on when you are driving, your
airbag system may not work properly. Have your vehicle
serviced right away.
{CAUTION:
If the airbag readiness light stays on after you
start your vehicle, it means the airbag system
may not be working properly. The airbags in
your vehicle may not in�ate in a crash, or they
could even in�ate without a crash. To help
avoid injury to yourself or others, have your
vehicle serviced right away if the airbag
readiness light stays on after you start your
vehicle.
The airbag readiness light should �ash for a few
seconds when you turn the ignition key to ON. If the
light does not come on then, have it �xed so it will
be ready to warn you if there is a problem.
On vehicles with the DIC, a SERVICE airbag message
will be displayed when there is a problem with the
airbag system. SeeDIC Warnings and Messages on
page 3-62for more information. United States and V6 in
Canada
Canada (V8 Only)
3-39
Page 152 of 438
Voltmeter Gage
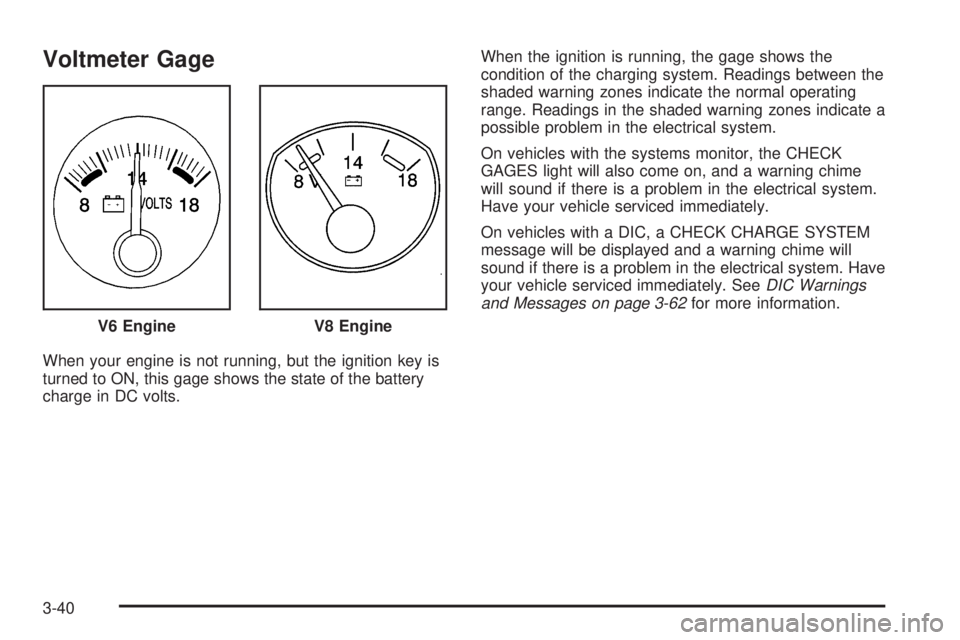
When your engine is not running, but the ignition key is
turned to ON, this gage shows the state of the battery
charge in DC volts.When the ignition is running, the gage shows the
condition of the charging system. Readings between the
shaded warning zones indicate the normal operating
range. Readings in the shaded warning zones indicate a
possible problem in the electrical system.
On vehicles with the systems monitor, the CHECK
GAGES light will also come on, and a warning chime
will sound if there is a problem in the electrical system.
Have your vehicle serviced immediately.
On vehicles with a DIC, a CHECK CHARGE SYSTEM
message will be displayed and a warning chime will
sound if there is a problem in the electrical system. Have
your vehicle serviced immediately. SeeDIC Warnings
and Messages on page 3-62for more information.
V6 Engine
V8 Engine
3-40