Page 132 of 438
Front Reading Lamps
The front reading lamps, located on the headliner, will
come on as courtesy lamps when you open any of
the doors while it is dark outside. They will also come
on as part of the interior lighting features listed
previously.
To turn on a reading lamp when the doors are closed,
press either button. Press it again to turn the lamp off.
To avoid draining your vehicle’s battery, be sure to
turn off the reading lamps when leaving your vehicle.
See “Inadvertent Power Battery Saver” later in this
section for more information.
Rear Reading Lamps
The rear reading lamps, located over each rear door,
will come on as courtesy lamps when you open
any of the doors while it is dark outside. They will also
come on as part of the interior lighting features listed
previously.
To turn on a reading lamp when the doors are closed,
press either button. Press it again to turn the lamp off.
Battery Load Management
The battery load management feature is designed to
monitor the vehicle’s electrical load and determine when
the battery is in a heavy discharge condition. During
times of high electrical loading, the engine may idle at
higher revolutions per minute (RPM) than normal to make
sure the battery charges. High electrical loads may occur
when several of the following are on: headlamps, high
beams, fog lamps, rear window defogger, fan on high
speed, heated seats, and engine cooling fans.
If your vehicle’s battery remains in a heavy discharge
condition for a long period of time, the fan, rear
defogger, heated seats and heated mirrors will be
disabled and the DIC will display BATTERY SAVER
ACTIVE. This can happen either under long periods of
idling or low speed driving with high electrical loading,
or in the event of a charging system fault.
Monitor the battery voltage when in the BATTERY
SAVER ACTIVE mode.
If the voltmeter remains in the shaded area, below
11 volts, when driving then have the charging
system serviced immediately.
If the voltage increases above 12 volts then the
battery needs to be recharged. Try driving on
the highway with as few electrical accessories on
as possible.
3-20
Page 133 of 438
Inadvertent Power Battery Saver
This feature is designed to protect your vehicle’s battery
against drainage from the interior lamps, trunk lamp
or glove box lamp. When the ignition is turned off, the
power to these features will automatically turn off
after 10 minutes. Power will be restored for an additional
10 minutes if any door is opened, the trunk is opened
or the courtesy lamps are turned on.
Head-Up Display (HUD)
{CAUTION:
If the HUD image is too bright, or too high in
your eld of view, it may take you more time to
see things you need to see when it is dark
outside. Be sure to keep the HUD image dim
and placed low in your eld of view.
If you have the optional Head-Up Display (HUD), you
can see some of the driver information also available on
your instrument panel cluster. The information maybe displayed in English or metric units and appears as
an image focused out toward the front of your vehicle.
The HUD shows the following:
Speedometer Reading
Turn Signal Indicators
High-beam Indicator Symbol
CHECK GAGES Message (for low oil pressure,
high coolant temperature, low oil level, high/low
battery, brake, ABS and air bag)
Low Fuel Warning Symbol
Radio Frequency and Playback Mode (with the
exception of the XM™ radio)
3-21
Page 166 of 438
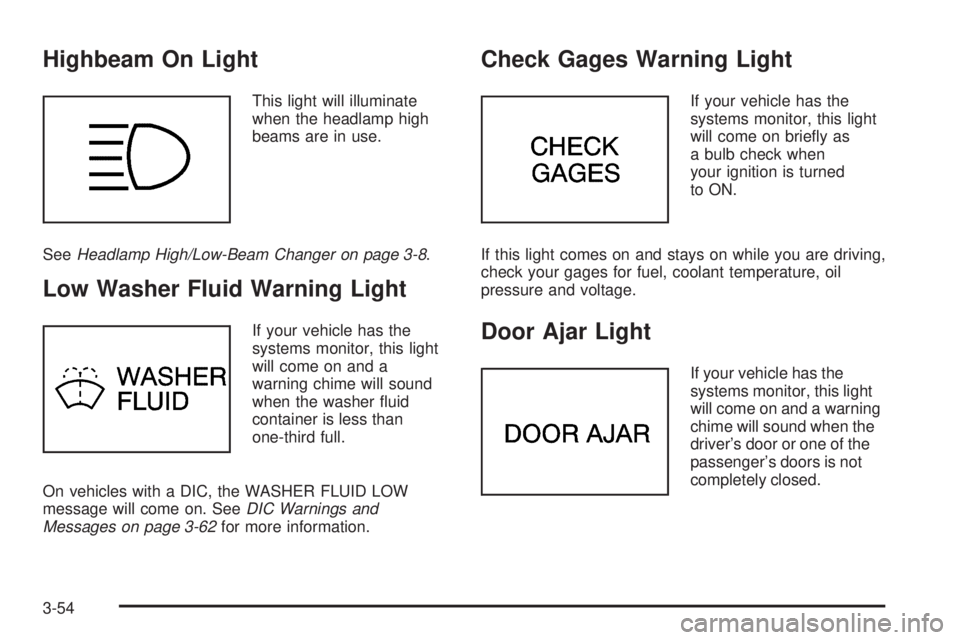
Highbeam On Light
This light will illuminate
when the headlamp high
beams are in use.
SeeHeadlamp High/Low-Beam Changer on page 3-8.
Low Washer Fluid Warning Light
If your vehicle has the
systems monitor, this light
will come on and a
warning chime will sound
when the washer uid
container is less than
one-third full.
On vehicles with a DIC, the WASHER FLUID LOW
message will come on. SeeDIC Warnings and
Messages on page 3-62for more information.
Check Gages Warning Light
If your vehicle has the
systems monitor, this light
will come on briey as
a bulb check when
your ignition is turned
to ON.
If this light comes on and stays on while you are driving,
check your gages for fuel, coolant temperature, oil
pressure and voltage.
Door Ajar Light
If your vehicle has the
systems monitor, this light
will come on and a warning
chime will sound when the
driver’s door or one of the
passenger’s doors is not
completely closed.
3-54
Page 232 of 438
You can be temporarily blinded by approaching
headlamps. It can take a second or two, or even several
seconds, for your eyes to re-adjust to the dark. When
you are faced with severe glare, as from a driver
who does not lower the high beams, or a vehicle with
misaimed headlamps, slow down a little. Avoid
staring directly into the approaching headlamps.
Keep your windshield and all the glass on your vehicle
clean — inside and out. Glare at night is made much
worse by dirt on the glass. Even the inside of the glass
can build up a lm caused by dust. Dirty glass makes
lights dazzle and ash more than clean glass would,
making the pupils of your eyes contract repeatedly.
Remember that your headlamps light up far less of a
roadway when you are in a turn or curve. Keep
your eyes moving; that way, it is easier to pick out dimly
lighted objects. Just as your headlamps should be
checked regularly for proper aim, so should your eyes
be examined regularly. Some drivers suffer from
night blindness — the inability to see in dim light — and
are not even aware of it.Driving in Rain and on Wet Roads
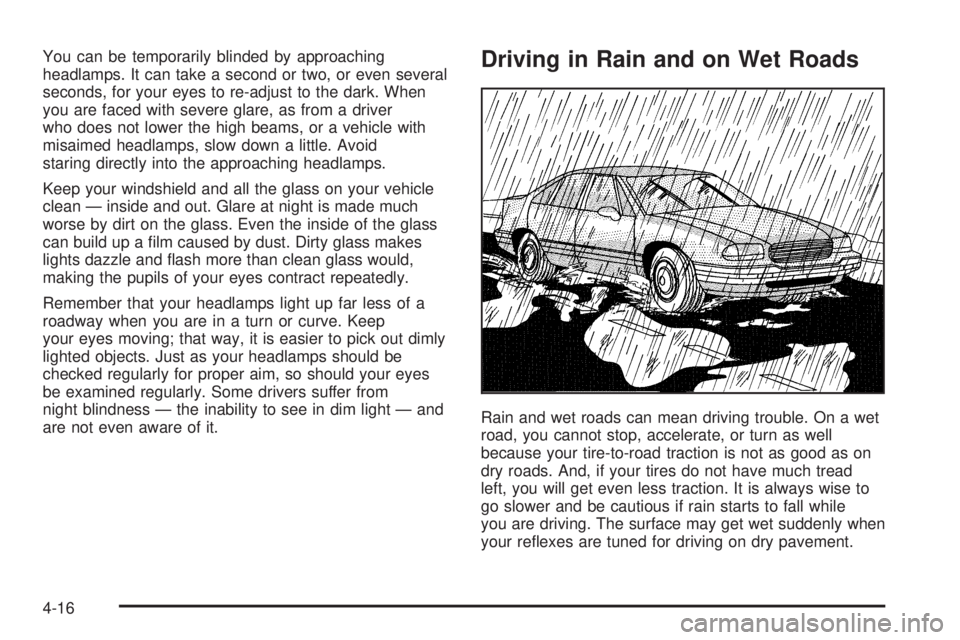
Rain and wet roads can mean driving trouble. On a wet
road, you cannot stop, accelerate, or turn as well
because your tire-to-road traction is not as good as on
dry roads. And, if your tires do not have much tread
left, you will get even less traction. It is always wise to
go slower and be cautious if rain starts to fall while
you are driving. The surface may get wet suddenly when
your reexes are tuned for driving on dry pavement.
4-16
Page 332 of 438
5. Remove the three nuts holding the lamp in place
and remove the lamp assembly.
6. Turn the bulb socket assembly counterclockwise
while pressing the release, to remove it from the
lamp assembly.
7. Pull the bulb straight out of the socket.
8. Replace the bulb and reverse Steps 1 through 6 to
reinstall the lamp assembly.
Replacement Bulbs
Exterior Lamp Bulb Number
Back-Up Lamps 3057/3155*
Headlamps
High-Beam 9005 / HIR1*
Low-Beam 9006
Parking/Turn Lamps 3157
Rear Turn Lamps 5701KA*
Sidemarker 168*
Stoplamps 3057
Taillamps 3057
Turn Signal 3157
Bulb numbers denoted by an asterisk (*) only apply to
the 4.6L V8 engine.
For replacement bulbs not listed here, contact
your dealer.
5-72
Page 372 of 438
Engine Compartment Fuse Block
(3.8L V6 Engine)
The engine compartment
fuse block is located in the
front of the engine
compartment on the
passenger’s side of the
vehicle. SeeEngine
Compartment Overview on
page 5-12for more
information on location. Lift
the cover to gain access.
Fuses Usage
1 Not Used
2 Accessory
3 Windshield Wipers
4 Not Used
5 Headlamp Low-Beam Left
6 Headlamp Low-Beam Right
7 Spare
8 Powertrain Control Module Battery
9 Headlamp High-Beam Right
10 Headlamp High-Beam Left
11 Ignition 1
12 Not Used
13 Transaxle
5-112
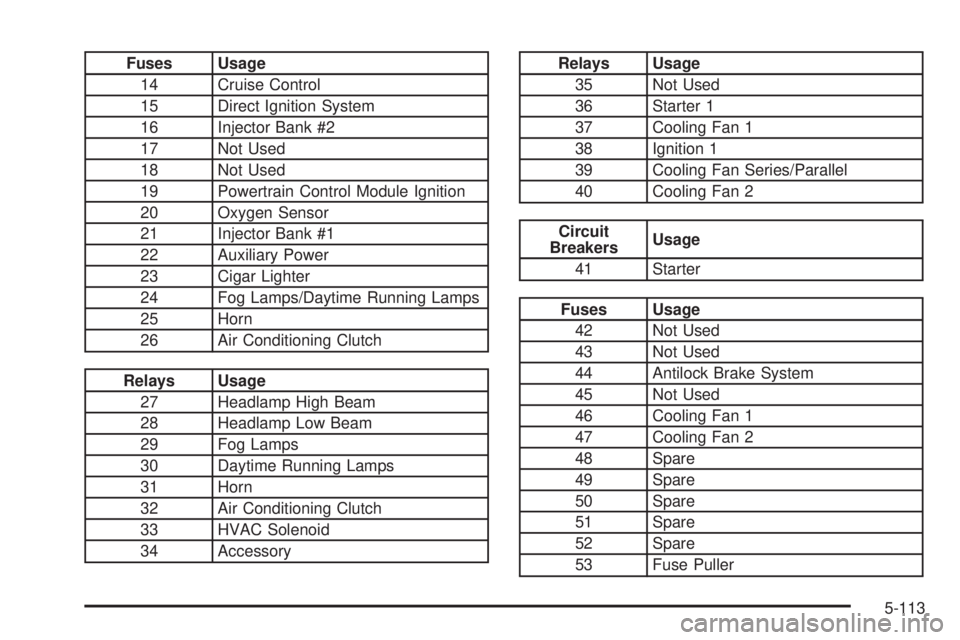
Page 373 of 438
Fuses Usage
14 Cruise Control
15 Direct Ignition System
16 Injector Bank #2
17 Not Used
18 Not Used
19 Powertrain Control Module Ignition
20 Oxygen Sensor
21 Injector Bank #1
22 Auxiliary Power
23 Cigar Lighter
24 Fog Lamps/Daytime Running Lamps
25 Horn
26 Air Conditioning Clutch
Relays Usage
27 Headlamp High Beam
28 Headlamp Low Beam
29 Fog Lamps
30 Daytime Running Lamps
31 Horn
32 Air Conditioning Clutch
33 HVAC Solenoid
34 Accessory
Relays Usage
35 Not Used
36 Starter 1
37 Cooling Fan 1
38 Ignition 1
39 Cooling Fan Series/Parallel
40 Cooling Fan 2
Circuit
BreakersUsage
41 Starter
Fuses Usage
42 Not Used
43 Not Used
44 Antilock Brake System
45 Not Used
46 Cooling Fan 1
47 Cooling Fan 2
48 Spare
49 Spare
50 Spare
51 Spare
52 Spare
53 Fuse Puller
5-113
Page 374 of 438
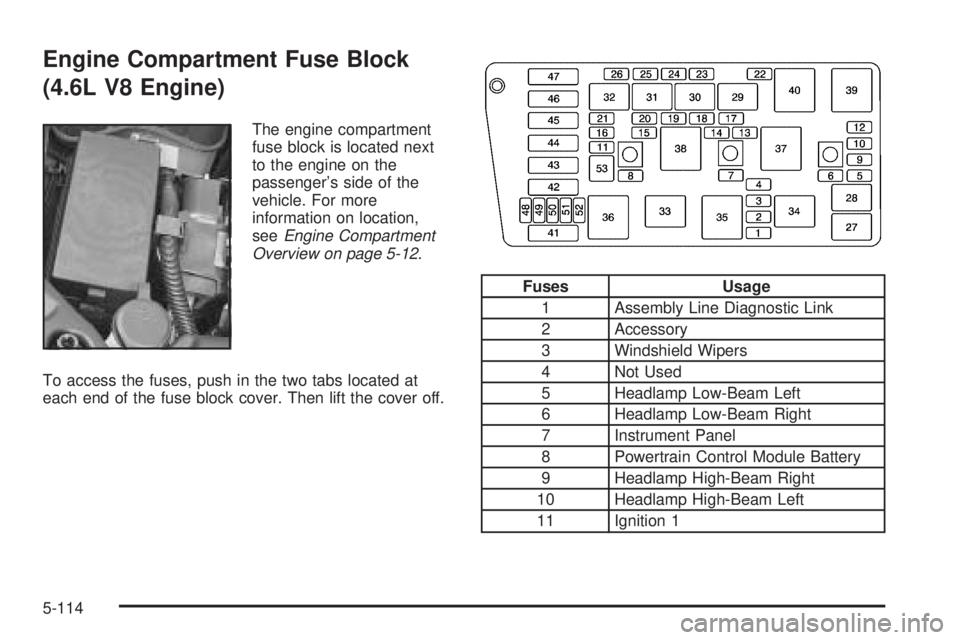
Engine Compartment Fuse Block
(4.6L V8 Engine)
The engine compartment
fuse block is located next
to the engine on the
passenger’s side of the
vehicle. For more
information on location,
seeEngine Compartment
Overview on page 5-12.
To access the fuses, push in the two tabs located at
each end of the fuse block cover. Then lift the cover off.
Fuses Usage
1 Assembly Line Diagnostic Link
2 Accessory
3 Windshield Wipers
4 Not Used
5 Headlamp Low-Beam Left
6 Headlamp Low-Beam Right
7 Instrument Panel
8 Powertrain Control Module Battery
9 Headlamp High-Beam Right
10 Headlamp High-Beam Left
11 Ignition 1
5-114