Page 17 of 192
cTerm [Expert Mode] is used in this manual
when the
Short Menus key indicator is
turned off. When the amber indicator is high-
lighted, the system is set to [Easy Mode].
cWhen the SETTING , DEST or
ROUTE button is pressed in the [Easy
Mode] screen, the
Help key is displayed.
For more information on the Short Menu feature,
please refer to section 4.
What features are available on the Nissan navigation system?3-5
ZREVIEW COPYÐ2005(nav)
Navigation System OMÐUSA_English(nna)
07/10/04Ðdebbie
X
Page 25 of 192

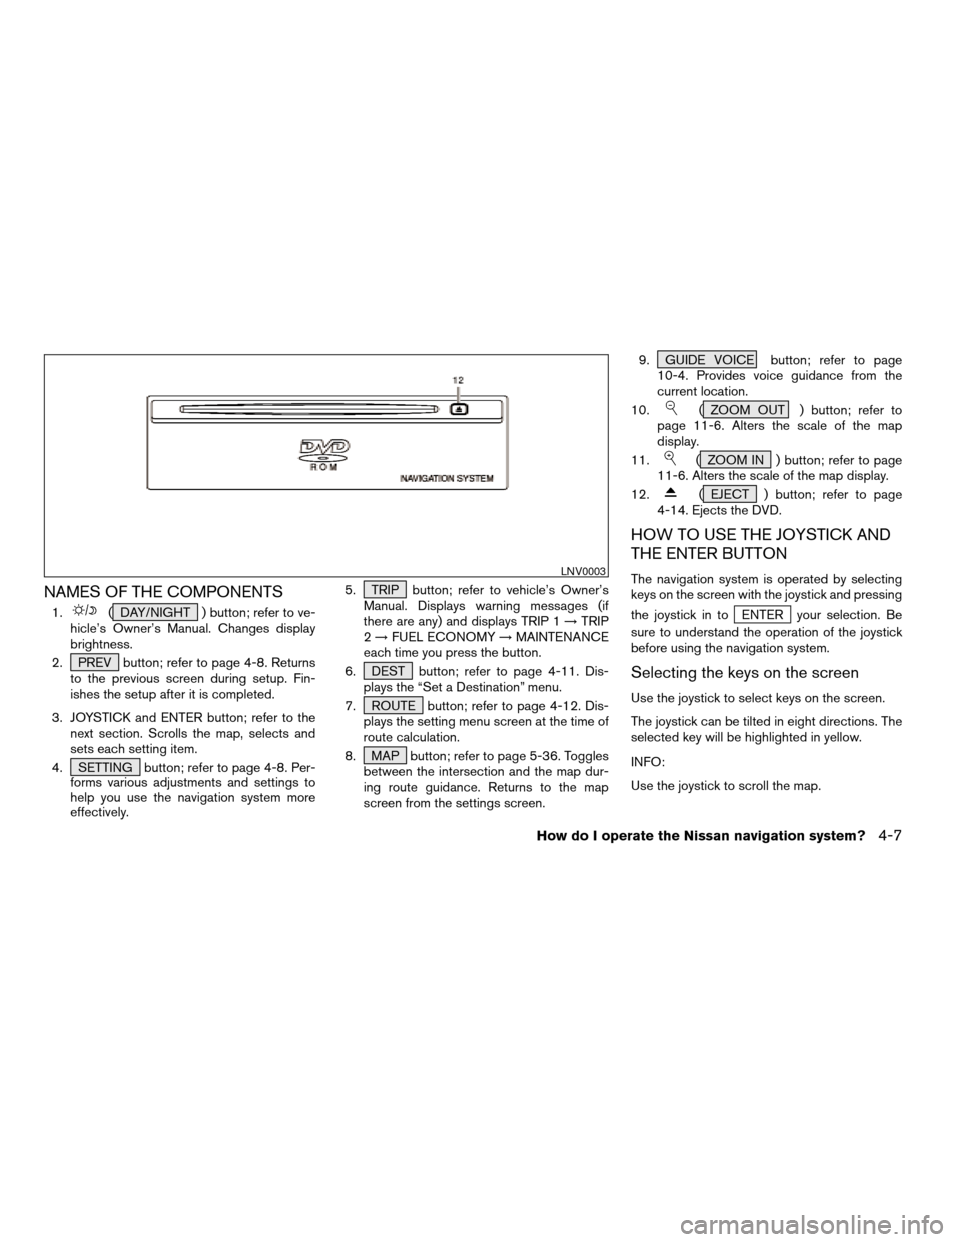
NAMES OF THE COMPONENTS
1.( DAY/NIGHT ) button; refer to ve-
hicle’s Owner’s Manual. Changes display
brightness.
2. PREV button; refer to page 4-8. Returns
to the previous screen during setup. Fin-
ishes the setup after it is completed.
3. JOYSTICK and ENTER button; refer to the
next section. Scrolls the map, selects and
sets each setting item.
4. SETTING button; refer to page 4-8. Per-
forms various adjustments and settings to
help you use the navigation system more
effectively.5. TRIP button; refer to vehicle’s Owner’s
Manual. Displays warning messages (if
there are any) and displays TRIP 1!TRIP
2!FUEL ECONOMY!MAINTENANCE
each time you press the button.
6. DEST button; refer to page 4-11. Dis-
plays the “Set a Destination” menu.
7. ROUTE button; refer to page 4-12. Dis-
plays the setting menu screen at the time of
route calculation.
8. MAP button; refer to page 5-36. Toggles
between the intersection and the map dur-
ing route guidance. Returns to the map
screen from the settings screen.9. GUIDE VOICE button; refer to page
10-4. Provides voice guidance from the
current location.
10.
( ZOOM OUT ) button; refer to
page 11-6. Alters the scale of the map
display.
11.
( ZOOM IN ) button; refer to page
11-6. Alters the scale of the map display.
12.
( EJECT ) button; refer to page
4-14. Ejects the DVD.
HOW TO USE THE JOYSTICK AND
THE ENTER BUTTON
The navigation system is operated by selecting
keys on the screen with the joystick and pressing
the joystick in to
ENTER your selection. Be
sure to understand the operation of the joystick
before using the navigation system.
Selecting the keys on the screen
Use the joystick to select keys on the screen.
The joystick can be tilted in eight directions. The
selected key will be highlighted in yellow.
INFO:
Use the joystick to scroll the map.
LNV0003
How do I operate the Nissan navigation system?4-7
ZREVIEW COPYÐ2005(nav)
Navigation System OMÐUSA_English(nna)
07/10/04Ðdebbie
X
Page 26 of 192

Selecting the function of the high-
lighted key
Press the ENTER button.
The display shows the screen used to carry out
the function of the selected key (highlighted in
yellow) .
HOW TO USE THE PREV BUTTON
This button has two functions.
To return to the previous screen:
When this button is pressed during setup, setup
will be canceled, and the screen will return to the
previous screen.
To finish the set-up:
When this button is pressed after set-up is
completed, the settings will be renewed as
directed, and the screen will return to the map.
INFO:
When the PREV button must be pressed, (for
example, after the set-up is finished) instructions
are given in the operation procedure of each
section in this manual. If the PREV button is
pressed when not finished with the set-up, the
setting will be canceled, and the screen will re-
turn to the previous screen.
HOW TO USE THE SETTING BUT-
TON
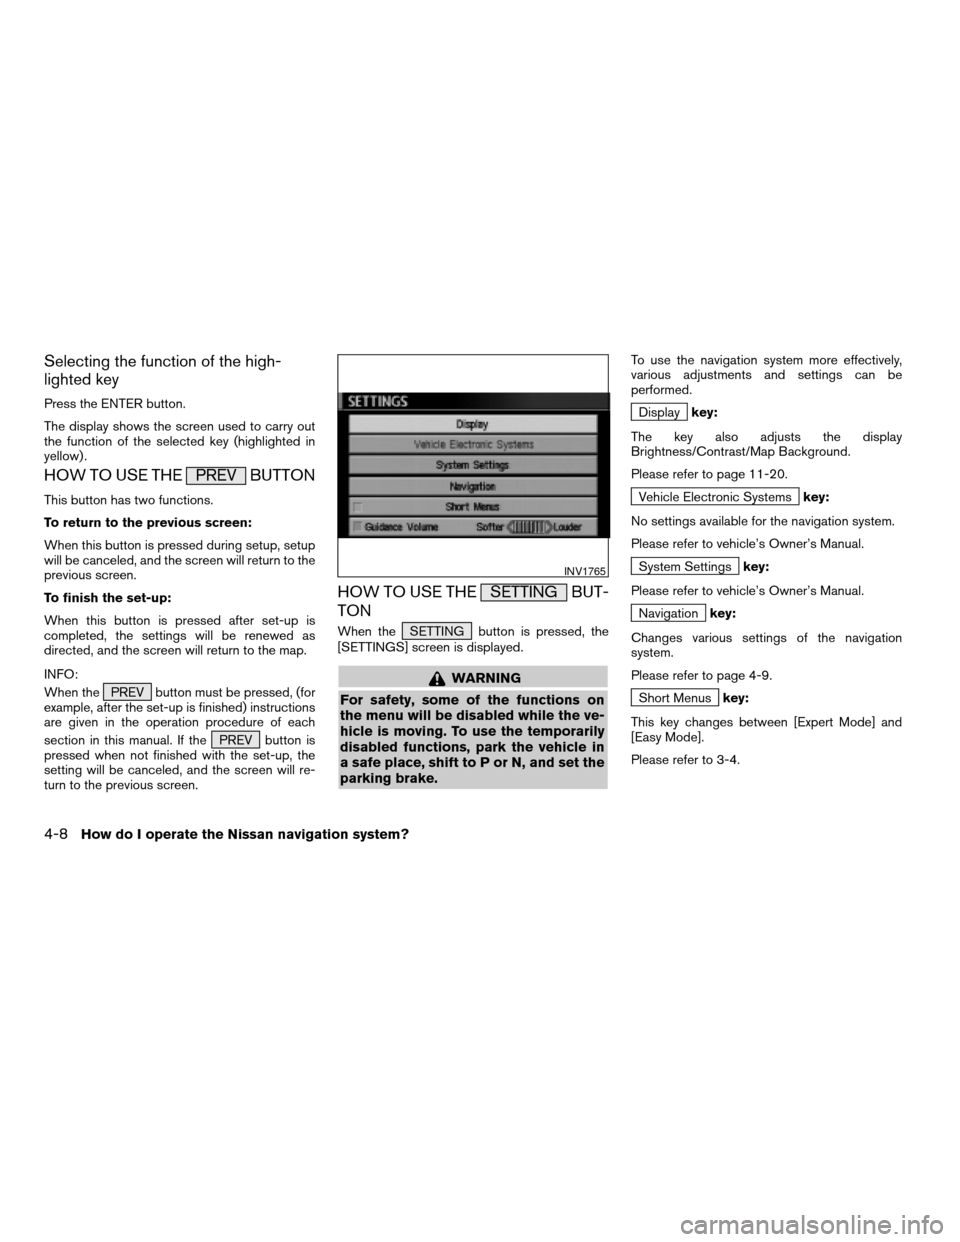
When the SETTING button is pressed, the
[SETTINGS] screen is displayed.
WARNING
For safety, some of the functions on
the menu will be disabled while the ve-
hicle is moving. To use the temporarily
disabled functions, park the vehicle in
a safe place, shift to P or N, and set the
parking brake.
To use the navigation system more effectively,
various adjustments and settings can be
performed.
Displaykey:
The key also adjusts the display
Brightness/Contrast/Map Background.
Please refer to page 11-20.
Vehicle Electronic Systemskey:
No settings available for the navigation system.
Please refer to vehicle’s Owner’s Manual.
System Settingskey:
Please refer to vehicle’s Owner’s Manual.
Navigationkey:
Changes various settings of the navigation
system.
Please refer to page 4-9.
Short Menuskey:
This key changes between [Expert Mode] and
[Easy Mode].
Please refer to 3-4.
INV1765
4-8How do I operate the Nissan navigation system?
ZREVIEW COPYÐ2005(nav)
Navigation System OMÐUSA_English(nna)
07/10/04Ðdebbie
X
Page 49 of 192

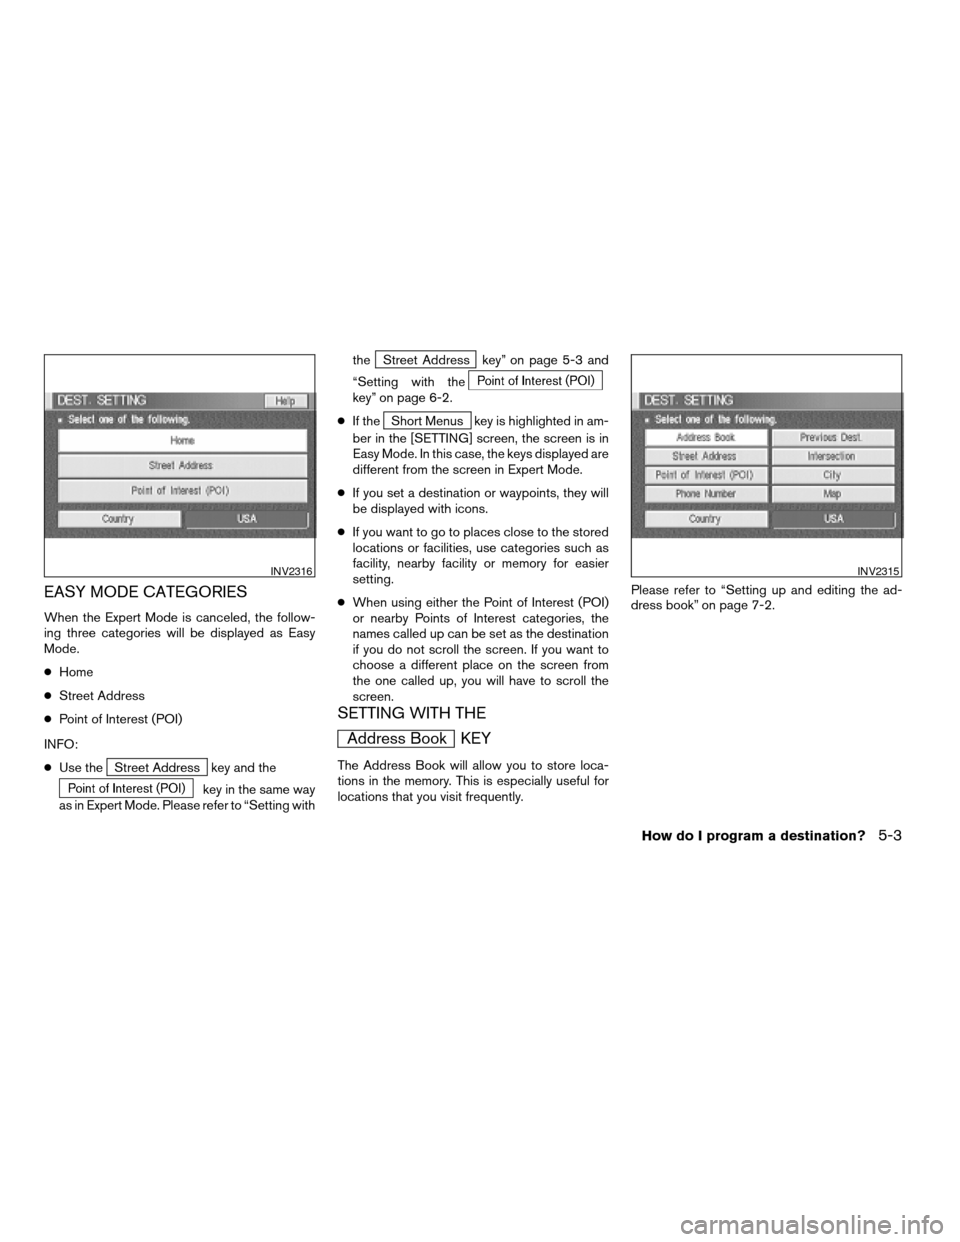
EASY MODE CATEGORIES
When the Expert Mode is canceled, the follow-
ing three categories will be displayed as Easy
Mode.
cHome
cStreet Address
cPoint of Interest (POI)
INFO:
cUse the
Street Address key and the
key in the same way
as in Expert Mode. Please refer to “Setting withthe
Street Address key” on page 5-3 and
“Setting with the
key” on page 6-2.
cIf the
Short Menus key is highlighted in am-
ber in the [SETTING] screen, the screen is in
Easy Mode. In this case, the keys displayed are
different from the screen in Expert Mode.
cIf you set a destination or waypoints, they will
be displayed with icons.
cIf you want to go to places close to the stored
locations or facilities, use categories such as
facility, nearby facility or memory for easier
setting.
cWhen using either the Point of Interest (POI)
or nearby Points of Interest categories, the
names called up can be set as the destination
if you do not scroll the screen. If you want to
choose a different place on the screen from
the one called up, you will have to scroll the
screen.
SETTING WITH THE
Address Book KEY
The Address Book will allow you to store loca-
tions in the memory. This is especially useful for
locations that you visit frequently.Please refer to “Setting up and editing the ad-
dress book” on page 7-2.
INV2316INV2315
How do I program a destination?5-3
ZREVIEW COPYÐ2005(nav)
Navigation System OMÐUSA_English(nna)
07/28/04Ðarosenma
X
Page 51 of 192
5. To slightly alter the destination.
Select the
Map key to display the map
screen of the area around the specified des-
tination (waypoints) .6. If necessary, operate the joystick to adjust
the location of the destination (waypoint) .
Press the ENTER button. Select the
Destination key to confirm. The [DEST.
SETTING] screen will be displayed. To set
the destination (waypoint) , refer to “Making
the system guide the route with detailed
options” on page 5-31.
INFO:
To change the listing order, select the
Sort key
on the [DEST. SETTING (Address Book)] screen
and tilt the joystick to the right or left, or press the
ENTER button.Please refer to “Changing the listing order” on
page 7-7.
SETTING WITH THE
Previous Dest. KEY
This system memorizes the last 10 destinations
previously chosen, allowing you to set new des-
tinations or waypoints from them.
INV1789INV1790
How do I program a destination?5-5
ZREVIEW COPYÐ2005(nav)
Navigation System OMÐUSA_English(nna)
07/10/04Ðdebbie
X
Page 56 of 192

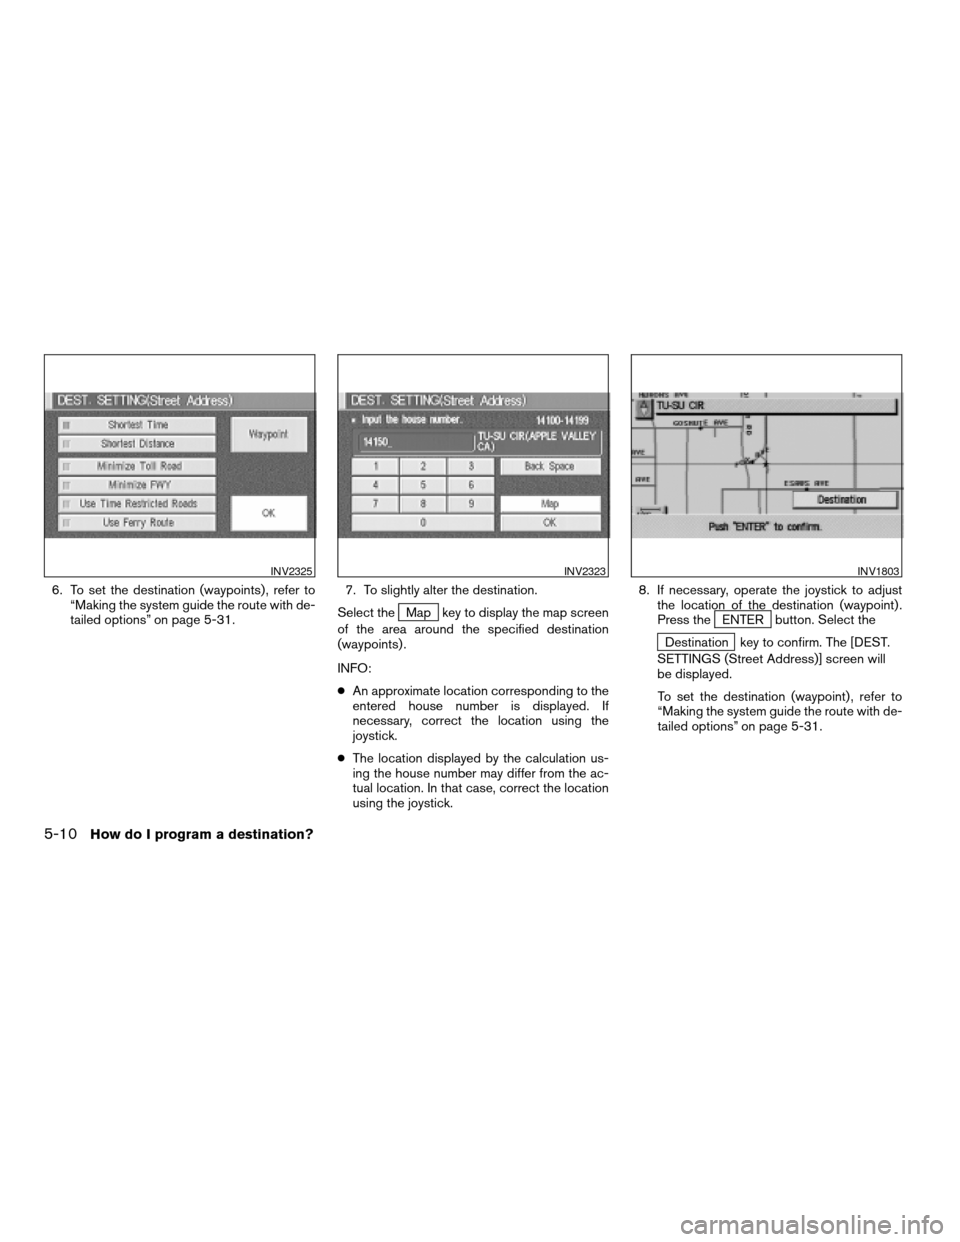
6. To set the destination (waypoints) , refer to
“Making the system guide the route with de-
tailed options” on page 5-31.7. To slightly alter the destination.
Select the
Map key to display the map screen
of the area around the specified destination
(waypoints) .
INFO:
cAn approximate location corresponding to the
entered house number is displayed. If
necessary, correct the location using the
joystick.
cThe location displayed by the calculation us-
ing the house number may differ from the ac-
tual location. In that case, correct the location
using the joystick.8. If necessary, operate the joystick to adjust
the location of the destination (waypoint) .
Press theENTER button. Select the
Destination key to confirm. The [DEST.
SETTINGS (Street Address)] screen will
be displayed.
To set the destination (waypoint) , refer to
“Making the system guide the route with de-
tailed options” on page 5-31.
INV2325INV2323INV1803
5-10How do I program a destination?
ZREVIEW COPYÐ2005(nav)
Navigation System OMÐUSA_English(nna)
07/10/04Ðdebbie
X
Page 63 of 192
6. To slightly alter the destination.
Select the
Map key to display the map
screen of the area around the specified des-
tination (waypoints) .7. If necessary, operate the joystick to adjust
the location of the destination (waypoint) .
Press the ENTER button. Select the
Destination key to confirm. The [DEST.
SETTINGS (Intersection)] screen will be
displayed.
To set the destination (waypoint) , refer to
“Making the system guide the route with de-
tailed options” on page 5-31.NOTE:
When the corresponding data does not ex-
ist under the following conditions, the
street name list may not be displayed:
cA street name is being input after the
Citykey has been selected.
cList is being displayed by selection of
the
Listkey.
INV1820INV1821
How do I program a destination?5-17
ZREVIEW COPYÐ2005(nav)
Navigation System OMÐUSA_English(nna)
07/22/04Ðmarlene
X
Page 69 of 192
2. Select the city name of your destination
(waypoints) on the [DEST. SETTING (City)]
screen.3. To set the destination (waypoints) , refer to
“Making the system guide the route with de-
tailed options” on page 5-31.4. To slightly alter the destination.
Select the
Map key to display the map
screen of the area around the specified des-
tination (waypoints) .
INV1835INV1836INV1837
How do I program a destination?5-23
ZREVIEW COPYÐ2005(nav)
Navigation System OMÐUSA_English(nna)
07/10/04Ðdebbie
X