Page 124 of 464
124 Controls in detailControl systemSelecting radio station�
Switch on the radio (
�page 197).
Vehicles with COMAND*:
Refer to the separate operating instruc-
tions.
�
Press buttonèorÿ repeatedly
until you see the currently tuned
station in the multifunction display.
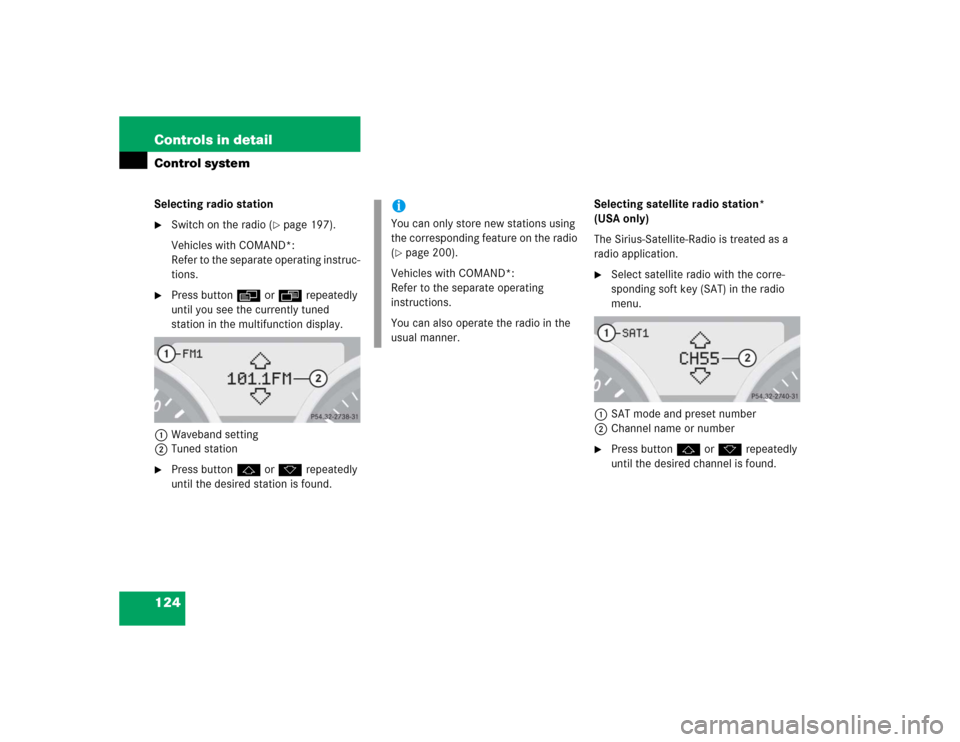
1Waveband setting
2Tuned station
�
Press buttonjork repeatedly
until the desired station is found.Selecting satellite radio station*
(USA only)
The Sirius-Satellite-Radio is treated as a
radio application.
�
Select satellite radio with the corre-
sponding soft key (SAT) in the radio
menu.
1SAT mode and preset number
2Channel name or number
�
Press buttonjork repeatedly
until the desired channel is found.
iYou can only store new stations using
the corresponding feature on the radio
(�page 200).
Vehicles with COMAND*:
Refer to the separate operating
instructions.
You can also operate the radio in the
usual manner.
Page 125 of 464
125 Controls in detail
Control system
Operating the CD player�
Switch on the radio and select the
CD player (
�page 208).
Vehicles with COMAND*:
Refer to the separate operating instruc-
tions.
�
Press buttonèorÿ repeatedly
until the settings for the CD currently
being played are shown in the multi-
function display.
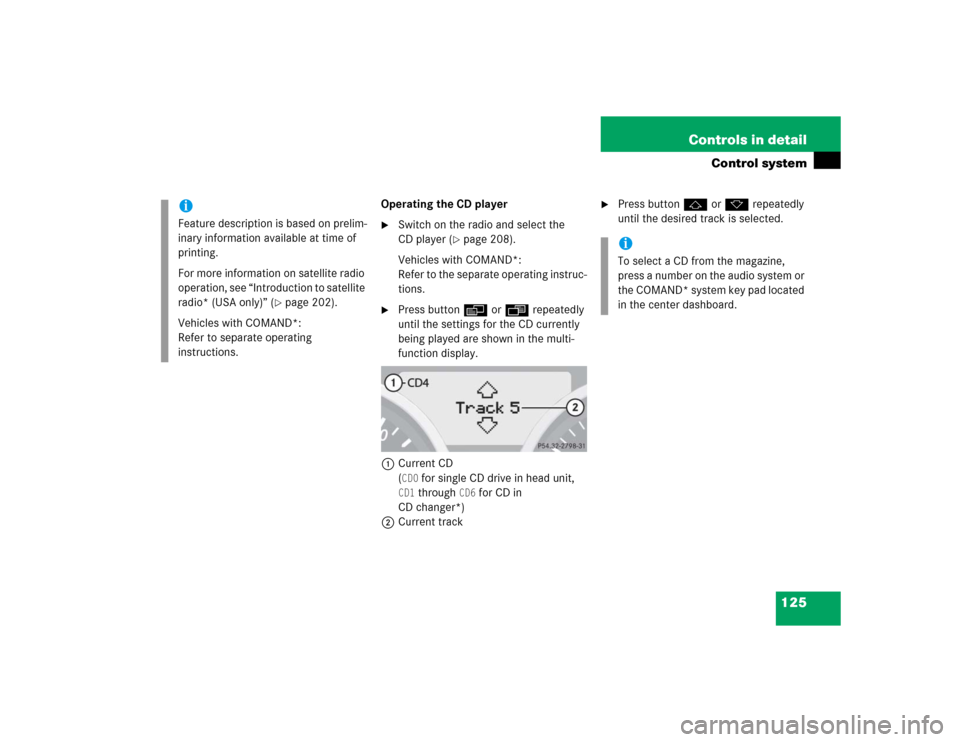
1Current CD
(CD0
for single CD drive in head unit,
CD1
through
CD6
for CD in
CD changer*)
2Current track
�
Press buttonjork repeatedly
until the desired track is selected.
iFeature description is based on prelim-
inary information available at time of
printing.
For more information on satellite radio
operation, see “Introduction to satellite
radio* (USA only)” (
�page 202).
Vehicles with COMAND*:
Refer to separate operating
instructions.
iTo select a CD from the magazine,
press a number on the audio system or
the COMAND* system key pad located
in the center dashboard.
Page 126 of 464

126 Controls in detailControl systemNAV* menu
The
NAV
menu contains the functions need-
ed to operate your navigation system.
�
Press buttonèorÿ repeatedly
until you see the message
NAV
in the
multifunction display.
�
If the navigation system is switched
off, the message
NAV off
is shown
in the multifunction display.
�
If the navigation system is on, dif-
ferent messages, depending on the
current state of the navigation sys-
tem, appear in the multifunction
display.
Please refer to the COMAND* manual for
instructions on how to activate the route
guidance system.
Vehicle status message memory menu
Use the vehicle status message memory
menu to scan malfunction and warning
messages that may be stored in the sys-
tem. Such messages appear in the multi-
function display and are based on
conditions or system status the vehicle’s
system has recorded.
�
Press buttonèorÿ repeatedly
until the vehicle status message mem-
ory appears in the multifunction dis-
play.
No vehicle status messages
If no conditions are recorded in memory,
the message in the multifunction display
is: No Malfunction
.
Vehicle status messages have been
recorded
If conditions have occurred causing status
messages to be recorded, the number of
messages appears in the multifunction dis-
play:
1Number of messages
Warning!
G
Malfunction and warning messages are only
indicated for certain systems and are inten-
tionally not very detailed. The malfunction
and warning messages are simply a remind-
er with respect to the operation of certain
systems and do not replace the owner’s
and/or driver’s responsibility to maintain
the vehicle’s operating safety by having all
required maintenance and safety checks
performed on the vehicle and by bringing
the vehicle to an authorized Mercedes-Benz
Center to address the malfunction and
warning messages (
�page 348).
Page 127 of 464

127 Controls in detail
Control system
�
Press buttonjork.
The stored messages will now be dis-
played in the order in which they have
occurred. For malfunction and warning
messages, see “Vehicle status messag-
es in the multifunction display”
(�page 348).
Should the vehicle’s system record any
conditions while driving, the number of
messages will reappear in the multifunc-
tion display when the SmartKey in the
starter switch is turned to position0 or re-
moved from the starter switch:
�
Press buttonJrepeatedly until you
have seen all occurred messages.
Settings menu
In the
Settings...
menu are two func-
tions:
�
The function
To reset: Press reset
button for 3 seconds
for resetting all
settings to factory standard.
�
A collection of submenus for perform-
ing individual settings for your vehicle.
�
Press buttonèorÿ repeatedly
until the
Settings...
menu appears in
the multifunction display.The following settings and submenus are
available in the
Settings...
menu:
iThe vehicle status message memory
will be cleared when you turn the
SmartKey in the starter switch to
position1or2.
You will then only see high-priority
messages in the multifunction display
(�page 348).
Function
Page
Resetting all settings
128
Submenus in the Settings menu
129
Resetting the functions of a sub-
menu
129
Instrument cluster submenu
131
Time/date submenu
131
Lighting submenu
137
Vehicle submenu
141
Convenience submenu
142
Page 128 of 464
 fo")
128 Controls in detailControl systemResetting all settings
You can reset all the functions of all sub-
menus to the factory settings.�
Press the reset buttonJon the instru-
ment cluster (
�page 24) for approxi-
mately three seconds.
The request to press the reset
buttonJonce more to confirm ap-
pears in the multifunction display.
�
Press the reset buttonJagain.
The functions of all submenus will be
reset to the factory settings.
The message
Reset to factory
settings
appears in the multifunction
display.
iFor safety reasons, the following func-
tions cannot be reset while driving:�
the function
Lamp circuit head-
lamp mode in the
Lighting
sub-
menu
�
the function
Key-dependent
in the
Convenience
submenu
The following message appears in the
multifunction display:
Lighting
(or
Convenience
) Cannot be
completely reset to factory
settings while driving.
iYour individual settings will not be re-
set unless you confirm the action by
pressing the reset buttonJagain.
After five seconds the
Settings...
menu reappears in the multifunction
display.
Page 129 of 464

129 Controls in detail
Control system
Submenus in the Settings menu�
Press buttonjork.
In the multifunction display you will see
the collection of submenus.
�
Press buttonç.
The selection marker moves to the next
submenu.
The submenus are arranged by hierarchy.
Scroll up with buttonæ, and scroll
down with buttonç.
Move within the submenus with
buttonjork to the individual
functions.
The settings themselves are made with
buttonæorç.Resetting the functions of a submenu
For each submenu you can reset the
functions to factory settings.
�
Move to a function in the submenu.
�
Press the reset buttonJ (
�page 24)
for approximately three seconds.
The request to press the reset
buttonJonce more to confirm ap-
pears in the multifunction display.
�
Press the reset buttonJagain.
All functions of the submenu will be
reset to the factory settings.
The message
Reset to factory
settings
appears in the multifunction
display.
iYour individual settings will not be re-
set unless you confirm the action by
pressing the reset buttonJagain.
After five seconds the
Settings...
menu reappears in the multifunction
display.
Page 130 of 464
130 Controls in detailControl systemThe table below shows what settings can
be changed within the various submenus.Detailed instructions on making individual
settings can be found on the following
pages.Instrument cluster
Time/Date
Lighting
Vehicle
Convenience
(�page 131)
(�page 133)
(�page 137)
(�page 141)
(�page 142)
Selecting temperature
display mode
Time synchronization
with head unit*
Setting daytime running
lamp mode (USA only)
Setting automatic locking
Activating
easy-entry/exit feature*
Selecting speedometer
display mode
Setting the time (hours)
Setting locator lighting
(Function surround
lighting)
Setting key-dependency
Selecting language
Setting the time
(minutes)
Setting night security
illumination
Setting parking position
for exterior rear view
mirror*
Selecting display (speed
display or outside
temperature) for status
indicator
Setting the date (month)
Setting interior lighting
delayed shut-off
Setting the date (day)Setting the date (year)
Page 131 of 464

131 Controls in detail
Control system
Instrument cluster submenu
Access the
Instr. cluster
submenu via
the
Settings...
menu. Use the
Instr.
cluster
submenu to change the instru-
ment cluster display settings. The follow-
ing functions are available:Selecting temperature display mode
�
Move the selection marker with
buttonæorç to the
Instr.
cluster
submenu.
�
Press buttonjork repeatedly
until you see
Temp. display
in the mul-
tifunction display.
The selection marker is on the current
setting.
�
Press buttonæorç to set the
temperature display unit to degrees
Celsius (
°C) or degrees Fahrenheit (
°F).Selecting speedometer display mode
�
Move the selection marker with
buttonæorç to the
Instr.
cluster
submenu.
�
Press buttonjork repeatedly
until you see
Display unit
Speed-/odometer
in the multifunction
display.
The selection marker is on the current
setting.
�
Press buttonæorç to set the
speedometer unit to
km or
miles
.
Function
Page
Selecting temperature display
mode
131
Selecting speedometer display
mode
131
Selecting language
132
Selecting display (speed display
or outside temperature) for
status indicator
132