Page 29 of 464
29 At a glance
Center console
Lower part
Item
Page
1
Automatic transmission*:
Gear selector lever
152
Manual transmission:
Gearshift lever
150
2
Retractable hardtop open-
ing/closing switch
237
3
Tow-away alarm
deactivation switch
87
4
Parking brake lever
49
5
Storage compartment
Telephone* compartment
250
Item
Page
6
Passenger-side exterior
rear view mirror switch
43,
167
7
Driver’s side exterior rear
view mirror switch
43,
167
8
Exterior rear view mirrors
adjustment switch
43,
167
9
Automatic transmission*:
Program mode selector
switch
158,
164
Page 41 of 464
41 Getting started
Adjusting
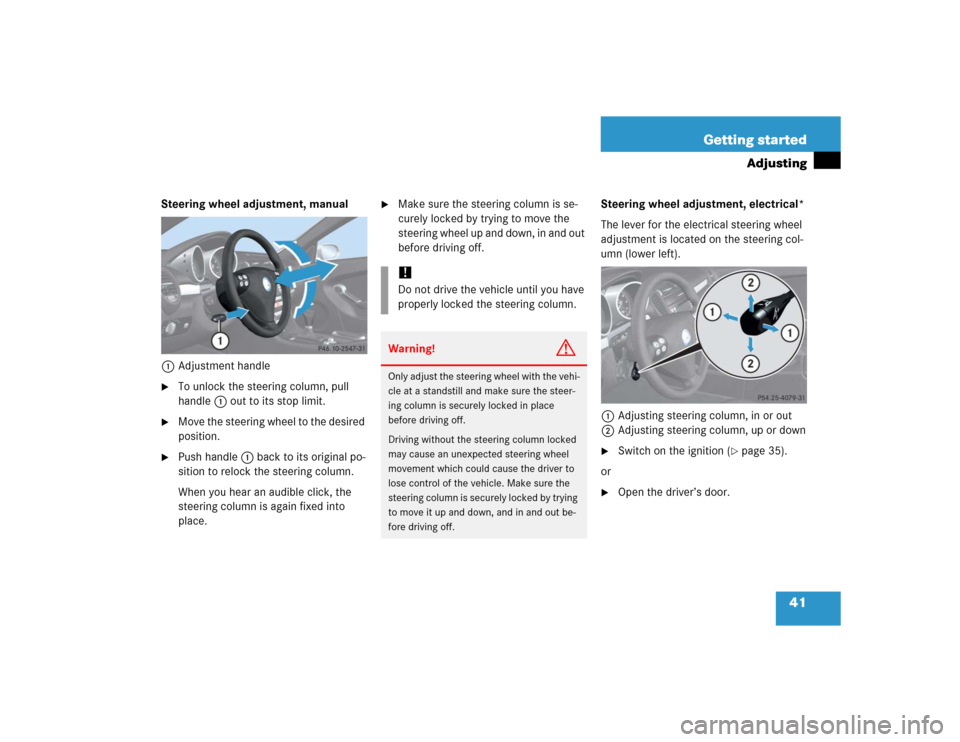
Steering wheel adjustment, manual
1Adjustment handle�
To unlock the steering column, pull
handle1 out to its stop limit.
�
Move the steering wheel to the desired
position.
�
Push handle1 back to its original po-
sition to relock the steering column.
When you hear an audible click, the
steering column is again fixed into
place.
�
Make sure the steering column is se-
curely locked by trying to move the
steering wheel up and down, in and out
before driving off.Steering wheel adjustment, electrical*
The lever for the electrical steering wheel
adjustment is located on the steering col-
umn (lower left).
1Adjusting steering column, in or out
2Adjusting steering column, up or down
�
Switch on the ignition (
�page 35).
or
�
Open the driver’s door.
!Do not drive the vehicle until you have
properly locked the steering column.Warning!
G
Only adjust the steering wheel with the vehi-
cle at a standstill and make sure the steer-
ing column is securely locked in place
before driving off.
Driving without the steering column locked
may cause an unexpected steering wheel
movement which could cause the driver to
lose control of the vehicle. Make sure the
steering column is securely locked by trying
to move it up and down, and in and out be-
fore driving off.
Page 159 of 464
159 Controls in detail
Automatic transmission*
Driving tips
Accelerator position
Your driving style influences the
transmission’s shifting behavior:
Less throttle Earlier upshifting
More throttle Later upshiftingKickdown
Use kickdown when you want maximum
acceleration.
�
Press the accelerator past the point of
resistance.
The transmission shifts into a lower
gear.
�
Ease on the accelerator when you have
reached the desired speed.
The transmission shifts up again.Stopping
When you stop briefly, e.g. at traffic lights:
�
Leave the transmission in gear.
�
Hold the vehicle with the brake.
When you stop longer with the engine
idling or on an uphill gradient:
�
Move the gear selector lever to
positionP.
�
Set the parking brake.
Page 164 of 464
164 Controls in detailAutomatic transmission*Manual shift program SLK 55 AMG
In the manual program modeM you can
change the gears manually on the steering
wheel (
�page 162) or by using the gear
selector lever (
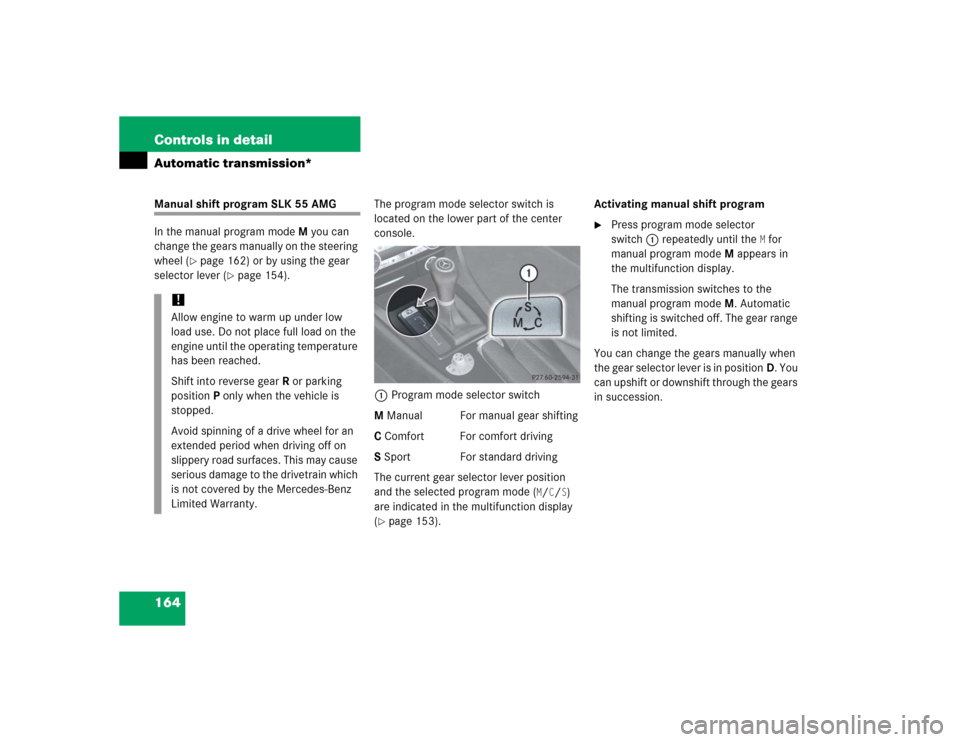
�page 154).The program mode selector switch is
located on the lower part of the center
console.
1Program mode selector switch
M Manual For manual gear shifting
C Comfort For comfort driving
S Sport For standard driving
The current gear selector lever position
and the selected program mode (
M/C/S)
are indicated in the multifunction display
(
�page 153).Activating manual shift program
�
Press program mode selector
switch1 repeatedly until the
M for
manual program modeM appears in
the multifunction display.
The transmission switches to the
manual program modeM. Automatic
shifting is switched off. The gear range
is not limited.
You can change the gears manually when
the gear selector lever is in positionD. You
can upshift or downshift through the gears
in succession.
!Allow engine to warm up under low
load use. Do not place full load on the
engine until the operating temperature
has been reached.
Shift into reverse gearR or parking
positionP only when the vehicle is
stopped.
Avoid spinning of a drive wheel for an
extended period when driving off on
slippery road surfaces. This may cause
serious damage to the drivetrain which
is not covered by the Mercedes-Benz
Limited Warranty.
Page 165 of 464
165 Controls in detail
Automatic transmission*
Downshifting�
Briefly press the gear selector lever to
the left in theD-direction
(�page 154).
or
�
Press button1 on the left side of the
steering wheel (
�page 162).
The transmission shifts to the next
lower gear.Upshifting
�
Briefly press the gear selector lever to
the right in theD+direction
(�page 154).
or
�
Press button2 on the right side of the
steering wheel (
�page 162).
The transmission shifts to the next
higher gear.
If, instead of the manual program mode
symbol
M, thep symbol appears in the
multifunction display (
�page 153), shift to
the next higher gear. The fuel supply will
otherwise be interrupted to prevent the
engine from overrevving.
Warning!
G
On slippery road surfaces, never downshift
in order to obtain braking action. This could
result in drive wheel slip and reduced
vehicle control. Your vehicle’s ABS will not
prevent this type of loss of control.iWhen you brake or stop, the transmis-
sion shifts down to a gear from which
you can easily accelerate or take off.
!In the manual program modeM, the
transmission will not upshift, even if
the engine has reached its overrevving
range. Shift up to the next gear before
the engine has reached its overrevving
range. Make absolutely certain that the
engine speed does not reach the red
marking on the tachometer
(�page 24). Otherwise the engine
could be damaged which is not covered
by the Mercedes-Benz Limited
Warranty.
Page 179 of 464

179 Controls in detail
Climate control
Activating
Moist air can fog up the windows. You can
dehumidify the air with the air condition-
ing.�
Press air condition on/off switch°
again (
�page 175).
The indicator lamp on the air condition
on/off switch° goes out.Maximum cooling
�
Turn thumbwheels4 and7 upwards
to the first stop (
�page 173).
The fixed center air vents3 and8
and the adjustable air vents5 and6
are open.
�
For draft-free ventilation, move the
sliders for the center air vents5
and6 to the middle position
(�page 173).
�
Turn thumbwheels1 anda for the
adjustable side air2 and9 vents to
the fully open position (
�page 172).
�
Set air distribution control3 to
positiona (
�page 176).
The air distribution directs the air
through the center and side air vents.
�
Set air volume control2 to position5
(�page 176).
The ventilation operates with maximum
blower speed.
�
Turn temperature controls1 and4
completely counterclockwise to their
end stops (
�page 175).
The lowest temperature for both sides
is set.
!If the indicator lamp on the air condi-
tion on/off switch° comes on
while driving and you cannot switch on
the air conditioning again by pressing
the air condition on/off switch°,
the air conditioning is losing refriger-
ant.
Have the air conditioning checked at
the nearest authorized Mercedes-Benz
Center.
��
Page 234 of 464
234 Controls in detailPower windowsStopping windows during
Express-operation�
Briefly press the respective switch at
the symbolkorj again.Opening and closing the windows with
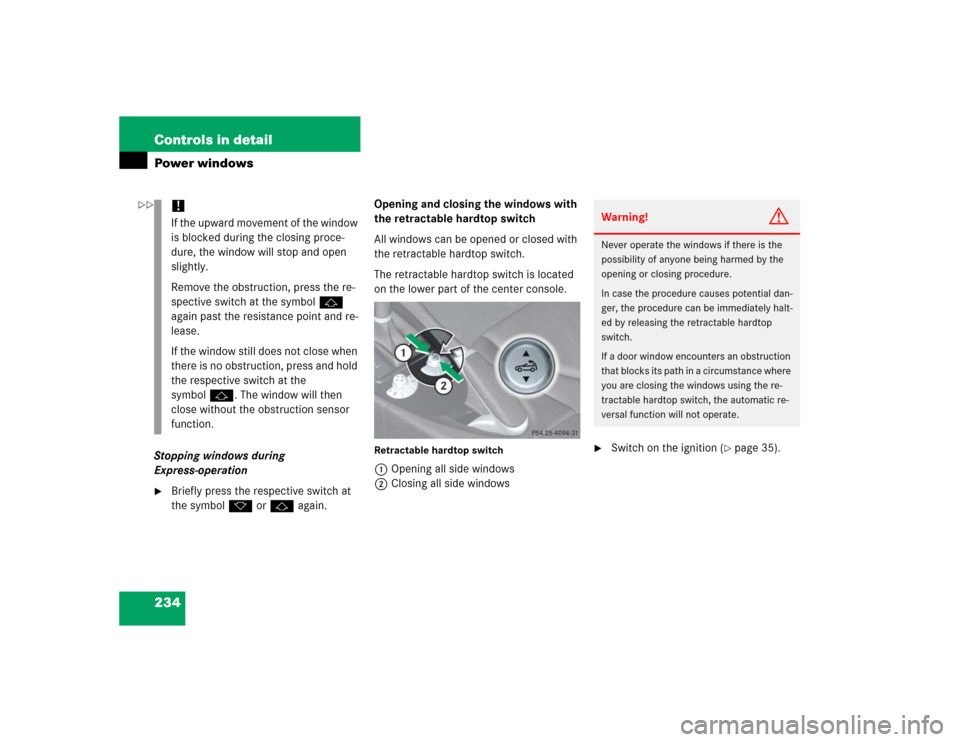
the retractable hardtop switch
All windows can be opened or closed with
the retractable hardtop switch.
The retractable hardtop switch is located
on the lower part of the center console.
Retractable hardtop switch1Opening all side windows
2Closing all side windows
�
Switch on the ignition (
�page 35).
!If the upward movement of the window
is blocked during the closing proce-
dure, the window will stop and open
slightly.
Remove the obstruction, press the re-
spective switch at the symbolj
again past the resistance point and re-
lease.
If the window still does not close when
there is no obstruction, press and hold
the respective switch at the
symbolj. The window will then
close without the obstruction sensor
function.
Warning!
G
Never operate the windows if there is the
possibility of anyone being harmed by the
opening or closing procedure.
In case the procedure causes potential dan-
ger, the procedure can be immediately halt-
ed by releasing the retractable hardtop
switch.
If a door window encounters an obstruction
that blocks its path in a circumstance where
you are closing the windows using the re-
tractable hardtop switch, the automatic re-
versal function will not operate.
��
Page 236 of 464
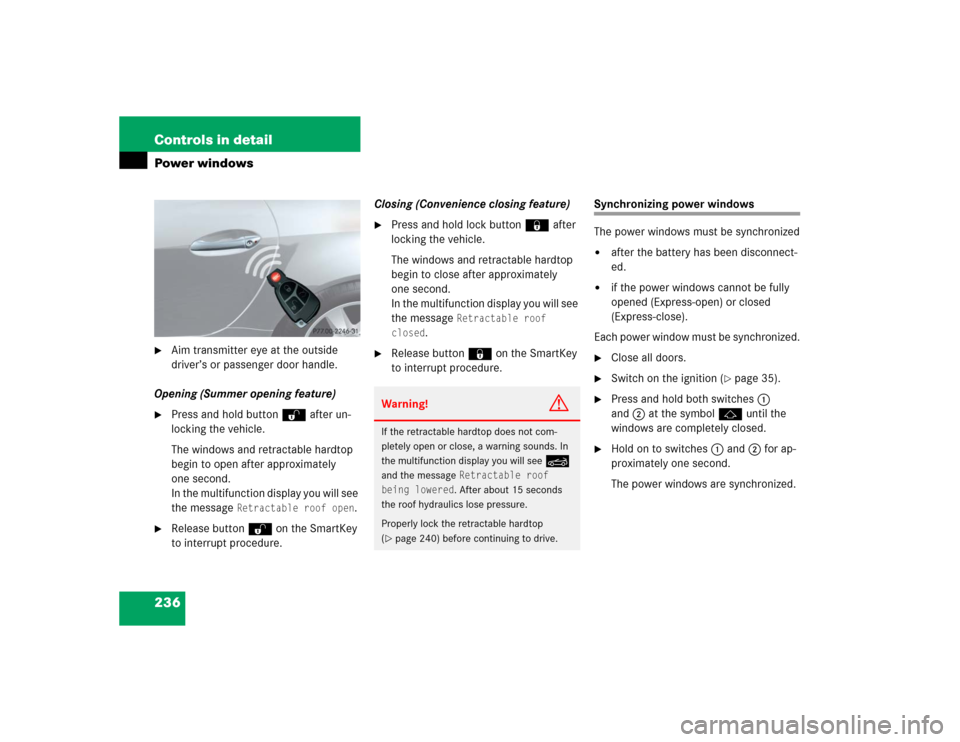
236 Controls in detailPower windows�
Aim transmitter eye at the outside
driver’s or passenger door handle.
Opening (Summer opening feature)
�
Press and hold buttonΠafter un-
locking the vehicle.
The windows and retractable hardtop
begin to open after approximately
one second.
In the multifunction display you will see
the message
Retractable roof open
.
�
Release buttonΠon the SmartKey
to interrupt procedure.Closing (Convenience closing feature)
�
Press and hold lock button‹ after
locking the vehicle.
The windows and retractable hardtop
begin to close after approximately
one second.
In the multifunction display you will see
the message
Retractable roof
closed
.
�
Release button‹ on the SmartKey
to interrupt procedure.
Synchronizing power windows
The power windows must be synchronized�
after the battery has been disconnect-
ed.
�
if the power windows cannot be fully
opened (Express-open) or closed
(Express-close).
Each power window must be synchronized.
�
Close all doors.
�
Switch on the ignition (
�page 35).
�
Press and hold both switches1
and2 at the symbolj until the
windows are completely closed.
�
Hold on to switches1and2 for ap-
proximately one second.
The power windows are synchronized.
Warning!
G
If the retractable hardtop does not com-
pletely open or close, a warning sounds. In
the multifunction display you will see
K
and the message
Retractable roof
being lowered. After about 15 seconds
the roof hydraulics lose pressure.
Properly lock the retractable hardtop
(
�page 240) before continuing to drive.