Page 181 of 474

179 Controls in detail
Good visibility
Activating exterior rear view mirror
parking position
Follow these steps to activate the mirror
parking position so that the passen-
ger-side exterior rear view mirror will be
turned downward to the stored position.�
Make sure you have stored a parking
position for the passenger-side exterior
rear view mirror (
�page 121).
�
Make sure the
Mirror setting when
parking
function in the
Convenience
submenu of the control system is
switched to
ON (�page 158).
�
Switch on the ignition (
�page 36).
�
Press button2 for the passenger-side
exterior rear view mirror.
Warning!
G
The auto-dimming function does not react if
incoming light is not aimed directly at sen-
sors in the interior rear view mirror.
The interior rear view mirror and the exterior
rear view mirror on the driver’s side do not
react, for example, if the wind screen is in-
stalled.
Glare can endanger you and others.Warning!
G
In the case of an accident liquid electrolyte
may escape from the mirror housing if the
mirror glass breaks.
Electrolyte has an irritating effect. Do not al-
low the liquid to come into contact with
eyes, skin, clothing, or respiratory system.
In case it does, immediately flush affected
area with water, and seek medical help if
necessary.
!Electrolyte drops coming into contact
with the vehicle paint finish can be
completely removed only while in the
liquid state by applying plenty of water.Warning!
G
Exercise care when using the passen-
ger-side exterior rear view mirror. The mirror
surface is convex (outwardly curved surface
for a wider field of view). Objects in mirror
are closer than they appear. Check your in-
terior rear view mirror or glance over your
shoulder before changing lanes.
��
Page 204 of 474

202 Controls in detailRetractable hardtopIndicator lamp in the retractable hard-
top switch lights when vehicle is
stopped
If the indicator lamp in the retractable
hardtop switch lights while the vehicle is
standing still and the switch was not acti-
vated, then the retractable hardtop is not
locked.�
Properly lock the retractable hardtop
(�page 199) before continuing to
drive.
The retractable hardtop will not lock
There is a malfunction in the retractable
hardtop system.
�
Notify an authorized Mercedes-Benz
Center.Wind screen
The wind screen deflects drafts away from
the driver and passenger when the hardtop
is lowered. It is stored in a separate stor-
age bag.
Installing
�
Leave the wind screen folded and place
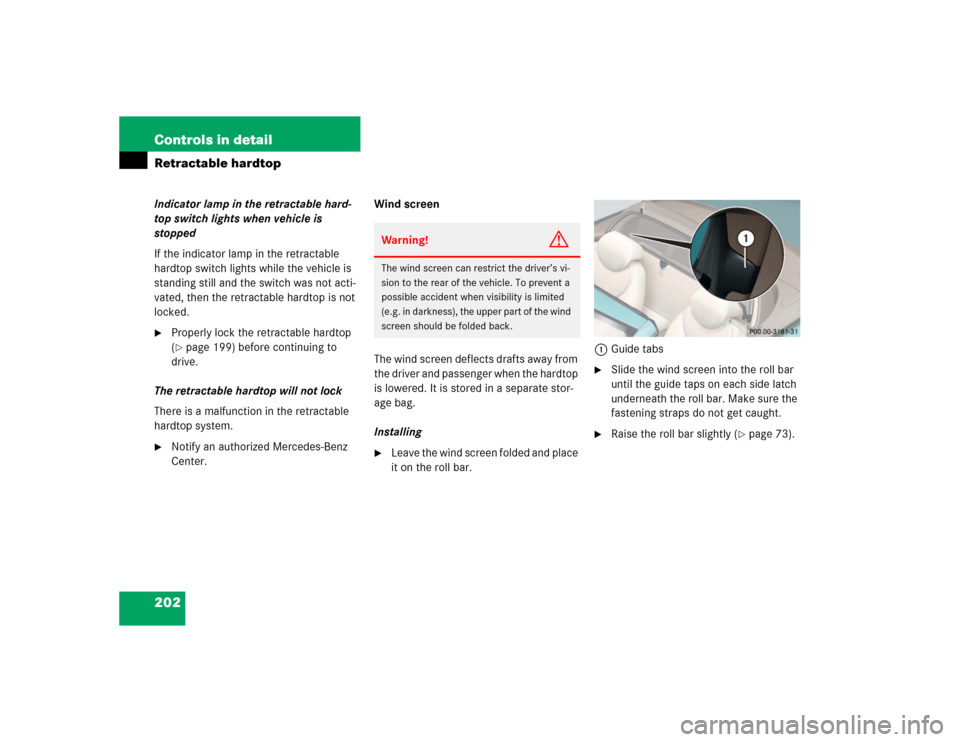
it on the roll bar.1Guide tabs
�
Slide the wind screen into the roll bar
until the guide taps on each side latch
underneath the roll bar. Make sure the
fastening straps do not get caught.
�
Raise the roll bar slightly (
�page 73).
Warning!
G
The wind screen can restrict the driver’s vi-
sion to the rear of the vehicle. To prevent a
possible accident when visibility is limited
(e.g. in darkness), the upper part of the wind
screen should be folded back.
Page 205 of 474

203 Controls in detail
Retractable hardtop
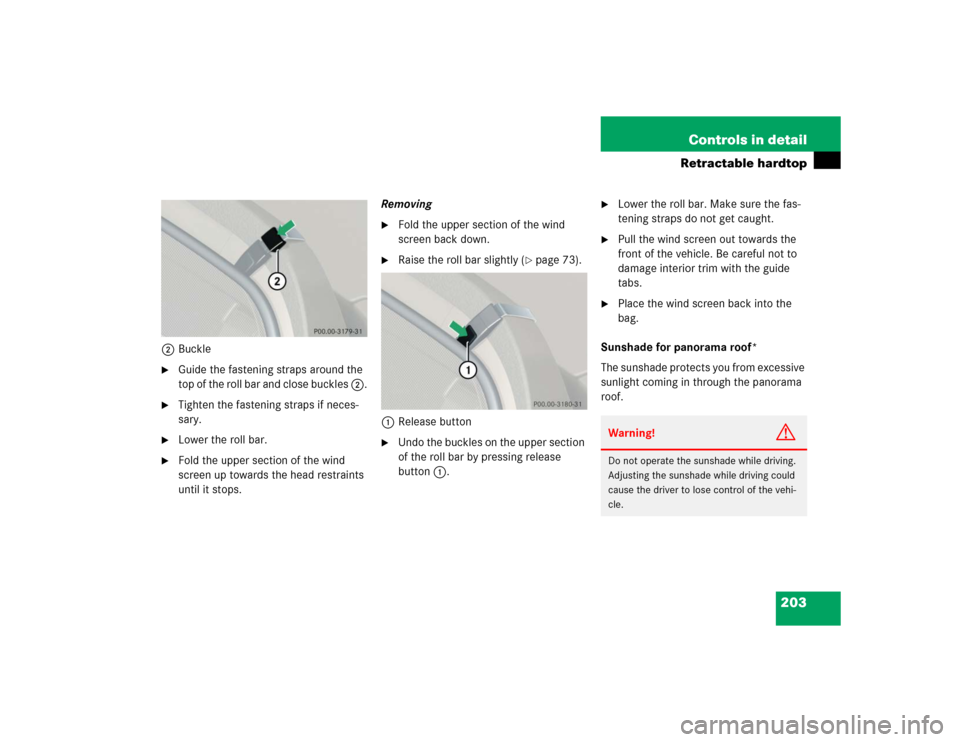
2Buckle�
Guide the fastening straps around the
top of the roll bar and close buckles 2.
�
Tighten the fastening straps if neces-
sary.
�
Lower the roll bar.
�
Fold the upper section of the wind
screen up towards the head restraints
until it stops.Removing
�
Fold the upper section of the wind
screen back down.
�
Raise the roll bar slightly (
�page 73).
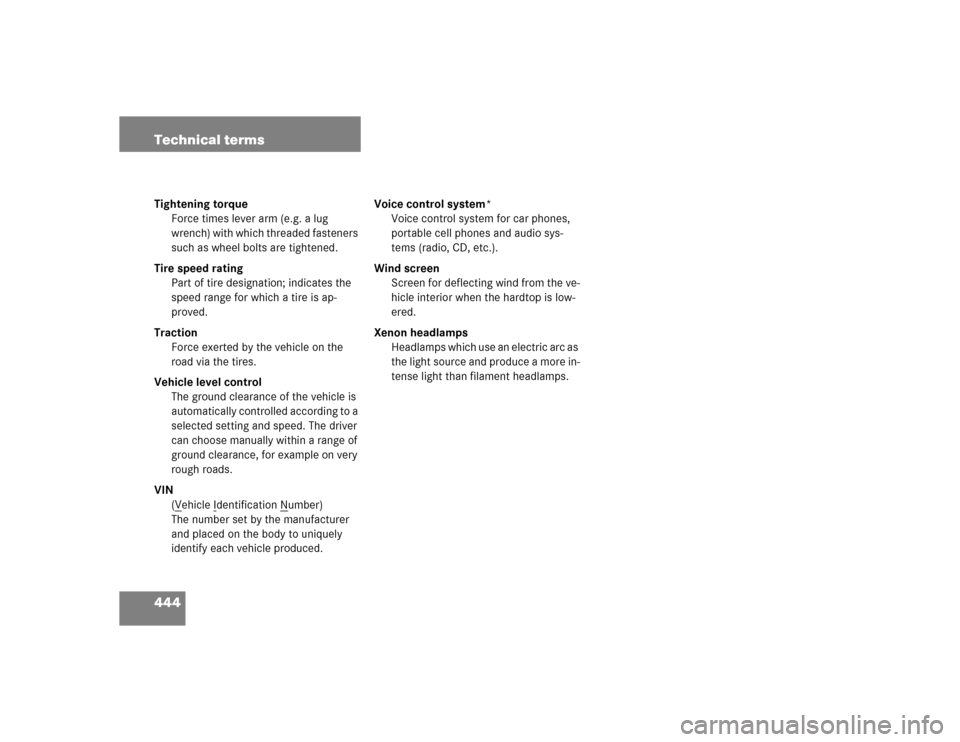
1Release button
�
Undo the buckles on the upper section
of the roll bar by pressing release
button1.
�
Lower the roll bar. Make sure the fas-
tening straps do not get caught.
�
Pull the wind screen out towards the
front of the vehicle. Be careful not to
damage interior trim with the guide
tabs.
�
Place the wind screen back into the
bag.
Sunshade for panorama roof*
The sunshade protects you from excessive
sunlight coming in through the panorama
roof.Warning!
G
Do not operate the sunshade while driving.
Adjusting the sunshade while driving could
cause the driver to lose control of the vehi-
cle.
Page 446 of 474

444 Technical termsTightening torque
Force times lever arm (e.g. a lug
wrench) with which threaded fasteners
such as wheel bolts are tightened.
Tire speed rating
Part of tire designation; indicates the
speed range for which a tire is ap-
proved.
Traction
Force exerted by the vehicle on the
road via the tires.
Vehicle level control
The ground clearance of the vehicle is
automatically controlled according to a
selected setting and speed. The driver
can choose manually within a range of
ground clearance, for example on very
rough roads.
VIN
(V
ehicle I
dentification N
umber)
The number set by the manufacturer
and placed on the body to uniquely
identify each vehicle produced.Voice control system*
Voice control system for car phones,
portable cell phones and audio sys-
tems (radio, CD, etc.).
Wind screen
Screen for deflecting wind from the ve-
hicle interior when the hardtop is low-
ered.
Xenon headlamps
Headlamps which use an electric arc as
the light source and produce a more in-
tense light than filament headlamps.
Page 469 of 474

467 Index
W
Warning lamps see Lamps, indicator and
warning
Warning sounds
Distance warning function* 216
Distronic* 211
Drivers seat belts 69
Warranty coverage 417
Washing the vehicle 317
Wear pattern (tires) 308
Wheel bolts
Tightening torque 399
Wheel change 393
Tightening torque 399
Wheel wrench 373
Wheels
Tires and wheels 279
Wind screen 202, 444
Installing 202
Removing 203Windows see Side windows
Windshield
Defrosting 187
Refilling washer fluid 278
Washer fluid 54, 278
Washer system 278
Windshield and headlamp washer
system 438
Windshield washer and headlamp cleaning
system 269
Windshield washer fluid 54
Filler neck 278
Messages in display 371
Mixing ratio 438
Refilling 278
Windshield wipers 23, 53
Fast wiper speed 53
Intermittent wiping 53
Replacing wiper blades 386
Wiping with windshield washer
fluid 54Winter driving
Snow chains 310
Tires 309
Winter driving instructions 262
Winter tires 309
Wood trims
Cleaning 321
Wrench, wheel (vehicle tool kit) 373
X
Xenon headlamps 444