Page 32 of 474
30 At a glanceCenter consoleLower part
Item
Page
1
Parking assist (Parktronic
system)* deactivation
switch
223
2
Active Body Control (ABC)
switch
220
3
Tow-away alarm switch
90
4
Hardtop open/close con-
trol with buttons for roll bar
196
73
5
Exterior rear view mirror
adjustment
43
Item
Page
6
Vehicle level control switch
221
7
ESP control switch
83
8
Thumbwheel for setting
distance for Distronic*
216
9
Distance warning func-
tion* on/off switch
216
a
Program mode selector
switch for automatic trans-
mission
175
b
Gear selector lever for
automatic transmission
170
Page 97 of 474

95 Controls in detail
Locking and unlocking
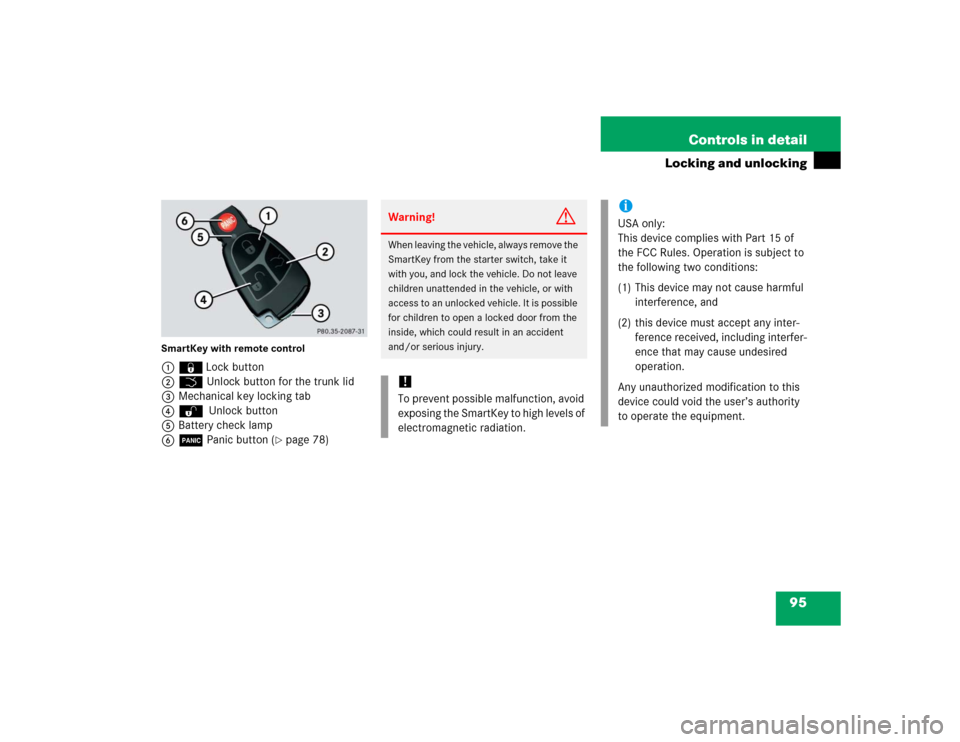
SmartKey with remote control1‹Lock button
2Š Unlock button for the trunk lid
3Mechanical key locking tab
4ΠUnlock button
5Battery check lamp
6Â Panic button (
�page 78)
Warning!
G
When leaving the vehicle, always remove the
SmartKey from the starter switch, take it
with you, and lock the vehicle. Do not leave
children unattended in the vehicle, or with
access to an unlocked vehicle. It is possible
for children to open a locked door from the
inside, which could result in an accident
and/or serious injury.!To prevent possible malfunction, avoid
exposing the SmartKey to high levels of
electromagnetic radiation.
iUSA only:
This device complies with Part 15 of
the FCC Rules. Operation is subject to
the following two conditions:
(1) This device may not cause harmful
interference, and
(2) this device must accept any inter-
ference received, including interfer-
ence that may cause undesired
operation.
Any unauthorized modification to this
device could void the user’s authority
to operate the equipment.
Page 120 of 474

118 Controls in detailSeatsVehicles with seat ventilation*
The switch is located on the door. The red
indicator lamps on the switch indicate the
selected heating level:
1Seat heating switch�
Switch on the ignition (
�page 36).Switching on seat heating
�
Press upper switch position1 twice.
A red indicator lamp on the switch
comes on.
Switching off seat heating
�
Press upper switch position1 again.
Switching on rapid seat heating
�
Press upper switch position1 once.
Both indicator lamps on the switch
come on. Switching off rapid seat heating
�
Press upper switch position1 twice.
Leveloff
No indicator lamp on
1
One indicator lamp on
2
Two indicator lamps on
iThe seat heating will be automatically
switched off after approximately
30 minutes. iThe system switches to normal heating
mode after approximately five minutes.
Only the right-hand indicator lamp re-
mains lit.
!If one or both of the lamps on the seat
heating switch are flashing, there is in-
sufficient voltage available since too
many electrical consumers are turned
on. The seat heating switches off auto-
matically.
The seat heating will switch back on
again automatically as soon as suffi-
cient voltage is available.
Page 163 of 474

161 Controls in detail
Control system
Call up range (distance to empty)�
Press button ÿ or è repeatedly
until you see the first function of the
Trip computer menu.
�
Press button j or k repeatedly
until you see this message in the left
display:
Range
.
In the right display you will see the cal-
culated range based on the current fuel
tank level.
TEL menu*
You can use the functions in the
TEL
menu
to operate your telephone, provided it is
connected to a hands-free system and
switched on.
�
Switch on the telephone and COMAND.
�
Press button ÿ or è on the
steering wheel repeatedly until you see
the
TEL
menu in the left display.
Warning!
G
A driver’s attention to the road must always
be his/her primary focus when driving. For
your safety and the safety of others, we rec-
ommend that you pull over to a safe location
and stop before placing or taking a tele-
phone call. If you choose to use the tele-
phone while driving, please use the
hands-free device and only use the tele-
phone when weather, road, and traffic con-
ditions permit.
Some jurisdictions prohibit the driver from
using a cellular telephone while driving a ve-
hicle.
Bear in mind that at a speed of just 30 mph
(approximately 50 km/h), your vehicle is
covering a distance of 44 feet (approximate-
ly 14 m) every second.
Never operate radio transmitters equipped
with a built-in or attached antenna (i.e. with-
out being connected to an external antenna)
from inside the vehicle while the engine is
running. Doing so could lead to a malfunc-
tion of the vehicle’s electronic system, pos-
sibly resulting in an accident and/or
personal injury.
Page 224 of 474

222 Controls in detailDriving systemsThe following vehicle level settings can be
selected when the vehicle is stationary:
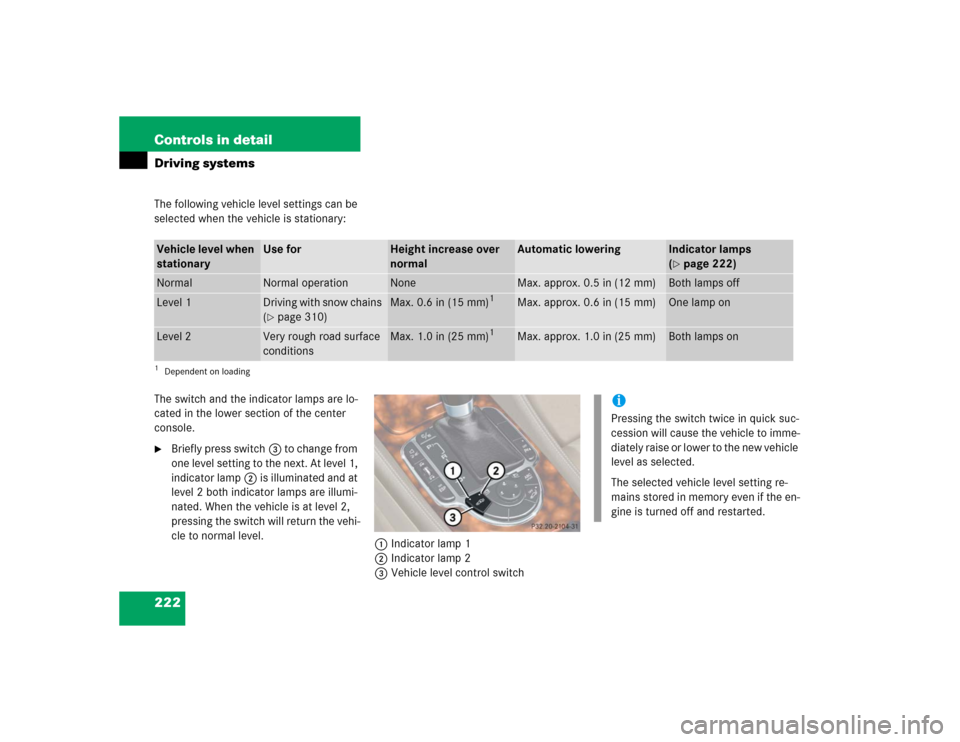
The switch and the indicator lamps are lo-
cated in the lower section of the center
console.�
Briefly press switch3 to change from
one level setting to the next. At level 1,
indicator lamp2 is illuminated and at
level 2 both indicator lamps are illumi-
nated. When the vehicle is at level 2,
pressing the switch will return the vehi-
cle to normal level.
1Indicator lamp 1
2Indicator lamp 2
3Vehicle level control switch
Vehicle level when
stationary
Use for
Height increase over
normal
Automatic lowering
Indicator lamps
(�page 222)
Normal
Normal operation
None
Max. approx. 0.5 in (12 mm)
Both lamps off
Level 1
Driving with snow chains
(�page 310)
Max. 0.6 in (15 mm)
1
Max. approx. 0.6 in (15 mm)
One lamp on
Level 2
Very rough road surface
conditions
Max. 1.0 in (25 mm)
1
Max. approx. 1.0 in (25 mm)
Both lamps on
1Dependent on loading
iPressing the switch twice in quick suc-
cession will cause the vehicle to imme-
diately raise or lower to the new vehicle
level as selected.
The selected vehicle level setting re-
mains stored in memory even if the en-
gine is turned off and restarted.
Page 271 of 474

269 Operation
At the gas station
Check regularly and before a long trip
For information on quantities and require-
ments of operating agents, see “Fuels,
coolants, lubricants, etc.” (
�page 431).
�
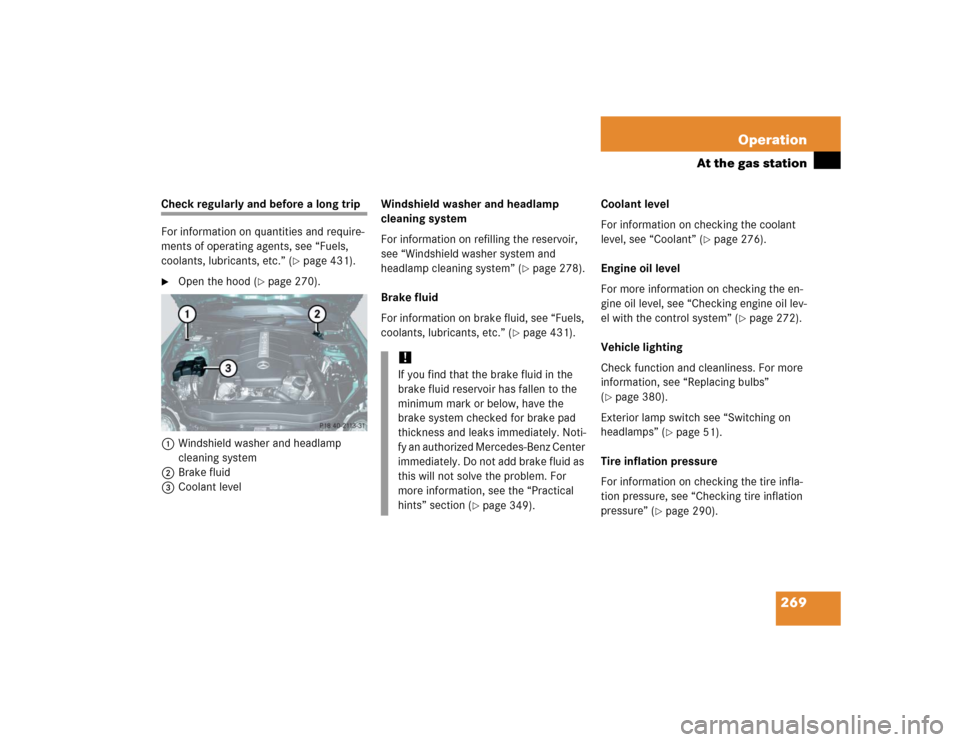
Open the hood (
�page 270).
1Windshield washer and headlamp
cleaning system
2Brake fluid
3Coolant levelWindshield washer and headlamp
cleaning system
For information on refilling the reservoir,
see “Windshield washer system and
headlamp cleaning system” (
�page 278).
Brake fluid
For information on brake fluid, see “Fuels,
coolants, lubricants, etc.” (
�page 431).Coolant level
For information on checking the coolant
level, see “Coolant” (
�page 276).
Engine oil level
For more information on checking the en-
gine oil level, see “Checking engine oil lev-
el with the control system” (
�page 272).
Vehicle lighting
Check function and cleanliness. For more
information, see “Replacing bulbs”
(
�page 380).
Exterior lamp switch see “Switching on
headlamps” (
�page 51).
Tire inflation pressure
For information on checking the tire infla-
tion pressure, see “Checking tire inflation
pressure” (
�page 290).
!If you find that the brake fluid in the
brake fluid reservoir has fallen to the
minimum mark or below, have the
brake system checked for brake pad
thickness and leaks immediately. Noti-
fy an authorized Mercedes-Benz Center
immediately. Do not add brake fluid as
this will not solve the problem. For
more information, see the “Practical
hints” section (
�page 349).
Page 274 of 474

272 OperationEngine compartmentEngine oil
The amount of oil your engine needs will
depend on a number of factors, including
driving style. Higher oil consumption can
occur when�
the vehicle is new
�
the vehicle is driven frequently at
higher engine speeds
Engine oil consumption checks should only
be made after the vehicle break-in period.Checking engine oil level with the
control system
When checking the oil level
�
the vehicle must be parked on level
ground
�
with the engine at operating tempera-
ture, the vehicle must have been sta-
tionary for at least five minutes with the
engine turned off
�
with the engine not at operating tem-
perature, the vehicle must have been
stationary for at least 30 minutes with
the engine turned off
To check the engine oil level via the
multifunction display, do the following:
�
Switch on the ignition (
�page 36).
The standard display (
�page 134) should
appear in the multifunction display.
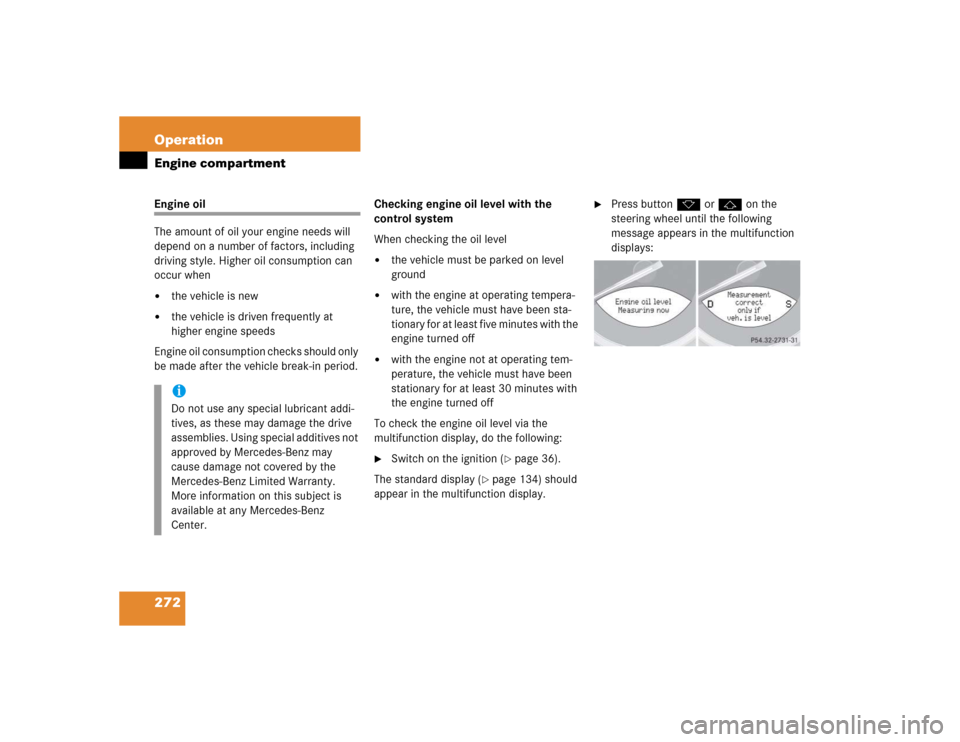
�
Press buttonk orj on the
steering wheel until the following
message appears in the multifunction
displays:
iDo not use any special lubricant addi-
tives, as these may damage the drive
assemblies. Using special additives not
approved by Mercedes-Benz may
cause damage not covered by the
Mercedes-Benz Limited Warranty.
More information on this subject is
available at any Mercedes-Benz
Center.
Page 447 of 474

445 Index
A
ABC 220, 439
Messages in display 337
Oil level 275
Setting vehicle level 221
ABC switch 30
ABS 79, 80, 439
ABS control 80
Messages in display 338
Warning lamp 27, 325
ABS/ESP
Warning lamp 25, 324
Accelerator position, automatic
transmission 171
Accessory weight 305
Activating
Air circulation mode 187
Air conditioning (cooling) 192
Anti-theft alarm system 89
Central locking (control system) 156
Distance warning function* 217Distronic* 213
Easy-entry/exit feature 157
Electric air pump 398
ESP 84
Exterior lamps 123
Exterior rear view mirror parking
position 179
Hazard warning flasher 129
High beams 128
Ignition 36
Immobilizer 58
Parktronic* 226
Rear window defroster 189
Residual heat 190
Seat heating 117, 118
Seat ventilation* 119
Tow-away alarm 90
Windshield wipers 53
Active Body Control (ABC) switch 30
Active Body Control see ABC
Adding
Engine oil 274Adjusting
Air distribution 186
Air volume 185
Backrest tilt 40, 41
Exterior rear view mirrors 43
Head restraint height 41
Head restraint tilt 41
Interior rear view mirror 43
Lumbar support 115
Mirrors 43
Multicontour backrest* 116
Seat cushion depth 41
Seat cushion tilt 41
Seat height 41
Seat in the lumbar region 116
Seat in the shoulder region 116
Seats 39
Steering column in/out 42
Steering column up/down 42
Steering wheel 42