Page 112 of 474
110 Controls in detailLocking and unlockingClosing the trunk and locking the vehi-
cle from the outside (vehicles with
KEYLESS-GO*)
In vehicles with trunk lid opening/closing
system* and KEYLESS-GO, you can close
the trunk lid and lock the vehicle simulta-
neously from the outside using the
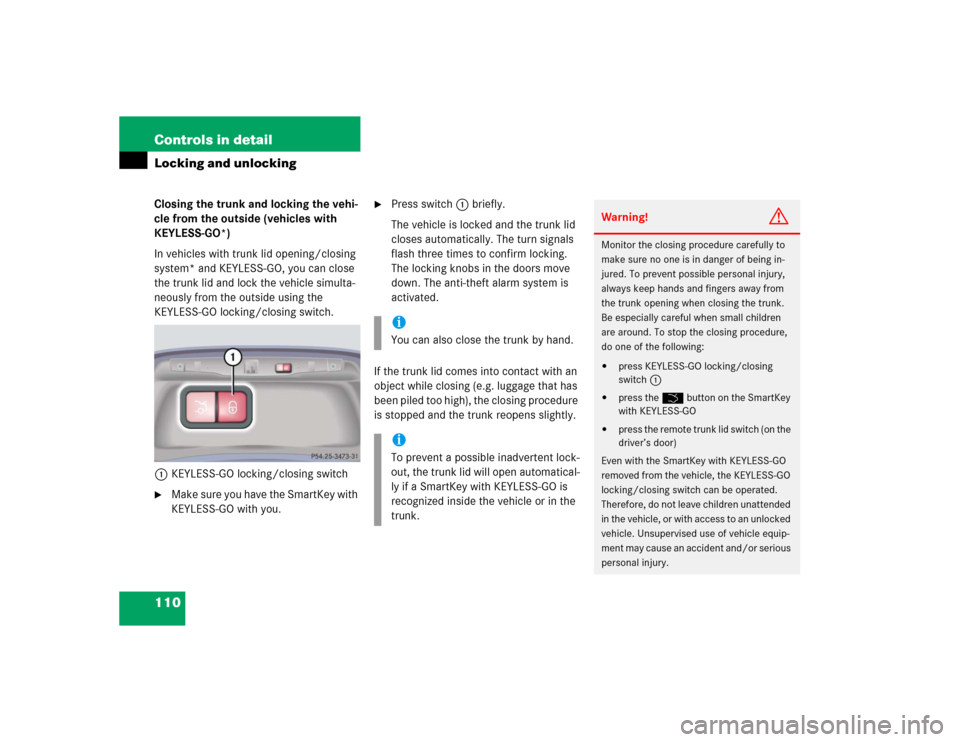
KEYLESS-GO locking/closing switch.
1KEYLESS-GO locking/closing switch�
Make sure you have the SmartKey with
KEYLESS-GO with you.
�
Press switch1 briefly.
The vehicle is locked and the trunk lid
closes automatically. The turn signals
flash three times to confirm locking.
The locking knobs in the doors move
down. The anti-theft alarm system is
activated.
If the trunk lid comes into contact with an
object while closing (e.g. luggage that has
been piled too high), the closing procedure
is stopped and the trunk reopens slightly.iYou can also close the trunk by hand.iTo prevent a possible inadvertent lock-
out, the trunk lid will open automatical-
ly if a SmartKey with KEYLESS-GO is
recognized inside the vehicle or in the
trunk.
Warning!
G
Monitor the closing procedure carefully to
make sure no one is in danger of being in-
jured. To prevent possible personal injury,
always keep hands and fingers away from
the trunk opening when closing the trunk.
Be especially careful when small children
are around. To stop the closing procedure,
do one of the following:�
press KEYLESS-GO locking/closing
switch1
�
press the Š button on the SmartKey
with KEYLESS-GO
�
press the remote trunk lid switch (on the
driver’s door)
Even with the SmartKey with KEYLESS-GO
removed from the vehicle, the KEYLESS-GO
locking/closing switch can be operated.
Therefore, do not leave children unattended
in the vehicle, or with access to an unlocked
vehicle. Unsupervised use of vehicle equip-
ment may cause an accident and/or serious
personal injury.
Page 114 of 474
112 Controls in detailLocking and unlockingPower closing assist for doors and trunk lid
It is not necessary to slam the door or
trunk lid closed. A pneumatic power-as-
sisted mechanism draws doors and trunk
lid closed quietly and automatically once
door and trunk lid has been latched. When
the pneumatic power-assisted mechanism
has stopped, doors and/or trunk can be
re-opened.Power closing assist for doors
�
Press the doors gently past the initial
engage position into the lock.
The doors close automatically.
Power closing assist for trunk lid
�
Press the trunk lid gently into its lock.
The trunk closes automatically.
Automatic central locking
The doors and the trunk automatically lock
when the ignition is switched on and the
wheels are turning at vehicle speeds of ap-
proximately 9 mph (15 km/h) or more.
You can open a locked door from the in-
side. Open door only when conditions are
safe to do so.
You can deactivate the automatic locking
using the control system (
�page 168).
Warning!
G
To prevent possible personal injury, always
keep hands and fingers away from the door
or trunk opening when closing a door or the
trunk lid. Be especially careful when small
children are around.
In case of danger, pull the inside or outside
door handle, or press the trunk lid lock.
To prevent personal injury, never actuate
the closing assist mechanism by tampering
with the door or trunk lid latch.
Warning!
G
Only drive with the doors closed. Otherwise,
one or more of the doors could open while
the vehicle is in motion, putting you and/or
others at risk.Warning!
G
Only drive with the trunk closed as, among
other dangers such as visibility blockage,
exhaust fumes may enter the vehicle interi-
or.
iThe doors unlock automatically after an
accident if the force of the impact ex-
ceeds a preset threshold. The vehicle
locks automatically when the ignition is
switched on and the wheels are turning
at vehicle speeds of approximately
9 mph (15 km/h) or more. You could
therefore lock yourself out when the
vehicle�
is pushed or towed
�
is on a test stand
Page 125 of 474
123 Controls in detailSeats
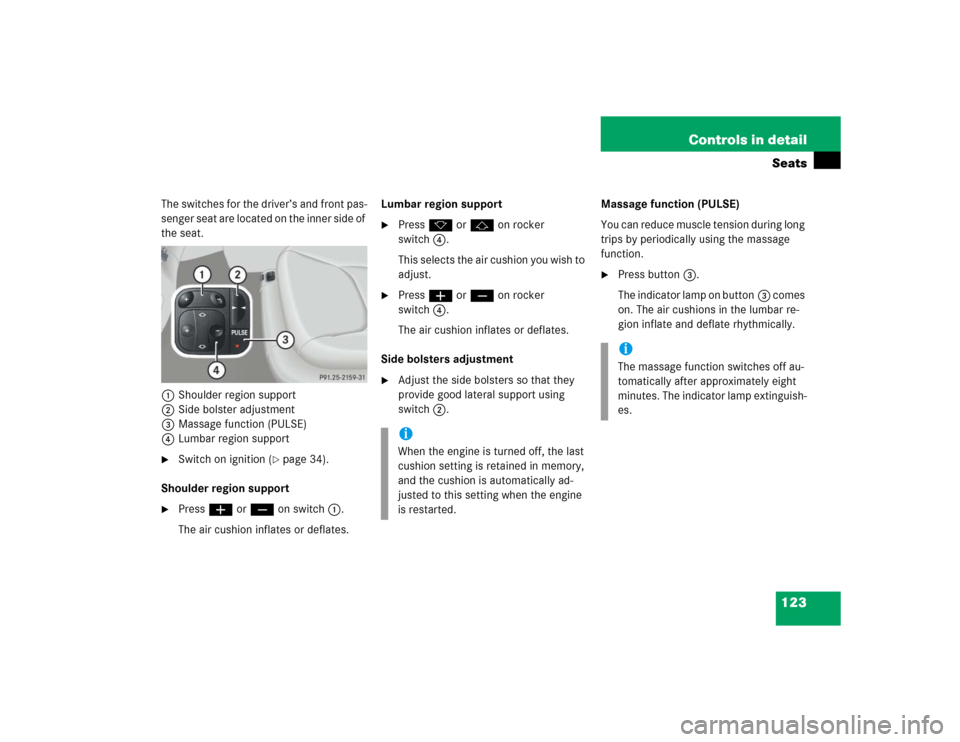
The switches for the driver’s and front pas-
senger seat are located on the inner side of
the seat.
1Shoulder region support
2Side bolster adjustment
3Massage function (PULSE)
4Lumbar region support�
Switch on ignition (
�page 34).
Shoulder region support
�
Press æ or ç on switch1.
The air cushion inflates or deflates.Lumbar region support
�
Press k or j on rocker
switch4.
This selects the air cushion you wish to
adjust.
�
Press æ or ç on rocker
switch4.
The air cushion inflates or deflates.
Side bolsters adjustment
�
Adjust the side bolsters so that they
provide good lateral support using
switch 2.Massage function (PULSE)
You can reduce muscle tension during long
trips by periodically using the massage
function.
�
Press button3.
The indicator lamp on button3 comes
on. The air cushions in the lumbar re-
gion inflate and deflate rhythmically.
iWhen the engine is turned off, the last
cushion setting is retained in memory,
and the cushion is automatically ad-
justed to this setting when the engine
is restarted.
iThe massage function switches off au-
tomatically after approximately eight
minutes. The indicator lamp extinguish-
es.
Page 126 of 474
124 Controls in detailSeatsDrive-dynamic seat*
The drive-dynamic seat automatically ad-
justs the lateral support provided by the
seat backrest to your driving style.
The switches for the driver’s and front pas-
senger seat are located on the inner side of
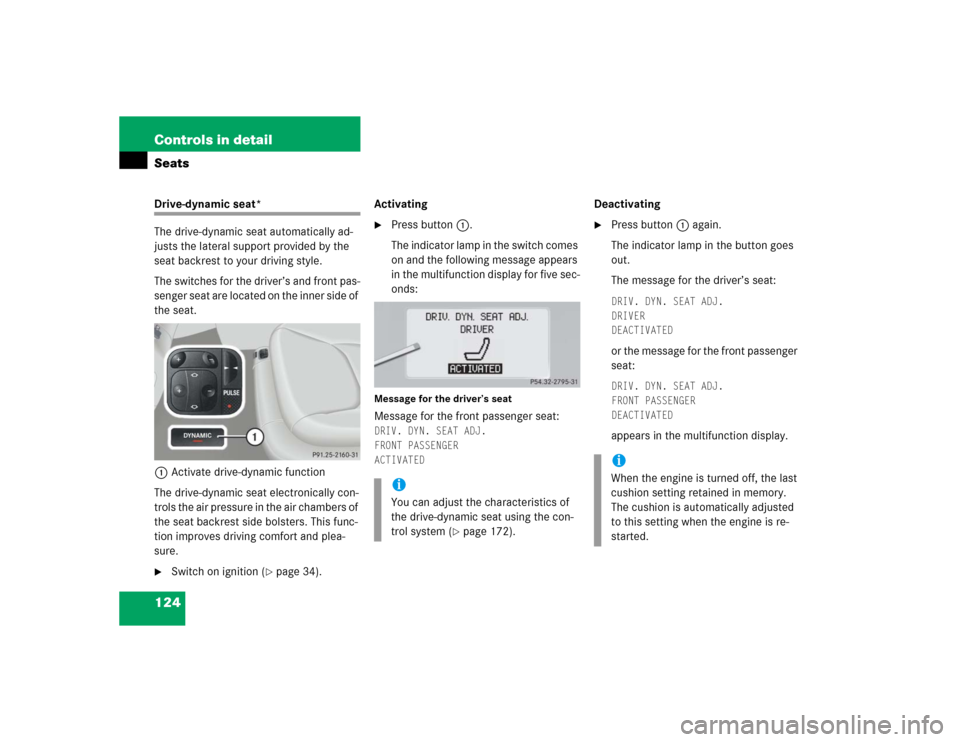
the seat.
1Activate drive-dynamic function
The drive-dynamic seat electronically con-
trols the air pressure in the air chambers of
the seat backrest side bolsters. This func-
tion improves driving comfort and plea-
sure.�
Switch on ignition (
�page 34).Activating
�
Press button1.
The indicator lamp in the switch comes
on and the following message appears
in the multifunction display for five sec-
onds:
Message for the driver’s seatMessage for the front passenger seat:DRIV. DYN. SEAT ADJ.
FRONT PASSENGER
ACTIVATED
Deactivating�
Press button1 again.
The indicator lamp in the button goes
out.
The message for the driver’s seat:DRIV. DYN. SEAT ADJ.
DRIVER
DEACTIVATED or the message for the front passenger
seat:DRIV. DYN. SEAT ADJ.
FRONT PASSENGER
DEACTIVATED appears in the multifunction display.
iYou can adjust the characteristics of
the drive-dynamic seat using the con-
trol system (
�page 172).
iWhen the engine is turned off, the last
cushion setting retained in memory.
The cushion is automatically adjusted
to this setting when the engine is re-
started.
Page 127 of 474

125 Controls in detailSeats
Seat heating*
Vehicles without seat ventilation*
The switch is located on the door.
1Normal heating
2Rapid heating�
Switch on ignition (
�page 34).
Switching on seat heating
�
Press switch1.
A red indicator lamp above the switch
comes on. Switching off seat heating
�
Press switch1 again.
Switching on rapid seat heating
�
Press switch2.
Both red indicator lamps above the
switch come on. Switching off rapid seat heating mode
�
Press switch2 again.
iThe seat heating will be automatically
switched off after approximately
30 minutes. iThe system switches over to normal
heating mode after approximately
five minutes. Only the right-hand indi-
cator lamp remains lit.
!If one or both of the lamps on the seat
heating switch are flashing, there is in-
sufficient voltage available since too
many electrical consumers are turned
on. The seat heating switches off auto-
matically.
The seat heating will switch back on
again automatically as soon as suffi-
cient voltage is available.
Page 128 of 474
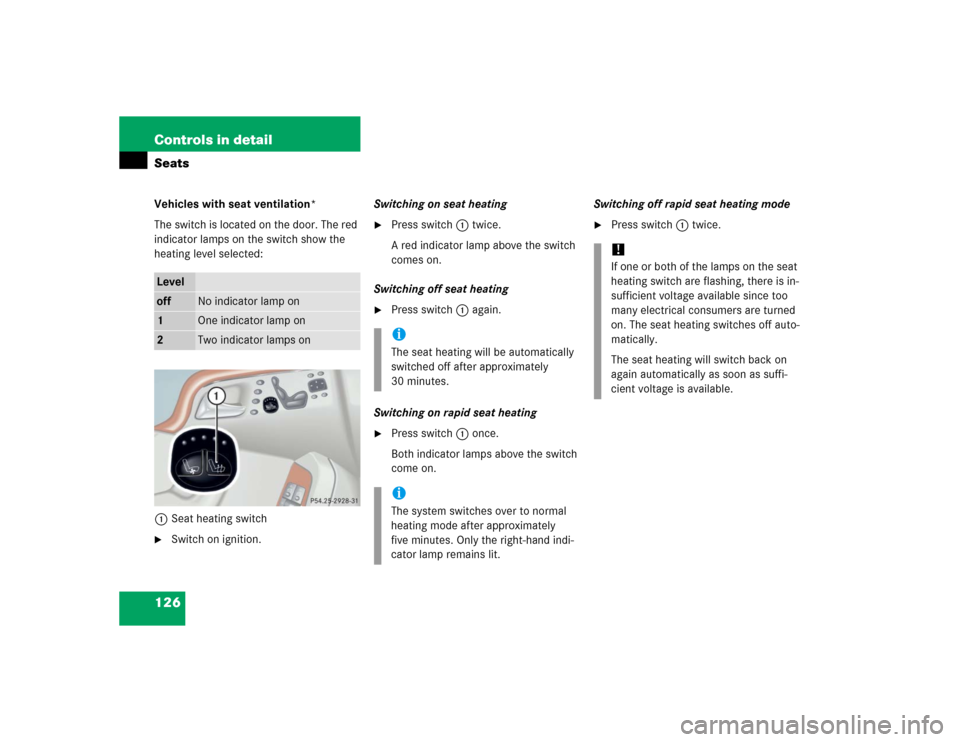
126 Controls in detailSeatsVehicles with seat ventilation*
The switch is located on the door. The red
indicator lamps on the switch show the
heating level selected:
1Seat heating switch�
Switch on ignition.Switching on seat heating
�
Press switch1 twice.
A red indicator lamp above the switch
comes on.
Switching off seat heating
�
Press switch1 again.
Switching on rapid seat heating
�
Press switch1 once.
Both indicator lamps above the switch
come on. Switching off rapid seat heating mode
�
Press switch1 twice.
Leveloff
No indicator lamp on
1
One indicator lamp on
2
Two indicator lamps on
iThe seat heating will be automatically
switched off after approximately
30 minutes. iThe system switches over to normal
heating mode after approximately
five minutes. Only the right-hand indi-
cator lamp remains lit.
!If one or both of the lamps on the seat
heating switch are flashing, there is in-
sufficient voltage available since too
many electrical consumers are turned
on. The seat heating switches off auto-
matically.
The seat heating will switch back on
again automatically as soon as suffi-
cient voltage is available.
Page 129 of 474
127 Controls in detailSeats
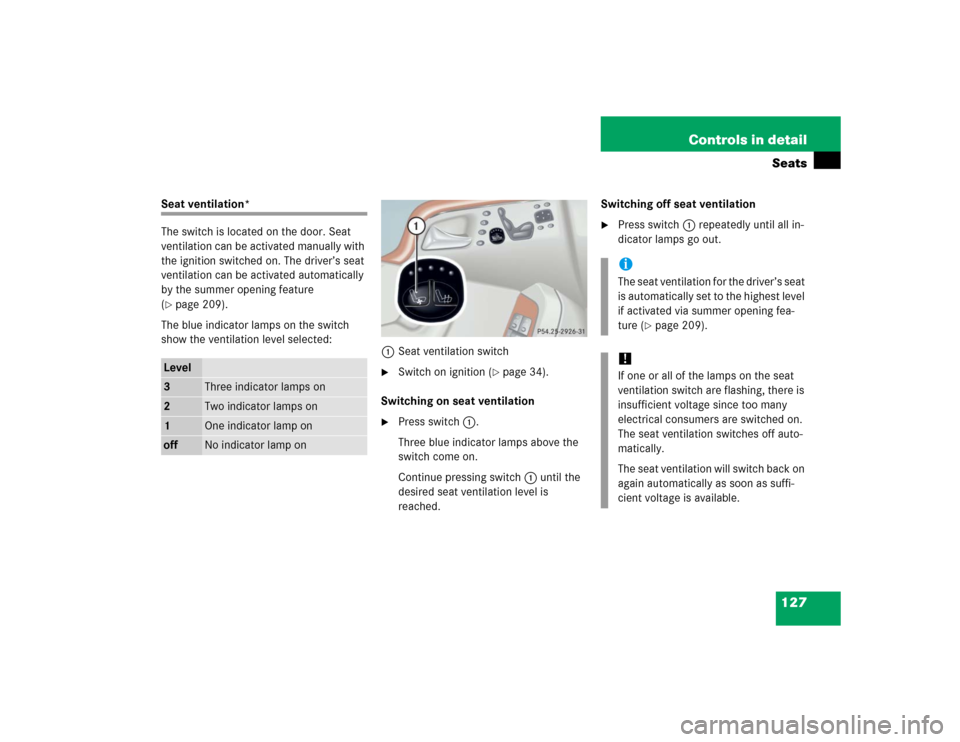
Seat ventilation*
The switch is located on the door. Seat
ventilation can be activated manually with
the ignition switched on. The driver’s seat
ventilation can be activated automatically
by the summer opening feature
(�page 209).
The blue indicator lamps on the switch
show the ventilation level selected:
1Seat ventilation switch
�
Switch on ignition (
�page 34).
Switching on seat ventilation
�
Press switch1.
Three blue indicator lamps above the
switch come on.
Continue pressing switch1 until the
desired seat ventilation level is
reached.Switching off seat ventilation
�
Press switch1 repeatedly until all in-
dicator lamps go out.
Level3
Three indicator lamps on
2
Two indicator lamps on
1
One indicator lamp on
off
No indicator lamp on
iThe seat ventilation for the driver’s seat
is automatically set to the highest level
if activated via summer opening fea-
ture (
�page 209).
!If one or all of the lamps on the seat
ventilation switch are flashing, there is
insufficient voltage since too many
electrical consumers are switched on.
The seat ventilation switches off auto-
matically.
The seat ventilation will switch back on
again automatically as soon as suffi-
cient voltage is available.
Page 130 of 474

128 Controls in detailMemory function
You can store up to three different settings
per SmartKey or SmartKey with
KEYLESS-GO*.
The following settings are saved for each
stored position the driver's door: �
Driver’s seat and backrest position
�
Settings for the multicontour seat*
�
Steering wheel position
�
Exterior rear view mirror position
�
Automatic climate control
These key-dependent memory settings
can be deactivated if desired. For informa-
tion on key-dependent memory settings,
see “Setting key-dependency”
(
�page 169).The following settings are not key-depen-
dent. They are stored when using the but-
tons on the front passenger door:
�
Front passenger seat, backrest and
head restraint position, and settings for
multicontour seat*
!Prior to operating the vehicle, the driv-
er should check and adjust the seat
height, seat position fore and aft, and
seat backrest angle if necessary, to en-
sure adequate control, reach, and com-
fort. The head restraint should also be
adjusted for proper height. See also the
section on air bags (
�page 61) for
proper seat positioning.
In addition, adjust the steering wheel to
ensure adequate control, reach, opera-
tion and comfort. Both the inside and
outside rear view mirrors should be ad-
justed for adequate rear vision.
Fasten seat belts. Infants and small
children should be seated in a properly
secured restraint system that complies
with U.S. Federal Motor Vehicle Safety
Standards 213 and 225 and Canadian
Motor Vehicle Safety Standards 213
and 210.2.
Warning!
G
Do not activate the memory function while
driving. Activating the memory function
while driving could cause the driver to lose
control of the vehicle.