Page 114 of 474

112 Controls in detailLocking and unlockingPower closing assist for doors and trunk lid
It is not necessary to slam the door or
trunk lid closed. A pneumatic power-as-
sisted mechanism draws doors and trunk
lid closed quietly and automatically once
door and trunk lid has been latched. When
the pneumatic power-assisted mechanism
has stopped, doors and/or trunk can be
re-opened.Power closing assist for doors
�
Press the doors gently past the initial
engage position into the lock.
The doors close automatically.
Power closing assist for trunk lid
�
Press the trunk lid gently into its lock.
The trunk closes automatically.
Automatic central locking
The doors and the trunk automatically lock
when the ignition is switched on and the
wheels are turning at vehicle speeds of ap-
proximately 9 mph (15 km/h) or more.
You can open a locked door from the in-
side. Open door only when conditions are
safe to do so.
You can deactivate the automatic locking
using the control system (
�page 168).
Warning!
G
To prevent possible personal injury, always
keep hands and fingers away from the door
or trunk opening when closing a door or the
trunk lid. Be especially careful when small
children are around.
In case of danger, pull the inside or outside
door handle, or press the trunk lid lock.
To prevent personal injury, never actuate
the closing assist mechanism by tampering
with the door or trunk lid latch.
Warning!
G
Only drive with the doors closed. Otherwise,
one or more of the doors could open while
the vehicle is in motion, putting you and/or
others at risk.Warning!
G
Only drive with the trunk closed as, among
other dangers such as visibility blockage,
exhaust fumes may enter the vehicle interi-
or.
iThe doors unlock automatically after an
accident if the force of the impact ex-
ceeds a preset threshold. The vehicle
locks automatically when the ignition is
switched on and the wheels are turning
at vehicle speeds of approximately
9 mph (15 km/h) or more. You could
therefore lock yourself out when the
vehicle�
is pushed or towed
�
is on a test stand
Page 142 of 474

140 Controls in detailInstrument clusterA full view illustration of the instrument
cluster can be found in the “At a glance”
section of this manual (
�page 24).
1Reset buttonJ
The instrument cluster is activated when
you:
�
open a door
�
turn on the ignition
�
press the reset buttonJ1
�
switch on the exterior lamps
You can change the instrument cluster set-
tings in the instrument cluster submenu of
the control system (
�page 163).
Instrument cluster illumination
1Knob for adjusting instrument cluster
illumination
Use knob1 to adjust the illumination
brightness for the instrument cluster.
�
Press knob1.
The knob will pop out.
To brighten illumination
�
Turn knob1 in the instrument cluster
clockwise.
The instrument cluster illumination will
brighten.
To dim illumination
�
Turn knob1 in the instrument cluster
counterclockwise.
The instrument cluster illumination will
dim.
iThe instrument cluster illumination is
dimmed or brightened automatically to
suit ambient light conditions.
The instrument cluster illumination will
also be adjusted automatically when
you switch on the vehicle’s exterior
lamps.
Page 143 of 474

141 Controls in detail
Instrument cluster
Coolant temperature gauge
During severe operating conditions,
e.g. stop-and-go traffic, the coolant tem-
perature may rise close to 248°F (120°C),
i.e. close to the red zone of the tempera-
ture gauge.
The engine should not be operated with
the coolant temperature above 248°F
(120°C), i.e. in the red zone of the coolant
temperature gauge. Doing so may cause
serious engine damage which is not cov-
ered by the Mercedes-Benz Limited War-
ranty.
Trip odometer�
Make sure you are viewing the trip
odometer display.
�
If it is not displayed, press the è or
ÿ button on the multifunction
steering wheel repeatedly until the trip
odometer appears (
�page 143).
�
Press and hold reset buttonJ
(�page 140) until the trip odometer is
reset.
Warning!
G
�
Driving when your engine is badly over-
heated can cause some fluids which
may have leaked into the engine com-
partment to catch fire. You could be se-
riously burned.
�
Steam from an overheated engine can
cause serious burns and can occur just
by opening the hood. Stay away from
the engine if you see or hear steam com-
ing from it.
Turn off the engine, get out of the vehicle
and do not stand near the vehicle until the
engine has cooled down.
iExcessive coolant temperature triggers
a warning in the multifunction display
(�page 359).
Page 149 of 474
147 Controls in detail
Control system
Menus, submenus and functions
Menu1
Standard dis-
play
Menu2
AUDIO
Menu3
Telephone*
Menu4
NAVI
Menu5
Distronic*
Menu6
Trip computer
Menu7
Vehicle status
message memory
Menu8
Settings
(�page 148)
(�page 148)
(�page 153)
(�page 155)
(�page 156)
(�page 157)
(�page 159)
(�page 160)
Commands/submenusCall up mainte-
nance service
display
Select radio
station
Load phone
book
Activate
route guid-
ance
Call up set-
tings
Fuel consump-
tion statistics
after start
Call up vehicle mal-
function, warning
and system status
messages stored in
memory
Reset to fac-
tory settings
Check tire in-
flation pres-
sure*
Select satellite
radio station*
(USA only)
Search for
name in
phone book
Fuel consump-
tion statistics
since the last
reset
Instrument
cluster
submenu
Check engine
oil level
Select CD
track
Select
number last
dialed
Call up range
Lighting
submenu
Digital speed-
ometer
Select MP3-CD
track
Vehicle
submenuConvenience
submenu
Page 151 of 474

149 Controls in detail
Control system
Select radio station�
Turn on the radio. Refer to separate
COMAND operating instructions.
�
Press buttonè orÿ repeatedly
until you see the currently tuned sta-
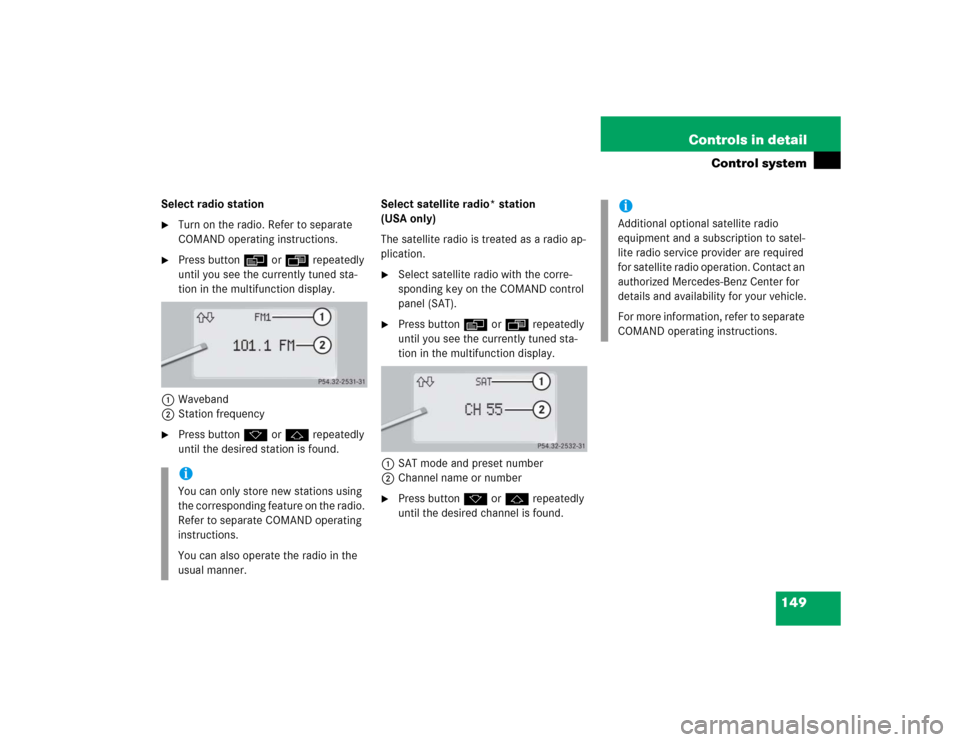
tion in the multifunction display.
1Waveband
2Station frequency
�
Press buttonk orj repeatedly
until the desired station is found.Select satellite radio* station
(USA only)
The satellite radio is treated as a radio ap-
plication.
�
Select satellite radio with the corre-
sponding key on the COMAND control
panel (SAT).
�
Press buttonè orÿ repeatedly
until you see the currently tuned sta-
tion in the multifunction display.
1SAT mode and preset number
2Channel name or number
�
Press buttonk orj repeatedly
until the desired channel is found.
iYou can only store new stations using
the corresponding feature on the radio.
Refer to separate COMAND operating
instructions.
You can also operate the radio in the
usual manner.
iAdditional optional satellite radio
equipment and a subscription to satel-
lite radio service provider are required
for satellite radio operation. Contact an
authorized Mercedes-Benz Center for
details and availability for your vehicle.
For more information, refer to separate
COMAND operating instructions.
Page 158 of 474
156 Controls in detailControl systemDistronic* menu
Use the
DISTRONIC
menu to display the
current settings for your Distronic system.
What information is shown in the display
depends on whether the Distronic system
is active or inactive.
Please refer to the “Driving systems” sec-
tion of this manual (�page 217) for in-
structions on how to activate Distronic.
�
Press buttonè orÿ repeatedly
until you see one of the following two
pictures in the display.Distronic deactivated
When Distronic is deactivated you will see
the standard display in the display.
1Vehicle ahead, if detected
2Actual distance to vehicle ahead
3Preset distance threshold to vehicle
ahead
4Symbol for activated distance warning
function
5Your vehicleDistronic activated
When you activate Distronic, you will see
the set speed for about five seconds in the
Distronic display. The following display
then appears:
1Distronic activated
Page 159 of 474

157 Controls in detail
Control system
Trip computer menu
Use the trip computer menu to call up sta-
tistical data on your vehicle. The following
information is available:Fuel consumption statistics after start
�
Press buttonÿ orè repeatedly
until you see the first function of the
Trip computer menu.
�
Press buttonj ork repeatedly
until you see this message in the left
display:
AFTER START
.
1Distance driven since start
2Time elapsed since start
3Average fuel consumption since start
4Average speed since startIncorporating statistics from the previ-
ous journey in the consumption statis-
tics
When you restart the engine, the
AFTER START
. display flashes for:
�
a distance of approximately 1.25 miles
(two kilometers)
or
�
a duration of two minutes
During this period, the data from the previ-
ous journey can be incorporated as fol-
lows:
�
Press the reset buttonJ in the instru-
ment cluster (
�page 140).
The statistics will be incorporated.
Function
Page
Fuel consumption statistics after
start
157
Fuel consumption statistics
since last reset
158
Resetting fuel consumption sta-
tistics
158
Call up range (distance to empty)
158
iEach time you call up the trip comput-
er, the last function used appears as
the first display.
iIf you do not press the reset buttonJ,
the consumption statistics will be reset
to
0.
Page 160 of 474

158 Controls in detailControl systemFuel consumption since last reset�
Press buttonÿ orè repeatedly
until you see the first function of the
trip computer menu.
�
Press buttonj ork repeatedly
until you see this message in the dis-
play:
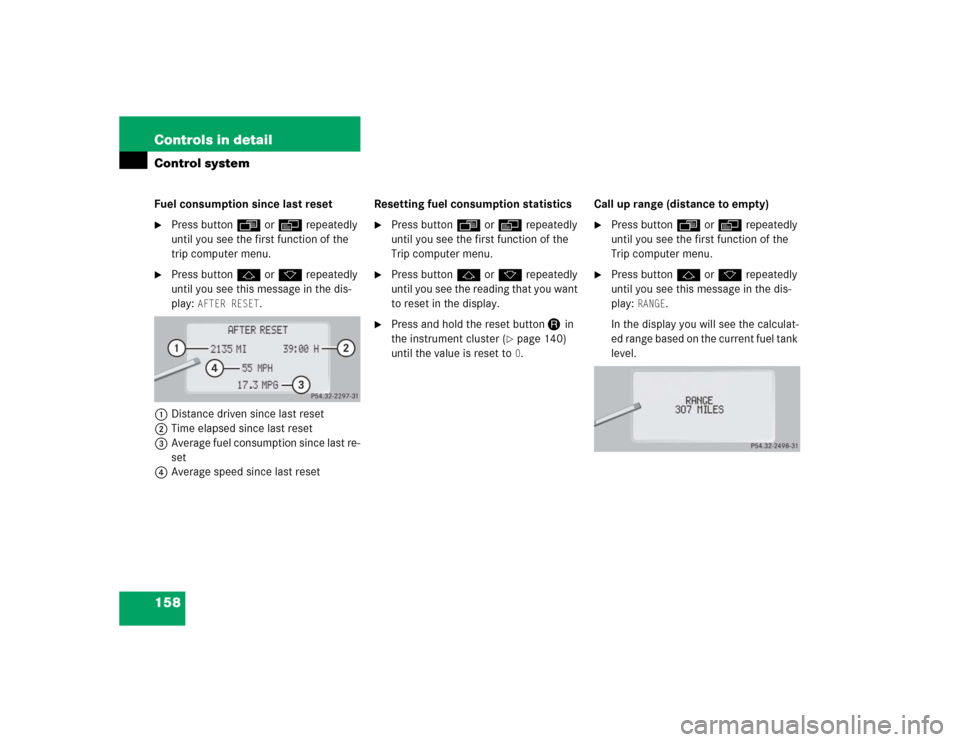
AFTER RESET
.
1Distance driven since last reset
2Time elapsed since last reset
3Average fuel consumption since last re-
set
4Average speed since last resetResetting fuel consumption statistics
�
Press buttonÿ orè repeatedly
until you see the first function of the
Trip computer menu.
�
Press buttonj ork repeatedly
until you see the reading that you want
to reset in the display.
�
Press and hold the reset buttonJ in
the instrument cluster (
�page 140)
until the value is reset to 0.Call up range (distance to empty)
�
Press buttonÿ orè repeatedly
until you see the first function of the
Trip computer menu.
�
Press buttonj ork repeatedly
until you see this message in the dis-
play:
RANGE
.
In the display you will see the calculat-
ed range based on the current fuel tank
level.