Page 141 of 474

139 Controls in detail
Lighting
Courtesy lighting
For better orientation in the dark, courtesy
lamps will illuminate the interior of your ve-
hicle as follows:
With parking lamps switched on:�
the door handles
�
the driver and passenger footwells
With the SmartKey in the starter switch
position1:
�
the door handles
�
the center console
Door entry lamps
For better orientation in the dark, the cor-
responding door entry lamps will switch on
in darkness when you open a door and the
automatic control is activated.
The door entry lamps switch off when the
corresponding door is closed.
Trunk lighting
The trunk lighting switches on if the trunk
lid is opened.
If you leave the trunk open for an extended
period of time, the trunk lighting will switch
off automatically after approximately
ten minutes.
iIf you turn the SmartKey in the starter
switch to position0 and switch off the
exterior headlamps, the door handle
lamps will remain lit for approximately
five minutes.
iIf you turn the SmartKey in the starter
switch to position0 and switch off the
exterior headlamps, the door entry
lamps will remain lit for approximately
five minutes.
Page 181 of 474
179 Controls in detail
Automatic transmission
Automatic shift program
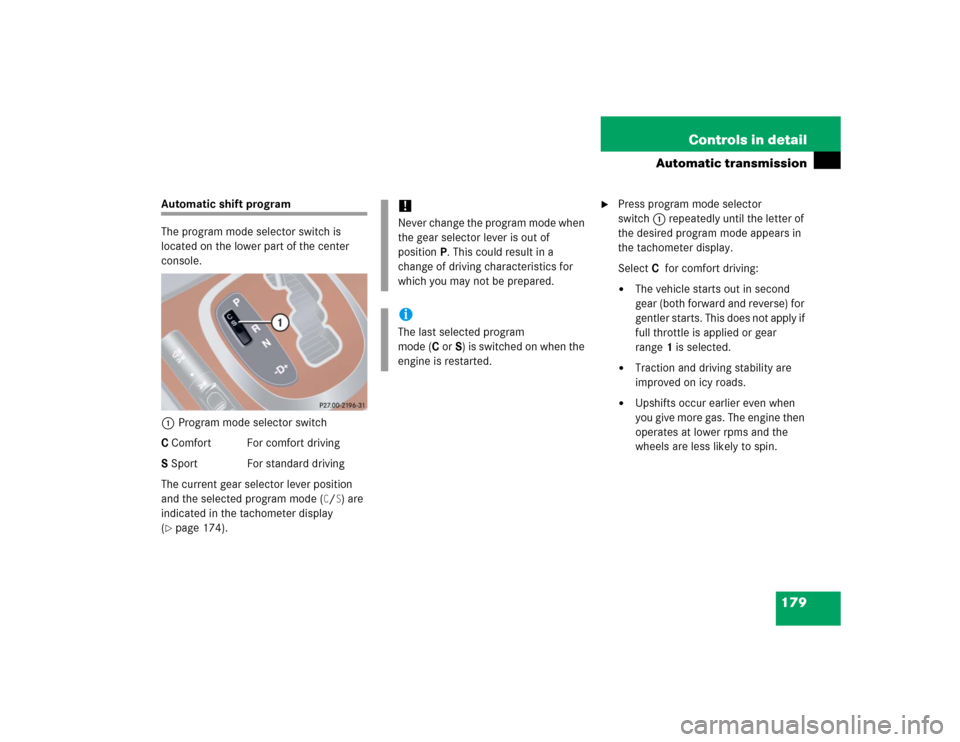
The program mode selector switch is
located on the lower part of the center
console.
1Program mode selector switch
C Comfort For comfort driving
S Sport For standard driving
The current gear selector lever position
and the selected program mode (
C/S) are
indicated in the tachometer display
(
�page 174).
�
Press program mode selector
switch1 repeatedly until the letter of
the desired program mode appears in
the tachometer display.
SelectCfor comfort driving:�
The vehicle starts out in second
gear (both forward and reverse) for
gentler starts. This does not apply if
full throttle is applied or gear
range1 is selected.
�
Traction and driving stability are
improved on icy roads.
�
Upshifts occur earlier even when
you give more gas. The engine then
operates at lower rpms and the
wheels are less likely to spin.
!Never change the program mode when
the gear selector lever is out of
positionP. This could result in a
change of driving characteristics for
which you may not be prepared.iThe last selected program
mode (CorS) is switched on when the
engine is restarted.
Page 185 of 474

183 Controls in detail
Automatic transmission
Manual shift program S 55 AMG
In the manual program modeM you can
change the gears manually on the steering
wheel (
�page 181) or by using the gear
selector lever (
�page 175).The program mode selector switch is
located on the lower part of the center
console.
1Program mode selector switch
M Manual For manual gear shifting
C Comfort For comfort driving
S Sport For standard driving
The current gear selector lever position
and the selected program mode (
M/C/S)
are indicated in the tachometer display
(
�page 174).Activating manual shift program
�
Press program mode selector
switch1 repeatedly until the
M for the
manual program modeM appears in
the tachometer display.
The transmission switches to the
manual program modeM. Automatic
shifting is switched off. The gear range
is not limited.
You can change the gears manually when
the gear selector lever is in positionD. You
can upshift or downshift through the gears
in succession.
!Allow engine to warm up under low
load use. Do not place full load on the
engine until the operating temperature
has been reached.
Shift into reverse gearR or parking
positionP only when the vehicle is
stopped.
Avoid spinning of a drive wheel for an
extended period when driving off on
slippery road surfaces. This may cause
serious damage to the drivetrain which
is not covered by the Mercedes-Benz
Limited Warranty.
Page 193 of 474

191 Controls in detail
Good visibility
Rear window sunshade*
The switch is located on the upper part of
the front center console.
1Rear window sunshade switch�
Switch on ignition (
�page 34).
�
Press switch 1 briefly to raise the sun-
shade.
�
Press switch 1 briefly to lower the
sunshade.
Always raise the sunshade fully for its sup-
port against the window frame.
Rear door window sunshade*�
To raise sunshade pull on the tab and
engage in holder.
�
To lower sunshade disengage tab and
guide retraction.
Warning!
G
When operating the rear window sunshade,
be sure that there is no danger of anyone be-
ing harmed by the raising or lowering proce-
dure.
The raising or lowering procedure can be im-
mediately reversed by pressing switch1.Warning!
G
When leaving the vehicle, always remove the
SmartKey or SmartKey with KEYLESS-GO*
from the starter switch, take it with you, and
lock the vehicle. Do not leave children unat-
tended in the vehicle, or with access to an
unlocked vehicle. Unsupervised use of vehi-
cle equipment can cause an accident
and/or serious personal injury.
!Always guide the sunshade. Do not let
it snap back abruptly, as the retractor
could be damaged.
Page 206 of 474
204 Controls in detailAutomatic climate controlVentilated storage compartment
Depending on vehicle model and configu-
ration, your vehicle is equipped with a stor-
age compartment under the front armrest
(�page 245) which can be ventilated
when the automatic air conditioning is
switched on. If so equipped, the switch is
located inside the storage compartment in
the front. The air temperature is about the
same as that of the center air vents.
The air volume is dependent on the setting
of:
�
Air distribution control
�
Air volume control
�
Air vents in the dashboard
The air temperature is about the same as
that of the dashboard air vents. It cannot
be regulated separately.Switching ventilation on
�
Open the storage compartment in front
of the armrest, see “Storage compart-
ment in front of armrest” (
�page 245).
�
Push upper portion of switch.
Switching ventilation off
�
Open the storage compartment in front
of the armrest, see “Storage compart-
ment in front of armrest” (
�page 245).
�
Push lower portion of switch. Rear passenger compartment adjust-
able air vents
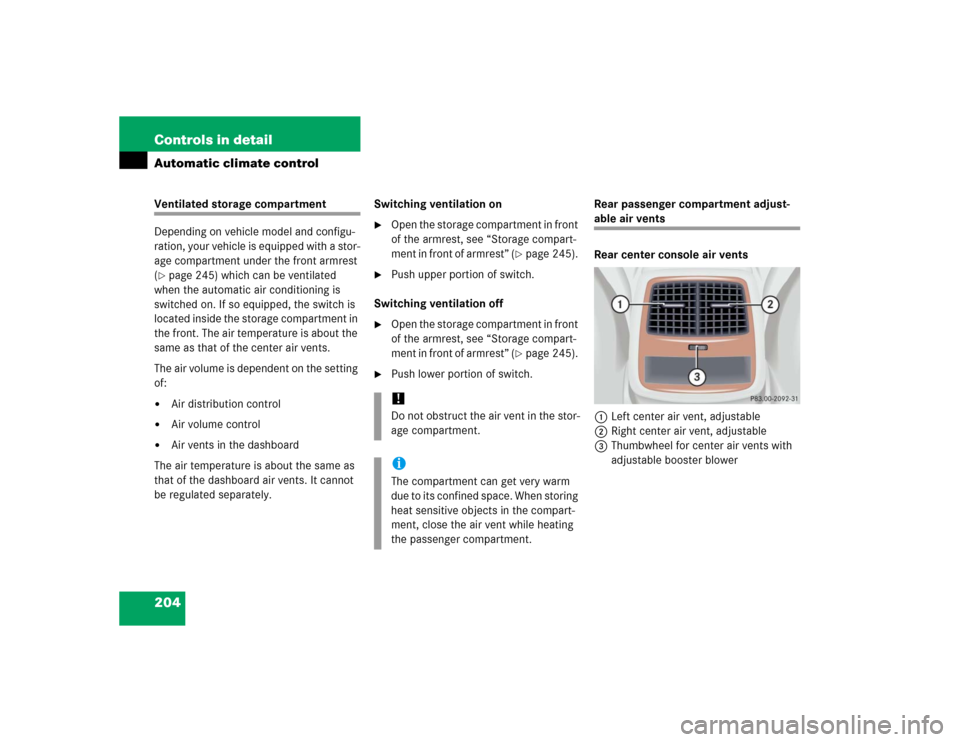
Rear center console air vents
1Left center air vent, adjustable
2Right center air vent, adjustable
3Thumbwheel for center air vents with
adjustable booster blower
!Do not obstruct the air vent in the stor-
age compartment.iThe compartment can get very warm
due to its confined space. When storing
heat sensitive objects in the compart-
ment, close the air vent while heating
the passenger compartment.
Page 232 of 474
230 Controls in detailDriving systemsVehicle level control with Airmatic
Your vehicle automatically adjusts its ride
height to:�
reduce fuel consumption
�
increase vehicle safety
The vehicle chassis ride height is raised or
lowered according to the selected level
setting and to the vehicle speed:
�
With increasing speed, ride height is re-
duced by up to approximately ¾ in
(20 mm).
�
With decreasing speed, the ride height
is again raised to the selected vehicle
level.The following vehicle level settings can be
selected when the vehicle is stationary:
Select the “Raised” level setting only when
required by current driving conditions.
Otherwise:
�
Fuel consumption may increase
�
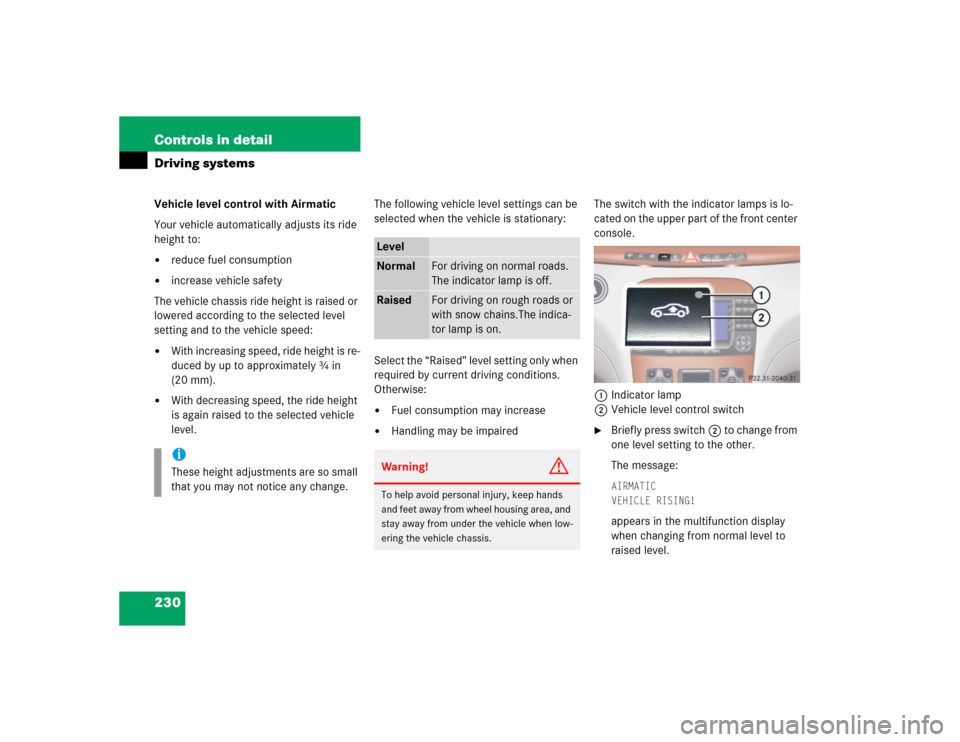
Handling may be impairedThe switch with the indicator lamps is lo-
cated on the upper part of the front center
console.
1Indicator lamp
2Vehicle level control switch
�
Briefly press switch2 to change from
one level setting to the other.
The message:AIRMATIC
VEHICLE RISING! appears in the multifunction display
when changing from normal level to
raised level.
iThese height adjustments are so small
that you may not notice any change.
LevelNormal
For driving on normal roads.
The indicator lamp is off.
Raised
For driving on rough roads or
with snow chains.The indica-
tor lamp is on.
Warning!
G
To help avoid personal injury, keep hands
and feet away from wheel housing area, and
stay away from under the vehicle when low-
ering the vehicle chassis.
Page 233 of 474
231 Controls in detail
Driving systems
The indicator lamp is then lit. The dis-
play switches off when the vehicle is
raised.
�
Press switch2 again to lower the ve-
hicle. The indicator lamp is off.
The selected vehicle level setting remains
stored in memory even if the engine is
turned off and restarted except when you
�
exceed a speed of 75 mph (120 km/h)
or
�
maintain a speed of between 50 mph
(80 km/h) and 75 mph (120 km/h) for
more than 5 minutes
The vehicle then lowers to regular level.
The message:
AIRMATIC
LEVELING CANCELLEDappears in the multifunction display and
the indicator lamp is off. The display
switches off when the vehicle is raised.
Active Body Control (ABC)*
The ABC system automatically selects the
optimum suspension tuning and ride
height for your vehicle.
Suspension tuning
The suspension tuning is set according to:�
Your driving style
�
Road surface conditions
�
The vehicle loading
�
Your choice of suspension style,
“sporty” or “regular”, which you select
using the ABC button
The selected suspension style is stored
in memory, even after the SmartKey is
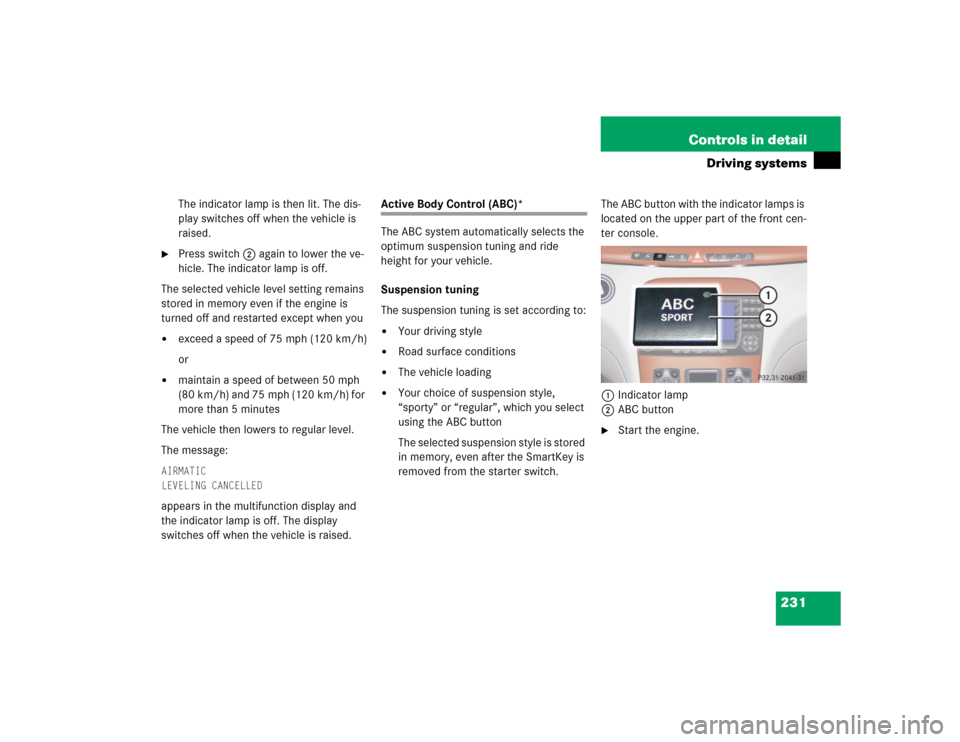
removed from the starter switch.The ABC button with the indicator lamps is
located on the upper part of the front cen-
ter console.
1Indicator lamp
2ABC button
�
Start the engine.
Page 235 of 474
233 Controls in detail
Driving systems
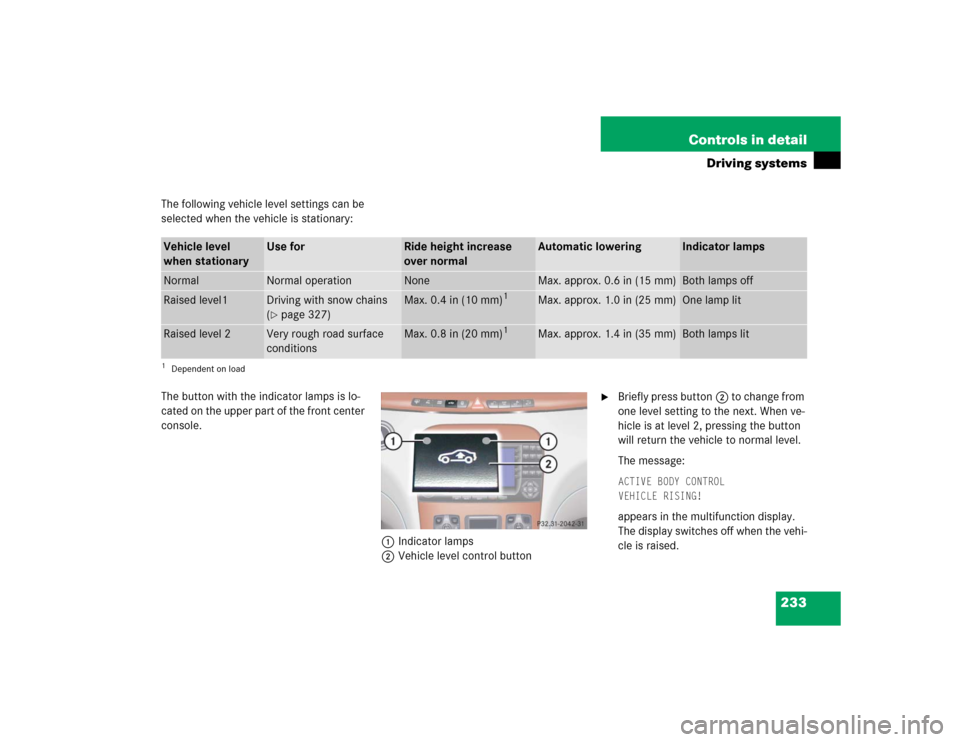
The following vehicle level settings can be
selected when the vehicle is stationary:
The button with the indicator lamps is lo-
cated on the upper part of the front center
console.
1Indicator lamps
2Vehicle level control button
�
Briefly press button2 to change from
one level setting to the next. When ve-
hicle is at level 2, pressing the button
will return the vehicle to normal level.
The message:ACTIVE BODY CONTROL
VEHICLE RISING! appears in the multifunction display.
The display switches off when the vehi-
cle is raised.
Vehicle level
when stationary
Use for
Ride height increase
over normal
Automatic lowering
Indicator lamps
Normal
Normal operation
None
Max. approx. 0.6 in (15 mm)
Both lamps off
Raised level1
Driving with snow chains
(�page 327)
Max. 0.4 in (10 mm)
1
1Dependent on load
Max. approx. 1.0 in (25 mm)
One lamp lit
Raised level 2
Very rough road surface
conditions
Max. 0.8 in (20 mm)
1
Max. approx. 1.4 in (35 mm)
Both lamps lit