Page 382 of 474
380 Practical hintsWhere will I find ...?The vehicle tool kit includes:�
One interchangeable slot/Phillips
screwdriver
�
One towing eye bolt
�
One wheel bolt wrench with socket
wrench
�
One alignment bolt
�
One pair of gloves
�
One fuse extractor
�
One fuse chart for the main fuse box
�
Spare fusesVehicle jack
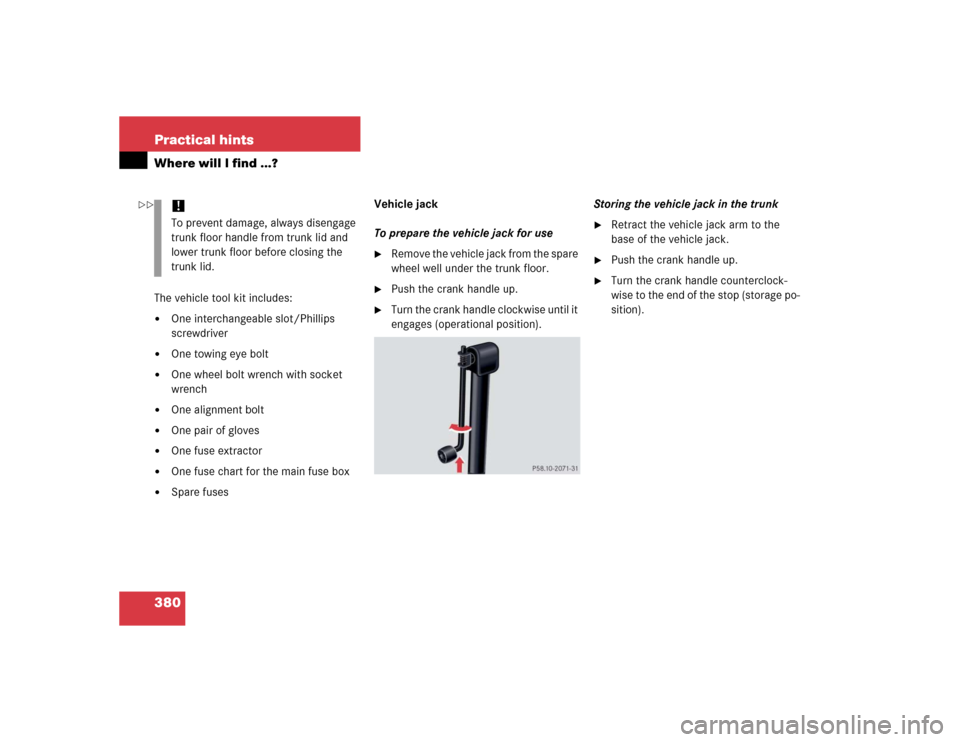
To prepare the vehicle jack for use
�
Remove the vehicle jack from the spare
wheel well under the trunk floor.
�
Push the crank handle up.
�
Turn the crank handle clockwise until it
engages (operational position).Storing the vehicle jack in the trunk
�
Retract the vehicle jack arm to the
base of the vehicle jack.
�
Push the crank handle up.
�
Turn the crank handle counterclock-
wise to the end of the stop (storage po-
sition).
!To prevent damage, always disengage
trunk floor handle from trunk lid and
lower trunk floor before closing the
trunk lid.
��
Page 407 of 474
405 Practical hints
Battery
Reconnecting the battery�
Turn off all electrical consumers.
�
Connect the positive lead and fasten its
cover2.
�
Connect negative lead3.Batteries contain materials that can harm
the environment if disposed of improperly.
Large 12-volt storage batteries contain
lead. Recycling of batteries is the preferred
method of disposal. Many states require
sellers of batteries to accept old batteries
for recycling.!Never invert the terminal connections.!The battery, its filler caps and the vent
tube must always be securely installed
when the vehicle is in operation.
iThe following procedures must be car-
ried out following any interruption of
battery power (e.g. due to reconnect-
ing):�
Set the clock (see COMAND opera-
tor’s manual).
�
Synchronize the ESP (
�page 352).
�
Synchronize side windows
(�page 209).
�
Synchronize tilt/sliding sunroof
(�page 213).
Page 450 of 474

448 IndexClock 25
Closing 58
Cup holder 250
Glove box 244
Hood 287
Power tilt/sliding sunroof 211
Power windows 207, 208
Side windows 208
Trunk 105
Closing from the inside automatically*
Trunk 105
Closing in an emergency
Power tilt/sliding sunroof 386
Cockpit 22, 438
Cockpit management and data system
(COMAND) 438
Cold tire inflation pressure 322
COMAND 438
COMAND* see separate operating instruc-
tions
Combination switch 135
High beam 50
High beam flasher 135
Turn signals 51
Windshield wipers 52Control and operation of radio
transmitters 280
Control system 143, 438
AUDIO menu 148
Checking oil level 288
Convenience submenu 169
Display digital speedometer 148
Distronic* menu 156
Functions 145, 147
Instrument cluster submenu 163
Lighting submenu 164
Menus 146, 147
Multifunction display 143
Multifunction steering wheel 144
NAVI menu 155
Settings menu 160
Standard display menu 148
Submenus 145, 147
TEL* menu 153
Trip computer menu 157
Vehicle status message memory
menu 159
Vehicle submenu 168Convenience submenu 169
Activating easy-entry/exit
feature 170
Adjusting drive-dynamic seat* 172
Setting Key-dependency 169
Setting parking position for exterior
rear view mirror 171
Coolant 292
Adding 293
Checking level 292
Messages in display 358, 359
Temperature 282
Temperature gauge 141
Warning lamp 359
Coolant level
Checking 292
Coolant temperature gauge 25
Courtesy lighting 139