Page 89 of 356
87 Controls in detail
Locking and unlocking
Seats
Memory function*
Lighting
Instrument cluster
Automatic transmission
Transmission control – LOW RANGE mode
Good visibility
Automatic climate control
Power windows
Power tilt / sliding sunroof*
Driving systems
Loading
Useful features
Page 112 of 356
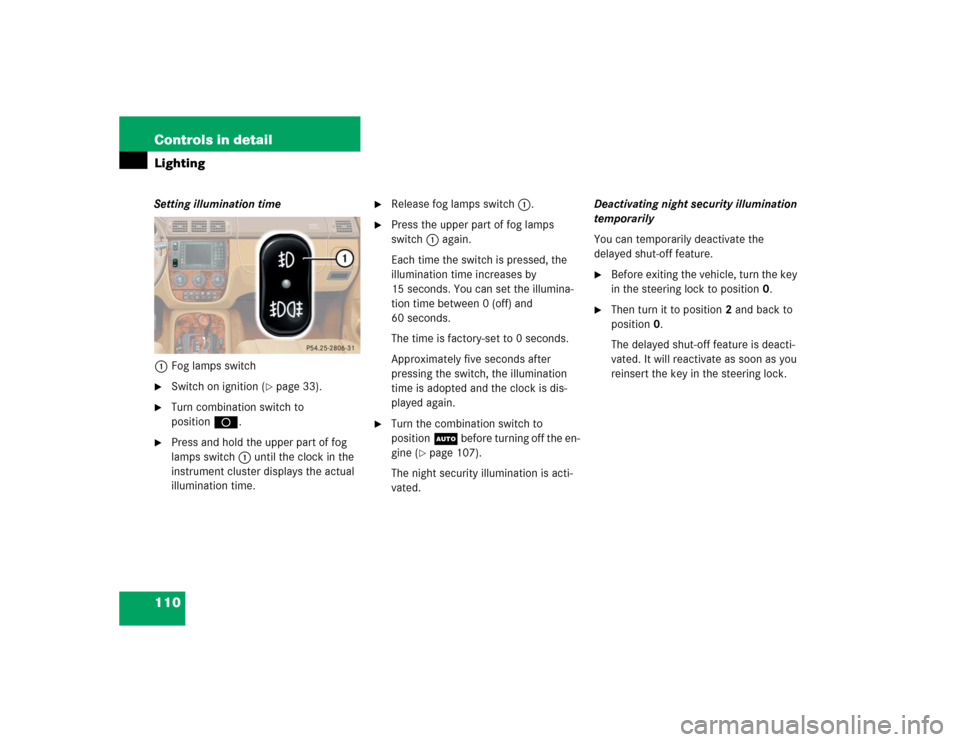
110 Controls in detailLightingSetting illumination time
1Fog lamps switch�
Switch on ignition (
�page 33).
�
Turn combination switch to
positionD.
�
Press and hold the upper part of fog
lamps switch1 until the clock in the
instrument cluster displays the actual
illumination time.
�
Release fog lamps switch1.
�
Press the upper part of fog lamps
switch1 again.
Each time the switch is pressed, the
illumination time increases by
15 seconds. You can set the illumina-
tion time between 0 (off) and
60 seconds.
The time is factory-set to 0 seconds.
Approximately five seconds after
pressing the switch, the illumination
time is adopted and the clock is dis-
played again.
�
Turn the combination switch to
positionU before turning off the en-
gine (
�page 107).
The night security illumination is acti-
vated.Deactivating night security illumination
temporarily
You can temporarily deactivate the
delayed shut-off feature.
�
Before exiting the vehicle, turn the key
in the steering lock to position0.
�
Then turn it to position2 and back to
position0.
The delayed shut-off feature is deacti-
vated. It will reactivate as soon as you
reinsert the key in the steering lock.
Page 113 of 356
111 Controls in detail
Lighting
Locator lighting
With the locator lighting feature activated,
the following lamps will switch on when the
vehicle is unlocked by remote control dur-
ing darkness:�
Tail and parking lamps
�
License plate lamps
�
Side marker lamps
�
Front fog lamps
�
Additional lamps in the exterior rear
view mirrors.
The locator lighting switches off when the
driver’s door is opened.
If you do not open a door after unlocking
by remote control the lamps will switch off
automatically after of approximately
40 seconds.
�
Turn the combination switch to
positionU when exiting the vehicle
(�page 107).
The locator lighting is activated.High beam
�
Turn the combination switch to
positionõ or U (
�page 107).
�
Push the combination switch in direc-
tion of arrow1 to switch on the high
beam (
�page 107).
The high beam headlamp indicator
lampA in the instrument cluster
comes on.
�
Pull the combination switch in direction
of arrow2 to its original position to
switch off the high beam.
The high beam indicator lampA in
the instrument cluster goes out.
High beam flasher
�
Pull the combination switch briefly in
direction of arrow2 (
�page 107).
Fog lampsWarning!
G
In low ambient lighting or foggy conditions,
only switch from positionU toõ with
the vehicle at a standstill. Switching
fromU toõ will briefly switch off the
headlamps. Doing so while driving in low
ambient lighting conditions may result in an
accident. iFog lamps will operate with the parking
lamps and / or low beam headlamps
on. Fog lamps should only be used in
conjunction with low beam headlamps.
Consult your State or Province Motor
Vehicle Regulations regarding permis-
sible lamp operation.
Page 114 of 356
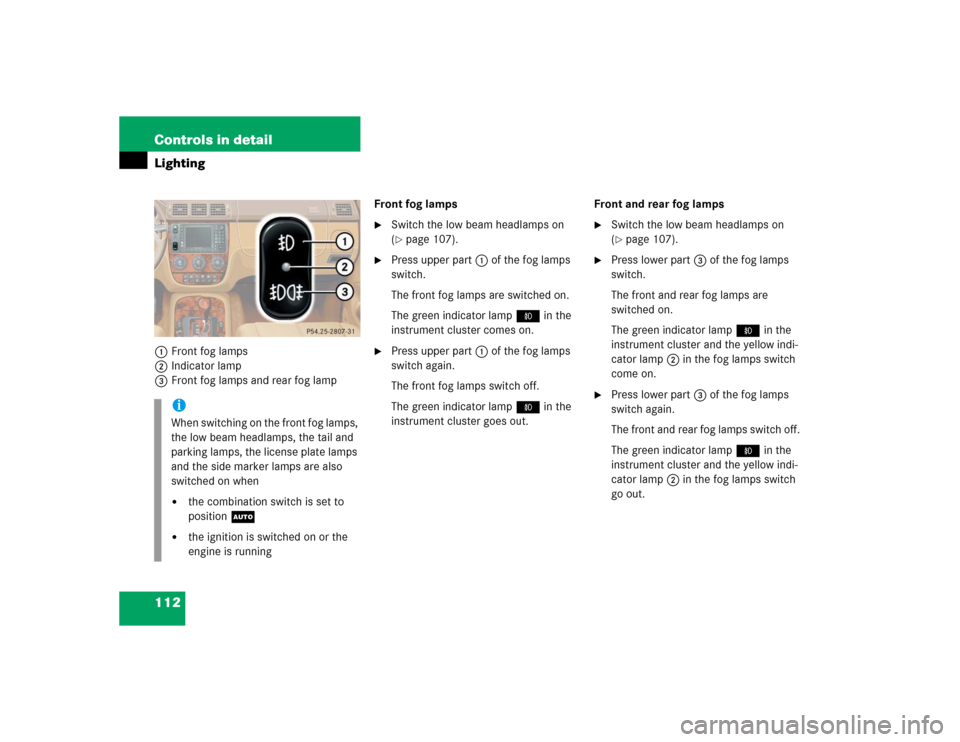
112 Controls in detailLighting1Front fog lamps
2Indicator lamp
3Front fog lamps and rear fog lampFront fog lamps
�
Switch the low beam headlamps on
(�page 107).
�
Press upper part1 of the fog lamps
switch.
The front fog lamps are switched on.
The green indicator lamp‡ in the
instrument cluster comes on.
�
Press upper part1 of the fog lamps
switch again.
The front fog lamps switch off.
The green indicator lamp‡ in the
instrument cluster goes out.Front and rear fog lamps
�
Switch the low beam headlamps on
(�page 107).
�
Press lower part3 of the fog lamps
switch.
The front and rear fog lamps are
switched on.
The green indicator lamp‡ in the
instrument cluster and the yellow indi-
cator lamp2 in the fog lamps switch
come on.
�
Press lower part3 of the fog lamps
switch again.
The front and rear fog lamps switch off.
The green indicator lamp‡ in the
instrument cluster and the yellow indi-
cator lamp2 in the fog lamps switch
go out.
iWhen switching on the front fog lamps,
the low beam headlamps, the tail and
parking lamps, the license plate lamps
and the side marker lamps are also
switched on when�
the combination switch is set to
positionU
�
the ignition is switched on or the
engine is running
Page 119 of 356
117 Controls in detail
Instrument cluster
�Instrument cluster
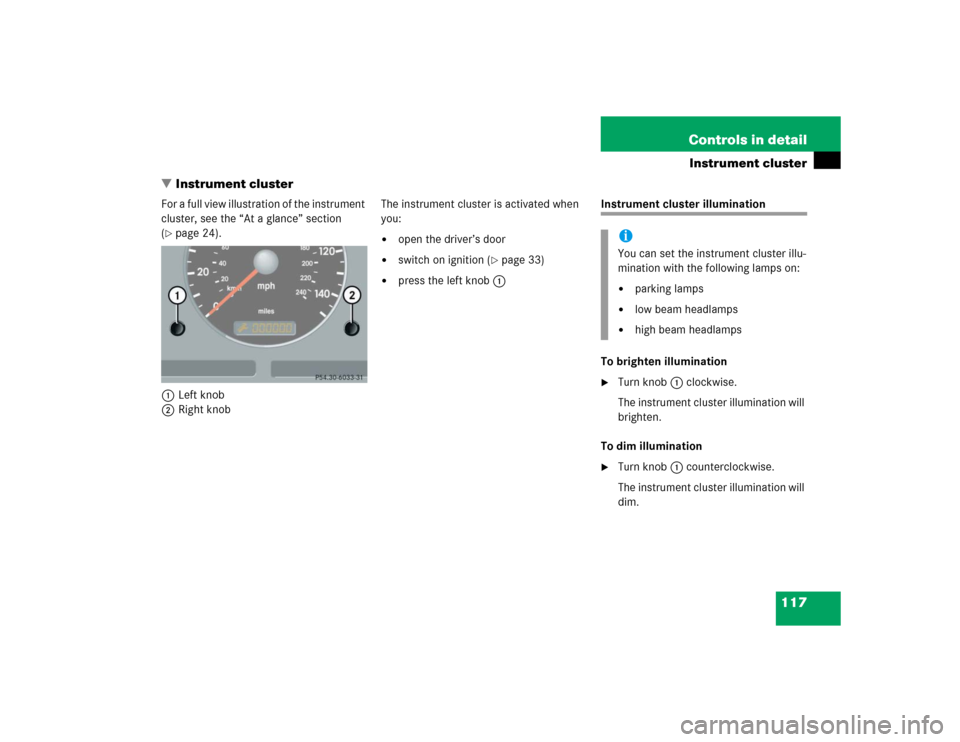
For a full view illustration of the instrument
cluster, see the “At a glance” section
(�page 24).
1Left knob
2Right knobThe instrument cluster is activated when
you:
�
open the driver’s door
�
switch on ignition (
�page 33)
�
press the left knob1
Instrument cluster illumination
To brighten illumination�
Turn knob1 clockwise.
The instrument cluster illumination will
brighten.
To dim illumination
�
Turn knob1 counterclockwise.
The instrument cluster illumination will
dim.iYou can set the instrument cluster illu-
mination with the following lamps on:�
parking lamps
�
low beam headlamps
�
high beam headlamps
Page 120 of 356
118 Controls in detailInstrument clusterCoolant temperature gauge
Under normal driving conditions, the cool-
ant temperature may rise to 248°F
(120°C). The coolant temperature may
climb to the red marking:�
at high outside temperatures
�
during stop-and-go city traffic
�
when driving on hilly terrain
The engine should not be operated with
the coolant temperature in the red zone.
Doing so may cause serious engine dam-
age which is not covered by the
Mercedes-Benz Limited Warranty.
Display in the speedometer
Changing display�
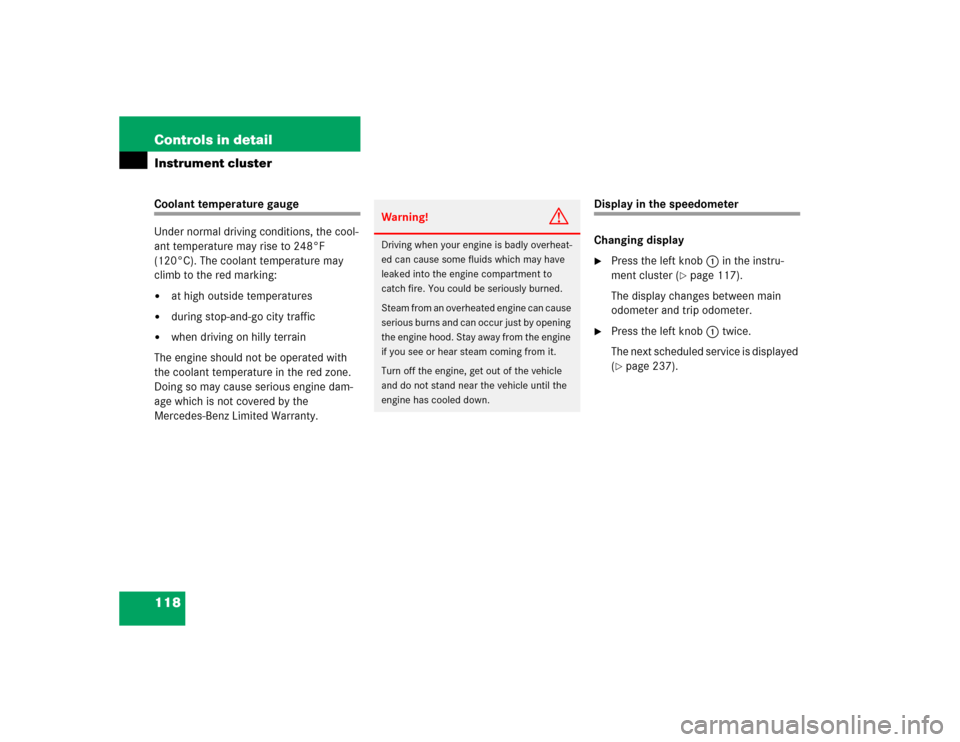
Press the left knob1 in the instru-
ment cluster (
�page 117).
The display changes between main
odometer and trip odometer.
�
Press the left knob1 twice.
The next scheduled service is displayed
(�page 237).
Warning!
G
Driving when your engine is badly overheat-
ed can cause some fluids which may have
leaked into the engine compartment to
catch fire. You could be seriously burned.
Steam from an overheated engine can cause
serious burns and can occur just by opening
the engine hood. Stay away from the engine
if you see or hear steam coming from it.
Turn off the engine, get out of the vehicle
and do not stand near the vehicle until the
engine has cooled down.
Page 121 of 356
119 Controls in detail
Instrument cluster
Resetting trip odometer�
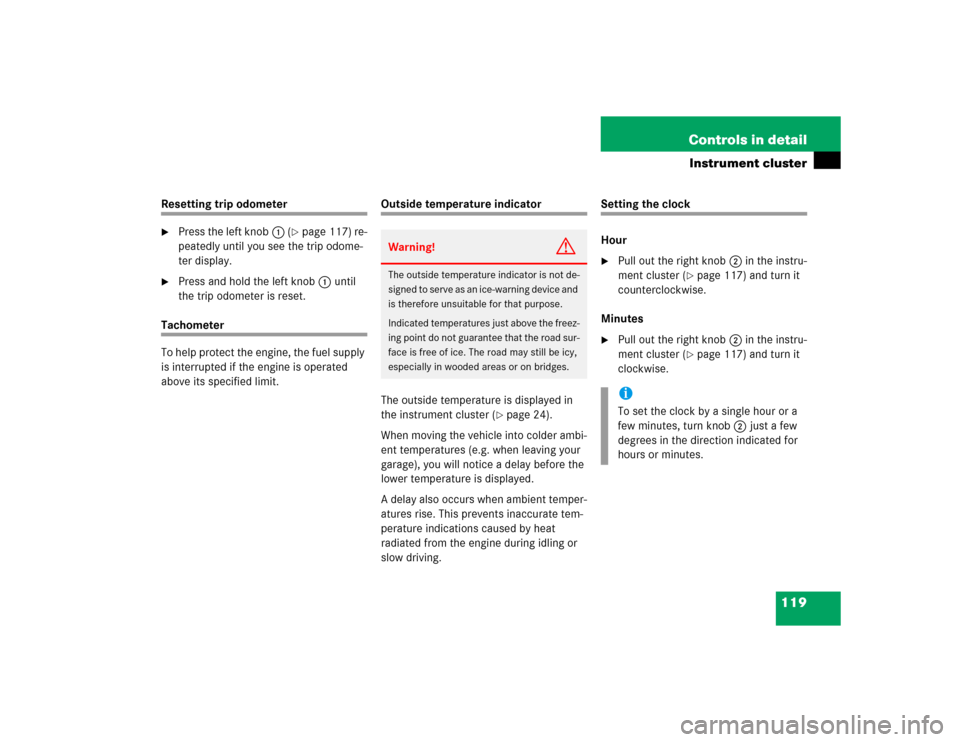
Press the left knob1 (
�page 117) re-
peatedly until you see the trip odome-
ter display.
�
Press and hold the left knob1 until
the trip odometer is reset.
Tachometer
To help protect the engine, the fuel supply
is interrupted if the engine is operated
above its specified limit.
Outside temperature indicator
The outside temperature is displayed in
the instrument cluster (
�page 24).
When moving the vehicle into colder ambi-
ent temperatures (e.g. when leaving your
garage), you will notice a delay before the
lower temperature is displayed.
A delay also occurs when ambient temper-
atures rise. This prevents inaccurate tem-
perature indications caused by heat
radiated from the engine during idling or
slow driving.
Setting the clock
Hour�
Pull out the right knob2 in the instru-
ment cluster (
�page 117) and turn it
counterclockwise.
Minutes
�
Pull out the right knob2 in the instru-
ment cluster (
�page 117) and turn it
clockwise.
Warning!
G
The outside temperature indicator is not de-
s i g n e d t o s e r v e a s a n i c e - w a r n i n g d e v i c e a n d
is therefore unsuitable for that purpose.
Indicated temperatures just above the freez-
ing point do not guarantee that the road sur-
face is free of ice. The road may still be icy,
especially in wooded areas or on bridges.
iTo set the clock by a single hour or a
few minutes, turn knob2 just a few
degrees in the direction indicated for
hours or minutes.
Page 227 of 356

225 Operation
Engine compartment
The display
------
flashes in the
speedometer display, if a proper oil level
check cannot be performed.
�
If engine is at normal operating
temperature, wait five minutes before
repeating check procedure.
�
If engine is not yet at normal operating
temperature, wait 30 minutes before
repeating check procedure.
See the “Practical hints” section
(
�page 260) if the low engine oil level
warning lamp in the instrument cluster
flashes.Checking engine oil level with the oil
dipstick
When checking the oil level the vehicle
must
�
be parked on level ground
�
be at normal operating temperature
�
have been stationary for at least five
minutes with the engine turned off
To check the engine oil level with the oil
dipstick, do the following:
�
Open the hood (
�page 222).
�
Pull out oil dipstick1 (
�page 226).
�
Wipe oil dipstick1 clean.
�
Fully insert oil dipstick1 into the
dipstick guide tube.
�
Pull out oil dipstick1 again after
approximately three seconds to obtain
accurate reading.
Oil dipstickThe oil level is correct when it is between
the lower (min) and upper (max) mark of
the oil dipstick.
iPerform the engine oil level check with
the dipstick if it cannot be completed
via the speedometer display
(�page 225).
In this case we recommend that you
have the system checked at a
Mercedes-Benz Light Truck Center.
iThe engine oil level can be checked by
either the oil dipstick or via the
speedometer display in the instrument
cluster (
�page 224). The amount of
engine oil needed is shown more
precisely in the speedometer display.