Page 84 of 356
82 Safety and SecurityDriving safety systems
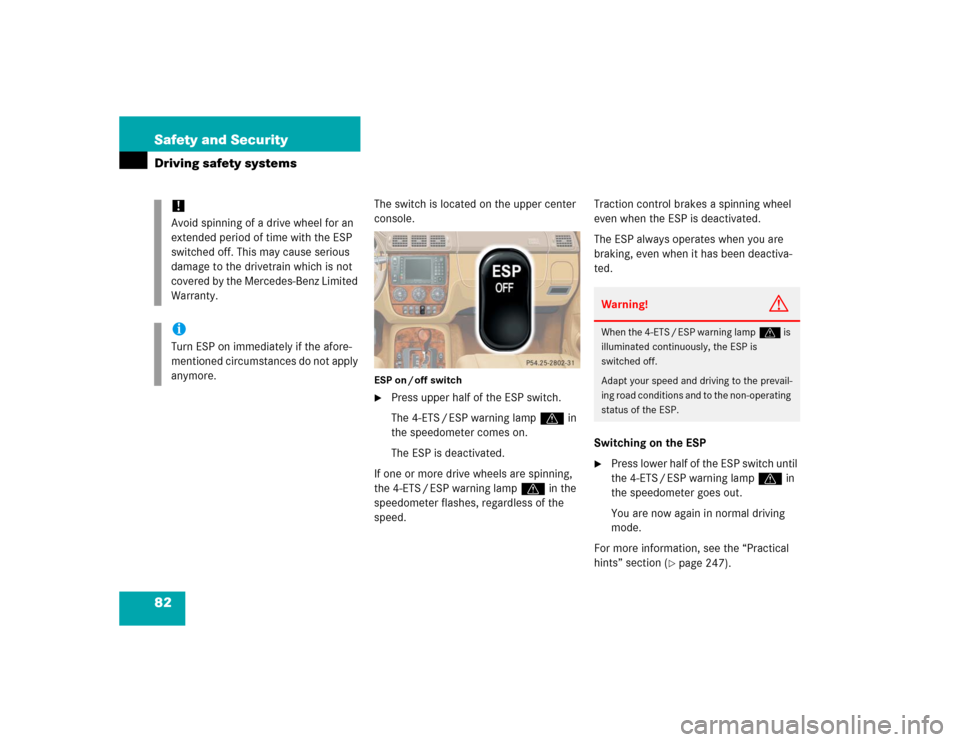
The switch is located on the upper center
console.ESP on / off switch�
Press upper half of the ESP switch.
The 4-ETS / ESP warning lampv in
the speedometer comes on.
The ESP is deactivated.
If one or more drive wheels are spinning,
the 4-ETS / ESP warning lampv in the
speedometer flashes, regardless of the
speed.Traction control brakes a spinning wheel
even when the ESP is deactivated.
The ESP always operates when you are
braking, even when it has been deactiva-
ted.
Switching on the ESP
�
Press lower half of the ESP switch until
the 4-ETS / ESP warning lampv in
the speedometer goes out.
You are now again in normal driving
mode.
For more information, see the “Practical
hints” section (
�page 247).
!Avoid spinning of a drive wheel for an
extended period of time with the ESP
switched off. This may cause serious
damage to the drivetrain which is not
covered by the Mercedes-Benz Limited
Warranty.iTurn ESP on immediately if the afore-
mentioned circumstances do not apply
anymore.
Warning!
G
When the 4-ETS / ESP warning lampv is
illuminated continuously, the ESP is
switched off.
Adapt your speed and driving to the prevail-
ing road conditions and to the non-operating
status of the ESP.
Page 85 of 356
83 Safety and Security
Anti-theft systems
�Anti-theft systems
Immobilizer
The immobilizer prevents unauthorized
persons from starting your vehicle.
Activating
Removing the key from the steering lock
activates the immobilizer.
Deactivating
Turning the key in the steering lock to
position2 (
�page 33) deactivates the im-
mobilizer.
Anti-theft alarm system
Once the alarm system has been armed, a
visual and audible alarm is triggered when
someone:�
opens a door
�
opens the liftgate
�
opens the hood
The alarm will stay on even if the activating
element (a door, for example) is immedi-
ately closed.
The alarm system will also be triggered
when
�
someone attempts to raise the vehicle
�
unlocking and opening the driver’s
door with the mechanical keyArming the alarm system
The alarm system is armed after locking
the vehicle with the remote control. The
turn signal lamps flash three times to indi-
cate that the alarm system is activated. A
red indicator lamp in the center console
will flash after approximately 10 seconds
when the alarm system is completely
armed (
�page 27).
iIn case the engine cannot be started
(yet the vehicle’s battery is charged),
the system is not operational. Contact
an authorized Mercedes-Benz Light
Truck Center or call
1-800-FOR-MERCedes (in the USA), or
1-800-387-0100 (in Canada).
iIf the alarm stays on for more than
30 seconds, a call to the Response
Center is initiated automatically by the
Tele Aid* system (
�page 174) provid-
ed Tele Aid service was subscribed to
and properly activated, and that neces-
sary cellular service and GPS coverage
are available.
Page 86 of 356

84 Safety and SecurityAnti-theft systemsDisarming the alarm system
The alarm system is disarmed when you
unlock your vehicle with the remote con-
trol. The turn signal lamps flash once to in-
dicate that the alarm system is
deactivated.Canceling the alarm
To cancel the alarm:
�
Switch on ignition (
�page 33).
or
�
Press theŒ or ‹button on the
remote control.
The alarm is canceled.
Tow-away alarm, glass breakage
sensor
The tow-away alarm and the glass break-
age sensor are part of the anti-theft alarm
system.
Once the tow-away alarm is armed, a visual
and audible alarm will be triggered when
someone:
�
attempts to raise the vehicle
�
breaks a window and reaches into the
passenger compartment
iIf the turn signal lamps do not flash
three times, the tow-away - glass
breakage sensor is malfunctioning or
one of the following elements may not
be properly closed:�
a door
�
the liftgate
�
the hood
Close the respective element and lock
the vehicle again.
iThe alarm system will rearm automati-
cally again after approximately
40 seconds if one of the doors or the
liftgate is not opened.
iThe tow-away protection alarm is trig-
gered, for example, if the vehicle is
lifted on one side.
If the alarm stays on for more than
30 seconds, a call to the Response
Center is initiated automatically by the
Tele Aid* system (
�page 174) provid-
ed Tele Aid service was subscribed to
and properly activated, and that neces-
sary cellular service and GPS coverage
are available.
Page 87 of 356
85 Safety and Security
Anti-theft systems
Arming tow-away alarm and glass
breakage sensor
When you lock your vehicle, the tow-away
and glass breakage sensor alarm is auto-
matically armed.
Disarming tow-away alarm and glass
breakage sensor
To prevent triggering the tow-away alarm
feature, switch off the tow-away alarm and
glass breakage sensor before towing the
vehicle, or when parking on a surface sub-
ject to movement, such as a ferry or auto
train.Vehicles with trip computer*
The buttons are located in the overhead
control panel.
1Reset button
2Mode button
3Display
4Glass breakage sensor
�
Turn key in steering lock to position2
(�page 33).
�
Return key to position0 and remove it
from the steering lock.
�
Within 30 seconds press button1
or2.
The display shows
OFF
.
�
Exit vehicle and lock vehicle with
remote control (
�page 32).
The tow-away alarm and glass breakage
sensor remain switched off until the key is
inserted in steering lock and turned to
position1.
Page 88 of 356
86 Safety and SecurityAnti-theft systemsVehicles without trip computer*
The buttons are located in the overhead
control panel.
1Switching off tow-away alarm and glass
breakage sensor
�
Turn key in steering lock to position2
(�page 33).
�
Return key to position0 and remove it
from the steering lock.
�
Within 30 seconds press button1 on
the right or left side.
�
Exit vehicle and lock vehicle with
remote control (
�page 32).
The tow-away alarm and glass breakage
sensor remain switched off until the key is
inserted in steering lock and turned to
position1.Canceling the alarm
To cancel the alarm:
�
Switch on ignition (
�page 33).
or
�
Press theŒ or ‹button on the
remote control.
The alarm is canceled.
Page 102 of 356
100 Controls in detailSeatsThe rear seats are divided asymmetrically.
To enlarge the cargo compartment you can
adjust the left and right part separately.
The following changes are possible:�
moving the seat fore and aft
�
folding down the backrest
�
lowering the seat
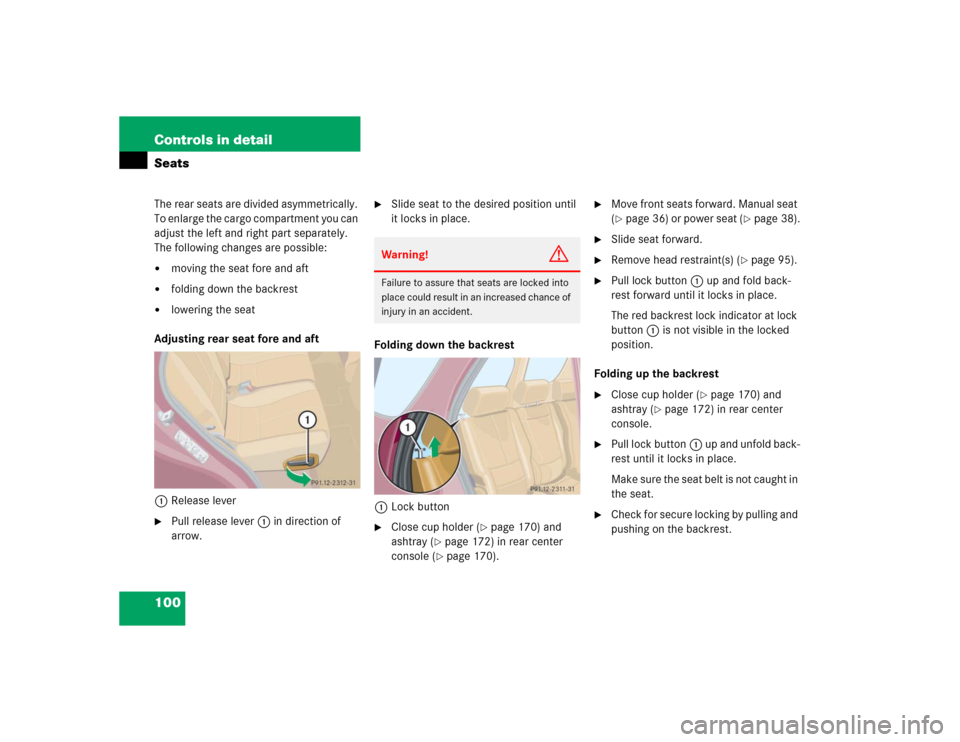
Adjusting rear seat fore and aft
1Release lever
�
Pull release lever1 in direction of
arrow.
�
Slide seat to the desired position until
it locks in place.
Folding down the backrest
1Lock button
�
Close cup holder (
�page 170) and
ashtray (
�page 172) in rear center
console (�page 170).
�
Move front seats forward. Manual seat
(�page 36) or power seat (
�page 38).
�
Slide seat forward.
�
Remove head restraint(s) (
�page 95).
�
Pull lock button1 up and fold back-
rest forward until it locks in place.
The red backrest lock indicator at lock
button1 is not visible in the locked
position.
Folding up the backrest
�
Close cup holder (
�page 170) and
ashtray (
�page 172) in rear center
console.
�
Pull lock button1 up and unfold back-
rest until it locks in place.
Make sure the seat belt is not caught in
the seat.
�
Check for secure locking by pulling and
pushing on the backrest.
Warning!
G
Failure to assure that seats are locked into
place could result in an increased chance of
injury in an accident.
Page 104 of 356
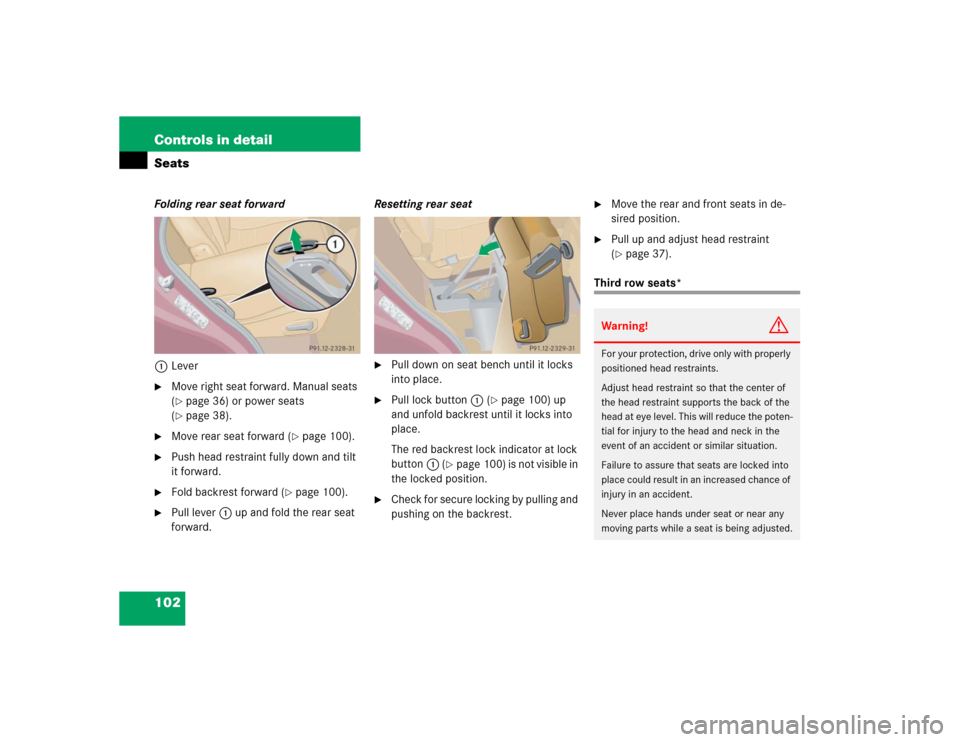
102 Controls in detailSeatsFolding rear seat forward
1Lever�
Move right seat forward. Manual seats
(�page 36) or power seats
(�page 38).
�
Move rear seat forward (
�page 100).
�
Push head restraint fully down and tilt
it forward.
�
Fold backrest forward (
�page 100).
�
Pull lever1 up and fold the rear seat
forward.Resetting rear seat
�
Pull down on seat bench until it locks
into place.
�
Pull lock button1 (
�page 100) up
and unfold backrest until it locks into
place.
The red backrest lock indicator at lock
button1 (
�page 100) is not visible in
the locked position.
�
Check for secure locking by pulling and
pushing on the backrest.
�
Move the rear and front seats in de-
sired position.
�
Pull up and adjust head restraint
(�page 37).
Third row seats*Warning!
G
For your protection, drive only with properly
positioned head restraints.
Adjust head restraint so that the center of
the head restraint supports the back of the
head at eye level. This will reduce the poten-
tial for injury to the head and neck in the
event of an accident or similar situation.
Failure to assure that seats are locked into
place could result in an increased chance of
injury in an accident.
Never place hands under seat or near any
moving parts while a seat is being adjusted.
Page 105 of 356
103 Controls in detailSeats
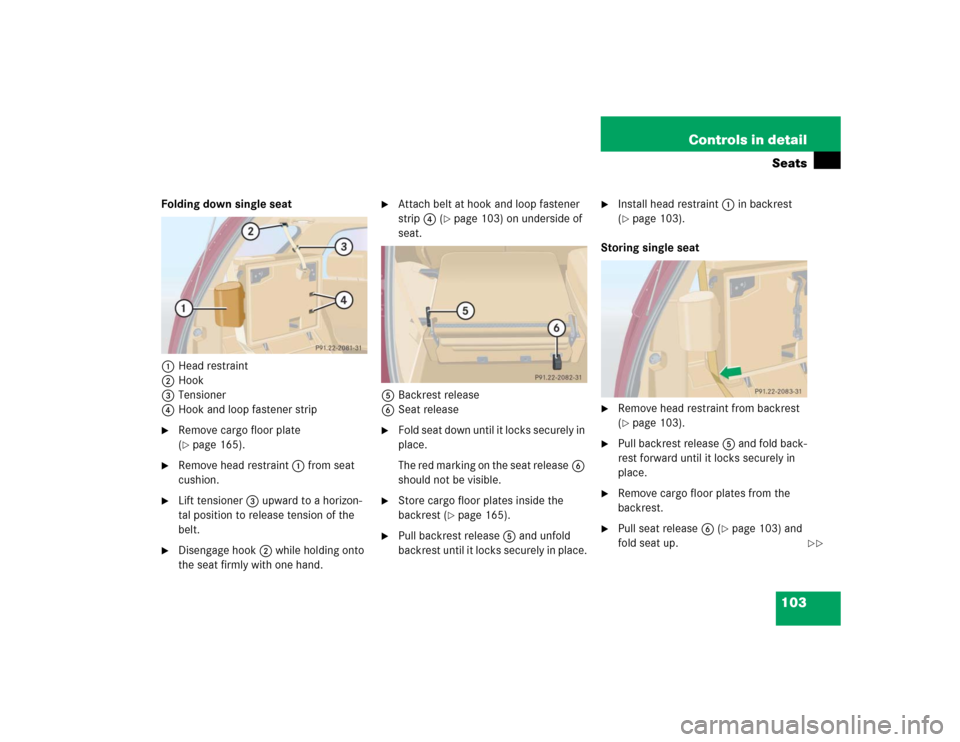
Folding down single seat
1Head restraint
2Hook
3Tensioner
4Hook and loop fastener strip�
Remove cargo floor plate
(�page 165).
�
Remove head restraint1 from seat
cushion.
�
Lift tensioner3 upward to a horizon-
tal position to release tension of the
belt.
�
Disengage hook2 while holding onto
the seat firmly with one hand.
�
Attach belt at hook and loop fastener
strip4 (
�page 103) on underside of
seat.
5Backrest release
6Seat release
�
Fold seat down until it locks securely in
place.
The red marking on the seat release6
should not be visible.
�
Store cargo floor plates inside the
backrest (
�page 165).
�
Pull backrest release5 and unfold
backrest until it locks securely in place.
�
Install head restraint1 in backrest
(�page 103).
Storing single seat
�
Remove head restraint from backrest
(�page 103).
�
Pull backrest release5 and fold back-
rest forward until it locks securely in
place.
�
Remove cargo floor plates from the
backrest.
�
Pull seat release6 (
�page 103) and
fold seat up.
��