Page 193 of 356

191 Controls in detail
Useful features
Setting the compass zone�
Determine the geographical point of
the vehicle with the aid of the zone
maps.
�
Switch on the ignition.
�
Press MODE2 (
�page 189) repeat-
edly until the compass display appears
in the trip computer display3.
�
Press RESET1 (
�page 189) to select
the compass zone mode.
The zone selected last is shown in the
display.
�
Press RESET1 repeatedly until the
correct compass zone, as determined
from the zone map, is shown in the dis-
play.
�
Press MODE2 twice.
The new compass zone is activated and
the compass display will be shown.Calibrating the compass
If the vehicle was exposed to a significant
magnetic zone, such as high voltage power
lines, the compass may have to be calibrat-
ed.
To calibrate the compass correctly, ob-
serve the following:
�
Calibrate the compass in an area free
of steel superstructures and power
lines.
�
Switch off all electrical consumers (e.g.
exterior lamps, climate control, rear
window defroster etc.).
�
Do not open or close the tilt / sliding
sunroof.
�
Close doors and liftgate.
�
Start and run the engine.
�
Press MODE2 (
�page 189) repeat-
edly until the compass display appears
in the trip computer display3.
�
Press RESET1 and afterwards press
MODE2.
In the display appears
CAL–
.
�
Press and hold RESET1 for approxi-
mately two seconds.
The calibration mode is activated and
the display shows
CAL
.
�
Drive without interruption two full cir-
cles at a speed between 3 mph
(5 km / h) and 7 mph (10 km / h).
The message
CAL
goes out after a short
time. The calibration is now complete.
iAn open liftgate triggers the
display
---
.
Page 207 of 356

205 Operation
Driving instructions
Special driving features for off-road
driving
The following driving features are available
for specific kind of operation:�
LOW RANGE mode (
�page 127)
�
LOW RANGE – ABS (
�page 77)
�
LOW RANGE – 4-ETS (
�page 80)
�
LOW RANGE – ESP (
�page 81)
Off-road driving rules
Engage the LOW RANGE mode before driv-
ing under off-road conditions
(
�page 127).
Fasten items being carried as securely as
possible (
�page 160).Checklist before off-road driving
Engine oil level
�
Check the engine oil level
(�page 224). The display
OIL i.O
must appear via display in the speed-
ometer.
Only then can the vehicle obtain a trou-
ble-free oil supply, even on steep gradi-
ents.
iWe recommend keeping doors, liftgate,
windows, and tilt / sliding sunroof*
closed whenever driving in off-road
mode.
!Observe the following during off-road
driving:�
Adjust vehicle speed to condition of
terrain. The more uneven, rutty and
steeper the terrain, the lower the
speed should be.
�
Watch out for obstacles, such as
rocks, holes, tree stumps and ruts.
�
Be especially careful when driving
in unknown territory. It may be nec-
essary to get out of the vehicle and
scout the path you intend to take.
�
Before driving through water, deter-
mine is depth.
�
Do not stop vehicle while immersed
in water, and do not shut off the
engine.
�
In sandy soil, please drive at a
steady speed as allowed by condi-
tions. This helps overcome the vehi-
cle rolling resistance and reduces
the likelihood of the vehicle sinking
into the ground.
�
Do not initiate jumps with the vehi-
cle. It interrupts the forward mo-
mentum of the vehicle.
�
Always drive onto slopes with the
the engine running and the vehicle
in gear.
Page 242 of 356

240 OperationVehicle careCleaning and care of the vehicle
While in operation, even while parked, your
vehicle is subjected to varying external in-
fluences which, if gone unchecked, can at-
tack the paintwork as well as the
underbody and cause lasting damage.Such damage is caused not only by ex-
treme and varying climatic conditions, but
also by:
�
Air pollution
�
Road salt
�
Tar
�
Gravel and stone chipping
To avoid paint damage, you should imme-
diately remove:
�
Grease and oil
�
Fuel
�
Coolant
�
Brake fluid
�
Bird droppings
�
Insects
�
Tree resins, etc.
Frequent washing reduces and / or elimi-
nates the aggressiveness and potency of
the above adverse influences.More frequent washings are necessary to
deal with unfavorable conditions:
�
near the ocean
�
in industrial areas (smoke, exhaust
emissions)
�
during winter operation
You should check your vehicle from time to
time for stone chipping or other damage.
Any damage should be repaired as soon as
possible to prevent corrosion.
In doing so, do not neglect the underbody
of the vehicle. A prerequisite for a thor-
ough check is a washing of the underbody
followed by a thorough inspection. Dam-
aged areas need to be re-undercoated.
Your vehicle has been treated at the facto-
ry with a wax-base rustproofing in the body
cavities which will last for the lifetime of
the vehicle. Post-production treatment is
neither necessary nor recommended by
Mercedes-Benz because of the possibility
of incompatibility between materials used
in the production process and others ap-
plied later.
Warning!
G
Many cleaning products can be hazardous.
Some are poisonous, others are flammable.
Always follow the instructions on the partic-
ular container. Always open your vehicle’s
doors or windows when cleaning the inside.
Never use fluids or solvents that are not de-
signed for cleaning your vehicle.
Page 273 of 356
271 Practical hints
Opening / closing in an emergency
�Opening / closing in an emergency
Power tilt / sliding sunroof*
You can open or close the tilt / sliding
sunroof manually should an electrical
malfunction occur.
The tilt / sliding sunroof drive is located be-
hind cover3 between the front interior
lamps.
1Hexagon drive hole
2Crank
3Cover�
Remove the key from the steering lock.
�
Pry off cover3 using a flat blade
srewdriver.
�
Take crank2 out of the Operator’s
Manual pouch.
�
Insert crank2 through hole1.
�
Turn crank2 clockwise to:�
slide sunroof closed
�
raise sunroof at the rear
�
Turn crank2 counterclockwise to:�
slide sunroof open
�
lower sunroof at the rear
iPush crank2 upward while turning to
disengage the electric motor.iTurn crank2 slowly and smoothy.
The tilt / sliding sunroof must be syn-
chronized if it has been operated man-
ually (
�page 152).
Page 290 of 356

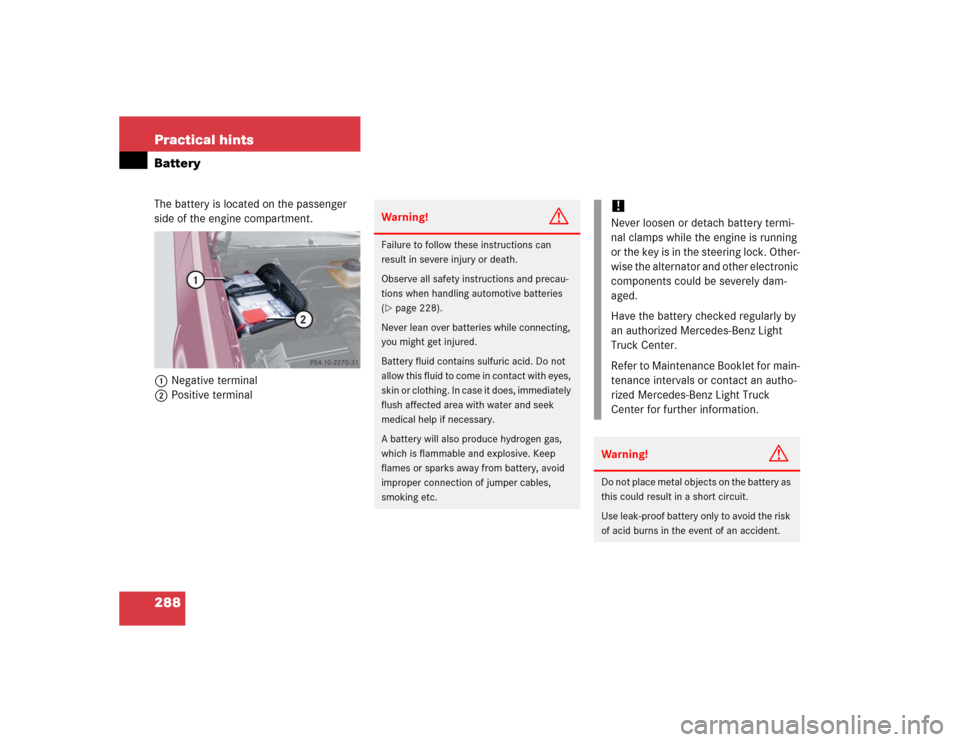
288 Practical hintsBatteryThe battery is located on the passenger
side of the engine compartment.
1Negative terminal
2Positive terminal
Warning!
G
Failure to follow these instructions can
result in severe injury or death.
Observe all safety instructions and precau-
tions when handling automotive batteries
(�page 228).
Never lean over batteries while connecting,
you might get injured.
Battery fluid contains sulfuric acid. Do not
allow this fluid to come in contact with eyes,
skin or clothing. In case it does, immediately
flush affected area with water and seek
medical help if necessary.
A battery will also produce hydrogen gas,
which is flammable and explosive. Keep
flames or sparks away from battery, avoid
improper connection of jumper cables,
smoking etc.
!Never loosen or detach battery termi-
nal clamps while the engine is running
or the key is in the steering lock. Other-
wise the alternator and other electronic
components could be severely dam-
aged.
Have the battery checked regularly by
an authorized Mercedes-Benz Light
Truck Center.
Refer to Maintenance Booklet for main-
tenance intervals or contact an autho-
rized Mercedes-Benz Light Truck
Center for further information.Warning!
G
Do not place metal objects on the battery as
this could result in a short circuit.
Use leak-proof battery only to avoid the risk
of acid burns in the event of an accident.
Page 292 of 356
290 Practical hintsBattery
Batteries contain materials that can harm
the environment if disposed of improperly.
Large 12 volt storage batteries contain
lead. Recycling of batteries is the preferred
method of disposal. Many states require
sellers of batteries to accept old batteries
for recycling.
iThe following procedures must be car-
ried out following any interruption of
battery power (e.g. due to reconnec-
tion):�
Set the clock (
�page 119).
�
Set the date in trip computer
(�page 189).
�
Calibrate the compass
(�page 191).
�
Resynchronize the ESP
(�page 252).
�
Resynchronize side power windows
(�page 148).
�
Resynchronize tilt / sliding
sunroof*(
�page 152).
Page 313 of 356
311 Technical data
Weights
�Weights
Roof load max.
220 lb (100 kg)
Page 335 of 356

333 Index
Cleaning
Cup holder 244
Gear selector lever 244
Hard plastic trim items 244
Headlamps 133
Headliner 244
Instrument cluster 244
Leather upholstery 245
Light alloy wheels 244
MB Tex upholstery 245
Plastic and rubber parts 245
Seat belts 244
Steering wheel 244
Windows 243
Windshield 51
Wiper blades 243
Clock 26, 119
Closing
Glove box 167
Hood 223
Liftgate 92
Power tilt/sliding sunroof* 271
Rear quarter windows* 149
Side windows 147
Tilt/sliding sunroof* 150Closing tilt/sliding sunroof*
In an emergency 271
Cockpit 22, 323
Combination switch
High beam flasher 50
Turn signals 50
Windshield wipers 51
Compass 190
Calibrating 191
Setting compass zone 191
Compass zone 191
Consumer information 320
Control and operation of radio
transmitters 216
Coolant 227, 316
Adding 228
Anticorrosion/antifreeze
quantity 316
Checking level 227
Indicator lamp 256
Temperature 218
Temperature gauge 118Coolant level
Checking 227
Crossing obstacles 209
Cruise control 153, 323
Canceling 154
Driving downhill 154
Driving uphill 154
Fine adjustment 155
LOW RANGE mode 155
Saving current speed 154
Setting speeds 155
Cruise control lever 153
Cup holder 169
Cleaning 244
In front seat armrest 170
In instrument panel 169
In rear center console 170
Customer Assistance Center (CAC) 323