Page 132 of 356

130 Controls in detailGood visibility�
Place the gear selector lever in reverse
gearR.
The passenger-side exterior rear view
mirror will be turned downward to the
stored position.
The exterior rear view mirror returns to its
previously stored driving position:
�
ten seconds after you put the gear
selector lever in positionD
�
immediately once you exceed a vehicle
speed of approx. 6 mph (10 km / h)
�
immediately when you press the
button1 for driver’s side mirrorElectrically folding exterior rear view
mirrors
Folding exterior mirrors in and out
manually*
The exterior rear view mirrors can vibrate if
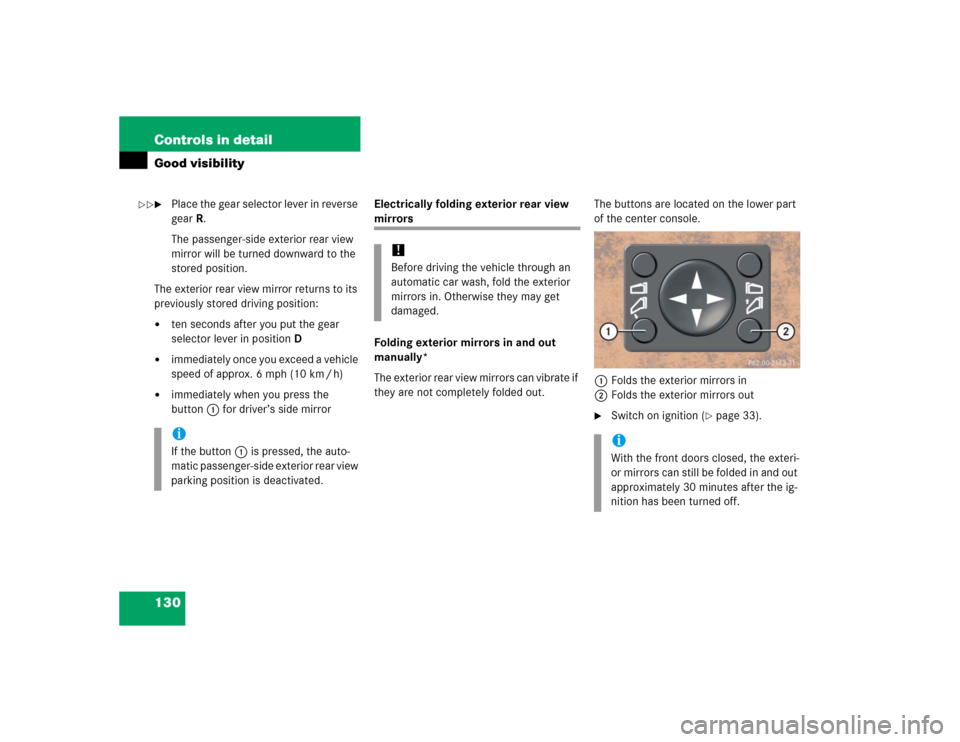
they are not completely folded out.The buttons are located on the lower part
of the center console.
1Folds the exterior mirrors in
2Folds the exterior mirrors out
�
Switch on ignition (
�page 33).
iIf the button1 is pressed, the auto-
matic passenger-side exterior rear view
parking position is deactivated.
!Before driving the vehicle through an
automatic car wash, fold the exterior
mirrors in. Otherwise they may get
damaged.
iWith the front doors closed, the exteri-
or mirrors can still be folded in and out
approximately 30 minutes after the ig-
nition has been turned off.
��
Page 135 of 356

133 Controls in detail
Good visibility
Headlamp cleaning system*
The button is located on the right side of
the dashboard.Headlamp washer button�
Switch on ignition.
�
Briefly press the upper part of button.
The headlamps will be cleaned with a
high-pressure water jet.For information on filling up the washer
reservoir, see the “Operation” section
(
�page 230).
Rear window wiper
For more information on Rear window wip-
er, see the “Getting started” section
(�page 52).
The rear window wiper will also automati-
cally engage if the windshield wiper is en-
gaged and the gear selector lever is placed
in reverse.Rear window wiper with rain sensor*
Rear window wiper intervals are controlled
automatically according to the amount of
water on the windshield and the speed of
the vehicle, if:
�
rear window wiper is switched on
�
front windshield wipers are switched to
intermittent wiping
The interval for the rear window wiper re-
mains constant when the windshield wiper
interval is ten seconds or more.
Page 152 of 356

150 Controls in detailPower tilt / sliding sunroof*Opening and closing the power tilt / sliding sunroof
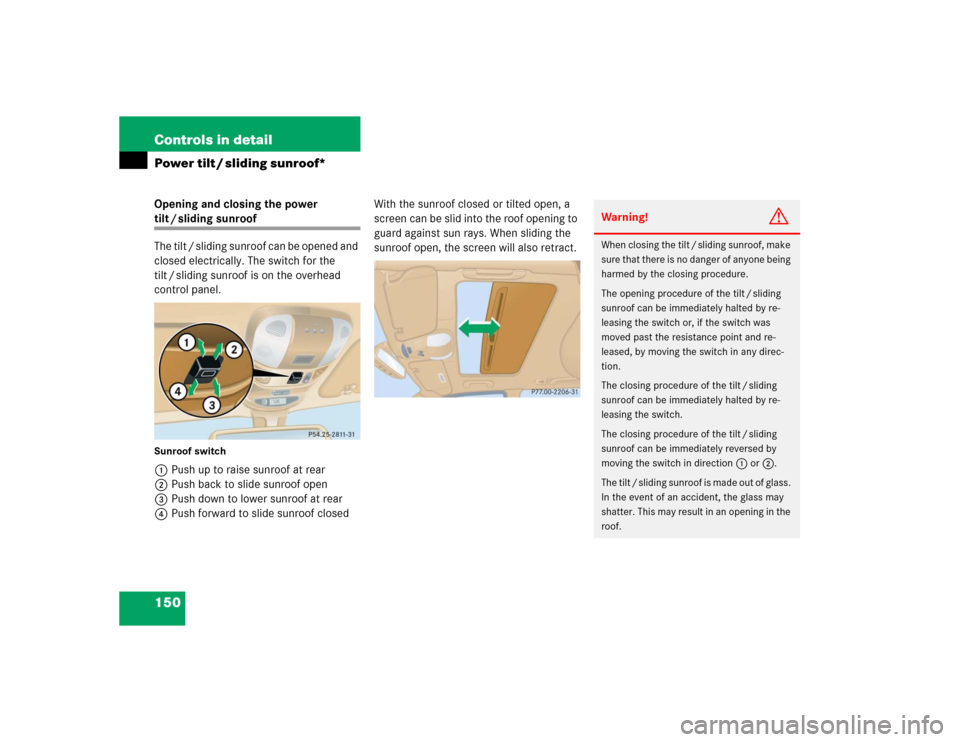
The tilt / sliding sunroof can be opened and
closed electrically. The switch for the
tilt / sliding sunroof is on the overhead
control panel.Sunroof switch1Push up to raise sunroof at rear
2Push back to slide sunroof open
3Push down to lower sunroof at rear
4Push forward to slide sunroof closedWith the sunroof closed or tilted open, a
screen can be slid into the roof opening to
guard against sun rays. When sliding the
sunroof open, the screen will also retract.
Warning!
G
When closing the tilt / sliding sunroof, make
sure that there is no danger of anyone being
harmed by the closing procedure.
The opening procedure of the tilt / sliding
sunroof can be immediately halted by re-
leasing the switch or, if the switch was
moved past the resistance point and re-
leased, by moving the switch in any direc-
tion.
The closing procedure of the tilt / sliding
sunroof can be immediately halted by re-
leasing the switch.
The closing procedure of the tilt / sliding
sunroof can be immediately reversed by
moving the switch in direction1 or2.
The tilt / sliding sunroof is made out of glass.
In the event of an accident, the glass may
shatter. This may result in an opening in the
roof.
Page 186 of 356

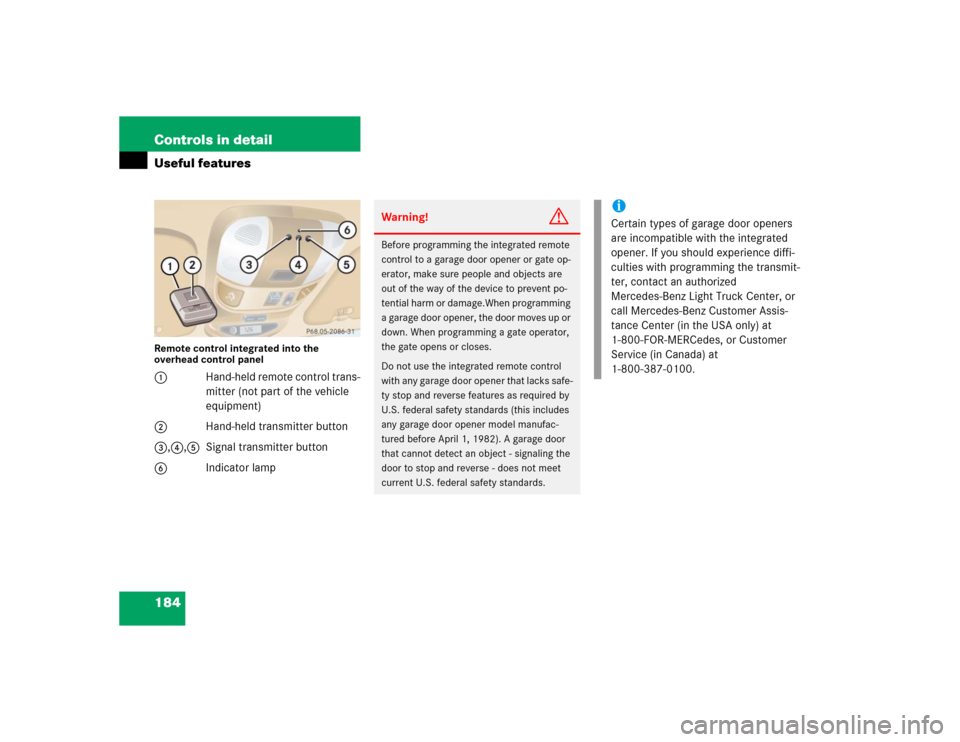
184 Controls in detailUseful featuresRemote control integrated into the
overhead control panel1Hand-held remote control trans-
mitter (not part of the vehicle
equipment)
2Hand-held transmitter button
3,4,5 Signal transmitter button
6Indicator lamp
Warning!
G
Before programming the integrated remote
control to a garage door opener or gate op-
erator, make sure people and objects are
out of the way of the device to prevent po-
tential harm or damage.When programming
a garage door opener, the door moves up or
down. When programming a gate operator,
the gate opens or closes.
Do not use the integrated remote control
with any garage door opener that lacks safe-
ty stop and reverse features as required by
U.S. federal safety standards (this includes
any garage door opener model manufac-
tured before April 1, 1982). A garage door
that cannot detect an object - signaling the
door to stop and reverse - does not meet
current U.S. federal safety standards.
iCertain types of garage door openers
are incompatible with the integrated
opener. If you should experience diffi-
culties with programming the transmit-
ter, contact an authorized
Mercedes-Benz Light Truck Center, or
call Mercedes-Benz Customer Assis-
tance Center (in the USA only) at
1-800-FOR-MERCedes, or Customer
Service (in Canada) at
1-800-387-0100.
Page 206 of 356

204 OperationDriving instructionsStanding water
Off-road driving
Read this chapter carefully before you be-
gin off-road travel.
Familiarize yourself with the vehicle char-
acteristics and gear changing before you
attempt any difficult terrain off-road driv-
ing. We recommend that you start out with
easy off-road travel.
!Do not drive through flooded areas or
water of unknown depth. Before driving
through water, determine its depth.
Never accelerate before driving into
water. The bow wave could force water
into the engine and auxiliary equip-
ment, thus damaging them.
If you must drive through standing wa-
ter, drive slowly to prevent water from
entering the passenger compartment
or the engine compartment. Water in
these areas could cause damage to
electrical components or wiring of the
engine or transmission, or could result
in water being ingested by the engine
through the air intake, causing severe
internal engine damage. Any such dam-
age is not covered by the
Mercedes-Benz Limited Warranty.
Warning!
G
Drive slowly in unknown terrain. This will
make it easier to recognize unexpected ob-
stacles and avoid damage to the vehicle.
To help avoid the vehicle rolling over, never
turn it around on steep inclines. If the vehi-
cle cannot complete the attempted climb,
back it down in reverse gear.
Do not drive along the side of a slope (dan-
ger of vehicle rollover). The vehicle might
otherwise rollover. If in doing so the vehicle
begins to show a tendency to roll, immedi-
ately steer into a line of gravity (straight up
or downhill).
Never let the vehicle roll backwards in idle.
You may lose control of the vehicle if you
use only the service brake.
Warning!
G
Sand, dirt, mud and other material having
friction property can cause exceptional wear
and tear as well as brake failure.
Have the brakes checked for dirt build-up
and cleaned. There is otherwise a risk that
full braking power may not be available in an
emergency.
Page 208 of 356

206 OperationDriving instructionsTires�
Check the tread depth and maintain
specified tire pressure (see tire pres-
sure label inside the fuel filler flap).
�
Check tires for possible damage and
remove foreign objects.
�
Replace missing valve caps.
Rims
�
Dented or bent rims can cause tire
pressure loss and damage the tire
beads. For this reason, check and, if
necessary, change rims before driving
off-road.
Vehicle tool kit
�
Check if the vehicle jack is functional.
�
In all cases take the vehicle tool kit, a
strong tow rope, a shovel and a small
plank (to put under the vehicle jack on
sandy soil) with you.Driving in steep terrain
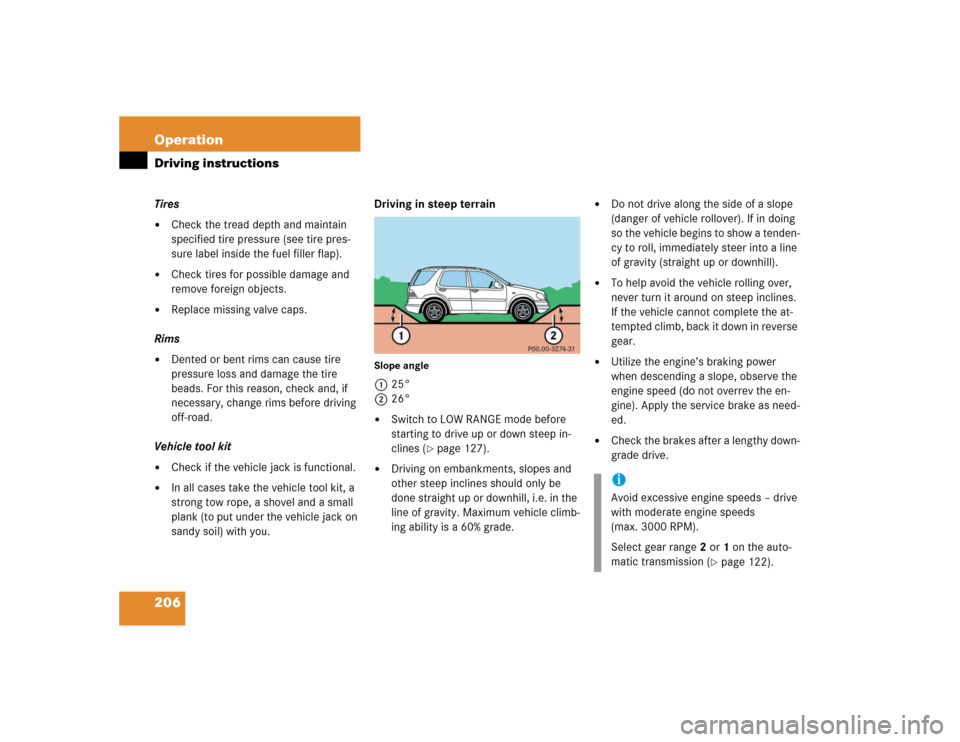
Slope angle1 25°
226°�
Switch to LOW RANGE mode before
starting to drive up or down steep in-
clines (
�page 127).
�
Driving on embankments, slopes and
other steep inclines should only be
done straight up or downhill, i.e. in the
line of gravity. Maximum vehicle climb-
ing ability is a 60% grade.
�
Do not drive along the side of a slope
(danger of vehicle rollover). If in doing
so the vehicle begins to show a tenden-
cy to roll, immediately steer into a line
of gravity (straight up or downhill).
�
To help avoid the vehicle rolling over,
never turn it around on steep inclines.
If the vehicle cannot complete the at-
tempted climb, back it down in reverse
gear.
�
Utilize the engine’s braking power
when descending a slope, observe the
engine speed (do not overrev the en-
gine). Apply the service brake as need-
ed.
�
Check the brakes after a lengthy down-
grade drive.iAvoid excessive engine speeds – drive
with moderate engine speeds
(max. 3000 RPM).
Select gear range2 or1 on the auto-
matic transmission (
�page 122).
Page 300 of 356
298 Practical hintsFusesAids for changing fuses
Fuse chart
A chart explaining fuse allocation and fuse
amperages can be found in the main fuse
box in the engine compartment
(�page 298).
Spare fuses
Spare fuses are found in the main fuse box
in the engine compartment (
�page 298).
Fuse extractor
The fuse extractor is found in the main fuse
box in the engine compartment
(
�page 298).
Main fuse box
The main fuse box is located in the engine
compartment on the driver’s side.
1Clamps
2Main fuse box cover
Removing / installing main fuse box
cover�
Opening the hood.
�
Release clamps1.
�
Lift fuse box cover2 up.
�
Install main fuse box cover in reverse
order.3Fuse chart
4Fuse extractor
5Spare fuses
Page 301 of 356
299 Practical hintsFuses
Fuse box in front passenger footwell
The fuse box is located in the front
passenger compartment.
1Lock
2CoverRemoving / installing cover
�
Open passenger-side door.
�
Turn both locks1
90°counterclockwise.
�
Remove cover2 in direction of arrow.
�
Install cover2 in reverse order.