Page 105 of 356
.
�
Remove head restraint1 from seat
cushion.")
103 Controls in detailSeats
Folding down single seat
1Head restraint
2Hook
3Tensioner
4Hook and loop fastener strip�
Remove cargo floor plate
(�page 165).
�
Remove head restraint1 from seat
cushion.
�
Lift tensioner3 upward to a horizon-
tal position to release tension of the
belt.
�
Disengage hook2 while holding onto
the seat firmly with one hand.
�
Attach belt at hook and loop fastener
strip4 (
�page 103) on underside of
seat.
5Backrest release
6Seat release
�
Fold seat down until it locks securely in
place.
The red marking on the seat release6
should not be visible.
�
Store cargo floor plates inside the
backrest (
�page 165).
�
Pull backrest release5 and unfold
backrest until it locks securely in place.
�
Install head restraint1 in backrest
(�page 103).
Storing single seat
�
Remove head restraint from backrest
(�page 103).
�
Pull backrest release5 and fold back-
rest forward until it locks securely in
place.
�
Remove cargo floor plates from the
backrest.
�
Pull seat release6 (
�page 103) and
fold seat up.
��
Page 165 of 356
163 Controls in detail
Loading
�
One after the other, press the two
mounting hooks2 inward against the
spring pressure and turn them.
The mounting hooks are locked in this
position and you can move the net into
position more easily.
�
Turn one of the mounting hooks2 in
the opposite direction.
The spring pressure will push it out.
�
Engage mounting hook2 in
holder1.
�
Turn the other mounting hook and en-
gage it in the opposite holder.
�
Push both mounting hooks2 forward
into holder1.Tightening partition net
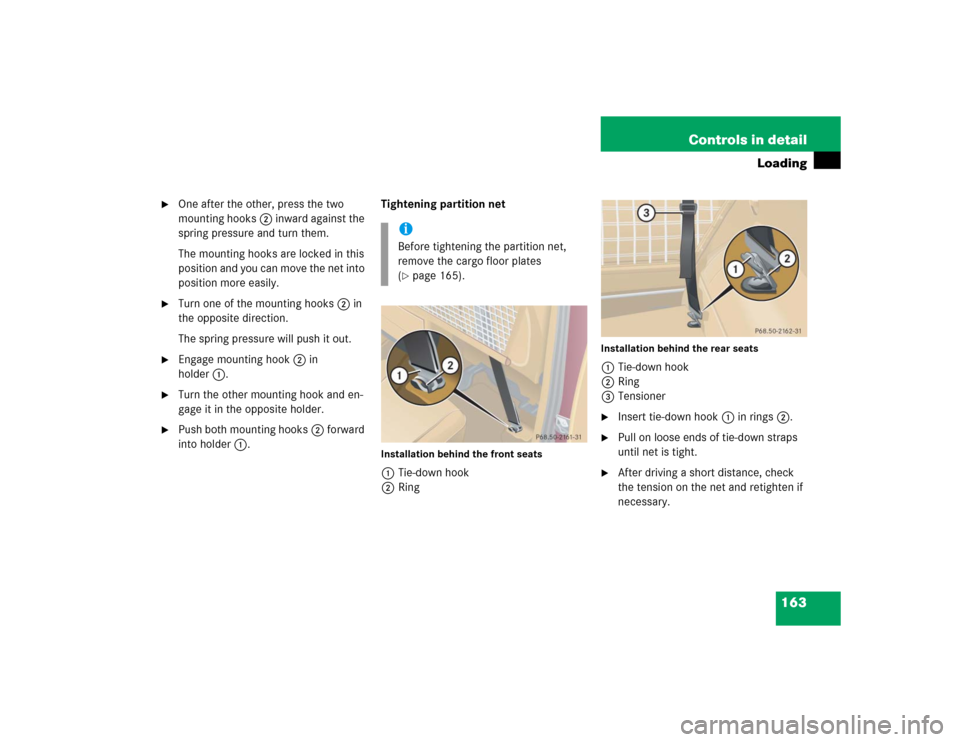
Installation behind the front seats1Tie-down hook
2Ring
Installation behind the rear seats1Tie-down hook
2Ring
3Tensioner�
Insert tie-down hook1 in rings2.
�
Pull on loose ends of tie-down straps
until net is tight.
�
After driving a short distance, check
the tension on the net and retighten if
necessary.
iBefore tightening the partition net,
remove the cargo floor plates
(�page 165).
Page 166 of 356
164 Controls in detailLoadingRemoving partition net�
Lift tensioner3 upward to a horizon-
tal position to release tensioning of the
strap.
�
Disengage tie-down hooks1 from
rings2.
�
Remove mounting hooks2
(�page 162) from holder1
(�page 162).
�
Roll up and close the partition net.
�
Store partition net behind rear seat
bench.
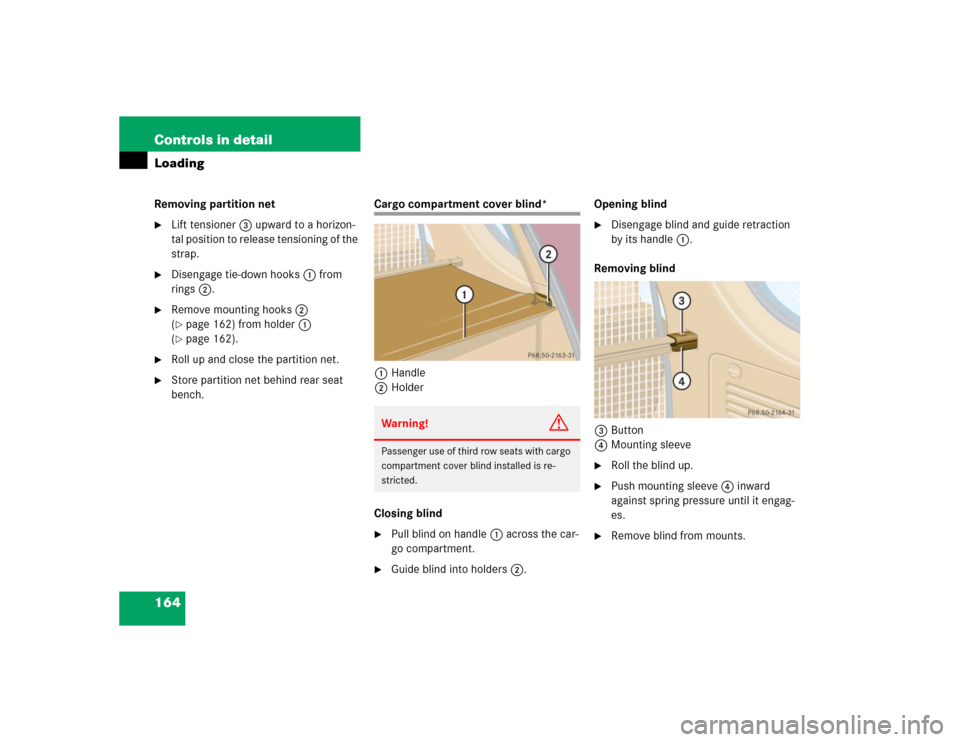
Cargo compartment cover blind*
1Handle
2Holder
Closing blind�
Pull blind on handle1 across the car-
go compartment.
�
Guide blind into holders2.Opening blind
�
Disengage blind and guide retraction
by its handle1.
Removing blind
3Button
4Mounting sleeve
�
Roll the blind up.
�
Push mounting sleeve4 inward
against spring pressure until it engag-
es.
�
Remove blind from mounts.
Warning!
G
Passenger use of third row seats with cargo
compartment cover blind installed is re-
stricted.
Page 167 of 356
165 Controls in detail
Loading
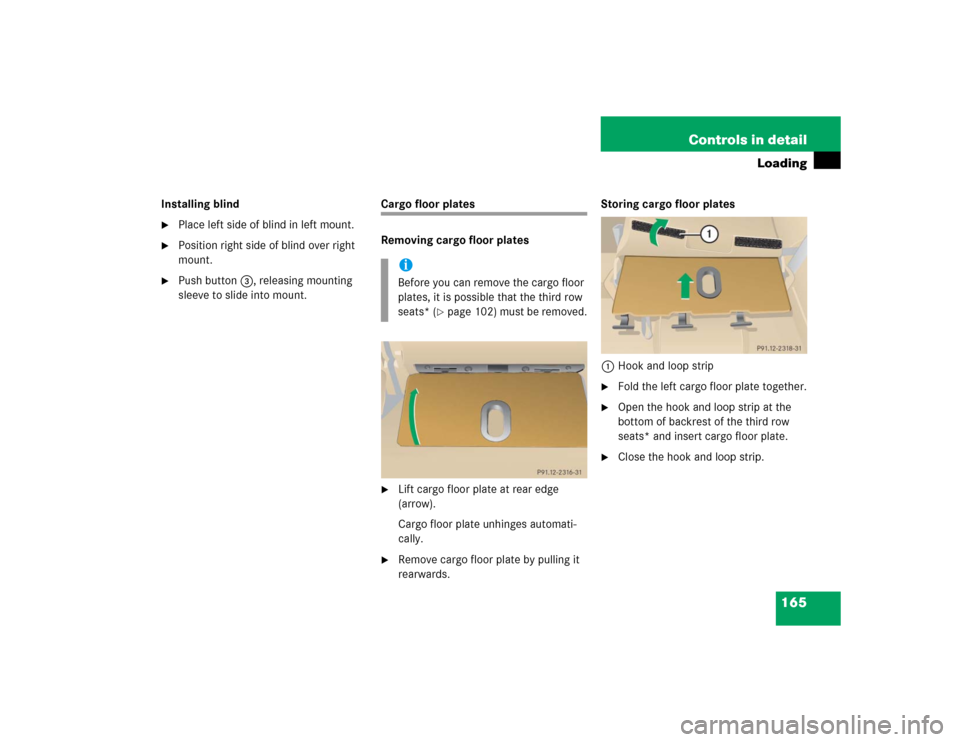
Installing blind�
Place left side of blind in left mount.
�
Position right side of blind over right
mount.
�
Push button3, releasing mounting
sleeve to slide into mount.
Cargo floor plates
Removing cargo floor plates�
Lift cargo floor plate at rear edge
(arrow).
Cargo floor plate unhinges automati-
cally.
�
Remove cargo floor plate by pulling it
rearwards.Storing cargo floor plates
1Hook and loop strip
�
Fold the left cargo floor plate together.
�
Open the hook and loop strip at the
bottom of backrest of the third row
seats* and insert cargo floor plate.
�
Close the hook and loop strip.
iBefore you can remove the cargo floor
plates, it is possible that the third row
seats* (
�page 102) must be removed.
Page 247 of 356
245 Operation
Vehicle care
Upholstery
Using aftermarket seat covers or wearing
clothing that has the tendency to give off
coloring (e.g. when wet, etc.) may cause
the upholstery to become permanently dis-
colored. By lining the seats with a proper
intermediate cover, contact-discoloration
will be prevented.
Leather upholstery*
Wipe leather upholstery with a damp cloth
and dry thoroughly or clean with
Mercedes-Benz approved Leather Care.
Exercise particular care when cleaning
perforated leather as its underside should
not become wet.MB Tex upholstery
Pour Mercedes-Benz approved Interior
Care onto soft lint-free cloth and apply
with light pressure.
Plastic and rubber parts
Do not use oil or wax on these parts.
Wood trims
Dampen cloth using water and use damp
cloth to clean wood trims in your vehicle.
Do not use solvents like tar remover or
wheel cleaner nor polishes or waxes as
these may be abrasive.
 may cause
the upholstery to become permanent")