Page 334 of 416
334 Practical hintsReplacing bulbsBulbs Front lamps Rear lamps
Lamp
Type
1
Additional turn
signal lamp
LED
2
Turn signal lamp
1156 NA
3
Side marker lamp
T 4 W
4
High and low beam
H4 60 (55 W)
Parking and
standing lamp
T 4 W
5
Fog lamp
H3 (55 W)
Lamp
Type
6
High mounted brake
lamp
LED
7
Turn signal lamp
PY 21 W
Brake lamp
P 21 W
Tail, parking and
standing lamp
R 5 W
8
Backup lamp
P 21 W
9
License plate lamps
C 5 W
a
Rear fog lamp
P 21 W
b
Side marker lamp
T 4 W
Page 346 of 416
346 Practical hintsFlat tirePreparing the vehicle�
Park the vehicle as far as possible from
moving traffic on a hard surface.
�
Turn on the hazard warning flashers.
�
Engage the steering wheel lock in the
straight ahead position and set the
parking brake.
�
Move the gear selector lever toP.
�
Have any passenger exit the vehicle at
a safe distance from the roadway.
�
Remove the vehicle tool kit
(�page 321) and the jack
(�page 322).
�
Remove the spare wheel from the
spare wheel mounting bracket
(�page 323).Information on spare wheel
When you replace the vehicle’s tires, you
can use the spare wheel as a regular wheel
if:
�
it is not more than six years old
�
rim and tire are the same model as the
regular wheels
Warning!
G
For your safety, remove spare wheel from
the spare wheel mounting bracket before
undertaking any further steps.
Warning!
G
If the spare tire is more than six years old or
is not the same model as the regular tires,
have the spare tire replaced with a new tire
at the nearest Mercedes-Benz Light Truck
Center.
Never operate the vehicle with more than
one spare tire.
Warning!
G
G55AMG:
Vehicles with different tire dimensions on
the front and rear axle: rim and tire size of
spare wheel and normal wheel differ.
Handling will be adversely affected when the
spare wheel is used.
Do not exceed the maximum speed of
50 mph (80 km/h).
Page 347 of 416
347 Practical hints
Flat tire
Mounting the spare wheel�
Prepare the vehicle (
�page 346).
Lifting the vehicle
�
Prevent the vehicle from rolling away
by blocking wheels with wheel chocks
(not included) or other sizable objects.
When changing wheel on a level surface:
�
Place one chock in front of and one be-
hind the wheel that is diagonally oppo-
site to the wheel being changed.
When changing wheel on a hill:
�
Place chocks on the downhill side
blocking both wheels of the other axle.
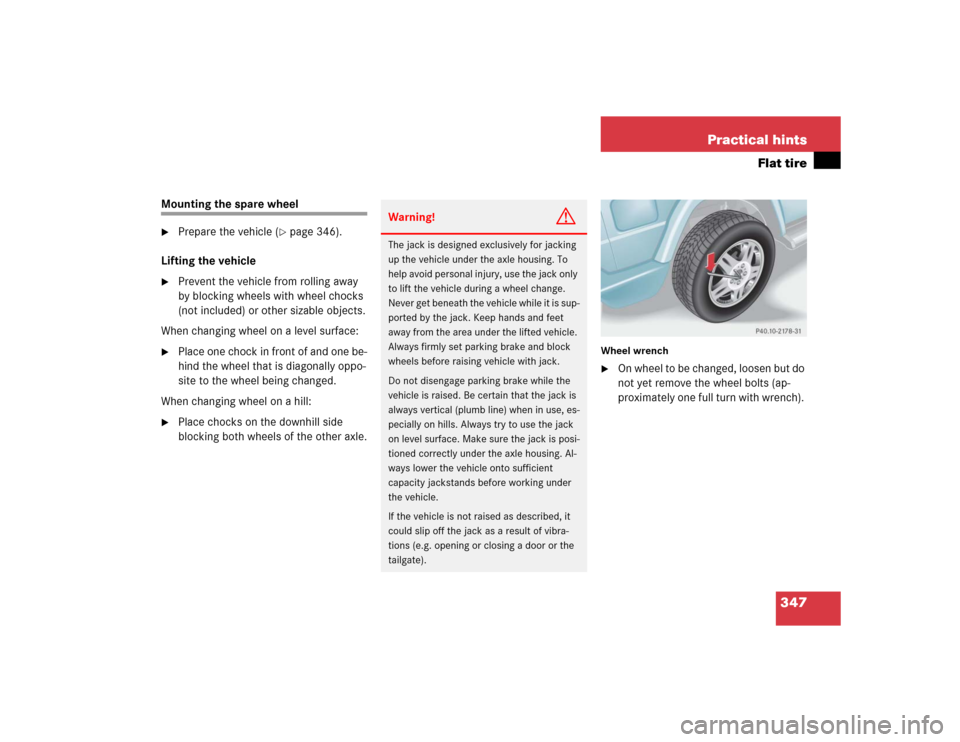
Wheel wrench�
On wheel to be changed, loosen but do
not yet remove the wheel bolts (ap-
proximately one full turn with wrench).
Warning!
G
The jack is designed exclusively for jacking
up the vehicle under the axle housing. To
help avoid personal injury, use the jack only
to lift the vehicle during a wheel change.
Never get beneath the vehicle while it is sup-
ported by the jack. Keep hands and feet
away from the area under the lifted vehicle.
Always firmly set parking brake and block
wheels before raising vehicle with jack.
Do not disengage parking brake while the
vehicle is raised. Be certain that the jack is
always vertical (plumb line) when in use, es-
pecially on hills. Always try to use the jack
on level surface. Make sure the jack is posi-
tioned correctly under the axle housing. Al-
ways lower the vehicle onto sufficient
capacity jackstands before working under
the vehicle.
If the vehicle is not raised as described, it
could slip off the jack as a result of vibra-
tions (e.g. opening or closing a door or the
tailgate).
Page 355 of 416

355 Practical hints
Jump starting
The jump-start contacts are located in the
engine compartment.�
Make sure the two vehicles do not
touch.
�
Turn off all electrical consumers.
�
Apply parking brake.
�
Shift gear selector lever to positionP.1Cover
2Positive (+) terminal
3Negative (-) terminal
�
Open cover1 of the positive terminal
of both vehicles.
�
Connect the positive terminals2 of
the batteries with the jumper cable.
Clamp cable to charged battery first.
�
Start engine of the vehicle with the
charged battery and run at idle speed.
�
Connect negative terminals3 of the
batteries with the jumper cable. Clamp
cable to charged battery first.
�
Start the engine of the disabled
vehicle.
Now you can again turn on the electrical
consumers. Do not turn on the lights under
any circumstances.
�
Remove the jumper cables first from
negative terminals3 of the batteries
and then from positive terminals2.
You can now turn on the lights.
�
Have the battery checked at the
nearest authorized Mercedes-Benz
Light Truck Center.
Warning!
G
Keep flames or sparks away from battery.
Do not smoke.
Observe all safety instructions and precau-
tions when handling automotive batteries
(�page 351).
Page 389 of 416

389 Index
Bead 271
Block heater (Canada only) 276
Blocking rear door window operation 78
B-pillar 366
Brake assist system (BAS) 381
Brake fluid 237, 376
Brake lamp bulbs, left and right 334
Brake lamp, high mounted 334
Brake pads
Message in display 303
Brakes 217
Warning lamp 290, 291
Break-in period 214
Brush guard* 329
Lowering 330
Raising and securing 330
Bulbs, replacing
Additional turn signals 334
Backup lamps 334, 342
Brake lamps 334, 341
Front fog lamps 334, 338
Front lamps 333, 334
Front turn signal lamps 334, 339
High and low beam 336High beam lamps 334
High mounted brake lamp 334
License plate lamps 334, 342
Low beam lamps 334
Parking lamps 334, 336
Rear fog lamp 334, 342
Rear turn signal lamps 334
Side marker lamps 334, 340
Standing lamps 334, 336
Tail lamp unit 334, 341C
CAC (Customer Assistance Center) 381
Calling up
Maintenance service indicator 278
Range (distance to empty) 145
CAN system 381
Capacities
Fuels, coolants, lubricants, etc. 374
Cargo area see Cargo compartment
Cargo compartment
Tailgate 97, 98
Tie-down rings 189
Cargo compartment cover 182
Installing 183
Removing 183
Cargo tie-down rings 189
Catalytic converter 232
CD changer 322
CD player
Operating 130
Center console 28
AIRBAG OFF indicator lamp 295
Lower part 29
Upper part 28
Page 398 of 416

398 IndexL
Labels, identification 366
Lamp bulbs, exterior 333
Lamps, exterior
Front 334
Light sensor 314
Messages in display 312, 314
Rear 334
Replacing bulbs for rear 341
Lamps, indicator and warning
ABS 288, 289
Battery (SmartKey) 94
Brakes 290, 291
CHECK ENGINE 292
Engine diagnostics 292
ESP 293
Fuel reserve 294
Instrument cluster 294
Maintenance service indicator 277
Seat belts 294
SRS 63
Turn signals 25
Language
Multifunction display 136
Setting 136LATCH child seat anchors 77
Layout of poly-V-belt drive 367
Leather upholstery
Cleaning 285
License plate lamps
Messages in display 314
Replacing bulbs 334, 342
Light alloy wheels
Cleaning 284
Technical data 370, 371
Light sensor 314
Lighter see Cigarette lighter
Lighting 110
Automatic headlamp mode 111
Combination switch 114
Daytime running lamp mode 112
Exterior lamp switch 110
Front fog lamps 113
High beam flasher 114
High beams 114
Instrument cluster illumination 120
Interior 116
Locator lighting 113
Low beams 110
Manual headlamp mode 111Night security illumination 113
Parking lamps 110
Rear fog lamp 114
Settings (control system) 137
Limiting the gear range 150
Limp Home Mode 153
Line of fall 383
Loading 182
Cargo compartment cover 182
Cargo tie-down rings 189
Instructions 187
Partition net* 185
Roof rack 182
Split rear bench seat 183
Loading terminology 271
Loading the vehicle 251
Locator lighting 113
Setting 138
Lock button 383
Locking 57, 92
Fuel filler flap 235
Global, SmartKey 94
Vehicle in an emergency 326
Loss of keys 96
Page 400 of 416

400 IndexMessages in the multifunction display
Symbol messages 302
Text messages 298
Middle tunnel
Fuse box in 362
Miles/kilometers in speedometer
Setting 136
Mirrors
Activating exterior rear view mirror
parking position 161
Adjusting 41
Auto-dimming for rear view
mirror 160
Exterior rear view mirror 41
Exterior rear view mirror parking
positions 143
Interior rear view mirror 41
Storing exterior rear view mirror
parking position 109
MON 236
MON (Motor Octane Number) 384
Monitoring reach
Rear Parking Assist* 180
Mph or km/h in speedometer
setting 136Multicontour seat* 104
Multifunction display 123, 384
Selecting language 136
Standard display 127
Multifunction display messages
ABS 298
BAS 298
Battery 302, 303
Brake fluid 303
Brake pads 303
Check engine 292
Coolant 305, 306, 307
Cruise control 308
Display 320
Doors 308
Engine 292
Engine air filter 308
Engine oil 309
ESP 300
Fuel reserve tank 311
Hood 311
Key 311
Lamps 312, 314
Parking brake 304
Sunroof 319Tailgate 320
Tele Aid 319
Telephone* 319
Washer fluid 320
Multifunction steering wheel 26, 124
Buttons 124
Page 402 of 416

402 IndexOperating
CD player 130
COMAND see separate operating
instructions
Navigation system 130
Radio 129
Radio transmitters 231
Telephone 145
Operator’s Manual 10
Ornamental moldings 282
Outside temperature indicator 122
Overdue maintenance service 278
Overhead control panel 30
Overspeed range 384P
Paintwork 281
Paintwork code 366
Panic alarm 79
Panic button on SmartKey 79
Parcel net
In front passenger footwell 193
Parking 57, 218
Parking brake 50, 57
Engaging 57
Message in display 304
Releasing 50
Parking lamp, front
Replacing bulbs 336
Parking lamps
Replacing bulbs 334
Switching on 110
Parking position
Exterior rear view mirrors 109, 143,
161
Parktronic see Rear Parking Assist*
Partition net* 185
Installing behind front seats 186
Installing behind rear seat bench 185
Removing 187Parts service 364
Passenger compartment 223
Fuse box in 360
Interior lighting 116
Interior rear view mirror 41
Parcel net in front passenger
footwell 193
Storage bags 193
Passenger footwell
Fuse box in 361
Passenger safety see Occupant safety
Pedals 216
Phone book
Loading 147
Quick search 147
Phone number
Dialing 147
Redialing 147
Plastic and rubber parts
Cleaning 285
Poly-V-belt drive 384
Layout 367
Positions (memory function)
Recalling from memory 108
Storing into memory 108
