Page 188 of 416
188 Controls in detailLoadingThe handling characteristics of a fully load-
ed vehicle depend greatly on the load dis-
tribution. It is therefore recommended to
load the vehicle according to the illustra-
tions shown, with the heaviest items being
placed towards the front of the vehicle.
�
Always place items being carried
against front or rear seat backrests,
and fasten them as securely as possi-
ble.
�
The heaviest portion of the cargo
should always be kept as low as possi-
ble against front or rear seat backrest
since it influences the handling charac-
teristics of the vehicle.
�
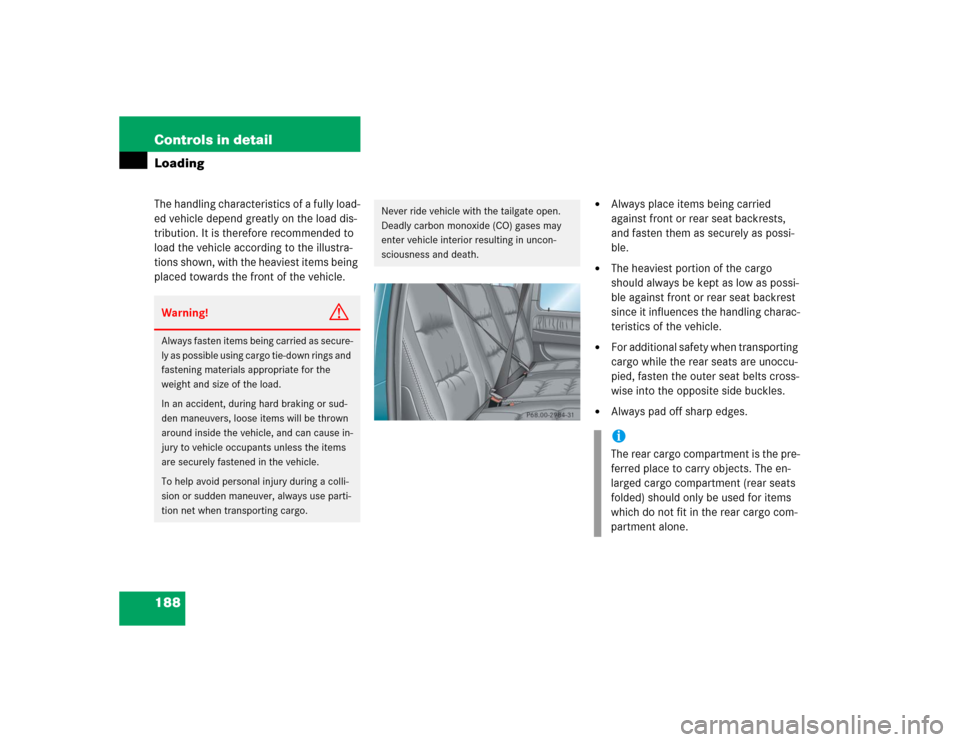
For additional safety when transporting
cargo while the rear seats are unoccu-
pied, fasten the outer seat belts cross-
wise into the opposite side buckles.
�
Always pad off sharp edges.
Warning!
G
Always fasten items being carried as secure-
ly as possible using cargo tie-down rings and
fastening materials appropriate for the
weight and size of the load.
In an accident, during hard braking or sud-
den maneuvers, loose items will be thrown
around inside the vehicle, and can cause in-
jury to vehicle occupants unless the items
are securely fastened in the vehicle.
To help avoid personal injury during a colli-
sion or sudden maneuver, always use parti-
tion net when transporting cargo.
Never ride vehicle with the tailgate open.
Deadly carbon monoxide (CO) gases may
enter vehicle interior resulting in uncon-
sciousness and death.
iThe rear cargo compartment is the pre-
ferred place to carry objects. The en-
larged cargo compartment (rear seats
folded) should only be used for items
which do not fit in the rear cargo com-
partment alone.
Page 205 of 416
205 Controls in detail
Useful features
Remote door unlock
In case you have locked your vehicle unin-
tentionally (e.g. SmartKey inside vehicle),
and the reserve key is not handy:�
Contact the Mercedes-Benz Response
Center at 1-800-756-9018 (in the USA)
or 1-888-923-8367 (in Canada).
You will be asked to provide your pass-
word which you provided when you
completed the subscriber agreement.
�
Then return to your vehicle and press
the tailgate lock for minimum of
20 seconds until the SOS button is
flashing.
The message
EMERGENCY CALL –
CALL CONNECTED appears in the multi-
function display.
As an alternative, you may unlock the vehi-
cle via Internet using the ID and password
sent to you shortly after the completion of
your acquaintance call.The Response Center will then unlock your
vehicle with the remote door unlocking
feature.Stolen Vehicle Recovery services
In the event your vehicle was stolen:
�
Report the incident to the police.
The police will issue a numbered inci-
dent report.
�
Pass this number on to the
Mercedes-Benz Response Center along
with your password issued to you when
you subscribed to the service.
The Response Center will then attempt
to covertly contact the vehicle’s
Tele Aid system. Once the vehicle is lo-
cated, the Response Center will con-
tact the local law enforcement and you.
The vehicle’s location will only be pro-
vided to law enforcement.
iThe remote door unlock feature is avail-
able if the relevant cellular phone net-
work is available.
The SOS button will flash and the mes-
sage
EMERGENCY CALL –
CALL CONNECTED
will appear in the mul-
tifunction display to indicate receipt of
the door unlock command.
Once the vehicle is unlocked, a
Response Center specialist will at-
tempt to establish voice contact with
the vehicle occupants.
If the tailgate lock was pressed for
more than 20 seconds before door un-
lock authorization was received by the
Response Center, you must wait
15 minutes before pressing the tailgate
lock again.
Page 224 of 416
224 OperationDriving instructionsRead this chapter carefully before you be-
gin off-road travel.
Familiarize yourself with the vehicle char-
acteristics and gear changing before you
attempt any difficult terrain off-road driv-
ing. We recommend that you start out with
easy off-road travel.Special driving features for off-road
driving
The following driving features are available
for specific kind of operation:
�
ABS (
�page 80)
�
ESP (
�page 84)
�
4-ETS (
�page 83)
�
Differential lock (
�page 156)
�
Transfer case (
�page 154)
Off-road driving rules
�
Engage the transfer case in position
LOW before driving under off-road con-
ditions (
�page 154).
�
If necessary activate differential locks
(�page 158).
The ABS, BAS and ESP are switched off
automatically when the differential
locks are activated.
�
Fasten items being carried as securely
as possible (
�page 187).
Never let the vehicle roll backwards in idle.
You may lose control of the vehicle if you
use only the brake.
Sand, dirt, mud and other material having
friction property can cause exceptional wear
and tear as well as brake failure.
Have the brakes checked for dirt build-up
and cleaned. There is otherwise a risk that
full braking power may not be available in an
emergency.
iWhenever driving in off-road mode, we
recommend:�
Keeping doors, tailgate, windows
and tilt/sliding sunroof closed.
�
Switching cruise control off.
!Observe the following during off-road
driving:�
Adjust vehicle speed to condition of
terrain. The more uneven, rutty and
steeper the terrain, the lower the
speed should be. Drive through wa-
ter slowly at an even speed, avoid-
ing a bow wave.
�
Be especially careful when driving
in unknown territory. It may be nec-
essary to get out of the vehicle and
scout the path you intend to take.
�
Watch out for obstacles, such as
rocks, holes, tree stumps and ruts.
��
Page 320 of 416
320 Practical hintsWhat to do if …Display
Possible cause
Possible solution
Ê
TRUNK OPEN!
This message will appear whenever the
tailgate is open.
�
Close the tailgate.
G
VISIT WORKSHOP!
DISPLAY MALFUNCTION:
The instrument cluster display is malfunc-
tioning.
Some systems themselves may also have
failed.
�
Continue driving with added caution.
�
Visit an authorized Mercedes-Benz
Light Truck Center as soon as
possible.
±
VISIT WORKSHOP!
DISPLAY MALFUNCTION:
Certain electronic systems are unable to
relay information to the control system.
The following systems may have failed:�
Coolant temperature display
�
Tachometer
�
Cruise control display
�
Have the electronic systems checked
by an authorized Mercedes-Benz Light
Truck Center.
W
WASHER FLUID
CHECK LEVEL!
The fluid level has dropped to about
1/3
of total reservoir capacity.�
Add washer fluid (
�page 380).
Page 323 of 416
323 Practical hints
Where will I find...?
Spare wheel
The spare wheel is located under a cover
on the outside of the vehicle’s tailgate.
For information on rim and tire specifica-
tions, see (
�page 369) and (
�page 371).
Removing cover
1Cover ring
2Key
3Tab
�
Open lock for cover ring1 with
key2 for the spare wheel cover.
�
Fold tab3 downwards.
4Cover plate
�
Pull cover ring1 slightly outwards in
direction of arrows and remove.
�
Pull cover plate4 upward towards
you.5Catch
6Recess
iWhen replacing cover plate4, make
sure catch5 engages in recess6.
Make sure the lock faces downwards
when mounting cover ring1.
For safety reasons, check regularly that
the spare wheel is securely fastened.
Page 325 of 416
325 Practical hints
Unlocking/locking in an emergency
�Unlocking/locking in an emergency
Unlocking the vehicle
If you are unable to unlock the vehicle with
the SmartKey, open the driver’s door and
the tailgate using the mechanical key.
The passenger door cannot be unlocked
manually.
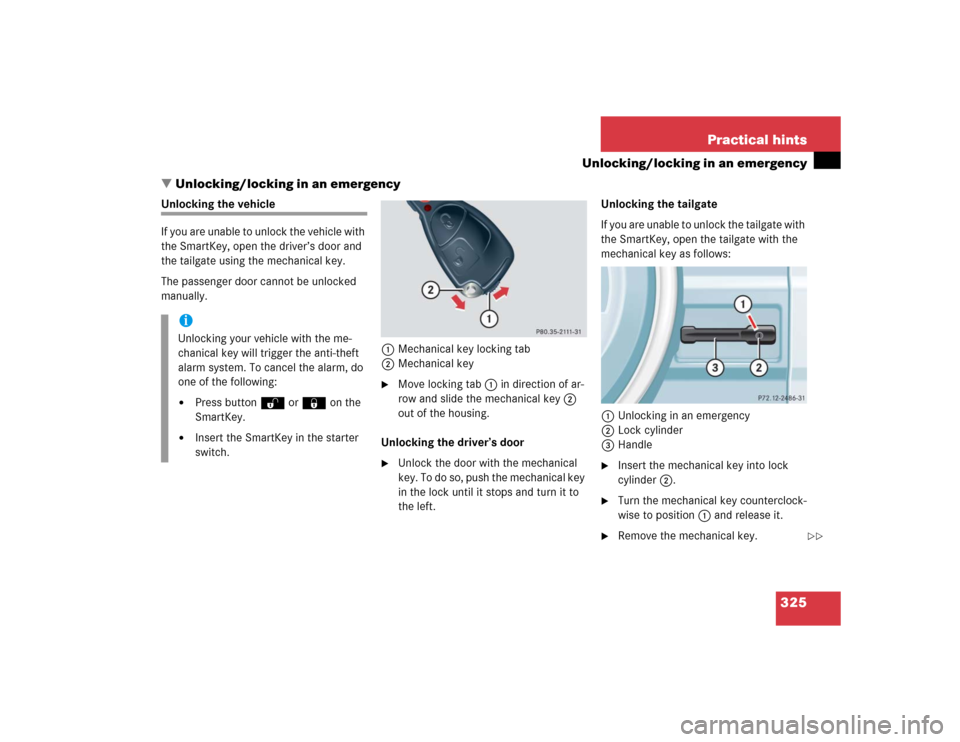
1Mechanical key locking tab
2Mechanical key
�
Move locking tab1 in direction of ar-
row and slide the mechanical key2
out of the housing.
Unlocking the driver’s door
�
Unlock the door with the mechanical
key. To do so, push the mechanical key
in the lock until it stops and turn it to
the left.Unlocking the tailgate
If you are unable to unlock the tailgate with
the SmartKey, open the tailgate with the
mechanical key as follows:
1Unlocking in an emergency
2Lock cylinder
3Handle
�
Insert the mechanical key into lock
cylinder2.
�
Turn the mechanical key counterclock-
wise to position1 and release it.
�
Remove the mechanical key.
iUnlocking your vehicle with the me-
chanical key will trigger the anti-theft
alarm system. To cancel the alarm, do
one of the following:�
Press button Œ or ‹ on the
SmartKey.
�
Insert the SmartKey in the starter
switch.
��
Page 326 of 416
326 Practical hintsUnlocking/locking in an emergency�
Press lock cylinder2 and pull on tail-
gate handle3.
�
Open the tailgate to the side.
Locking the vehicle
If you are unable to lock the vehicle with
the SmartKey, lock it with the mechanical
key as follows:�
Close the passenger doors and the tail-
gate.
�
Press the central locking switch in the
cockpit (
�page 99).
�
Check to see whether the locking
knobs on the passenger doors are still
visible. If necessary, push them down
manually.
�
Slide the mechanical key2 out of the
SmartKey.
�
Lock the driver’s door with the me-
chanical key.
�
Check if the tailgate is locked. If neces-
sary lock the tailgate with the mechan-
ical key.
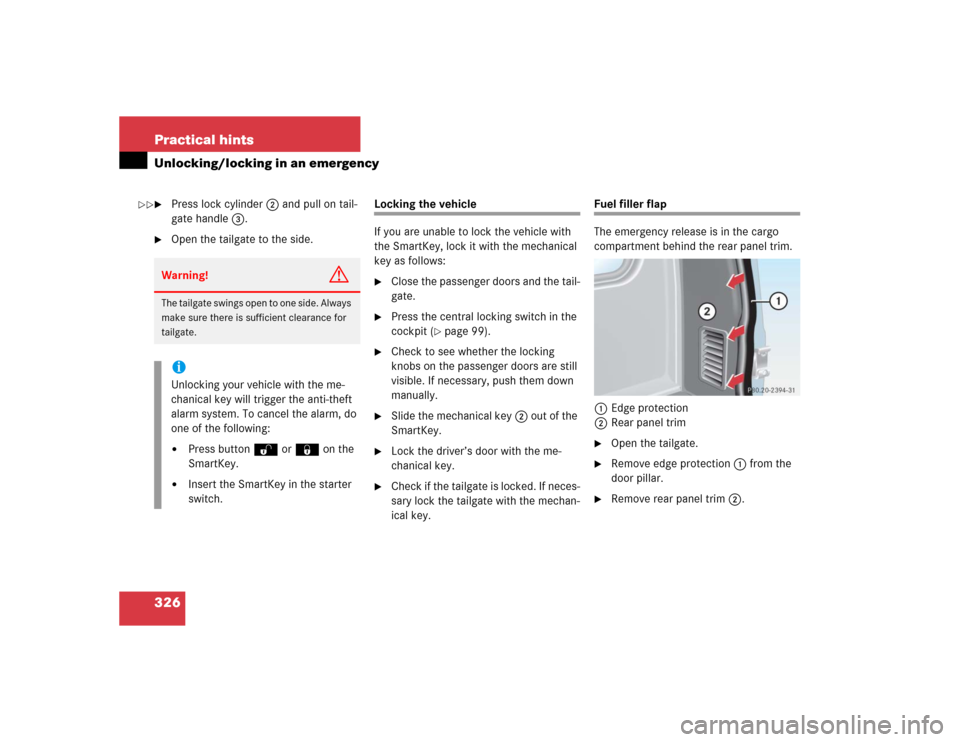
Fuel filler flap
The emergency release is in the cargo
compartment behind the rear panel trim.
1Edge protection
2Rear panel trim�
Open the tailgate.
�
Remove edge protection1 from the
door pillar.
�
Remove rear panel trim2.
Warning!
G
The tailgate swings open to one side. Always
make sure there is sufficient clearance for
tailgate.iUnlocking your vehicle with the me-
chanical key will trigger the anti-theft
alarm system. To cancel the alarm, do
one of the following:�
Press button Œ or ‹ on the
SmartKey.
�
Insert the SmartKey in the starter
switch.
��
Page 328 of 416
328 Practical hintsOpening/closing in an emergencyTilt/sliding sunroof
You can open or close the tilt/sliding sun-
roof manually in the case of power failure.
The tilt/sliding sunroof drive is located on
the left side (driver’s side) of the cargo
compartment behind the rear panel trim.
1Edge protection
2Rear panel trim�
Take the vehicle tool kit out from its
storage compartment (
�page 321).
�
Open the tailgate.
�
Remove edge protection1 from door
pillar.
�
Remove rear panel trim2.
3Key (vehicle tool kit)
4Screwdriver (vehicle tool kit)
�
Fit key3 into hexagon nut of drive.
�
Insert screwdriver4 into the key as a
lever.
�
Turn screwdriver4 clockwise to:�
slide sunroof closed
�
raise sunroof at the rear
�
Turn screwdriver4 counterclockwise
to:�
slide sunroof open
�
lower sunroof at the rear
iDo not disconnect electrical connec-
tors.