Page 10 of 498

ContentsBattery ............................................... 420
Disconnecting the battery ............ 421
Removing the battery ................... 421
Charging and reinstalling battery . 422
Reconnecting the battery ............. 422
Jump starting ..................................... 423
Towing the vehicle ............................. 425
Towing the vehicle........................ 425
Installing towing eye bolt.............. 427
Fuses ................................................. 429
Aids for changing fuses ................ 430
Main fuse box in passenger
compartment................................ 430
Fuse box in engine compartment . 431
Fuse box in trunk.......................... 432
Technical data................................. 433
Parts service ...................................... 434
Warranty coverage............................. 435
Loss of Service and Warranty
Information Booklet ..................... 435
Identification labels ........................... 436
Layout of poly-V-belt drive ................. 437
CLK 320/CLK 500/CLK 55 AMG. 437
Engine................................................ 438
Rims and tires.................................... 439
Same size tires ............................. 440
Mixed size tires ............................ 441
Minispare wheel
(except CLK 55 AMG)................... 443
Collapsible tire
(CLK 55 AMG only)....................... 443
Electrical system ............................... 444
Main dimensions ............................... 445
Weights.............................................. 446Fuels, coolants, lubricants, etc. ......... 447
Capacities .................................... 447
Engine oils ................................... 449
Engine oil additives ...................... 449
Air conditioning refrigerant .......... 450
Brake fluid.................................... 450
Premium unleaded gasoline ......... 450
Fuel requirements ........................ 451
Gasoline additives ........................ 451
Coolants ...................................... 452
Windshield washer system and
headlamp cleaning system*......... 454
Technical terms............................... 455Index................................................. 461
Page 355 of 498
353 Practical hints
What to do if …?
Where will I find...?
Unlocking/locking in an emergency
Opening/closing in an emergency
Replacing bulbs
Replacing wiper blades
Flat tire
Battery
Jump starting
Towing the vehicle
Fuses
Page 391 of 498

389 Practical hints
Where will I find...?
�Where will I find...?
First aid kit
The first aid kit is located in the trunk on
the left side secured by a hook and loop
fastener.�
Loosen hook and loop fastener.
�
Remove first aid kit.
Vehicle tool kit
The vehicle tool kit is located in the storage
compartment underneath the trunk floor.
The following is included:�
Towing eye bolt
�
Wheel wrench
�
Alignment bolt
�
Vehicle jack
�
Spare wheel bolts
�
Spare fuses
�
Valve extractor (CLK 55 AMG only)
�
Protective wrap (CLK 55 AMG only)
�
Collapsible wheel chock
�
A pair of gloves Removing the vehicle tool kit (except
CLK 55 AMG)
�
Lift up trunk floor cover and engage
trunk floor handle in upper edge of
trunk.
1Retaining screw
2Storage well casing
�
Loosen retaining screw1 in the mid-
dle of storage well casing by turning it
counterclockwise.
�
Remove storage well casing2.
iCheck expiration dates and contents
for completeness at least once a year
and replace missing/expired items.
��
Page 393 of 498

391 Practical hints
Where will I find...?
1Vehicle jack
2Collapsible wheel chock and spare
wheel bolts
3Towing eye bolt
4Alignment bolt
5Wheel wrench
6Spare fuses and valve extractor
7Electric air pumpVehicle jackThe vehicle jack is located in the storage
compartment underneath the trunk floor.
Storage position�
Remove vehicle jack from its
compartment.
�
Push crank handle up.
Warning!
G
The jack is designed exclusively for jacking
up the vehicle at the jack take-up brackets
built into both sides of the vehicle. To help
avoid personal injury, use the jack only to lift
the vehicle during a wheel change. Never
get beneath the vehicle while it is supported
by the jack. Keep hands and feet away from
the area under the lifted vehicle. Always
firmly set parking brake and block wheels
before raising vehicle with jack.
Do not disengage parking brake while the
vehicle is raised. Be certain that the jack is
always vertical (plumb line) when in use,
especially on hills. Always try to use the jack
on level surface. Make sure the jack arm is
fully seated in the jack take-up bracket.
Always lower the vehicle onto sufficient
capacity jackstands before working under
the vehicle.
Page 431 of 498
429 Practical hintsFuses
�Fuses
The electrical fuses in your vehicle serve to
stop the supply of electricity to a device
that is malfunctioning. This helps to
prevent damage to the other vehicle
electronics.
The following aids are available to help you
change fuses (
�page 430):
�
Fuse chart
�
Spare fuses
�
Fuse extractorThe electrical fuses are located in different
fuse boxes:
�
Main fuse box in passenger
compartment (
�page 430)
�
Fuse box in engine compartment
(�page 431)
�
Fuse box in trunk (
�page 432)
Warning!
G
Only use fuses approved for Mercedes-Benz
with the specified amperage for the system
in question. Otherwise, a short circuit could
result and cause a fire.!Only install fuses that have been tested
and approved by Mercedes-Benz and
that have the specified amperage
rating.
Otherwise, electrical parts or systems
could be damaged.
Never attempt to repair or bridge a
blown fuse. Have the cause determined
and remedied by an authorized
Mercedes-Benz Center.
Page 432 of 498
430 Practical hintsFusesAids for changing fuses
Fuse chart
The fuse chart is found in the main fuse
box in the passenger compartment
(�page 430). The amperages of the fuses
are also given there.
Spare fuses
Spare fuses are found in the vehicle tool kit
in the spare wheel well (
�page 390).
Fuse extractor
The fuse extractor is located in the cover of
the auxiliary fuse box in the trunk
(
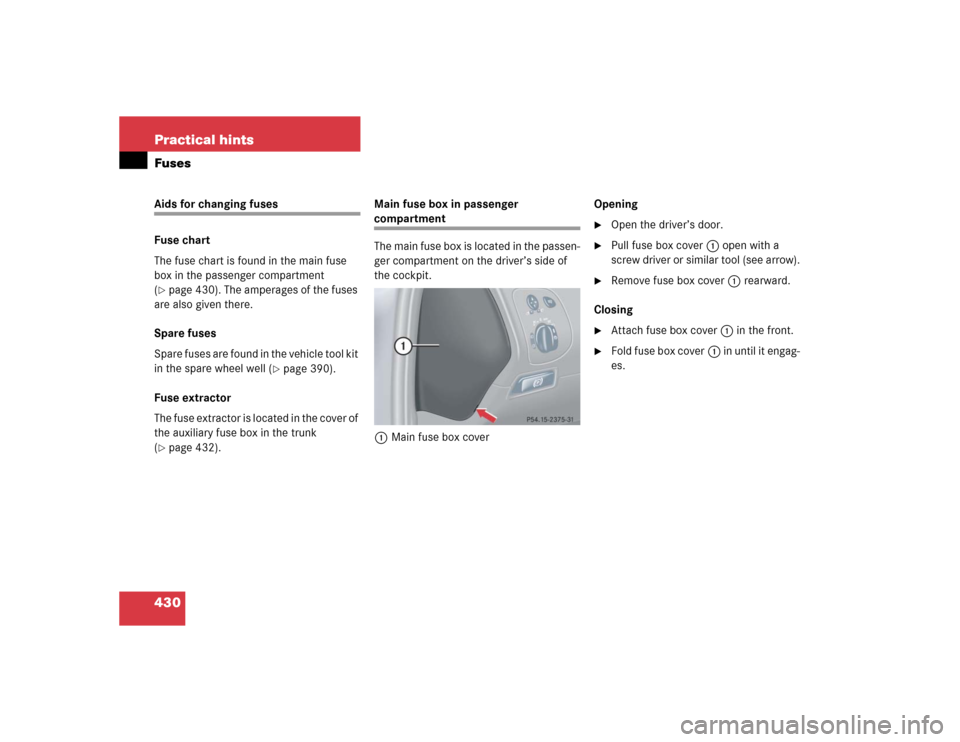
�page 432).Main fuse box in passenger
compartment
The main fuse box is located in the passen-
ger compartment on the driver’s side of
the cockpit.
1Main fuse box coverOpening
�
Open the driver’s door.
�
Pull fuse box cover1 open with a
screw driver or similar tool (see arrow).
�
Remove fuse box cover1 rearward.
Closing
�
Attach fuse box cover1 in the front.
�
Fold fuse box cover1 in until it engag-
es.
Page 433 of 498
431 Practical hintsFuses
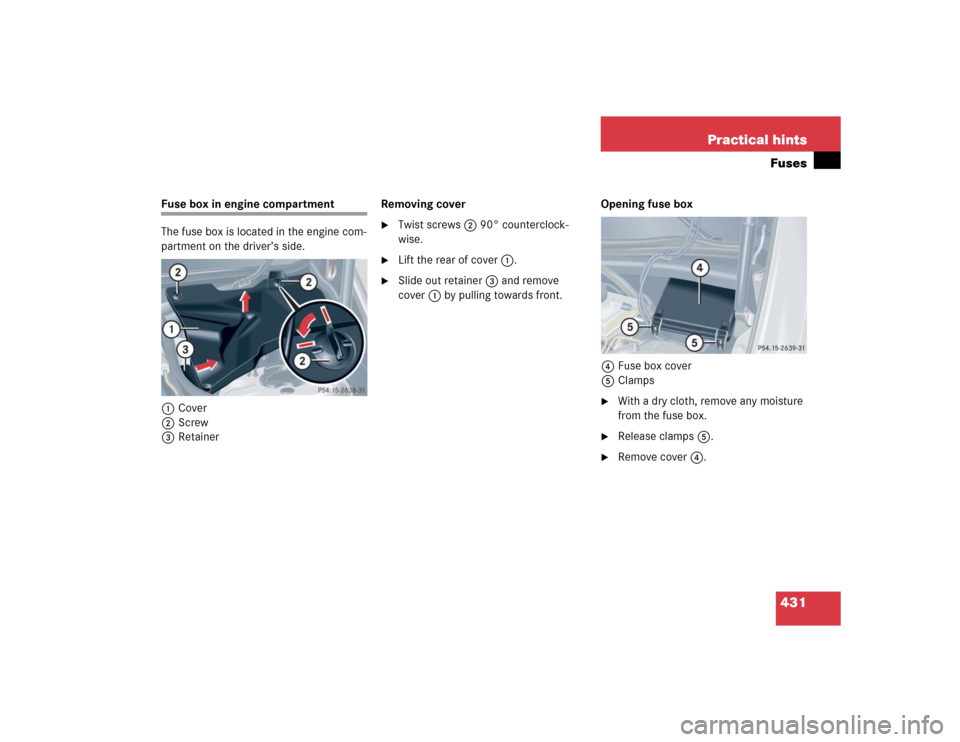
Fuse box in engine compartment
The fuse box is located in the engine com-
partment on the driver’s side.
1Cover
2Screw
3RetainerRemoving cover
�
Twist screws2 90° counterclock-
wise.
�
Lift the rear of cover1.
�
Slide out retainer3 and remove
cover1 by pulling towards front.Opening fuse box
4Fuse box cover
5Clamps
�
With a dry cloth, remove any moisture
from the fuse box.
�
Release clamps5.
�
Remove cover4.
Page 434 of 498
432 Practical hintsFusesClosing fuse box�
Make sure that the sealing rubber is
properly positioned.
�
Press fuse box cover4 down and
secure with clamps5.
Installing cover
�
Insert cover1 sideways into
retainer3.
�
Twist screws2 90° clockwise.
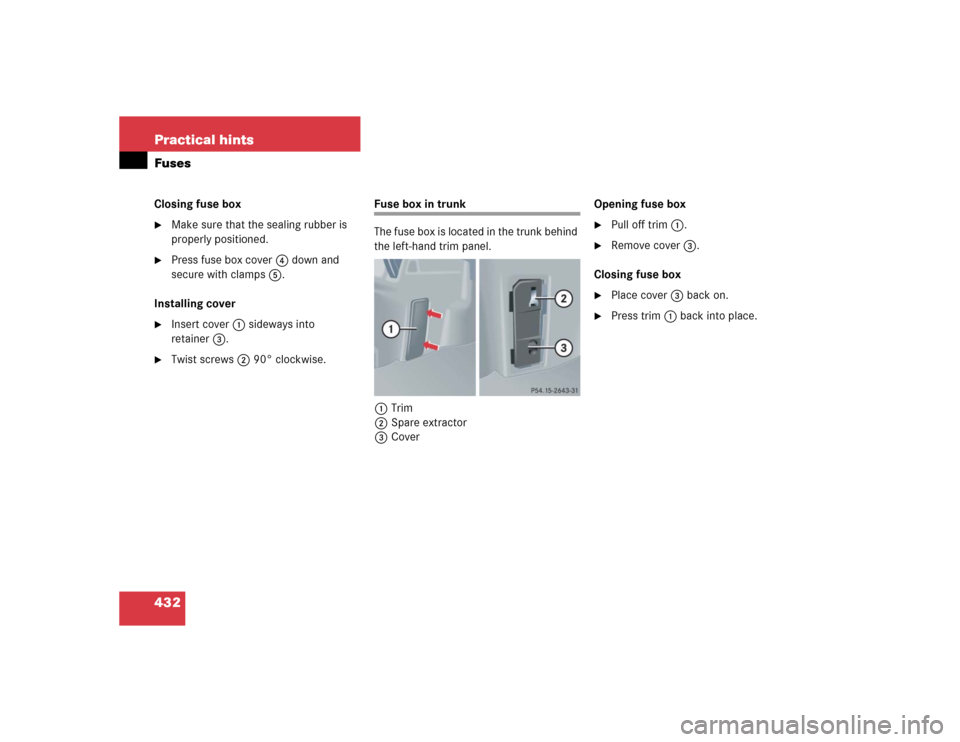
Fuse box in trunk
The fuse box is located in the trunk behind
the left-hand trim panel.
1Trim
2Spare extractor
3CoverOpening fuse box
�
Pull off trim1.
�
Remove cover3.
Closing fuse box
�
Place cover3 back on.
�
Press trim1 back into place.