Page 182 of 498

180 Controls in detailGood visibilityActivating exterior rear view mirror
parking position
Follow these steps to activate the mirror
parking position so that the
passenger-side exterior rear view mirror
will be turned downward to the stored
position.
The buttons are located above the exterior
lamp switch.
1Driver’s side exterior rear view mirror
button
2Passenger-side exterior rear view
mirror button
�
Make sure you have stored a parking
position for the passenger-side exterior
rear view mirror (
�page 123).
�
Make sure the
Mirror adjustment
parking aid function
in the
Convenience
submenu of the control
system is switched to
on (�page 160).
�
Switch on ignition (
�page 36).
�
Press button2 for the passenger-side
exterior rear view mirror.
�
Place the gear selector lever in reverse
gearR.
The passenger-side exterior rear view
mirror will be turned downward to the
stored position.The exterior rear view mirror returns to its
previously stored driving position:
�
ten seconds after you put the gear se-
lector lever out of positionR
�
immediately once your vehicle exceeds
a speed of approx. 6 mph (10 km/h)
�
immediately when you press button1
for the driver’s side mirror.
Page 212 of 498
210 Controls in detailAudio systemButton and soft key operation
In these instructions, the alphanumeric
keypad (right side of radio panel) and the
function buttons (left side of radio panel)
are referred to as “buttons”. The four keys
below the display panel are referred to as
“soft keys”.
Operation
Switching the unit on/off
Switching on�
Turn the SmartKey in the starter switch
to position 1 or 2.
�
If the audio system was on as you
removed the SmartKey from the starter
switch, the audio system will
automatically come back on as you
turn the SmartKey to position 1 or 2.
or
�
Press M button.
!Do not press directly in the display
face. Otherwise, the display will be
damaged.
iIf the radio is switched on without the
key in the starter switch, it will
automatically switch off again after
approx. 30 minutes.
If your vehicle is equipped with a
telephone, the display may prompt you
to enter your PIN (GSM network) or
code (TDMA or CDMA network).
Page 218 of 498
216 Controls in detailAudio systemCalling up wavebands for radios with
SAT*�
Press
FM, AM or
WB soft key repeatedly
until desired waveband has been se-
lected.
The FM, AM and WB wavebands are
called up one after another.
The waveband currently selected
appears in the upper left-hand corner
of the display.Selecting a station
The following options are available for se-
lecting a station:
�
Direct frequency input (
�page 216)
�
Manual tuning (
�page 217)
�
Automatic seek tuning (
�page 217)
�
Scan search (
�page 217)
�
Station memory (
�page 218)
�
Automatic station memory (Autostore)
(�page 218)
The station search proceeds in the follow-
ing frequency increments:
�
200 kHz in FM range
�
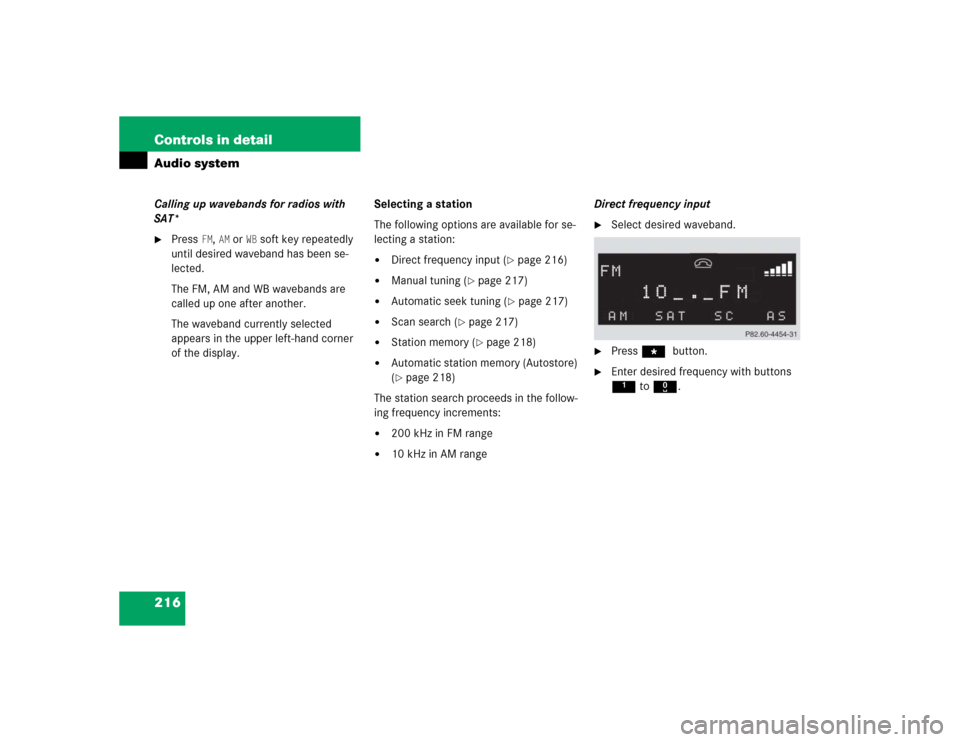
10 kHz in AM rangeDirect frequency input
�
Select desired waveband.
�
Press * button.
�
Enter desired frequency with buttons
1to R.
Page 220 of 498
218 Controls in detailAudio system�
Ending scan search�
Press
SC soft key or S or T.
The station last played will be se-
lected and
SC disappears from the
display.
Station memory
You can store ten AM and ten FM stations
in the memory.
�
Storing stations�
Tune in desired station.
�
Press and hold desired station
button1 to R until a brief
signal tone is heard.
The frequency is stored on the se-
lected station button.
�
Calling up stations�
Press desired station button1
to R briefly.
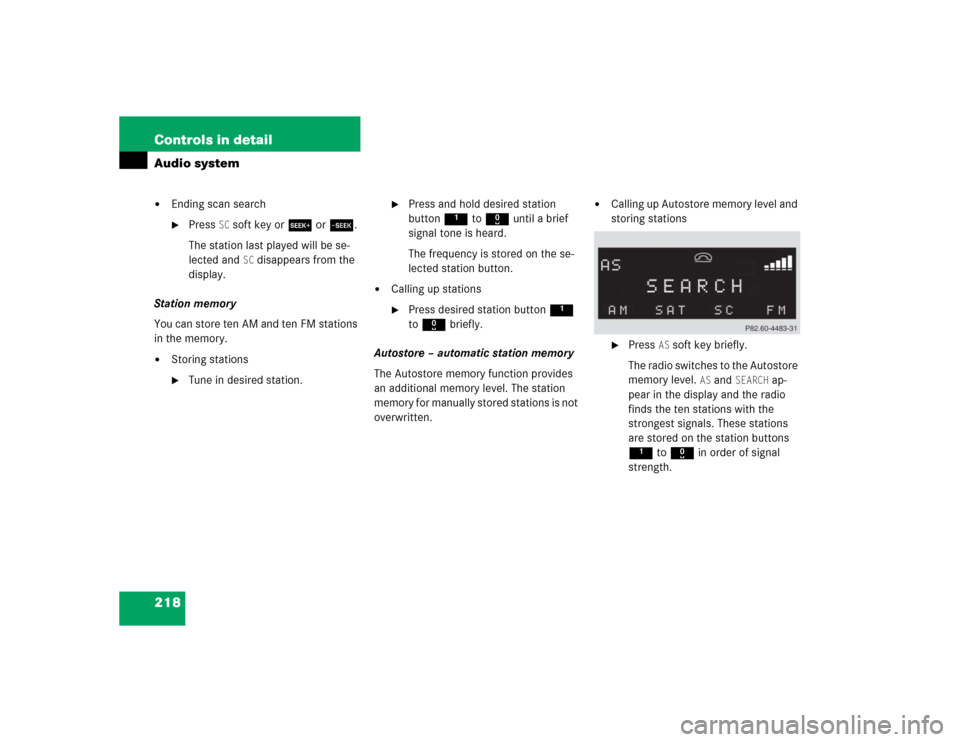
Autostore – automatic station memory
The Autostore memory function provides
an additional memory level. The station
memory for manually stored stations is not
overwritten.
�
Calling up Autostore memory level and
storing stations�
Press
AS soft key briefly.
The radio switches to the Autostore
memory level.
AS and
SEARCH
ap-
pear in the display and the radio
finds the ten stations with the
strongest signals. These stations
are stored on the station buttons
1 to R in order of signal
strength.
Page 221 of 498

219 Controls in detail
Audio system
�
Calling up stations�
Press desired station button1
to R.
�
Leaving the Autostore memory level�
Press
FM or
AM
soft key briefly.
Interrupting radio mode
The radio mode is interrupted by an incom-
ing call on the telephone* (
�page 237)
�
Mute on�
Press U button.
The radio mode is interrupted and MUTED
appears in the display.
�
Mute off�
Press U button.
The radio mode is again active.
Weather band
�
Press
WB soft key.
The weather band station last received
is tuned in.Selecting a weather band station
directly
�
Select desired weather band station
with buttons 1 to 7.
If a station cannot be tuned in, a search
is automatically started.
Search
�
Press S or T button to tune in
the next receivable weather band sta-
tion.iIf no weather band station is received
after three consecutive scans of the
complete frequency range, then the
scan stops at the channel with which it
began and
NO WB FOUND
appears in the
display.
If this happens, switch back to stan-
dard radio mode.
Page 231 of 498
229 Controls in detail
Audio system
Playing tracks
You have the following options:�
Audio system with CD changer*: se-
lecting CDs
�
Direct track entry
�
Track skip forward/reverse
�
Fast forward/reverse
�
Scan
�
Random tracks
�
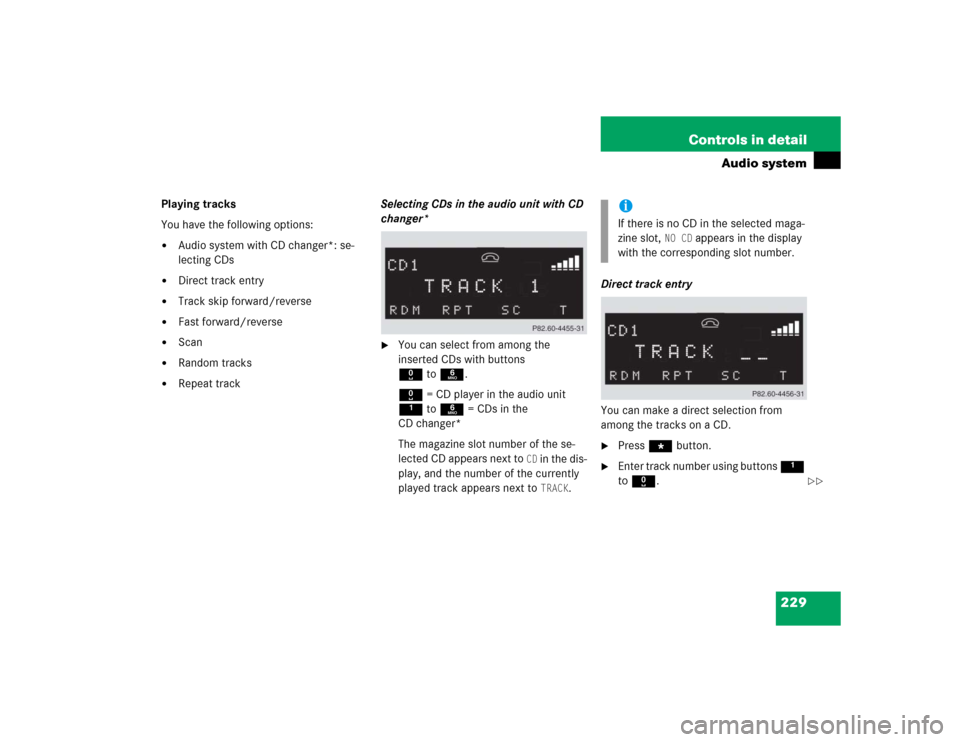
Repeat trackSelecting CDs in the audio unit with CD
changer*
�
You can select from among the
inserted CDs with buttons
Rto6.
R = CD player in the audio unit
1to6 = CDs in the
CD changer*
The magazine slot number of the se-
lected CD appears next to
CD in the dis-
play, and the number of the currently
played track appears next to TRACK
.Direct track entry
You can make a direct selection from
among the tracks on a CD.
�
Press * button.
�
Enter track number using buttons 1
to R.iIf there is no CD in the selected maga-
zine slot,
NO CD
appears in the display
with the corresponding slot number.
��
Page 235 of 498

233 Controls in detail
Audio system
PIN entry�
Enter PIN number using buttons 1
to R.
�
If necessary, correct number entered
with the
CLR
soft key. Press soft key
briefly to delete the last digit entered;
press soft key and hold to delete the
complete number.
�
Press
OK soft key after entering correct
PIN.
�
READY
or
ROAMING
will appear in the dis-
play.Adjusting the volume
�
Turn rotary control of N button dur-
ing a telephone call.
The volume will increase or decrease
depending on the direction turned.
Adjusting sound
�
Adjust sound during a telephone call.
Sound adjustment (
�page 211).Placing a call
Entering a telephone number and
starting the dialing process
�
Enter desired telephone number using
buttons 1 to R.
The number can have up to 32 digits,
but only twelve of these are visible in
the display.
iIf the PIN is entered incorrectly three
times,
NEED PUK
will appear in the dis-
play. Enter PUK via your telephone.
Please refer to the separate telephone
operating instructions for more infor-
mation.
iThe volume can be adjusted separately
for telephone mode and audio mode.
��
Page 238 of 498

236 Controls in detailAudio system�
Speed dial
If you have stored telephone numbers
as speed dial numbers in your tele-
phone, you can also enter these with
buttons 1 to R on the radio
head unit.�
Press desired button 1 to R
briefly.
�
Press s button.
The call will be made.
�
Turbo dial
If you have stored telephone numbers
as turbo dial numbers in your tele-
phone, you can also enter these with
buttons 1 to R on the radio
head unit.�
Press desired button 1 to R
until the call is made.Redial
If the number you have dialed is busy, you
can again place calls to the last ten tele-
phone numbers dialed using the redial
function.
�
Manual redial
�
Press s button.
The telephone number last dialed
will appear in the display.
�
Select desired telephone number
with button ‚ or ƒ.
The letter
L and the number of the
memory position appears in the
left-hand corner of the display. The
numbers are stored in the order of
the calls received.
�
When you have selected a number,
press s button.
The call will be made.
iIf you have activated the automatic re-
dial function on your telephone, the
number of the person being called is
automatically redialed after a short
waiting period if there is a busy signal.
Refer to the separate operating instruc-
tions for the mobile telephone.
 and the
function buttons (left side of radio panel)
are re")