Page 312 of 474
311 Operation
Tires and wheels
Be sure to readjust the tire inflation
pressure for normal driving speeds. You
should wait until the tires are cold before
adjusting the tire inflation pressure.
Some vehicles may have supplemental tire
inflation pressure information for vehicle
loads less than the maximum loaded
vehicle condition. If such information is
provided, it can be found on the placard
located on the inside of the fuel filler flap.
Tire inflation pressure changes by approxi-
mately 1.5 psi (0.1 bar) per 18°F (10°C) of
air temperature change. Keep this in mind
when checking tire inflation pressure
where the temperature is different from
the outside temperature.
Checking tire inflation pressure
Regularly check your tire inflation pressure
at least once a month.
Check and adjust the tire inflation
pressure when the tires are cold. The tires
can be considered cold if the vehicle has
been parked for at least three hours or
driven less than one mile (1.6 km).
If you check the tire inflation pressure
when the tires are warm (the vehicle has
been driven for several miles or sitting less
than three hours), the reading will be
approximately 4 psi (0.3 bar) higher than
the cold reading. This is normal. Do not let
air out to match the specified cold tire
inflation pressure. Otherwise, the tire will
be underinflated.Follow the steps below to achieve correct
tire inflation pressure:
�
Remove the cap from the valve on one
tire.
�
Firmly press a tire gauge onto the
valve.
�
Read tire inflation pressure on tire
gauge and check against the recom-
mended tire inflation pressure on the
placard on the driver’s door B-pillar
(�page 310). If necessary, add air to
achieve the recommended tire inflation
pressure.
��
Page 328 of 474
327 Operation
Tires and wheels
For information on wheel change, see the
“Practical hints” section (
�page 373) and
(
�page 394).Warning!
G
Have the tightening torque checked after
changing a wheel. Wheels could become
loose if not tightened with a torque of
80 lb-ft (110 Nm).
Only use genuine Mercedes-Benz wheel
bolts specified for your vehicle’s rims.
Page 329 of 474
328 OperationWinter drivingBefore the onset of winter, have your
vehicle winterized at an authorized
Mercedes-Benz Center.
This service includes:�
Check of anticorrosion and antifreeze
concentration.
�
Addition of cleaning concentrate to the
water of the windshield and headlamp
cleaning system. Add MB Concentrate
“S” to a premixed windshield washer
solvent / antifreeze which is formulated
for temperatures below freezing point
(�page 435).
�
Battery test. Battery capacity drops
with decreasing ambient temperature.
A well charged battery helps to ensure
that the engine can be started, even at
low ambient temperatures.
�
Tire change. Mercedes-Benz recom-
mends M+S rated radial-ply tires with a
minimum tread depth of approximately 1/6 in (4 mm) on all four wheels for the
winter season.
Winter tires
Always use winter tires at temperatures
below 45°F (7°C) and whenever wintry
road conditions prevail. Use of winter tires
is the only way to achieve the maximum
effectiveness of the ABS and ESP in winter
operation.
For safe handling, make sure that all
mounted winter tires are of the same make
and have the same tread design.Always observe the speed rating of the
winter tires installed on your vehicle. If the
maximum speed for which your tires are
rated is below the speed rating of your
vehicle, you must place a notice to this
effect where it will be seen by the driver.
Such notices are available at your tire deal-
er or any authorized Mercedes-Benz
Center.Warning!
G
Winter tires with a tread depth under
1/6 in
(4 mm) must be replaced. They are no long-
er suitable for winter operation.
Warning!
G
If you use your spare tire when winter tires
are fitted on the other wheels, be aware that
the difference in tire characteristics may
very well impair turning stability and that
overall driving stability may be reduced.
Adapt your driving style accordingly.
Have the spare tire replaced with a winter
tire at the nearest authorized
Mercedes-Benz Center.
Page 375 of 474
374 Practical hintsWhere will I find ...?Vehicle jack
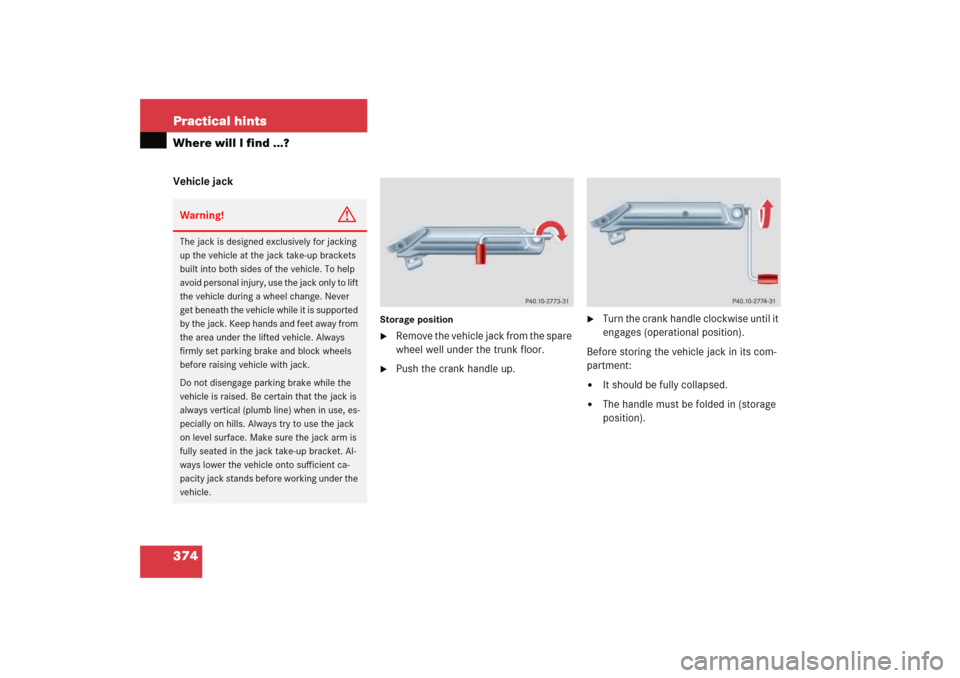
Storage position�
Remove the vehicle jack from the spare
wheel well under the trunk floor.
�
Push the crank handle up.
�
Turn the crank handle clockwise until it
engages (operational position).
Before storing the vehicle jack in its com-
partment:
�
It should be fully collapsed.
�
The handle must be folded in (storage
position).
Warning!
G
The jack is designed exclusively for jacking
up the vehicle at the jack take-up brackets
built into both sides of the vehicle. To help
avoid personal injury, use the jack only to lift
the vehicle during a wheel change. Never
get beneath the vehicle while it is supported
by the jack. Keep hands and feet away from
the area under the lifted vehicle. Always
firmly set parking brake and block wheels
before raising vehicle with jack.
Do not disengage parking brake while the
vehicle is raised. Be certain that the jack is
always vertical (plumb line) when in use, es-
pecially on hills. Always try to use the jack
on level surface. Make sure the jack arm is
fully seated in the jack take-up bracket. Al-
ways lower the vehicle onto sufficient ca-
pacity jack stands before working under the
vehicle.
Page 395 of 474
394 Practical hintsFlat tire
Preparing the vehicle�
Park the vehicle as far as possible from
moving traffic on a hard surface.
�
Turn on the hazard warning flashers.
�
Turn the steering wheel so that the
front wheels are in a straight ahead
position.
�
Move the gear selector lever toP
(manual transmission to first or reverse
gear).
�
Turn off the engine (
�page 58).
�
Remove the SmartKey from the starter
switch.
�
Have any passenger exit the vehicle at
a safe distance from the roadway.
Mounting the spare wheel
Preparing the vehicle
Prepare the vehicle as described
(�page 394).
�
Take the wheel wrench and the jack
out of wheel well below the trunk floor
(�page 373).
�
Take the spare wheel out of the trunk
(�page 375).
Warning!
G
The dimensions of the spare wheel are dif-
ferent from those of the road wheels. As a
result, the vehicle handling characteristics
change when driving with a spare wheel
mounted. Adapt your driving style accord-
ingly.
The spare wheel is for temporary use only.
When driving with spare wheel mounted, en-
sure proper tire pressure and do not exceed
vehicle speed of 50 mph (80 km/h).
Drive to the nearest Mercedes-Benz Center
as soon as possible to have the spare wheel
replaced with a regular road wheel.
Never operate the vehicle with more than
one spare wheel mounted.
Page 396 of 474
395 Practical hints
Flat tire
Lifting the vehicle�
Prevent the vehicle from rolling away
by blocking wheels with wheel chocks
or other sizable objects.
One wheel chock is included with
vehicle tool kit (
�page 373).
When changing wheel on a level surface:
�
Place the wheel chock (located in the
vehicle tool kit) in front of and another
sizable object behind the wheel that is
diagonally opposite to the wheel being
changed.
When changing wheel on a hill:
�
Place the wheel chock and other size-
able object on the downhill side block-
ing both wheels of the other axle.
�
Take the two-piece wheel wrench and
the jack out of the vehicle tool kit
(�page 373). Assemble wheel wrench.
�
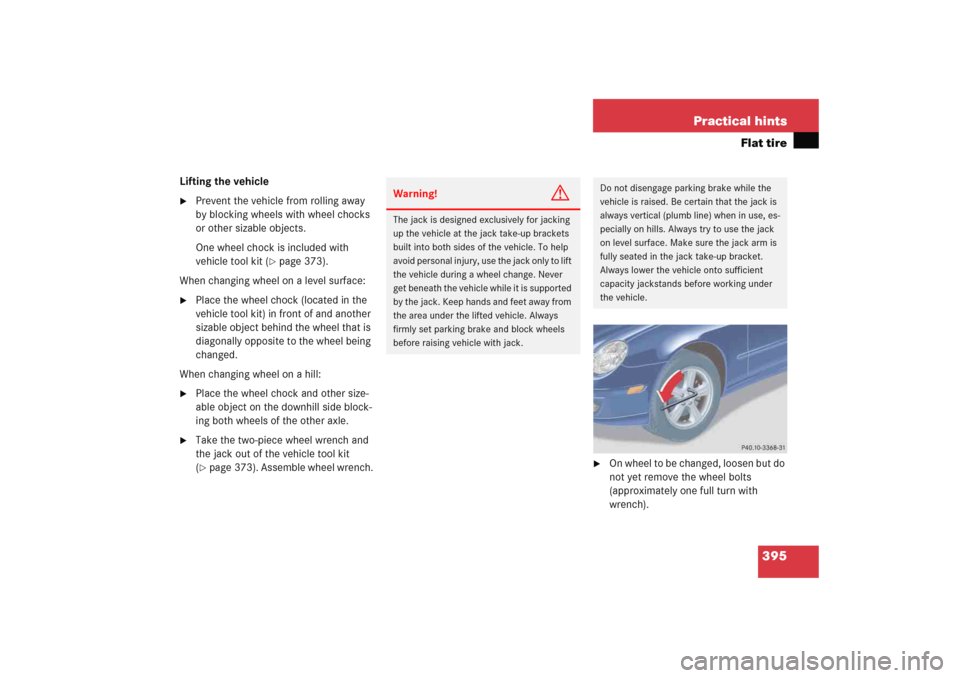
On wheel to be changed, loosen but do
not yet remove the wheel bolts
(approximately one full turn with
wrench).
Warning!
G
The jack is designed exclusively for jacking
up the vehicle at the jack take-up brackets
built into both sides of the vehicle. To help
avoid personal injury, use the jack only to lift
the vehicle during a wheel change. Never
get beneath the vehicle while it is supported
by the jack. Keep hands and feet away from
the area under the lifted vehicle. Always
firmly set parking brake and block wheels
before raising vehicle with jack.
Do not disengage parking brake while the
vehicle is raised. Be certain that the jack is
always vertical (plumb line) when in use, es-
pecially on hills. Always try to use the jack
on level surface. Make sure the jack arm is
fully seated in the jack take-up bracket.
Always lower the vehicle onto sufficient
capacity jackstands before working under
the vehicle.
Page 397 of 474
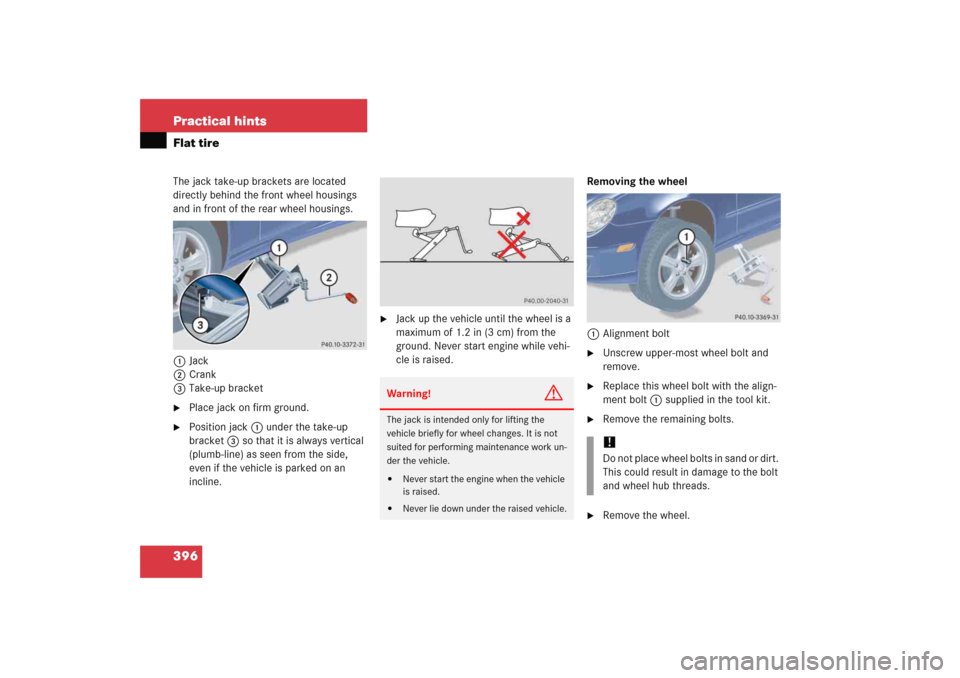
396 Practical hintsFlat tireThe jack take-up brackets are located
directly behind the front wheel housings
and in front of the rear wheel housings.
1Jack
2Crank
3Take-up bracket�
Place jack on firm ground.
�
Position jack1 under the take-up
bracket3 so that it is always vertical
(plumb-line) as seen from the side,
even if the vehicle is parked on an
incline.
�
Jack up the vehicle until the wheel is a
maximum of 1.2 in (3 cm) from the
ground. Never start engine while vehi-
cle is raised.Removing the wheel
1Alignment bolt
�
Unscrew upper-most wheel bolt and
remove.
�
Replace this wheel bolt with the align-
ment bolt1 supplied in the tool kit.
�
Remove the remaining bolts.
�
Remove the wheel.
Warning!
G
The jack is intended only for lifting the
vehicle briefly for wheel changes. It is not
suited for performing maintenance work un-
der the vehicle.�
Never start the engine when the vehicle
is raised.
�
Never lie down under the raised vehicle.
!Do not place wheel bolts in sand or dirt.
This could result in damage to the bolt
and wheel hub threads.
Page 411 of 474
410 Practical hintsFusesThe electrical fuses in your vehicle serve to
stop the supply of electricity to a device
that is malfunctioning. This helps to
prevent damage to the other vehicle
electronics.
The following aids are available to help you
change fuses.�
Fuse chart
�
Spare fuses
�
Fuse extractor
The electrical fuses are located in different
fuse boxes.
�
Main fuse box in passenger compart-
ment (
�page 411)
�
Fuse box in engine compartment
(�page 411)
�
Fuse box in trunk (
�page 412)
Aids for changing fuses
Fuse chart
The fuse chart is found in the main fuse
box in the passenger compartment
(�page 411). The amperages of the fuses
are also given there.
Spare fuses
Spare fuses are found in the vehicle tool kit
in the spare wheel well (
�page 373).
Fuse extractor
The fuse extractor is found in the fuse box
cover in the trunk (
�page 412).
Warning!
G
Only use fuses approved for Mercedes-Benz
with the specified amperage for the system
in question. Otherwise, a short circuit could
result and cause a fire.
!Only install fuses that have been tested
and approved by Mercedes-Benz and
that have the specified amperage
rating.
Otherwise, electrical parts or systems
could be damaged.
Never attempt to repair or bridge a
blown fuse. Have the cause determined
and remedied by an authorized
Mercedes-Benz Center.