2005 MAZDA MODEL 6 HATCHBACK brake
[x] Cancel search: brakePage 135 of 340

N (Neutral)
In N, the wheels and transaxle are not
locked. The vehicle will roll freely even
on the slightest incline unless the parking
brake or brakes are on.
WARNING
Shifting from N or P:
It's dangerous to shift from N or P
into a driving gear when the engine is
running faster than idle. If this is
done, the vehicle could move suddenly,
causing an accident or serious injury.
If the engine is running faster than
idle, don't shift from N or P into a
driving gear.
Shifting into N while Driving:
Shifting into N while driving is
dangerous. Engine braking cannot be
applied when decelerating which
could lead to an accident or serious
injury. Do not shift into N when
driving the vehicle.
CAUTION
Do not shift into N when driving the
vehicle. Doing so can cause transaxle
damage.
D (Drive)
D is the normal driving position. From a
stop, the transaxle will automatically shift
through a 4-gear/6-gear
*sequence.
* 3.0-liter engine model
M (Manual)
M is the manual shift mode position.
Gears can be shifted up or down by
operating the shift lever.
Refer to Manual Shift Mode (page 5-12).
q Shift-Lock System
The shift-lock system prevents shifting
out of P unless the brake pedal is
depressed.
To shift from P:
1. Depress and hold the brake pedal.
2. Start the engine.
3. Move the shift lever.
NOTE
lWhen the ignition switch is in the
LOCK position, the shift lever
cannot be shifted from P.
lTo be sure the vehicle is in park, the
ignition key cannot be removed
unless the shift lever is in P.
Driving Your Mazda
Starting and Driving
5-11
Page 139 of 340

If the vehicle is kicked down at the following speeds
or lower, the gears shift down automatically:Gear Vehicle speed
M6 →M5 212 km/h (131 mph)
M6 →M4 161 km/h (100 mph)
M5 →M4 161 km/h (100 mph)
M5 →M3 70 km/h (44 mph)
M4 →M3 70 km/h (44 mph)
M4 →M2 46 km/h (28 mph)
M3 →M2 46 km/h (28 mph)
Recommendations for shifting
Upshifting
For normal acceleration and cruising, we recommend
these shift points.
(2.3-liter engine)
Gear Vehicle speed
M1 to M2 24 km/h (15 mph)
M2 to M3 40 km/h (25 mph)
M3 to M4 65 km/h (40 mph)
(3.0-liter engine)
Gear Vehicle speed
M1 to M2 24 km/h (15 mph)
M2 to M3 40 km/h (25 mph)
M3 to M4 65 km/h (40 mph)
M4 to M5 73 km/h (45 mph)
M5 to M6 80 km/h (50 mph)
Downshifting
When you must slow down in heavy
traffic or on a steep upgrade, downshift
before the engine starts to overwork. This
gives better acceleration when you need
more speed.
On a steep downgrade , downshifting
helps maintain safe speed and prolongs
brake life.
q Driving Tips
Passing
For extra power when passing another
vehicle or climbing steep grades, depress
the accelerator fully. The transaxle will
shift to a lower gear, depending on vehicle
speed.
Climbing steep grades from a stop
To climb a steep grade from a stopped
position:
1. Depress the brake pedal.
2. Shift to D or M1, depending on the
load weight and grade steepness.
3. Release all brakes while gradually accelerating.
Descending steep grades
When descending a steep grade, shift to
lower gears, depending on load weight
and grade steepness. Descend slowly,
using the brakes only occasionally to
prevent them from overheating.
Driving Your Mazda
Starting and Driving
5-15
Page 143 of 340

qTo Decrease Cruising Speed
Press the SET/COAST button and hold it.
The vehicle will gradually slow.
Release the button at the speed you want.
Your vehicle has a tap-down feature that
allows you to decrease your current speed
in decrements of 1.6 km/h (1 mph) by a
momentary tap of the SET/COAST
button. Multiple taps will decrease your
vehicle speed 1.6 km/h (1 mph) for each
tap.
q To Resume Cruising Speed at
More Than 30 km/h (19 mph)
If some other method besides the ON/
OFF switch was used to cancel cruising
speed and the system is still activated, the
most recent set speed will automatically
resume when the RES/ACCEL button is
pressed.
If vehicle speed is below 30 km/h (19
mph), increase the vehicle speed up to 30
km/h (19 mph) and press the RES/
ACCEL button.
qTo Cancel
To turn off the system, use oneof these
methods:
lPress the ON/OFF switch.
lSlightly depress the brake pedal.
lDepress the clutch pedal. (Manual
transaxle only)
Driving Your Mazda
Starting and Driving
5-19
Page 151 of 340

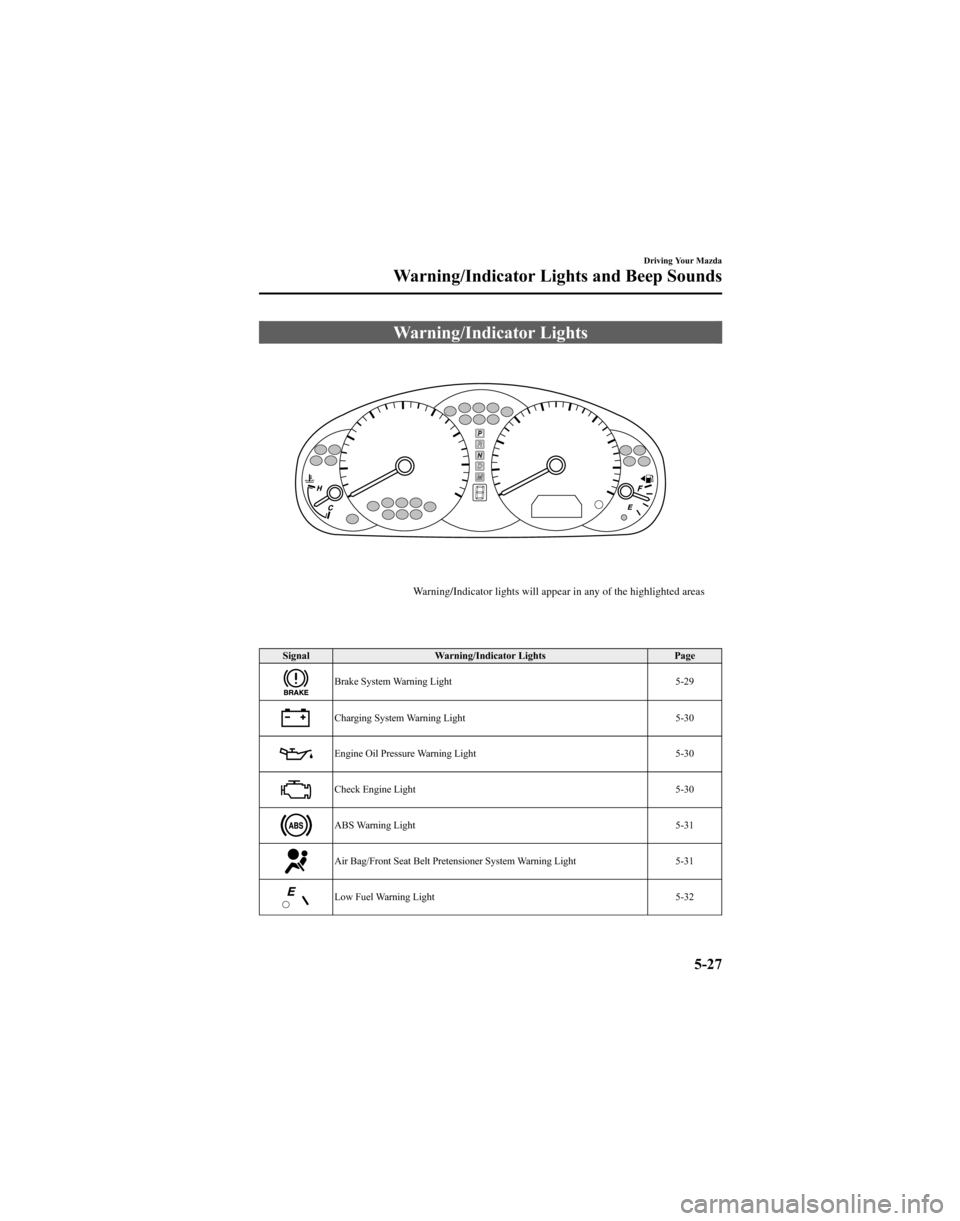
Warning/Indicator Lights
Warning/Indicator lights will appear in any of the highlighted areas
Signal Warning/Indicator Lights Page
Brake System Warning Light 5-29
Charging System Warning Light 5-30
Engine Oil Pressure Warning Light 5-30
Check Engine Light 5-30
ABS Warning Light 5-31
Air Bag/Front Seat Belt Pretensioner System Warning Light 5-31
Low Fuel Warning Light 5-32
Driving Your Mazda
Warning/Indicator Lights and Beep Sounds
5-27
Page 153 of 340

qBrake System Warning Light
This warning has the following functions:
Parking brake warning
The light comes on when the parking
brake is applied with the ignition switch
in the START or ON position. It goes off
when the parking brake is fully released.
Low brake fluid level warning/Electronic brake force distributionsystem warning
If the light stays on after the parking brake
is fully released, you may have a brake
problem.
Drive to the side of the road and park off
the right-of-way.
Low brake fluid level warning
You may notice that the pedal is harder to
push or that it may go closer to the floor.
In either case, it will take longer to stop
the vehicle.
1. With the engine stopped, check the
brake fluid level immediately and add
fluid as required (page 8-16).
2. After adding fluid, check the light again.
If the warning light remains on, or if the
brakes do not operate properly, do not
drive the vehicle. Have it towed to an
Authorized Mazda Dealer. Even if the light goes off, have your brake
system inspected as soon as possible.
Electronic brake force distribution
system warning
If the electronic brake force distribution
control unit determines that some
components are operating incorrectly, the
control unit may turn the brake system
warning light on.
In this case, the ABS warning light comes
on at the same time (page 5-31).
WARNING
Brake Warning Light:
Driving with the brake system warning
light on is dangerous. It indicates that
your brakes may not work at all or
that they could completely fail at any
time. If this light remains on, after
checking that the parking brake is
fully released, have the brakes
inspected immediately. Don't drive
with this light on, and contact an
Authorized Mazda Dealer to have the
brakes inspected as soon as possible.
ABS Warning Light and BrakeWarning Light on at the Same Time:
Driving when the brake system
warning light and ABS warning light
are on at the same time is dangerous.
When both lights are on, the rear
wheels could lock more quickly in an
emergency stop than under normal
circumstances.
Don't drive with both lights on, and
contact an Authorized Mazda Dealer
to have the brakes inspected as soon
as possible.
Driving Your Mazda
Warning/Indicator Lights and Beep Sounds
5-29
Page 155 of 340

lThe fuel-filler cap is missing or not
tightened securely.
If the check engine light remains on or
flashes continuously, do not drive at high
speeds and consult an Authorized Mazda
Dealer as soon as possible.
q ABS Warning Light
The warning light stays on for a few
seconds when the ignition switch is turned
to the ON position.
If the ABS warning light stays on while
you're driving, the ABS control unit has
detected a system malfunction. If this
occurs, your brakes will function normally
as if the vehicle had no ABS.
Should this happen, consult an Authorized
Mazda Dealer as soon as possible.
WARNING
ABS Warning Light and BrakeWarning Light on at the Same Time:
Driving when the brake system
warning light and ABS warning light
are on at the same time is dangerous.
When both lights are on, the rear
wheels could lock more quickly in an
emergency stop than under normal
circumstances.
Don't drive with both lights on, and
contact an Authorized Mazda Dealer
to have the brakes inspected as soon
as possible.
NOTE
When the engine is jump-started to
charge the battery, uneven rpm occurs
and the ABS warning light comes on.
This is due to a weak battery, not a
malfunction.
Recharge the battery.
q Air Bag/Front Seat Belt
Pretensioner System Warning
Light
If the air bag/front seat belt pretensioner
system is normal, the warning light
illuminates when the ignition switch is
turned to the ON position or after the
engine is cranked. After about 6 seconds
it goes out.
Driving Your Mazda
Warning/Indicator Lights and Beep Sounds
5-31
Page 163 of 340

qDaytime Running Lights
(Canada)
In Canada, vehicles must be driven with
the headlights on during daytime
operation.
For that reason, the daytime running lights
automatically turn on when the ignition
switch is turned to the ON position.
NOTE
The Daytime Running Lights turn off
when the parking brake is applied.
Turn and Lane-Change
Signals
q Turn Signal
Move the signal lever down (for a left
turn) or up (for a right turn) to the stop
position. The signal will self-cancel after
the turn is completed.
If the indicator light continues to flash
after a turn, manually return the lever to
its original position.
Right turn
Left turn OFF
Right lane
change
Left lane
change
Green indicators on the dashboard show
which signal is working.
Lane-change signals
Move the lever slightly toward the
direction of the change ―until the
indicator flashes ―and hold it there. It
will return to the off position when
released.
NOTE
If an indicator light stays on without
flashing or if it flashes abnormally, the
turn signal bulb may be burned out.
Driving Your Mazda
Switches and Controls
5-39
Page 236 of 340

Changing a Flat Tire
NOTE
If the following occurs while driving, it
could indicate a flat tire.
lSteering becomes difficult.
lThe vehicle begins to vibrate
excessively.
lThe vehicle pulls in one direction.
If you have a flat tire, drive slowly to a
level spot that is well off the road and out
of the way of traffic to change the tire.
Stopping in traffic or on the shoulder of a
busy road is dangerous.
WARNING
Jacking a Vehicle:
Changing a tire is dangerous if not
done properly. The vehicle can slip off
the jack and seriously injure someone.
Be sure to follow the directions for
changing a tire, and never get under a
vehicle that is supported only by a
jack.
Passenger in Vehicle Supported by aJack:
Allowing someone to remain in a
vehicle supported by a jack is
dangerous. The occupant could cause
the vehicle to fall resulting in serious
injury. Never allow anyone inside a
vehicle supported by a jack.
NOTE
Make sure the jack is well lubricated
before using it. 1. Park on a level surface off the right-of-
way and firmly set the parking brake.
2. Put a vehicle with an automatic transaxle in Park (P), a manual
transaxle in Reverse (R) or 1, and turn
off the engine.
3. Turn on the hazard warning flasher.
4. Have everyone get out of the vehicle and away from the vehicle and traffic.
5. Remove the jack, tool, and spare tire (page 7-3).
6. Block the wheel diagonally opposite the flat tire. When blocking a wheel,
place a block both in front and behind
the tire.
NOTE
When blocking a tire, use rocks or
wood blocks of sufficient size to hold
the tire in place.
7-8
In Case of an Emergency
Flat Tire