Page 8 of 368
These are some of the symbols you may see on your vehicle.
Vehicle Symbol Glossary
Safety Alert
See Owner’s Guide
Fasten Safety BeltAir Bag-Front
Air Bag-SideChild Seat
Child Seat Installation
WarningChild Seat Lower
Anchor
Child Seat Tether
AnchorBrake System
Anti-Lock Brake SystemBrake Fluid -
Non-Petroleum Based
Powertrain MalfunctionSpeed Control
Master Lighting SwitchHazard Warning Flasher
Fog Lamps-FrontFuse Compartment
Fuel Pump ResetWindshield Wash/Wipe
Windshield
Defrost/DemistRear Window
Defrost/Demist
REVIEW COPY
2005 Aviator f/k/a Navigator LS(231), Owners Guide (post-2002-fmt)(own2002),
Market:USA_English(fus)
Introduction
8
Page 9 of 368
Vehicle Symbol Glossary
Power Windows
Front/Rear
Power Window Lockout
Child Safety Door
Lock/UnlockInterior Luggage
Compartment Release
Symbol
Panic AlarmEngine Oil
Engine CoolantEngine Coolant
Temperature
Do Not Open When HotBattery
Avoid Smoking, Flames,
or SparksBattery Acid
Explosive GasFan Warning
Power Steering FluidMaintain Correct Fluid
LevelMAX
MIN
Emission SystemEngine Air Filter
Passenger Compartment
Air FilterJack
Check fuel capLow tire warning
REVIEW COPY
2005 Aviator f/k/a Navigator LS(231), Owners Guide (post-2002-fmt)(own2002),
Market:USA_English(fus)
Introduction
9
Page 114 of 368

4. Disconnect the electrical
connector by pulling downward.
5. Rotate the high beam bulb
counterclockwise until the tabs on
the bulb line up with the ring, and
the bulb can be removed by pulling
rearward.
To install the new bulb:
Handle a halogen headlamp bulb carefully and keep out of
children’s reach. Grasp the bulb only by its plastic base and do
not touch the glass. The oil from your hand could cause the bulb to
break the next time the headlamps are operated.
1. Push the bulb straight in,
carefully aligning the plastic tabs in
the base of the bulb with the
openings in the plastic ring.
2. Rotate the bulb clockwise until it
stops.
3. Reconnect the electrical
connector to the bulb.
4. Install the headlamp on the
vehicle by aligning the four plastic projections into the four holes,
pushing rearward to seat the lamp assembly.
5. Insert the two retainers, making sure that the retainers go over both
plastic projections on each side of the lamp, pushing the retainers down
until they seat.
6. Replace the plastic radiator cover by inserting the edge of the cover
into the tongue and groove of the mating cover, and then rotating the
cover downward. Press firmly on the cover over each headlamp and in
the center of the cover to re-engage the snap in fasteners.
7. Turn the headlamps on and make sure they work properly. If the
headlamp was correctly aligned before you changed the bulb, you should
not need to align it again.
If a low beam headlamp bulb fails, take your vehicle to your
dealer or a qualified service technician to have it replaced.
REVIEW COPY
2005 Aviator f/k/a Navigator LS(231), Owners Guide (post-2002-fmt)(own2002),
Market:USA_English(fus)
Lights
114
Page 124 of 368

Do not let children play with the moon roof or leave children
unattended in the vehicle. They may seriously hurt themselves.
CLOCK
Press the right control to increase
the time displayed.
Press the left control to decrease
the time displayed.
AUXILIARY POWER POINT (IF EQUIPPED)
Power outlets are designed for accessory plugs only. Do not hang
any type of accessory or accessory bracket from the plug.
Improper use of the power outlet can cause damage not covered
by your warranty.
The auxiliary power point is located
inside the center console.
Do not plug optional electrical
accessories into the cigarette lighter.
Use the power point.
Do not use the power point for
operating the cigarette lighter
element.
The maximum power each power point can supply depends on the fuse
rating. For example: a 20A fuse can supply a maximum of 240 Watts, a
15A fuse can supply a maximum of 180 Watts and a 10A fuse can supply
a maximum of 120 Watts. Exceeding these limits will result in a blown
fuse.
Always keep the power point caps closed when not being used.
REVIEW COPY
2005 Aviator f/k/a Navigator LS(231), Owners Guide (post-2002-fmt)(own2002),
Market:USA_English(fus)
Driver Controls
124
Page 159 of 368

•The brake is pressed while the ignition is in the 3 (ON) position.
•The transmission is in either a forward or reverse gear.
•The vehicle has a speed of 5 mph (8 km/h) or greater.
This feature relocks all doors if any door is opened, the brake is pressed
after all doors are closed again and the vehicle has a speed of 5 mph (8
km/h) or greater.
Deactivating/activating the autolock feature
The autolock feature may be deactivated/activated by selecting the
autolock function (accessed by pressing the SETUP control). Press the
RESET control to turn the autolock function on or off. Refer toMessage
centerin theDriver Controlschapter for additional information.
The autolock feature may also be deactivated/activated using the keyless
entry keypad. For additional information, refer toKeyless entry system
in this chapter.
Childproof door locks
When these locks are set, the rear
doors cannot be opened from the
inside. The rear doors can be
opened from the outside when the
doors are unlocked.
The childproof locks are located on
rear edge of each rear door and
must be set separately for each
door. Setting the lock for one door
will not automatically set the lock
for both doors.
Move lock control up to engage the childproof lock. Move control down
to disengage childproof locks.
REMOTE ENTRY SYSTEM
This device complies with part 15 of the FCC rules and with RS-210 of
Industry Canada. Operation is subject to the following two conditions:
(1) This device may not cause harmful interference, and (2) This device
must accept any interference received, including interference that may
cause undesired operation.
Changes or modifications not expressly approved by the party
responsible for compliance could void the user’s authority to
operate the equipment.
REVIEW COPY
2005 Aviator f/k/a Navigator LS(231), Owners Guide (post-2002-fmt)(own2002),
Market:USA_English(fus)
Locks and Security
159
Page 192 of 368

Always transport children 12 years old and under in the back
seat and always properly use appropriate child restraints.
Safety belts and seats can become hot in a vehicle that has been
closed up in sunny weather; they could burn a small child. Check
seat covers and buckles before you place a child anywhere near them.
Energy Management Feature
•This vehicle has a safety belt system with an energy management
feature at the front seating positions to help further reduce the risk of
injury in the event of a head-on collision.
•This safety belt system has a retractor assembly that is designed to
extend the seat belt webbing in a controlled manner. This helps
reduce the belt force acting on the user’s chest.
BELT AND RETRACTOR ASSEMBLY MUST BE REPLACED if
the safety belt assembly automatic locking retractor feature or
any other safety belt function is not operating properly when checked
according to the procedures inWorkshop Manual. Failure to replace
the Belt and Retractor assembly could increase the risk of injury in
collisions.
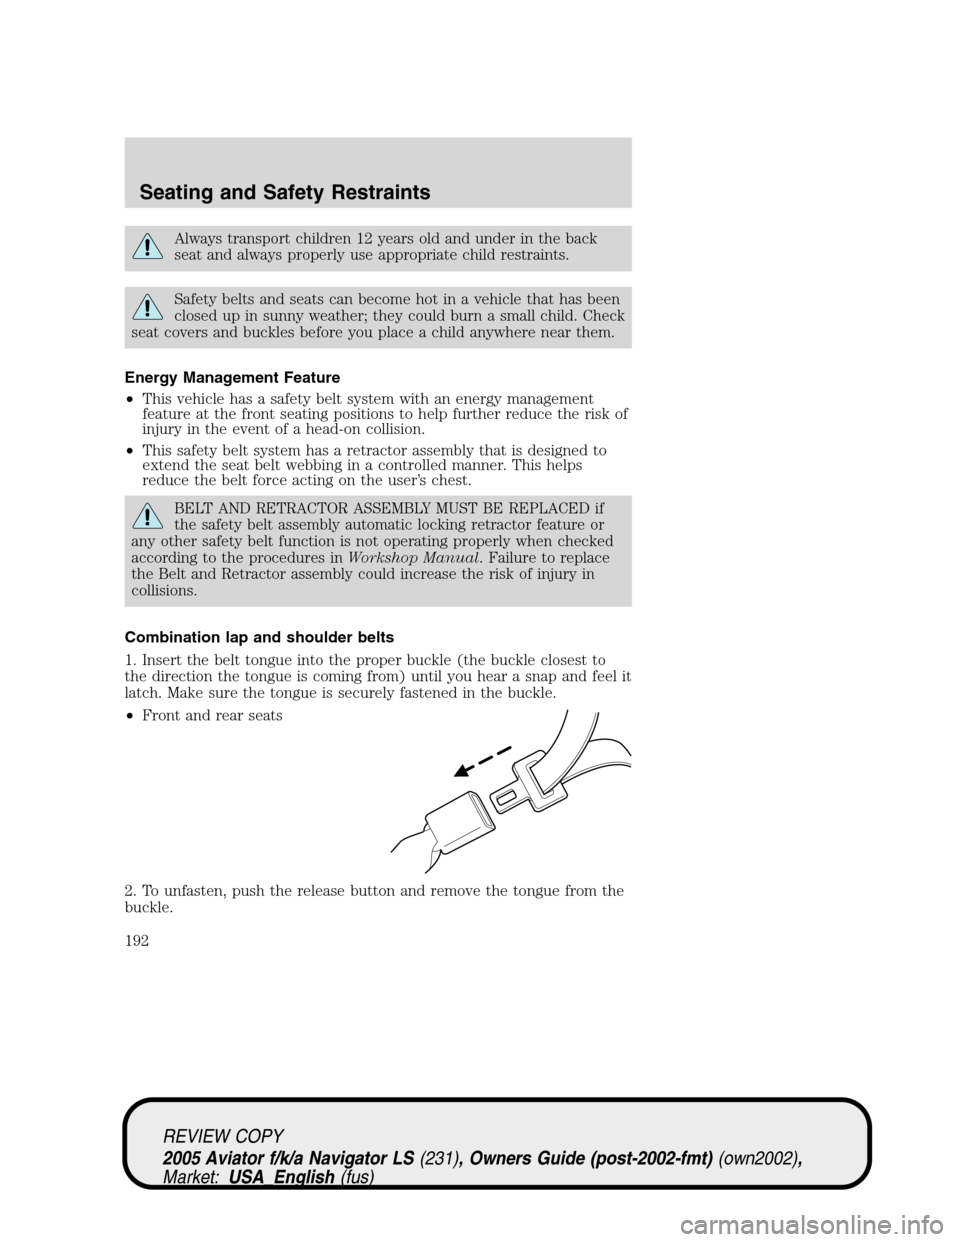
Combination lap and shoulder belts
1. Insert the belt tongue into the proper buckle (the buckle closest to
the direction the tongue is coming from) until you hear a snap and feel it
latch. Make sure the tongue is securely fastened in the buckle.
•Front and rear seats
2. To unfasten, push the release button and remove the tongue from the
buckle.
REVIEW COPY
2005 Aviator f/k/a Navigator LS(231), Owners Guide (post-2002-fmt)(own2002),
Market:USA_English(fus)
Seating and Safety Restraints
192
Page 193 of 368

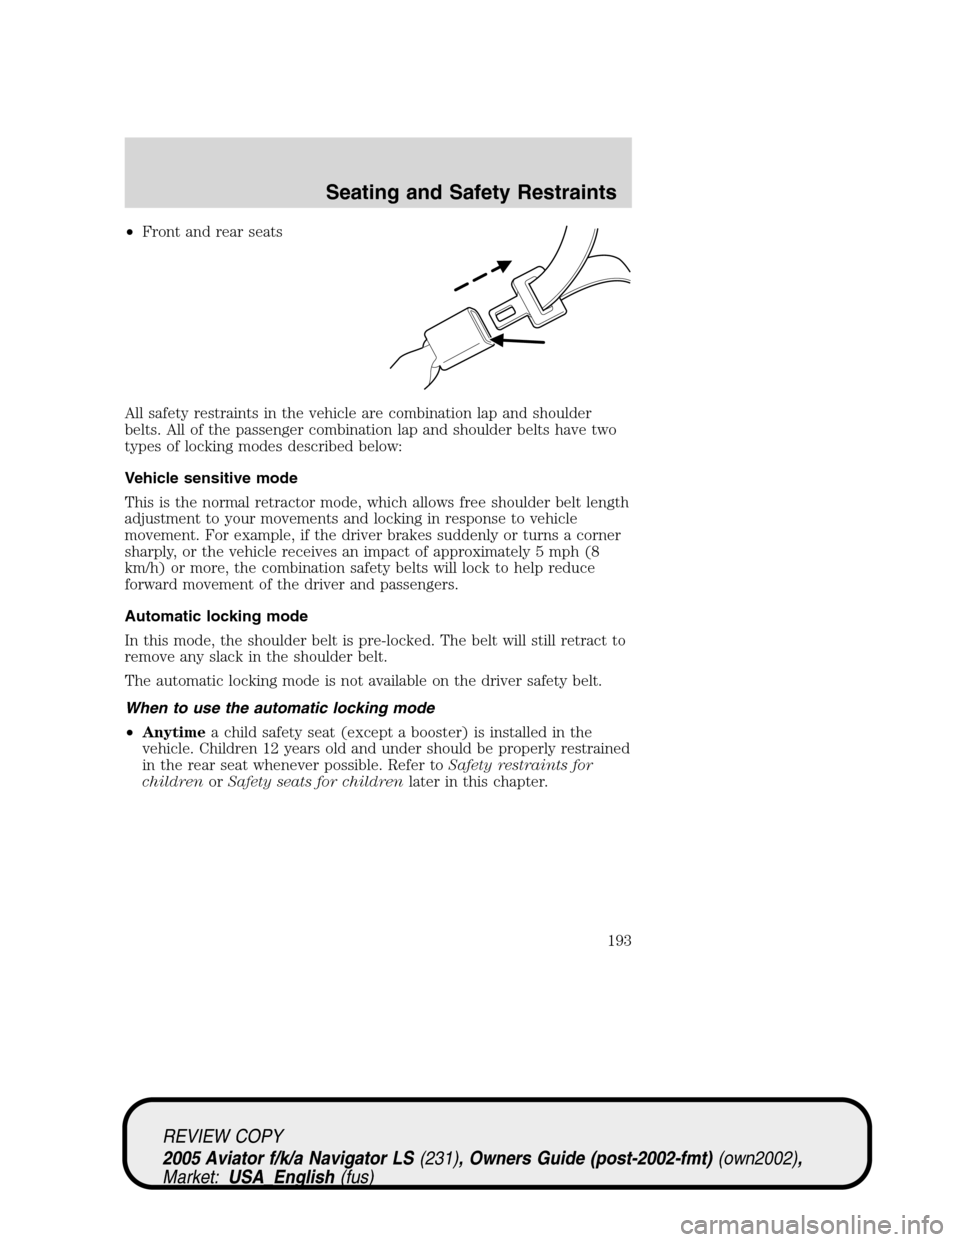
•Front and rear seats
All safety restraints in the vehicle are combination lap and shoulder
belts. All of the passenger combination lap and shoulder belts have two
types of locking modes described below:
Vehicle sensitive mode
This is the normal retractor mode, which allows free shoulder belt length
adjustment to your movements and locking in response to vehicle
movement. For example, if the driver brakes suddenly or turns a corner
sharply, or the vehicle receives an impact of approximately 5 mph (8
km/h) or more, the combination safety belts will lock to help reduce
forward movement of the driver and passengers.
Automatic locking mode
In this mode, the shoulder belt is pre-locked. The belt will still retract to
remove any slack in the shoulder belt.
The automatic locking mode is not available on the driver safety belt.
When to use the automatic locking mode
•Anytimea child safety seat (except a booster) is installed in the
vehicle. Children 12 years old and under should be properly restrained
in the rear seat whenever possible. Refer toSafety restraints for
childrenorSafety seats for childrenlater in this chapter.
REVIEW COPY
2005 Aviator f/k/a Navigator LS(231), Owners Guide (post-2002-fmt)(own2002),
Market:USA_English(fus)
Seating and Safety Restraints
193
Page 194 of 368

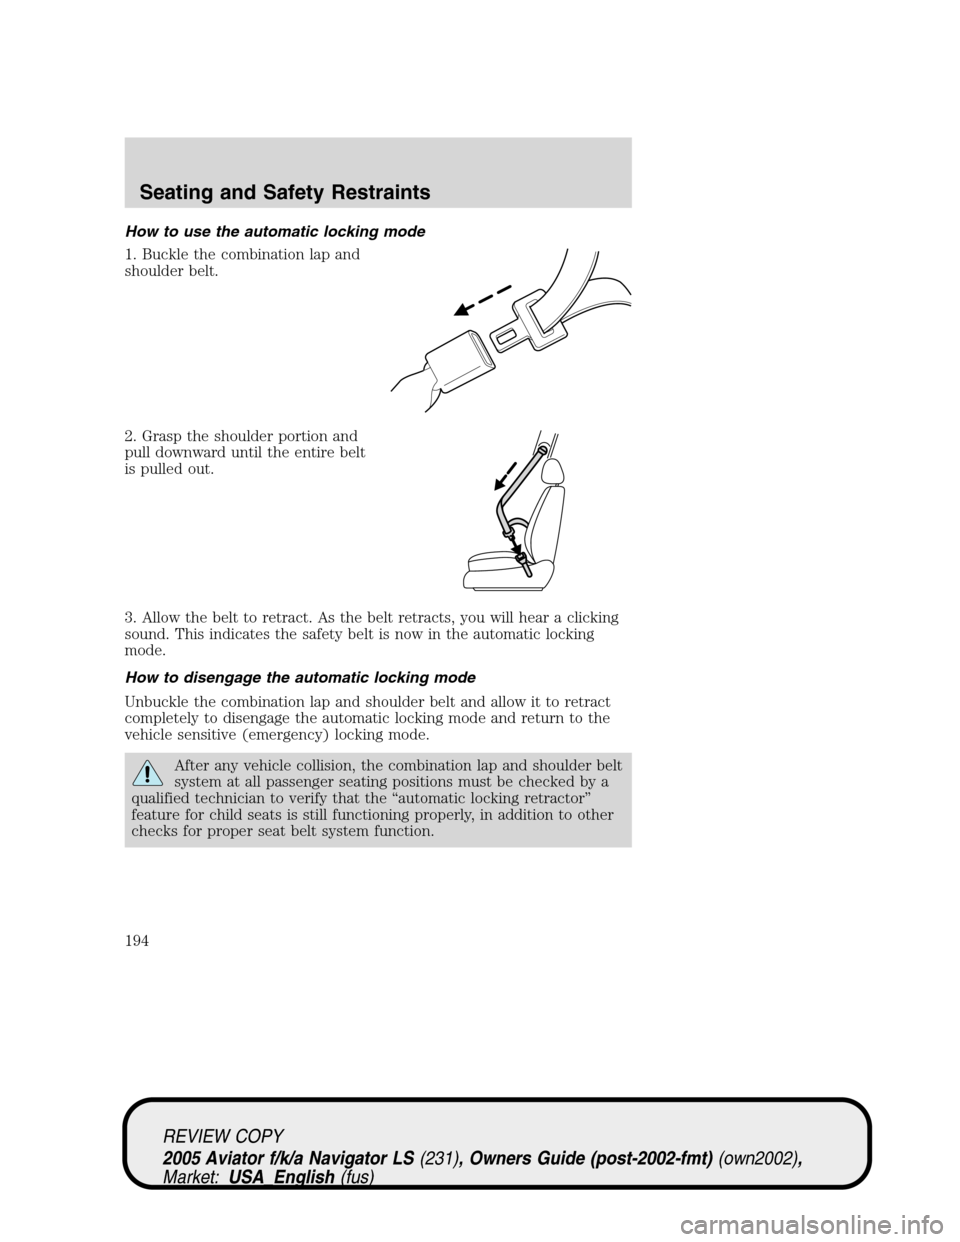
How to use the automatic locking mode
1. Buckle the combination lap and
shoulder belt.
2. Grasp the shoulder portion and
pull downward until the entire belt
is pulled out.
3. Allow the belt to retract. As the belt retracts, you will hear a clicking
sound. This indicates the safety belt is now in the automatic locking
mode.
How to disengage the automatic locking mode
Unbuckle the combination lap and shoulder belt and allow it to retract
completely to disengage the automatic locking mode and return to the
vehicle sensitive (emergency) locking mode.
After any vehicle collision, the combination lap and shoulder belt
system at all passenger seating positions must be checked by a
qualified technician to verify that the“automatic locking retractor”
feature for child seats is still functioning properly, in addition to other
checks for proper seat belt system function.
REVIEW COPY
2005 Aviator f/k/a Navigator LS(231), Owners Guide (post-2002-fmt)(own2002),
Market:USA_English(fus)
Seating and Safety Restraints
194