Page 109 of 368
5. Locate the vertical adjuster hole
in the upper radiator sight shield.
The hole is located on the top of the
headlamp. Insert a standard #2
Phillips screwdriver into the hole
until it engages the vertical adjuster
gear. Turn the screwdriver either
counterclockwise (to adjust down)
or clockwise to (to adjust up)
aligning the upper edge of the light
pattern up to the horizontal line.
6. HORIZONTAL AIM IS NOT REQUIRED FOR THIS VEHICLE AND IS
NON-ADJUSTABLE.
7. Close the hood and turn off the lamps.
TURN SIGNAL CONTROL
•Push down to activate the left
turn signal.
•Push up to activate the right turn
signal.
INT2OFFOFFINT1
REVIEW COPY
2005 Aviator f/k/a Navigator LS(231), Owners Guide (post-2002-fmt)(own2002),
Market:USA_English(fus)
Lights
109
Page 111 of 368

BULBS
Headlamp Condensation
The headlamps are vented to equalize pressure. When moist air enters
the headlamp(s) through the vents, there is a possibility that
condensation can occur. This condensation is normal and will clear
within 45 minutes of headlamp operation.
Replacing exterior bulbs
Check the operation of all the bulbs frequently.
Using the right bulbs
Replacement bulbs are specified in the chart below. Headlamp bulbs
must be marked with an authorized“D.O.T.”for North America to assure
lamp performance, light brightness and pattern and safe visibility. The
correct bulbs will not damage the lamp assembly or void the lamp
assembly warranty and will provide quality bulb burn time.
Function Number of bulbs Trade number
Park/turn lamps
(front)2
3157 AK (amber)
TH headlamps, low
beam2
H11
HID headlamps, low
beam*2
D2R
Headlamps, high beam 2 9005 (HB3)
Front sidemarker 2 WY5W
Rear stop/turn/tail
lamps4
3057K
Back-up lamps 2 3156K
Fog lamp 2 9140
Liftgate lamp 4 916
High-mount stop lamp 32 LEDS 2C54–13A613**
Rear license plate
lamp2
168
Mirror turn signal
lamp2
906
REVIEW COPY
2005 Aviator f/k/a Navigator LS(231), Owners Guide (post-2002-fmt)(own2002),
Market:USA_English(fus)
Lights
111
Page 115 of 368

Replacing HID headlamp bulbs (if equipped)
The low beam headlamps on your vehicle use a“high intensity discharge”
source. These lamps operate at a high voltage. The bulb is NOT
replaceable. When the bulb is burned out, the bulb assembly must be
replaced by your dealer or a qualified technician.
Replacing front parking lamp/turn signal/sidemarker bulbs
To remove the headlamps from the vehicle and to change the front turn
signal lamp bulbs:
1. Make sure the headlamp switch is
in the OFF position, then open the
hood.
2.
Remove the plastic radiator cover
over the headlamps by grasping the
rear edge of the cover and pulling up
and toward you. This will disengage
the four snap-on attachments on the
cover. Set the cover aside.
3. Pry back the top corner of the
radiator cover to gain access to the
inner retaining pins. At the back of
the headlamp, pry up and remove
the two retainer pins to release the
headlamp assembly from the vehicle
and pull headlamp forward.
4. Rotate the bulb socket
counterclockwise and remove from
lamp assembly.
5. Carefully pull the bulb straight
out of socket and push in the new
bulb.
6. Install bulb socket in lamp
assembly by turning clockwise.
REVIEW COPY
2005 Aviator f/k/a Navigator LS(231), Owners Guide (post-2002-fmt)(own2002),
Market:USA_English(fus)
Lights
115
Page 119 of 368
Approach lamp/mirror turn signal bulb removal
To change the bulbs:
1. Make sure the headlamp switch is
in the OFF position.
2. Remove the approach lamp/turn
signal lens from the mirror housing
using a standard flat screwdriver to
pry the lamp assembly out.
3. Pull the lens out to remove it
from the mirror assembly.
4. Disconnect the bulb assembly
from the lens.
5. Remove and replace the bulb.
6. Reverse the order to reassemble
lamp and lens.
REVIEW COPY
2005 Aviator f/k/a Navigator LS(231), Owners Guide (post-2002-fmt)(own2002),
Market:USA_English(fus)
Lights
119
Page 130 of 368
Heated outside mirrors
Both mirrors are heated
automatically to remove ice, mist
and fog when the rear window
defrost is activated.
Do not remove ice from the
mirrors with a scraper or
attempt to readjust the mirror
glass if it is frozen in place.
These actions could cause
damage to the glass and mirrors.
Signal indicator mirrors
When the turn signal is activated,
the lower portion of the mirror
housing will blink.
Fold-away mirrors
Pull the side mirrors in carefully
when driving through a narrow
space, like an automatic car wash.
REVIEW COPY
2005 Aviator f/k/a Navigator LS(231), Owners Guide (post-2002-fmt)(own2002),
Market:USA_English(fus)
Driver Controls
130
Page 138 of 368

Retain the original transmitter for use in other vehicles as well as for
future programming procedures (i.e. new HomeLink�equipped vehicle
purchase). It is also suggested that upon the sale of the vehicle, the
programmed Homelink�buttons be erased for security purposes, refer to
Programmingin this section.
Programming
Do not program HomeLink�with the vehicle parked in the garage.
Note:Some vehicles may require the ignition switch to be turned to the
second (or“ACC”) position for programming and/or operation of the
HomeLink�. It is also recommended that a new battery be placed in the
hand-held transmitter of the device being programmed to HomeLink�for
quicker training and accurate transmission of the radio-frequency signal.
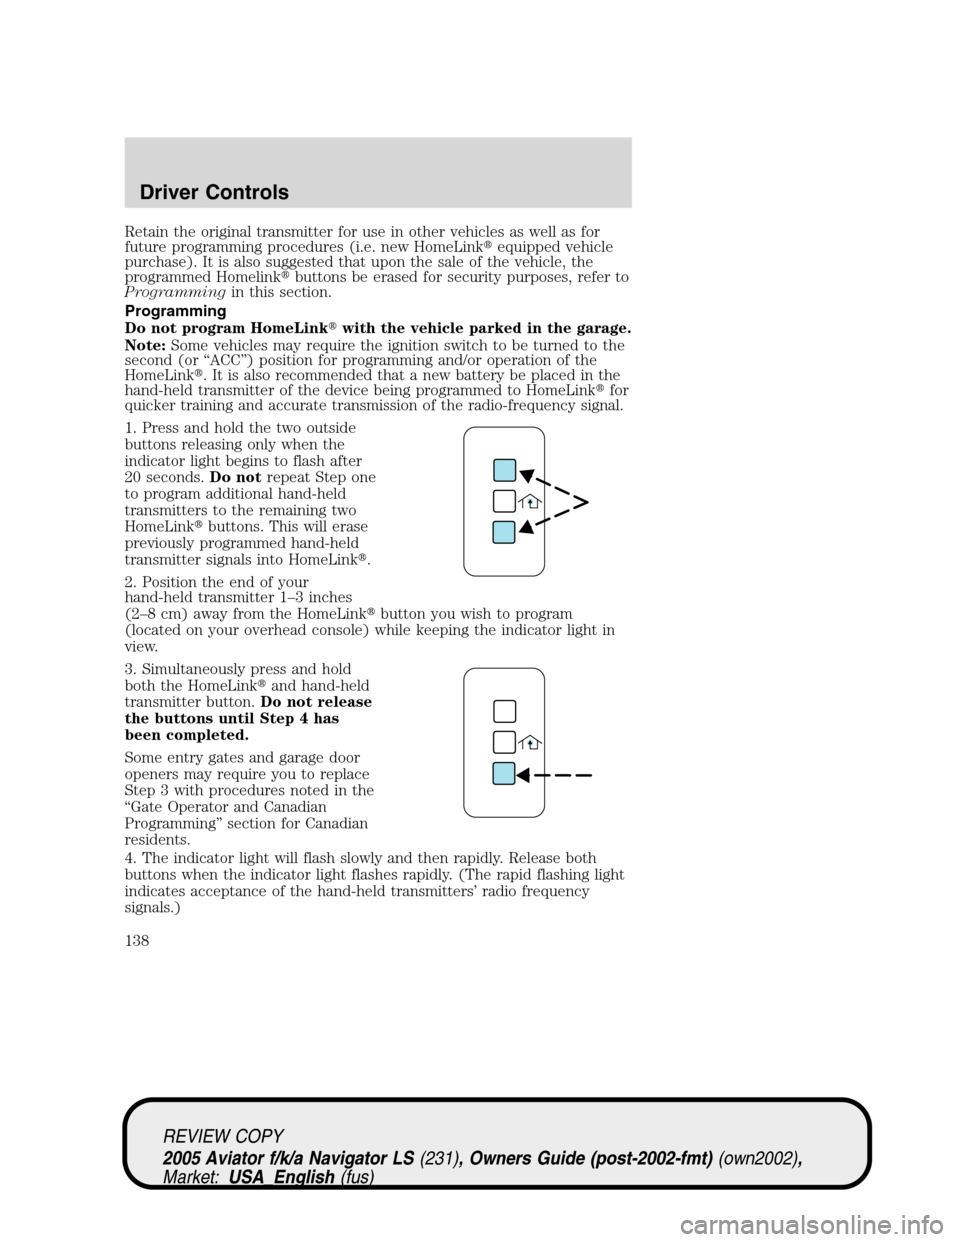
1. Press and hold the two outside
buttons releasing only when the
indicator light begins to flash after
20 seconds.Do notrepeat Step one
to program additional hand-held
transmitters to the remaining two
HomeLink�buttons. This will erase
previously programmed hand-held
transmitter signals into HomeLink�.
2. Position the end of your
hand-held transmitter 1–3 inches
(2–8 cm) away from the HomeLink�button you wish to program
(located on your overhead console) while keeping the indicator light in
view.
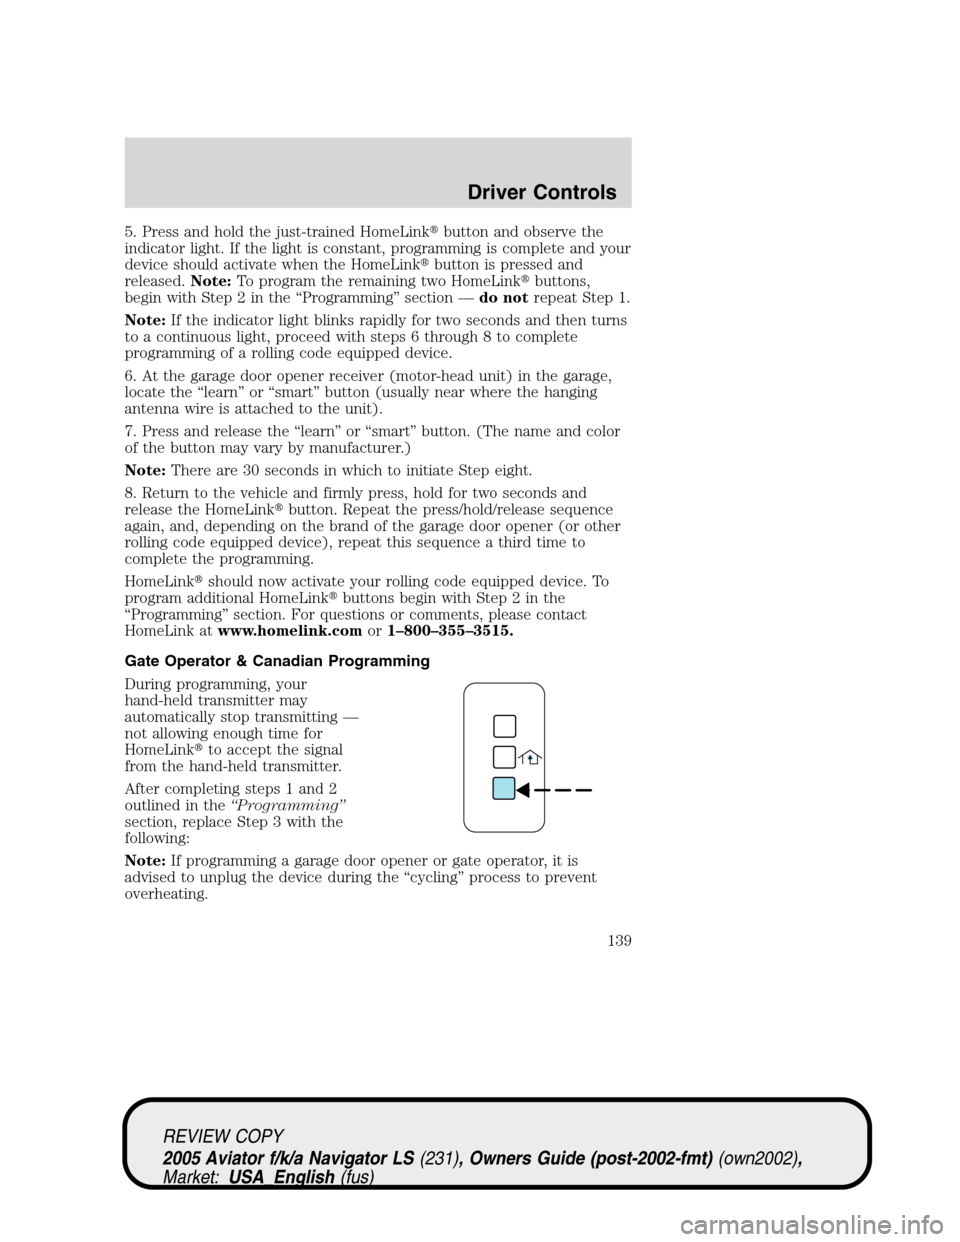
3. Simultaneously press and hold
both the HomeLink�and hand-held
transmitter button.Do not release
the buttons until Step 4 has
been completed.
Some entry gates and garage door
openers may require you to replace
Step 3 with procedures noted in the
“Gate Operator and Canadian
Programming”section for Canadian
residents.
4. The indicator light will flash slowly and then rapidly. Release both
buttons when the indicator light flashes rapidly. (The rapid flashing light
indicates acceptance of the hand-held transmitters’radio frequency
signals.)
REVIEW COPY
2005 Aviator f/k/a Navigator LS(231), Owners Guide (post-2002-fmt)(own2002),
Market:USA_English(fus)
Driver Controls
138
Page 139 of 368

5. Press and hold the just-trained HomeLink�button and observe the
indicator light. If the light is constant, programming is complete and your
device should activate when the HomeLink�button is pressed and
released.Note:To program the remaining two HomeLink�buttons,
begin with Step 2 in the“Programming”section—do notrepeat Step 1.
Note:If the indicator light blinks rapidly for two seconds and then turns
to a continuous light, proceed with steps 6 through 8 to complete
programming of a rolling code equipped device.
6. At the garage door opener receiver (motor-head unit) in the garage,
locate the“learn”or“smart”button (usually near where the hanging
antenna wire is attached to the unit).
7. Press and release the“learn”or“smart”button. (The name and color
of the button may vary by manufacturer.)
Note:There are 30 seconds in which to initiate Step eight.
8. Return to the vehicle and firmly press, hold for two seconds and
release the HomeLink�button. Repeat the press/hold/release sequence
again, and, depending on the brand of the garage door opener (or other
rolling code equipped device), repeat this sequence a third time to
complete the programming.
HomeLink�should now activate your rolling code equipped device. To
program additional HomeLink�buttons begin with Step 2 in the
“Programming”section. For questions or comments, please contact
HomeLink atwww.homelink.comor1–800–355–3515.
Gate Operator & Canadian Programming
During programming, your
hand-held transmitter may
automatically stop transmitting—
not allowing enough time for
HomeLink�to accept the signal
from the hand-held transmitter.
After completing steps 1 and 2
outlined in the“Programming”
section, replace Step 3 with the
following:
Note:If programming a garage door opener or gate operator, it is
advised to unplug the device during the“cycling”process to prevent
overheating.
REVIEW COPY
2005 Aviator f/k/a Navigator LS(231), Owners Guide (post-2002-fmt)(own2002),
Market:USA_English(fus)
Driver Controls
139
Page 161 of 368
Locking the doors/liftgate
Press this control to lock all doors
and liftgate. The park/turn signal
lamps will flash once.
To confirm all doors are closed and
locked, press the control a second
time within three seconds; the
park/turn signal lamps will flash
once and the horn will chirp.
If any of the doors or liftgate are
ajar, the horn will make two quick
chirps, reminding you to properly close all doors.
Opening the liftgate window
Press the control to unlatch the
liftgate window.
Sounding a panic alarm
Press this control to activate the
alarm.
The personal panic alarm will cycle
the horn and parking lamps on/off.
To deactivate the alarm, press the
control again or turn the ignition to
the 2 (ACCESSORY) or 3 (ON)
position.
REVIEW COPY
2005 Aviator f/k/a Navigator LS(231), Owners Guide (post-2002-fmt)(own2002),
Market:USA_English(fus)
Locks and Security
161