Page 8 of 354
Your vehicle at a glance2 2
1
2
3
4
5
6
7
8
9
EXTERIOR OVERVIEW
1. Door
2. Window
3. Sunroof (if equipped)
4. Wiper
5. Engine hood
6. Tire
7. Headlights
1KMA0001
KM CAN (ENG) 2.qxd 9/13/2004 4:51 PM Page 2
Page 101 of 354

Knowing your vehicle90 3
1
2
3
4
5
6
7
8
9
Outside rearview mirror heater
(if equipped) The outside rearview mirror heater is
actuated in connection with the rear
window defroster. To heat the outside
rearview mirror glass, push the but-
ton for the rear window defroster.
The rearview mirror heater (and rear
window defroster) will not operate
unless the engine is running.
The outside rearview mirror glass will
be heated for defrosting or defogging
and will give you improved rear
vision in inclement weather condi-
tions. Push the button again to turn
the heater off. The outside rearview
mirror heater automatically turns off
after 20 minutes.
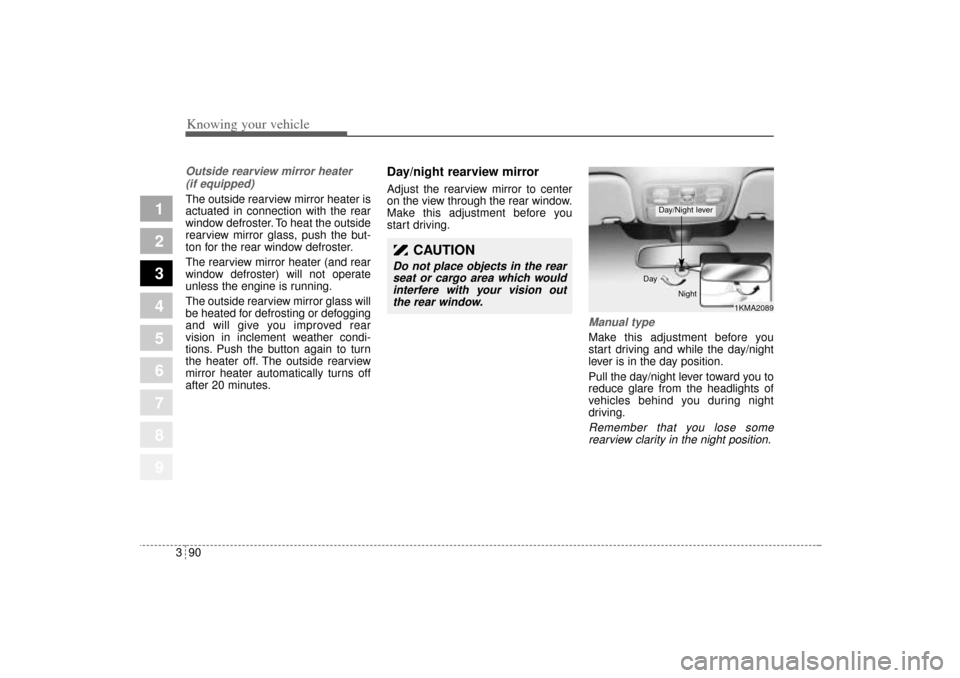
Day/night rearview mirror Adjust the rearview mirror to center
on the view through the rear window.
Make this adjustment before you
start driving.
Manual type Make this adjustment before you
start driving and while the day/night
lever is in the day position.
Pull the day/night lever toward you to
reduce glare from the headlights of
vehicles behind you during night
driving.Remember that you lose some
rearview clarity in the night position.
CAUTION
Do not place objects in the rear
seat or cargo area which would
interfere with your vision out
the rear window.
1KMA2089 Day
Night
Day/Night lever
KM CAN (ENG) 3 (~112).qxd 9/13/2004 4:51 PM Page 90
Page 102 of 354

391
1
2
3
4
5
6
7
8
9
Knowing your vehicle
Electric type (if equipped)The electric day/night rearview mir-
ror automatically controls the glare
from the headlights of the car behind
you in nighttime or low light driving
conditions. The sensor mounted in
the mirror senses the light level
around the vehicle, and through a
chemical reaction, automatically
controls the headlight glare (10% to
70 %) from vehicles behind you.
When the engine is running, the
glare is automatically controlled by
the sensor mounted in the rearview
mirror.
Whenever the shift lever is shifted
into reverse (R), the mirror will auto-
matically go to the brightest setting in
order to improve the drivers view
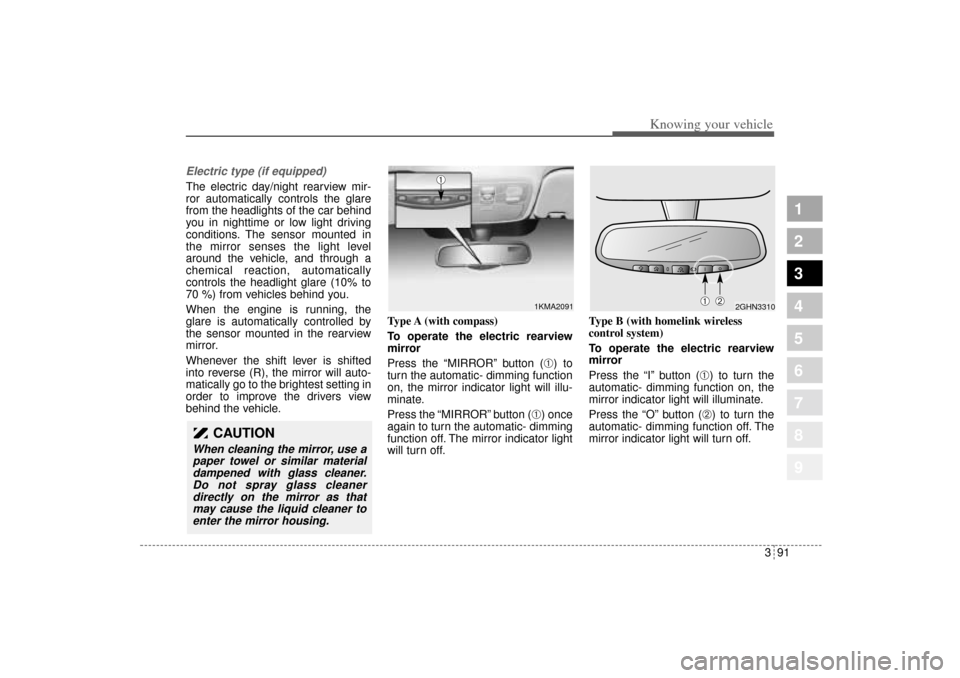
behind the vehicle.Type A (with compass)
To operate the electric rearview
mirror
Press the “MIRROR” button (
➀) to
turn the automatic- dimming function
on, the mirror indicator light will illu-
minate.
Press the “MIRROR” button (
➀) once
again to turn the automatic- dimming
function off. The mirror indicator light
will turn off.Type B (with homelink wireless
control system)
To operate the electric rearview
mirror
Press the “I” button (
➀) to turn the
automatic- dimming function on, the
mirror indicator light will illuminate.
Press the “O” button (➁) to turn the
automatic- dimming function off. The
mirror indicator light will turn off.
1KMA2091
➀
CAUTION
When cleaning the mirror, use a
paper towel or similar material
dampened with glass cleaner.
Do not spray glass cleaner
directly on the mirror as that
may cause the liquid cleaner to
enter the mirror housing.
2GHN3310
➀
➁
KM CAN (ENG) 3 (~112).qxd 9/13/2004 4:51 PM Page 91
Page 104 of 354
393
1
2
3
4
5
6
7
8
9
Knowing your vehicle
Door courtesy lamp
(if equipped)The door courtesy lamp comes ON
when the door is opened to assist
entering or exiting the vehicle. It also
serves as a warning to passing vehi-
cles that the vehicle door is open.
Glove box lampThe glove box lamp comes ON when
the glove box is opened.
The parking lights or headlights must
be ON for the glove box lamp to func-
tion.
Cargo area lampThe cargo area lamp comes ON
when the rear hatch or rear hatch
window are opened.
1KMB5047
1KMB3086
1KMB3087
KM CAN (ENG) 3 (~112).qxd 9/13/2004 4:51 PM Page 93
Page 168 of 354
445
Driving your vehicle
1
2
3
4
5
6
7
8
9
Instrument panel illumination
(if equipped)When the vehicle’s parking lights or
headlights are on, rotate the illumina-
tion control knob to adjust the instru-
ment panel illumination intensity.
1KMA2108
KM CAN (ENG) 4.qxd 9/13/2004 4:48 PM Page 45
Page 172 of 354

449
Driving your vehicle
1
2
3
4
5
6
7
8
9
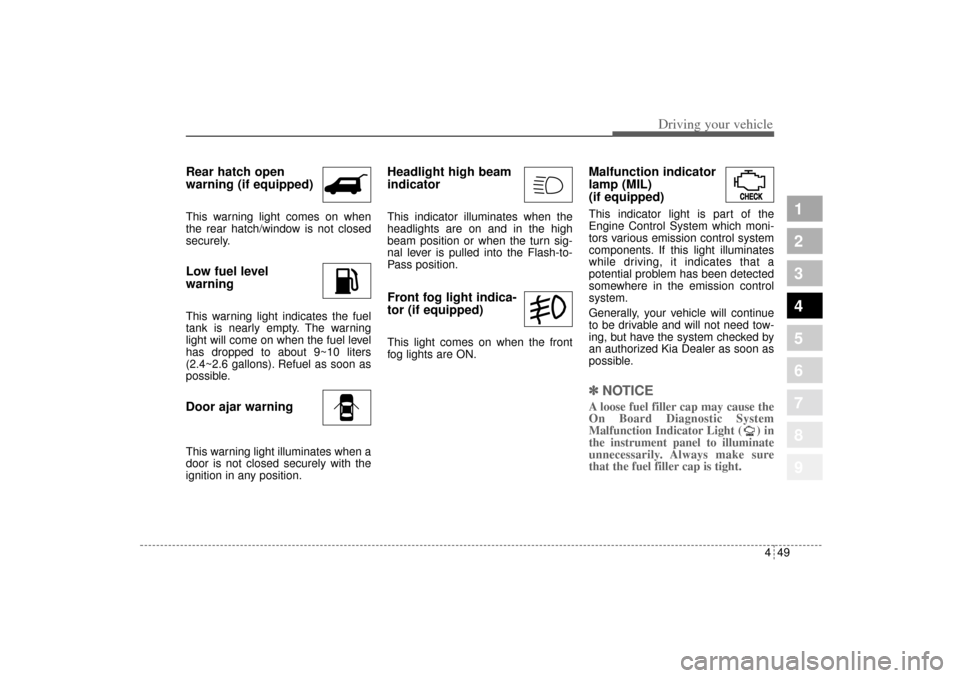
Rear hatch open
warning (if equipped)This warning light comes on when
the rear hatch/window is not closed
securely.Low fuel level
warningThis warning light indicates the fuel
tank is nearly empty. The warning
light will come on when the fuel level
has dropped to about 9~10 liters
(2.4~2.6 gallons). Refuel as soon as
possible.Door ajar warningThis warning light illuminates when a
door is not closed securely with the
ignition in any position.
Headlight high beam
indicator This indicator illuminates when the
headlights are on and in the high
beam position or when the turn sig-
nal lever is pulled into the Flash-to-
Pass position.Front fog light indica-
tor (if equipped) This light comes on when the front
fog lights are ON.
Malfunction indicator
lamp (MIL)
(if equipped)This indicator light is part of the
Engine Control System which moni-
tors various emission control system
components. If this light illuminates
while driving, it indicates that a
potential problem has been detected
somewhere in the emission control
system.
Generally, your vehicle will continue
to be drivable and will not need tow-
ing, but have the system checked by
an authorized Kia Dealer as soon as
possible.✽ ✽
NOTICEA loose fuel filler cap may cause the
On Board Diagnostic System
Malfunction Indicator Light ( ) in
the instrument panel to illuminate
unnecessarily. Always make sure
that the fuel filler cap is tight.
KM CAN (ENG) 4.qxd 9/13/2004 4:48 PM Page 49
Page 182 of 354

459
Driving your vehicle
1
2
3
4
5
6
7
8
9
Battery saver function The purpose of this feature is to
prevent the battery from being dis-
charged. The system automatically
turns off the headlights and park-
ing lights when the driver removes
the ignition key and opens the driv-
er- side door.
With this feature, the parklight will
be turned off automatically if the
driver parks on the side of road at
night.
If necessary, to keep the lights on
when the ignition key is removed,
perform the following :
1) Open the driver-side door.
2) Turn the parklights OFF and ON
again using the light switch on the
steering column.
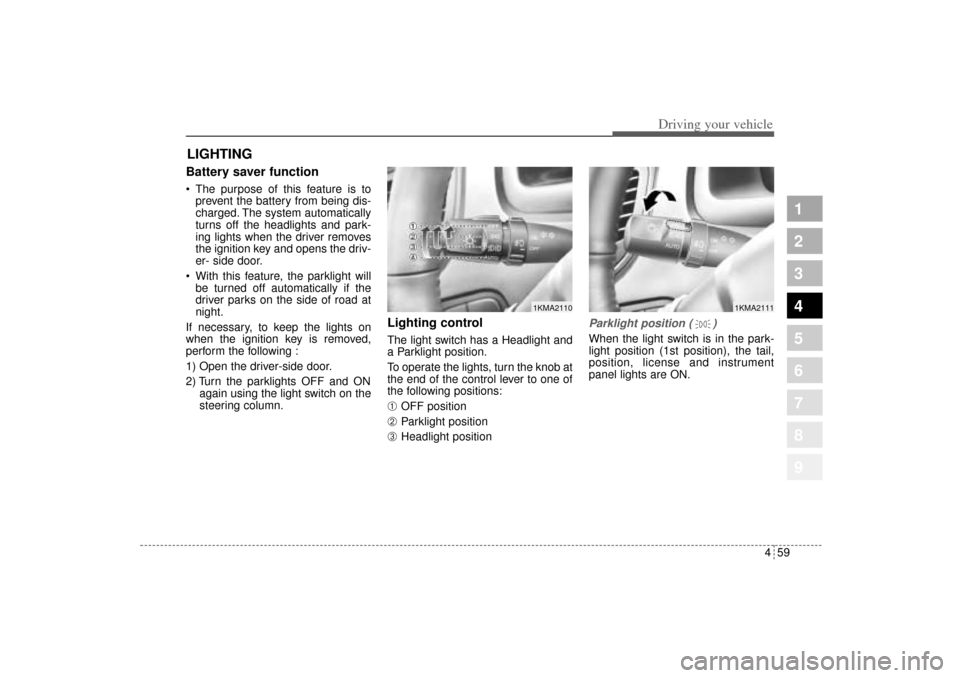
Lighting control The light switch has a Headlight and
a Parklight position.
To operate the lights, turn the knob at
the end of the control lever to one of
the following positions:➀
OFF position
➁
Parklight position
➂
Headlight position
Parklight position ( )When the light switch is in the park-
light position (1st position), the tail,
position, license and instrument
panel lights are ON.
LIGHTING
1KMA2111
1KMA2110
KM CAN (ENG) 4.qxd 9/13/2004 4:48 PM Page 59
Page 183 of 354
Driving your vehicle60 4
1
2
3
4
5
6
7
8
9
Headlight position ( )When the light switch is in the head-
light position (2nd position) the head,
tail, position, license and instrument
panel lights are ON.
High - beam operation To turn on the high beam headlights,
push the lever forward.
The high-beam indicator will light
when the headlight high beams are
switched on.
To prevent the battery from being
discharged, do not leave the lights
on for a prolonged time while the
engine is not running.
Flashing headlights To flash the headlights, pull the lever
towards you. It will return to the nor-
mal (low-beam) position when
released. The headlight switch does
not need to be on to use this flashing
feature.
1KMA2112
1KMA2114
1KMA2115
KM CAN (ENG) 4.qxd 9/13/2004 4:48 PM Page 60