Page 25 of 318

Knowing your vehicle
14
3
1 23456789
Window opening and closing
The driver’s door has a master power
window switch that controls all the
windows in the vehicle. To open or
close a window, press down (
➄) or
pull up ( ➄) the front portion of the
corresponding switch. Automatic power window down
(driver’s window, if equipped)
Depressing the power window switch
momentarily to the second detentposition (
➅) completely lowers the
driver’s window even when the
switch is released. To stop the win-
dow at the desired position while the
window is in operation, pull up the
switch momentarily to the opposite
direction of the window movement.
If the battery has been discharged or disconnected, the automatic
power window system must be reset
as follows:
1. Turn the ignition key to ON posi- tion.
2. Close each window and continue pulling up on each power window
switch for at least 0.5 second after
the window is completely closed. Power window lock switch (if equipped)
The driver can disable the power
window switches on a passenger
door by depressing the power win-
dow lock switch located on the dri-
ver’s door to LOCK (pressed).
When the power window lock switch is ON, the driver’s master
control cannot operate the passen-
ger door power windows either.
1LDA2012
RLDA2011
RLDA2013
Page 106 of 318
395
1 23456789
Knowing your vehicle
Digital clock (if equipped)
Whenever the battery terminals,
ROOM fuse, or Power Connect are
disconnected, you must reset the
time.
When the ignition switch is in the
ACC or ON position, the clock but-
tons operates as follows:
HOUR:
Pressing the “H” button with your
finger, a pencil or similar object will
advance the time displayed by one
hour.
MINUTE: Pressing the “M” button with your
finger, a pencil or similar object will
advance the time displayed by one
minute.
RESET: To clear away minutes, press the
“R” button with your finger, a pencil
or similar object. Then the clock will
be set precisely on the hour.
For example, if the “R” button is
pressed while the time is between
9:01 and 9:29, the display will bereset to 9:00.9:01 ~ 9:29 ➾9:00
9:30 ~ 9:59 ➾10:00
1LDA2150
Page 109 of 318

Knowing your vehicle
98
3
1 23456789
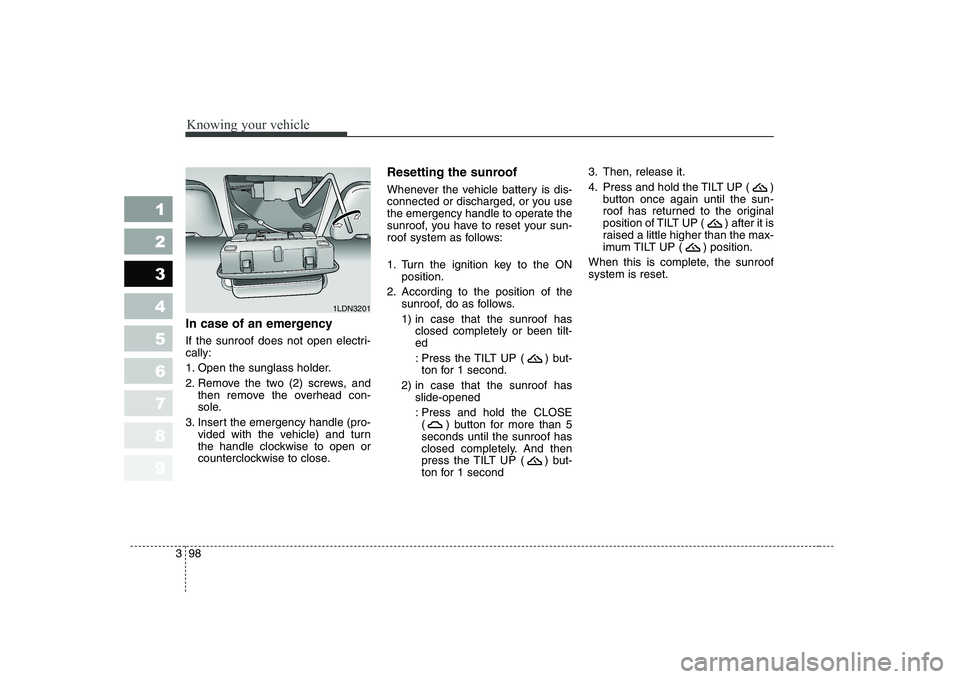
In case of an emergency
If the sunroof does not open electri- cally:
1. Open the sunglass holder.
2. Remove the two (2) screws, and
then remove the overhead con-
sole.
3. Insert the emergency handle (pro- vided with the vehicle) and turn
the handle clockwise to open or
counterclockwise to close. Resetting the sunroof
Whenever the vehicle battery is dis-
connected or discharged, or you use
the emergency handle to operate the
sunroof, you have to reset your sun-
roof system as follows:
1. Turn the ignition key to the ON
position.
2. According to the position of the sunroof, do as follows.
1) in case that the sunroof hasclosed completely or been tilt- ed
: Press the TILT UP ( ) but- ton for 1 second.
2) in case that the sunroof has slide-opened
: Press and hold the CLOSE ( ) button for more than 5seconds until the sunroof has
closed completely. And then
press the TILT UP ( ) but-
ton for 1 second 3. Then, release it.
4. Press and hold the TILT UP ( )
button once again until the sun-
roof has returned to the original
position of TILT UP ( ) after it is
raised a little higher than the max-
imum TILT UP ( ) position.
When this is complete, the sunroofsystem is reset.
1LDN3201
Page 138 of 318

Driving your vehicle
26
4
1 23456789
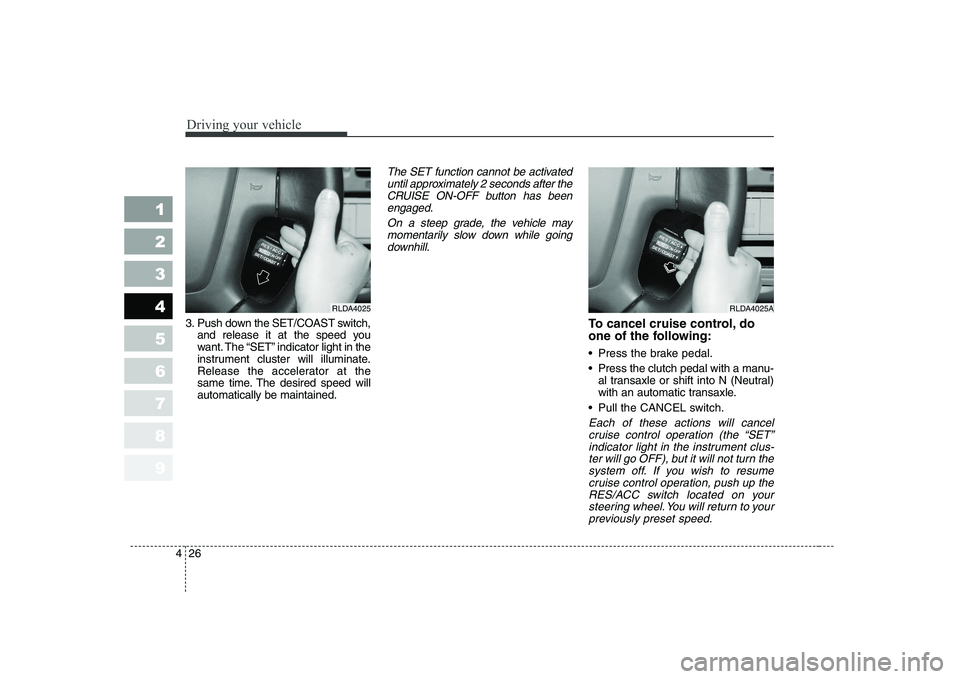
3. Push down the SET/COAST switch,
and release it at the speed you
want. The “SET” indicator light in the
instrument cluster will illuminate.
Release the accelerator at the
same time. The desired speed willautomatically be maintained.
The SET function cannot be activated
until approximately 2 seconds after theCRUISE ON-OFF button has beenengaged.
On a steep grade, the vehicle maymomentarily slow down while goingdownhill.
To cancel cruise control, do
one of the following:
Press the brake pedal.
Press the clutch pedal with a manu- al transaxle or shift into N (Neutral)
with an automatic transaxle.
Pull the CANCEL switch.
Each of these actions will cancel cruise control operation (the “SET”indicator light in the instrument clus-ter will go OFF), but it will not turn the system off. If you wish to resumecruise control operation, push up theRES/ACC switch located on your steering wheel. You will return to yourpreviously preset speed.
RLDA4025RLDA4025A
Page 139 of 318
427
1 23456789
Driving your vehicle
To turn cruise control off, do
one of the following:
Push the CRUISE ON-OFF button(the CRUISE indicator light in the
instrument cluster will go OFF).
Turn the ignition off.
Both of these actions cancel cruise control operation. If you want to resume cruise control operation,repeat the steps provided in “To SetCruise Control Speed” on the previ- ous page.
To increase cruise control set speed:
Follow either of these procedures:
Push up the RES/ACC switch and hold it. Your vehicle will accelerate.
Release the switch at the speed you
want. Push up the RES/ACC switch and
release it immediately. The cruisingspeed will increase 1.6 km/h (1
mph) by one touch and will be mem-
orized to the reset speed.
RLDA4026
Page 140 of 318
Driving your vehicle
28
4
1 23456789
To temporarily accelerate with
the cruise control on
If you want to speed up temporarily
when the cruise control is on,
depress the accelerator pedal.
Increased speed will not interfere
with cruise control operation orchange the set speed.
To return to the set speed, take your
foot off the accelerator.
To decrease the cruising speed:
Follow either of these procedures:
Push downthe SET/COAST switch
and hold it. Your vehicle will gradu-
ally slow down. Release the switch
at the speed you want to maintain. Push down
the SET/COAST switch
and release it immediately. The
cruising speed will decrease 1.6
km/h (1 mph) by one touch and will
be memorized to the reset speed.
RLDA4025
Page 145 of 318
433
1 23456789
Driving your vehicle
INSTRUMENT CLUSTER
1. Tachometer
2. Turn signal indicators
3. Speedometer4. Engine temperature gauge
5. Warning and indicator lights
6. Odometer / Tripmeter
7. Tripmeter mode/reset button8. Shift position indicator
(Automatic transaxle only)
9. Fuel gauge
10. Trip computer (if equipped)
1LDE2090/1LDE2090A/1LDE2090B/1LDE2090C
■■ Gasoline (Type A)
■
■ Gasoline (Type B) ■
■
Diesel (Type A)
■
■ Diesel (Type B)
➀➁➁
➂
➃
➄➄➅
➉➇
➆
➈
➀➁➁
➂
➃
➄➄➅
➉➇
➆
➈
➀➁➁
➂
➃
➄➄➅
➉➇
➆
➈
➀➁➁
➂
➃
➄➄➅
➉➇
➆
➈
Page 146 of 318

Driving your vehicle
34
4
1 23456789
Speedometer
The speedometer indicates the for-
ward speed of the vehicle.
Odometer/Tripmeter
You can choose the odometer, trip-
meter A and tripmeter B by pressing
the tripmeter mode button.
Odometer
The odometer indicates the total dis-
tance the vehicle has been driven.
Tripmeter
TRIP A: Tripmeter A
TRIP B: Tripmeter B
The tripmeter indicates the distance
of individual trips selected by the
driver. Tripmeter A and B can be
reset to 0 by pressing the reset but-
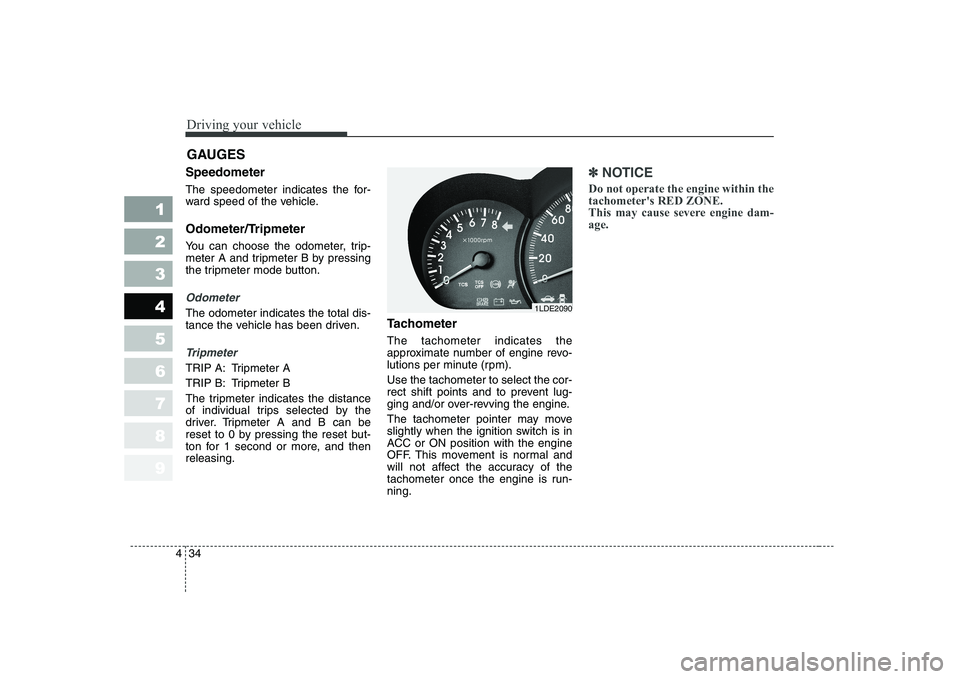
ton for 1 second or more, and thenreleasing. Tachometer The tachometer indicates the
approximate number of engine revo-
lutions per minute (rpm). Use the tachometer to select the cor-
rect shift points and to prevent lug-
ging and/or over-revving the engine.
The tachometer pointer may move
slightly when the ignition switch is in
ACC or ON position with the engine
OFF. This movement is normal and
will not affect the accuracy of the
tachometer once the engine is run-ning.
✽✽
NOTICE
Do not operate the engine within the tachometer's RED ZONE.
This may cause severe engine dam-age.
GAUGES
1LDE2090