Page 75 of 424
Defrosters
Check operation by selecting the defrost mode and place
the blower control on high speed. You should feel the air
directed against the windshield.
Safety Checks You Should Make Outside The
Vehicle
Tires
Examine tires for excessive tread wear or uneven wear
patterns. Check for stones, nails, glass, or other objects
lodged in the tread. Inspect for tread cuts or sidewall
cracks. Check wheel nuts for tightness and tires (includ-
ing spare) for proper pressure.
Lights
Have someone observe the operation of all exterior lights
while you work the controls. Check turn signal and high
beam indicator lights on the instrument panel.
Fluid Leaks
Check area under vehicle after overnight parking for fuel,
coolant, oil or other fluid leaks. Also, if gasoline fumes
are detected, the cause should be located and corrected
immediately.
THINGS TO KNOW BEFORE STARTING YOUR VEHICLE 75
2
Page 168 of 424

INSTRUMENT CLUSTER DESCRIPTION
1. Tachometer
Indicates the permissible engine revolutions-per-minute
for each gear range. Before reaching the red area, ease up
on the accelerator to prevent engine damage.
2. Turn Signal Indicator Light
The arrows will flash in unison with the exterior
turn signals, when using the multi-function control
lever. A chime will sound if the turn signals are left on
continuously for 2 miles (3 km) until they are deacti-
vated.
3. High Beam Indicator Light
This light shows that the headlights are on high
beam. Pull the multi-function control lever to-
wards the steering wheel to switch the headlights from
high to low beam.4. Speedometer
Indicates vehicle speed.
5. Tire Pressure Monitor Warning Light — If Equipped
This light will turn on when there is a low tire
pressure condition. The light will also turn on
if a problem exist with any tire sensor. The light
will remain on until the tire pressure is prop-
erly set or the problem with the sensor is corrected.
This light will turn on momentarily as a bulb check when
the engine is started.
When the “Tire Pressure Monitor Warning Light” is lit,
one or more of your tires is significantly under-inflated.
You should stop and check your tires as soon as possible,
and inflate them to the proper pressure as indicated on
the vehicle’s tire information placard. Driving on a
significantly under-inflated tire causes the tire to over-
heat and can lead to tire failure. Under-inflation also
reduces fuel efficiency and tire tread life, and may affect
168 UNDERSTANDING YOUR INSTRUMENT PANEL
Page 169 of 424

the vehicle’s handling and stopping ability. Each tire,
including the spare, should be checked monthly when
cold and set to the recommended inflation pressure as
specified on the vehicle placard. (See page 268 for more
information.)
6. 4LO Mode Indicator Light — If Equipped
This light alerts the driver that the vehicle is in
the 4 LO four–wheel drive mode. The front and
rear driveshafts are mechanically locked to-
gether forcing the front and rear wheels to
rotate at the same speed. (See page 236 for more infor-
mation.)
7. Fog Light Indicator Light — If Equipped
This light shows when the front fog lights are on.8. Malfunction Indicator Light
This light is part of an onboard diagnostic system
called OBD II which monitors engine and auto-
matic transmission control systems. This light
will illuminate when the ignition is in the ON position
before engine start. If the bulb does not come on when
turning the ignition key from OFF to ON, have the
condition checked promptly.
Certain conditions such has a loose or missing gas cap,
poor fuel quality, etc. may illuminate the light after
engine start. The vehicle should be serviced if the light
stays on through several typical driving cycles. In most
situations, the vehicle will drive normally and will not
require towing.
When the engine is running, the “Malfunction Indicator
Light” may flash to alert of serious conditions that could
lead to immediate loss of power or severe catalytic
UNDERSTANDING YOUR INSTRUMENT PANEL 169
4
Page 219 of 424
▫Tire Pressure Monitoring — Base System.....268
▫Tire Pressure Monitoring — Premium System . 270
▫General Information...................273
�Tire Chains...........................274
�Tire Rotation Recommendations............275
�Fuel Requirements (Gasoline Engines)........276
▫Reformulated Gasoline.................277
▫Gasoline/Oxygenate Blends..............278
▫MMT In Gasoline.....................278
▫Materials Added To Fuel................279
▫Fuel System Cautions..................279▫Carbon Monoxide Warnings..............280
�Fuel Requirements (Diesel Engines)..........280
�Fuel Tank Filler Cap (Gas Cap).............281
▫Loose Fuel Filler Cap Message............283
�Trailer Towing.........................283
▫Warranty Requirements.................284
�Recreational Towing (Behind Motorhome, Etc.) . . 287
▫Towing – 2WD Models.................287
▫Towing — 4WD Models................287
�Snow Plow...........................289
STARTING AND OPERATING 219
5
Page 263 of 424

2. Economy—
Improper inflation pressures can cause uneven wear
patterns to develop across the tire tread. These abnormal
wear patterns will reduce tread life resulting in a need for
earlier tire replacement. Under inflation also increases
tire rolling resistance and results in higher fuel consump-
tion.
3. Ride Comfort and Vehicle Stability—
Proper tire inflation contributes to a comfortable ride.
Over inflation produces a jarring and uncomfortable ride.
Both under inflation and over inflation affect the stability
of the vehicle and can produce a feeling of sluggish
response or over responsiveness in the steering.
Unequal tire pressures can cause erratic and unpredict-
able steering response.
Unequal tire pressure from side to side may cause the
vehicle to drift left or right.Tire Inflation Pressures
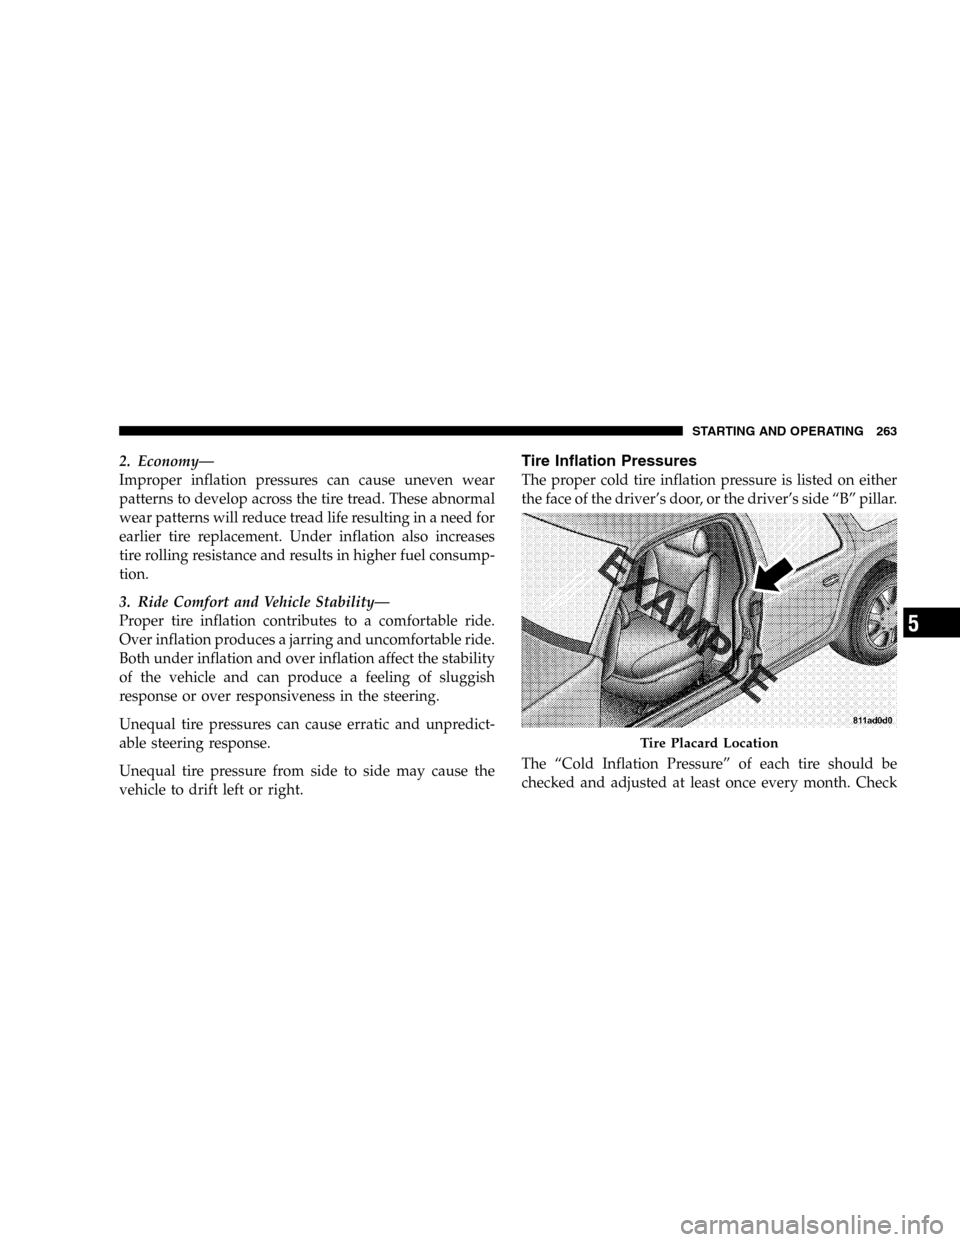
The proper cold tire inflation pressure is listed on either
the face of the driver’s door, or the driver’s side “B” pillar.
The “Cold Inflation Pressure” of each tire should be
checked and adjusted at least once every month. Check
Tire Placard Location
STARTING AND OPERATING 263
5
Page 266 of 424
Tread Wear Indicators
These indicators are narrow strips 1/16 inch (1.6 mm)
thick and are found in the tread pattern grooves.
When the tread pattern is worn down to these treadwear
indicators, the tires should be replaced.
Overloading your vehicle, long trips in very hot weather,
and driving on bad roads may result in greater wear.
Replacement Tires
The tires on your new vehicle provide a balance of many
characteristics. They should be inspected regularly for
wear and correct inflation pressure. The manufacturer
strongly recommends that you use tires equivalent to the
originals in quality and performance when replacement
is needed (see section on tread wear indicators). Failure
to use equivalent replacement tires may adversely affect
the safety, handling, ride and fuel economy of your
vehicle. We recommend that you contact your original
equipment tire dealer on any questions you may have on
tire specifications or capability.
266 STARTING AND OPERATING
Page 362 of 424

At Each Stop for Fuel
•Check the engine oil level about 5 minutes after a fully
warmed engine is shut off. Checking the oil level while
the vehicle is on level ground will improve the accu-
racy of the oil level reading. Add oil only when the
level is at or below the ADD or MIN mark.
•Check the windshield washer solvent, add as required.
Once a Month
•Check the tire pressure and look for unusual wear or
damage.
•Inspect the battery, and clean and tighten the terminals
as required.
•Check the fluid levels of the engine coolant/anti-
freeze reservoir, brake master cylinder, and transmis-
sion, and add as needed.
•Check all lights and all other electrical items for correct
operation.
At Each Oil Change
•Change the engine oil filter.
•Inspect the exhaust system.
•Inspect brake hoses.
•Check the engine coolant/anti-freeze level, hoses, and
clamps.
•Inspect manual transmission fluid level, and for leaks
(if equipped).
•After completion of off-road operation, the underside
of the vehicle should be thoroughly inspected. Exam-
ine threaded fasteners for looseness.
362 MAINTENANCE SCHEDULES
8
M
A
I
N
T
E
N
A
N
C
E
S
C
H
E
D
U
L
E
S
Page 379 of 424

At Each Stop for Fuel
•Check the engine oil level about 5 minutes after a fully
warmed engine is shut off. Checking the oil level while
the vehicle is on level ground will improve the accu-
racy of the oil level reading. Add oil only when the
level is at or below the ADD or MIN mark.
•Check the windshield washer solvent, add as required.
Once a Month
•Check the tire pressure and look for unusual wear or
damage.
•Inspect the battery, clean and tighten the terminals as
required.
•Check the fluid levels of engine coolant/anti-freeze
deaeration bottle, brake master cylinder, and transmis-
sion, and add as needed.
•Check all lights and all other electrical items for correct
operation.
At Each Oil Change
•Change the engine oil filter.
•Inspect the exhaust system.
•Inspect brake hoses.
•Check the engine coolant/anti-freeze level, hoses, and
clamps.
•Inspect engine accessory drive belts. Replace as neces-
sary.
•Inspect for the presence of water in the fuel filter/
water separator unit.
Tire Rotation
•Rotate the tires every 6,000 miles (10 000 km).
SCHEDULE “A” — GASOLINE ENGINES 379
8
M
A
I
N
T
E
N
A
N
C
E
S
C
H
E
D
U
L
E
S