Page 232 of 424
The following indicators should be used to ensure that
you have engaged the transmission shift lever into the P
(Park) position:
•When shifting into P (Park), depress the button on the
shift lever and firmly move the lever all the way
forward until it stops.
•Look at the shift indicator window on the console to
ensure it is in the P (Park) position.
•When engaged in P (Park), you will not be able to
move the shifter rearward without depressing the shift
lever button.
CAUTION!
Before moving the shift lever out of P (Park), you must
turn the ignition from LOCK to ON so the steering
wheel and shift lever are released. Otherwise, damage
to the steering column or shifter could result.
R (Reverse)
For moving the vehicle rearward. Always stop before
moving the lever to R (Reverse), except when rocking the
vehicle.
N (Neutral)
Engine may be started in this position.
NOTE:Towing the vehicle, coasting, or otherwise driv-
ing with the transmission in N (Neutral) can cause severe
damage to the transmission.
WARNING!
Do not coast in N (Neutral) and never turn off the
ignition to coast down a hill. These are unsafe
practices that limit your response to changing traffic
or road conditions. You might lose control of the
vehicle.
232 STARTING AND OPERATING
Page 233 of 424
Overdrive (O/D)
For most city and highway driving. The transmission
contains an electronically controlled Overdrive, and will
automatically shift from D (Drive) to O/D (Overdrive) if
the following conditions are present:
•The transmission selector is in D (Drive).
•The O/D OFF button has not been activated.
•Vehicle speed is above approximately 30 mph (48
km/h).
•Transmission has reached normal operating tempera-
ture.
When frequent transmission shifting occurs while using
Overdrive, such as when operating the vehicle under
heavy load conditions (for example, in hilly terrain,
strong head winds, or trailer towing), turning off over-
drive will improve performance and extend transmission
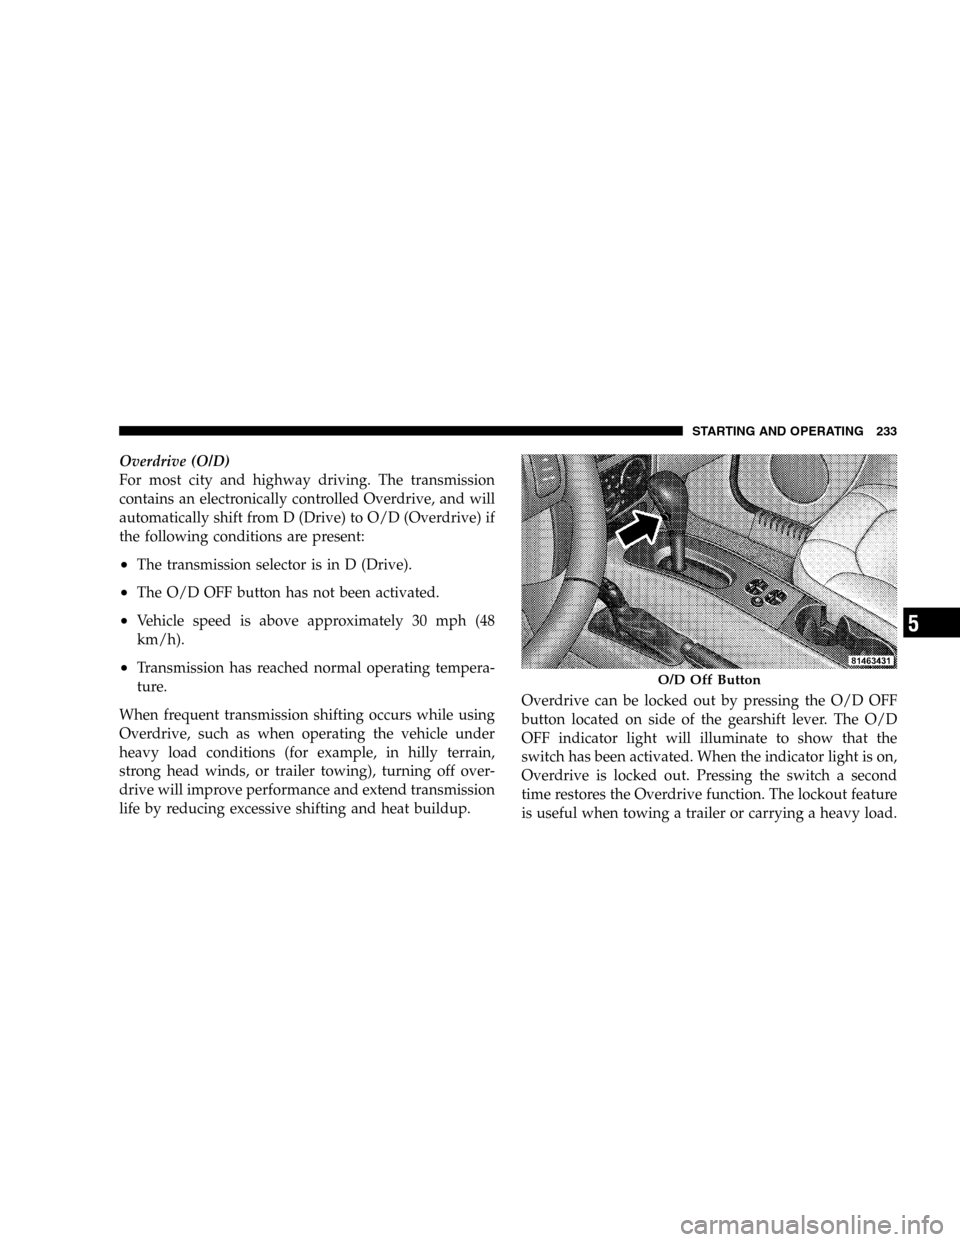
life by reducing excessive shifting and heat buildup.Overdrive can be locked out by pressing the O/D OFF
button located on side of the gearshift lever. The O/D
OFF indicator light will illuminate to show that the
switch has been activated. When the indicator light is on,
Overdrive is locked out. Pressing the switch a second
time restores the Overdrive function. The lockout feature
is useful when towing a trailer or carrying a heavy load.O/D Off Button
STARTING AND OPERATING 233
5
Page 238 of 424
Proper operation of 4-wheel drive vehicles depends on
tires of equal size, type and circumference on each wheel.
Any difference will adversely affect shifting and can
cause damage to the transfer case.
WARNING!
•Because 4-wheel drive provides improved trac-
tion, there is a tendency to exceed safe turning and
stopping speeds. Do not go faster than road con-
ditions permit.
•You or others could be injured if you leave the
vehicle unattended with the transfer case in the
Neutral (N) position without first fully engaging
the parking brake. The transfer case Neutral (N)
position disengages both the front and rear drive-
shafts from the powertrain and will allow the
vehicle to move despite the transmission position.
The parking brake should always be applied
when the driver is not in the vehicle.
Shift Positions
For additional information on the appropriate use of each
transfer case mode position see the information below:
2H
Rear Wheel Drive High Range - Normal street and
highway driving. Dry hard surfaced roads.
4H
4-Wheel-Drive High Range - Locks the front and rear
driveshafts together. Forces the front and rear wheels to
rotate at the same speed. Additional traction for loose,
slippery road surfaces only.
N
Neutral - Disengages both the front and rear driveshafts
from the powertrain. To be used for flat towing behind
another vehicle. Refer to “Recreational Towing” in Sec-
tion 5 for more information.
238 STARTING AND OPERATING
Page 243 of 424
N
Neutral - Disengages both the front and rear driveshafts
from the powertrain. To be used for flat towing behind
another vehicle. Refer to “Recreational Towing” in Sec-
tion 5 for more information.
4LO
Part Time 4–Wheel Drive Low Range - Low speed
4–wheel drive. Locks the transfer case inter-axle differ-
ential. Forces the front and rear wheels to rotate at the
same speed. Additional traction and maximum pulling
power for loose, slippery road surfaces only. Do not
exceed 25 mph (40 km/h).
Shifting Procedure
2WDto4PARTTIMEor4PARTTIMEto2WD
Shifting between 2WD and 4 PART TIME can be made
with the vehicle stopped or in motion. If the vehicle is in
motion, shifts can be made up to 55 mph (88 km/h). With
the vehicle in motion two momentary releases of theaccelerator pedal may be required after shifting. This will
induce a torque interrupt and allow full engagement of
the newly selected position. With the vehicle stationary it
may be necessary to shift the automatic transmission
from D (Drive) to R (Reverse) and back to D (Drive) after
shifting. This will allow full engagement of the newly
selected position. Apply a constant force when shifting
the transfer case lever.
4 PART TIME to 4 FULL TIME or 4 FULL TIME to
4 PART TIME
Shifting between 4 PART TIME and 4 FULL TIME can be
made with the vehicle stopped or in motion. If the vehicle
is in motion shifts can be made up to 55 mph (88 km/h).
With the vehicle in motion two momentary releases of the
accelerator pedal may be required after shifting. This will
induce a torque interrupt and allow full engagement of
the newly selected position. With the vehicle stationary it
may be necessary to shift the automatic transmission
from D (Drive) to R (Reverse) and back to D (Drive) after
STARTING AND OPERATING 243
5
Page 259 of 424
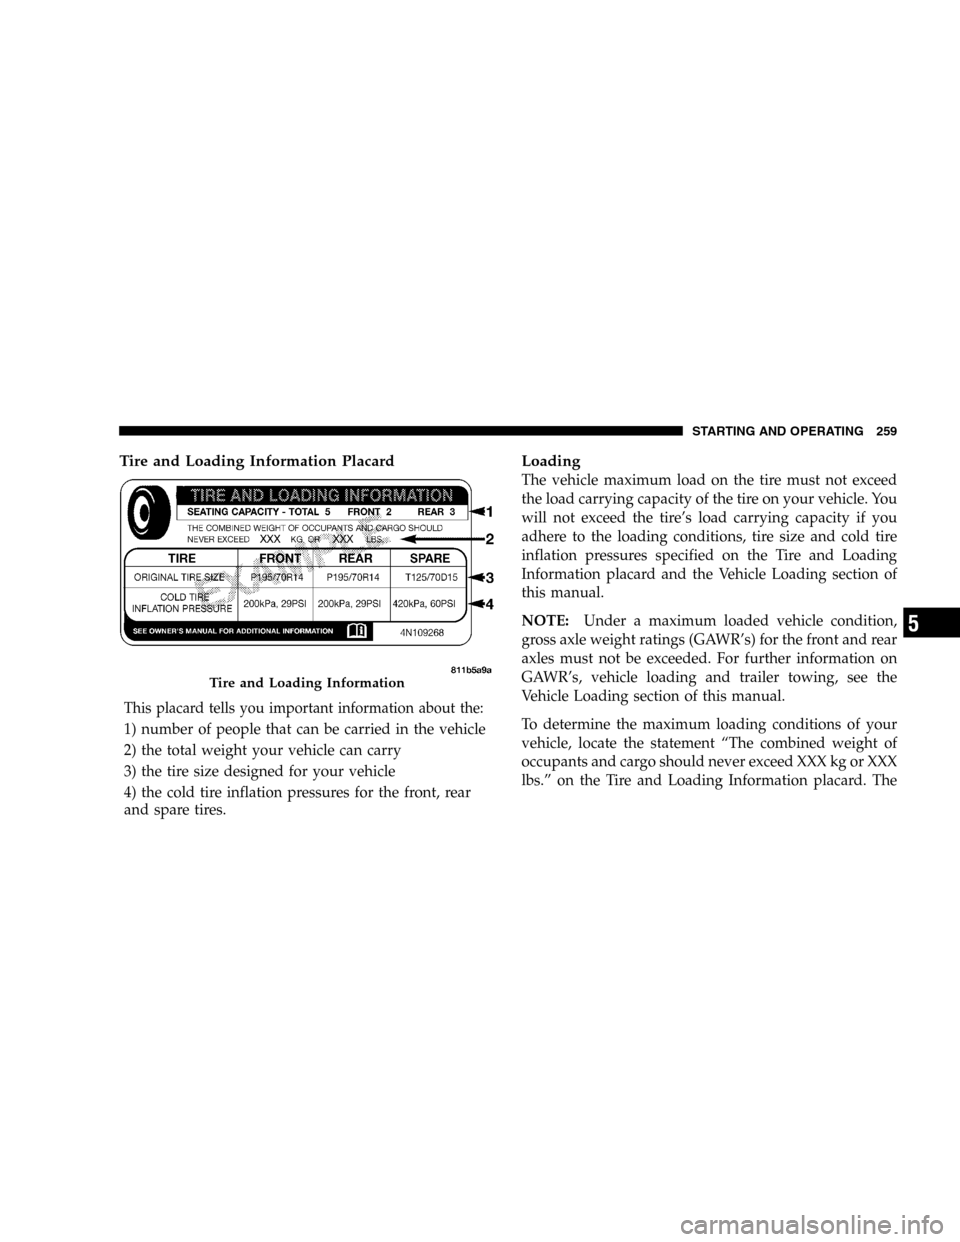
Tire and Loading Information Placard
This placard tells you important information about the:
1) number of people that can be carried in the vehicle
2) the total weight your vehicle can carry
3) the tire size designed for your vehicle
4) the cold tire inflation pressures for the front, rear
and spare tires.
Loading
The vehicle maximum load on the tire must not exceed
the load carrying capacity of the tire on your vehicle. You
will not exceed the tire’s load carrying capacity if you
adhere to the loading conditions, tire size and cold tire
inflation pressures specified on the Tire and Loading
Information placard and the Vehicle Loading section of
this manual.
NOTE:Under a maximum loaded vehicle condition,
gross axle weight ratings (GAWR’s) for the front and rear
axles must not be exceeded. For further information on
GAWR’s, vehicle loading and trailer towing, see the
Vehicle Loading section of this manual.
To determine the maximum loading conditions of your
vehicle, locate the statement “The combined weight of
occupants and cargo should never exceed XXX kg or XXX
lbs.” on the Tire and Loading Information placard. The
Tire and Loading Information
STARTING AND OPERATING 259
5
Page 260 of 424
combined weight of occupants, cargo/luggage and
trailer tongue weight (if applicable) should never exceed
the weight referenced here.
Steps for Determining Correct Load Limit
1. Locate the statement “The combined weight of occu-
pants and cargo should never exceed XXX pounds” on
your vehicle’s placard.
2. Determine the combined weight of the driver and
passengers that will be riding in your vehicle.
3. Subtract the combined weight of the driver and pas-
sengers from XXX kilograms or XXX pounds.
4. The resulting figure equals the available amount of
cargo and luggage load capacity. For example, if “XXX”
amount equals 1400 lbs. and there will be five 150 lb.
passengers in your vehicle, the amount of available cargo
and luggage load capacity is 650 lb. (since 5 x 150 = 750,
and 1400 – 750 = 650 lb.)5. Determine the combined weight of luggage and cargo
being loaded on the vehicle. That weight may not safely
exceed the available cargo and luggage load capacity
calculated in step 4.
6. If your vehicle will be towing a trailer, load from your
trailer will be transferred to your vehicle. Consult this
manual to determine how this reduces the available
cargo and luggage load capacity of your vehicle.
NOTE:The following table shows examples on how to
calculate total load, cargo/luggage and towing capacities
of your vehicle with varying seating configurations and
number and size of occupants. This table is for illustra-
tion purposes only and may not be accurate for the
seating and load carry capacity of your vehicle.
NOTE:For the following example the combined weight
of occupants and cargo should never exceed 865 lbs. (392
Kg).
260 STARTING AND OPERATING
Page 276 of 424
The suggested rotation method is the “forward-cross”
shown in the following diagram.FUEL REQUIREMENTS (GASOLINE ENGINES)
Your engine is designed to meet all emis-
sions regulations and provide excellent
fuel economy and performance when us-
ing high quality unleaded gasoline having
an octane rating of 87. The use of premium
gasoline is not recommended. The use of
premium gasoline will provide no benefit over high
quality regular gasoline, and in some circumstances may
result in poorer performance.
Mid-grade gasoline (89 octane) will enhance engine per-
formance during the following conditions (3.7L Only):
•Hot weather
•Towing
•Hard accelerations
•Hilly terrain
•Low humidity
276 STARTING AND OPERATING
Page 283 of 424
Loose Fuel Filler Cap Message
If the vehicle diagnostic system determines that the fuel
filler cap is loose, improperly installed, or damaged, a
“CHECK GAS CAP” message will be displayed in the
EVIC (Electronic Vehicle Information Center). Refer to
“Overhead Console” in Section 3 of this manual. Tighten
the fuel filler cap properly and press the odometer reset
button to turn the message off. If the problem continues,
the message will appear the next time the vehicle is
started. Refer to “Onboard Diagnostic System — OBDII”
in Section 7 of this manual for more information.
CAUTION!
Damage to the fuel system or emission control
system could result from using an improper fuel
tank filler cap (gas cap). A poorly fitting cap could let
impurities into the fuel system.
WARNING!
•Never add fuel when the engine is running.
•Never have any smoking materials lit in or near
the vehicle when the fuel cap is removed or the
tank filled.
TRAILER TOWING
In this section you will find information on limits to the
type of towing you can reasonably do with your vehicle.
Before towing a trailer, carefully review this information
to tow your load as efficiently and safely as possible.
To maintain warranty coverage, follow the requirements
and recommendations in this manual concerning ve-
hicles used for trailer towing.
STARTING AND OPERATING 283
5