2005 HYUNDAI XG350 mirror
[x] Cancel search: mirrorPage 77 of 247

1
FEATURES OF YOUR HYUNDAI
65
!!
HOMELINK PROGRAMMING
CAUTION:o Make sure people and/or objects are out
of the way of any garage doors or gates
you may be operating during the pro-
gramming procedures.
o Keep original transmitters for potential
future programming needs, or in case
you sell the vehicle.
o In the event you do sell your vehicle, it's
recommended you erase your pro-
grammed HomeLink mirror buttons.
WARNING:
Do not use HomeLink with any garage door
opener that lacks the safety stop and re-
verse feature as required by federal safety
standards (includes garage doors manu-
factured before April 1, 1982), as these
doors can increase the risk of serious injury
or death. Call 1-800-355-3515 or visit
www.homelink.com for more information.
ProgrammingEnsure the ignition switch is turned to the "ACC"
position to program and/or operate HomeLink
system. It is also recommended that a new
battery be placed in the handheld transmitter of
the device being programmed to HomeLink for
quicker programming and accurate transmis-
sion of the radio-frequency.
Follow these steps to program your HomeLink
mirror:1. When programming the buttons for the first
time, press and hold the two outside
HomeLink buttons ( , ), releasing when
the indicator light begins to flash (approxi-
mately 20 seconds). This procedure erases
the factory-set default codes. Do not per-
form this step when programming additional
transmitters.
B520C02L
Flashing
NOTE:If programming a garage door opener or
gate, it is advised to unplug the device
during the "cycling" process to prevent
possible motor burnout.
Flashing
2. Hold the transmitter of the device you want
to program 1 to 3 inches away from the
bottom of the mirror. Simultaneously press
the handheld transmitter button and the
HomeLink button you wish to program. The
indicator light will flash slowly at first, then
rapidly, indicating successful programming.
B520C03L
Transmitter
1 ~ 3 inches
xgflhma-1.p656/16/04, 3:03 PM 65
Page 78 of 247

1FEATURES OF YOUR HYUNDAI66
Operating HomeLinkSimply press the appropriate HomeLink button
to activate the trained product (garage door,
security system, entry door lock, estate gate,
lighting, etc.). The original handheld transmit-
ters may also be used at any time.
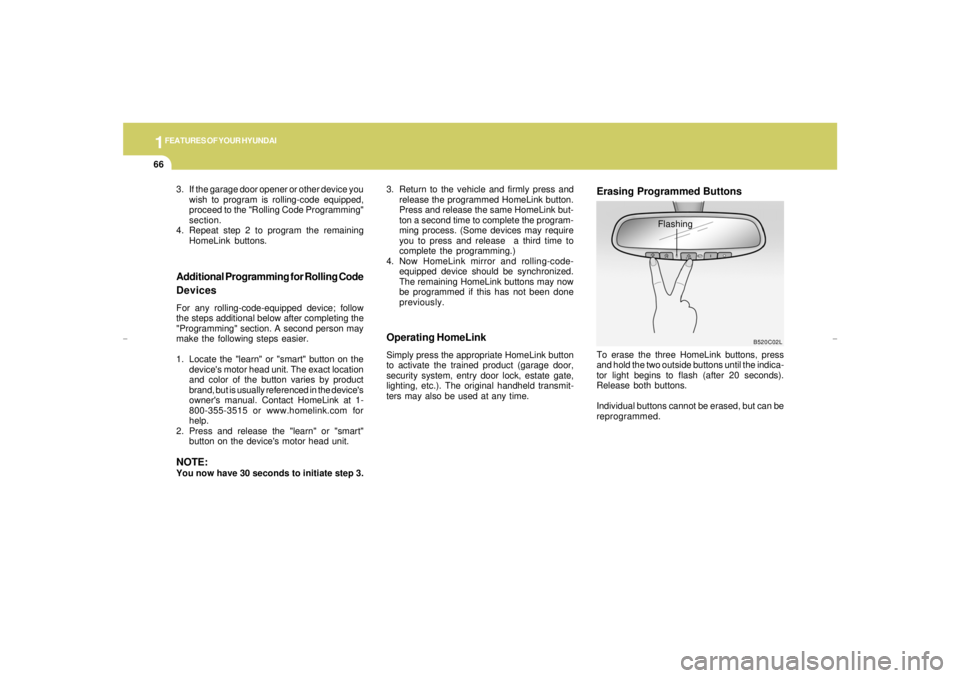
Erasing Programmed ButtonsTo erase the three HomeLink buttons, press
and hold the two outside buttons until the indica-
tor light begins to flash (after 20 seconds).
Release both buttons.
Individual buttons cannot be erased, but can be
reprogrammed.
Additional Programming for Rolling Code
DevicesFor any rolling-code-equipped device; follow
the steps additional below after completing the
"Programming" section. A second person may
make the following steps easier.
1. Locate the "learn" or "smart" button on the
device's motor head unit. The exact location
and color of the button varies by product
brand, but is usually referenced in the device's
owner's manual. Contact HomeLink at 1-
800-355-3515 or www.homelink.com for
help.
2. Press and release the "learn" or "smart"
button on the device's motor head unit.NOTE:You now have 30 seconds to initiate step 3.
B520C02L
Flashing 3. If the garage door opener or other device you
wish to program is rolling-code equipped,
proceed to the "Rolling Code Programming"
section.
4. Repeat step 2 to program the remaining
HomeLink buttons.3. Return to the vehicle and firmly press and
release the programmed HomeLink button.
Press and release the same HomeLink but-
ton a second time to complete the program-
ming process. (Some devices may require
you to press and release a third time to
complete the programming.)
4. Now HomeLink mirror and rolling-code-
equipped device should be synchronized.
The remaining HomeLink buttons may now
be programmed if this has not been done
previously.
xgflhma-1.p656/16/04, 3:03 PM 66
Page 79 of 247

1
FEATURES OF YOUR HYUNDAI
67
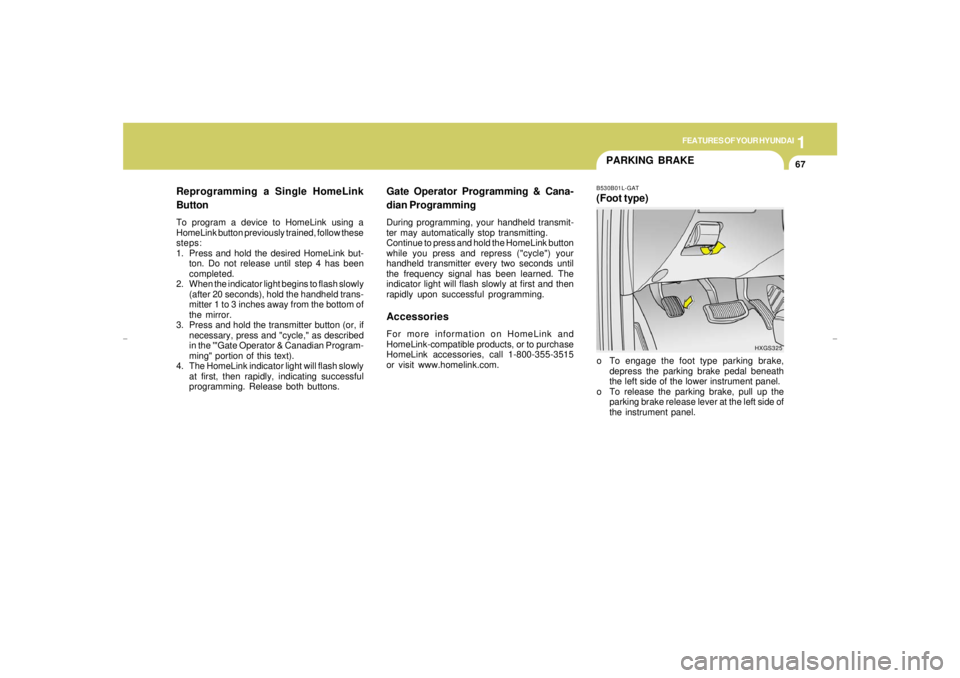
PARKING BRAKEB530B01L-GAT(Foot type)o To engage the foot type parking brake,
depress the parking brake pedal beneath
the left side of the lower instrument panel.
o To release the parking brake, pull up the
parking brake release lever at the left side of
the instrument panel.
Gate Operator Programming & Cana-
dian ProgrammingDuring programming, your handheld transmit-
ter may automatically stop transmitting.
Continue to press and hold the HomeLink button
while you press and repress ("cycle") your
handheld transmitter every two seconds until
the frequency signal has been learned. The
indicator light will flash slowly at first and then
rapidly upon successful programming.AccessoriesFor more information on HomeLink and
HomeLink-compatible products, or to purchase
HomeLink accessories, call 1-800-355-3515
or visit www.homelink.com.
HXGS325
Reprogramming a Single HomeLink
ButtonTo program a device to HomeLink using a
HomeLink button previously trained, follow these
steps:
1. Press and hold the desired HomeLink but-
ton. Do not release until step 4 has been
completed.
2. When the indicator light begins to flash slowly
(after 20 seconds), hold the handheld trans-
mitter 1 to 3 inches away from the bottom of
the mirror.
3. Press and hold the transmitter button (or, if
necessary, press and "cycle," as described
in the '"Gate Operator & Canadian Program-
ming" portion of this text).
4. The HomeLink indicator light will flash slowly
at first, then rapidly, indicating successful
programming. Release both buttons.
xgflhma-1.p656/16/04, 3:03 PM 67
Page 85 of 247

1
FEATURES OF YOUR HYUNDAI
73
SUN VISOR
FLOOR MAT ANCHOR
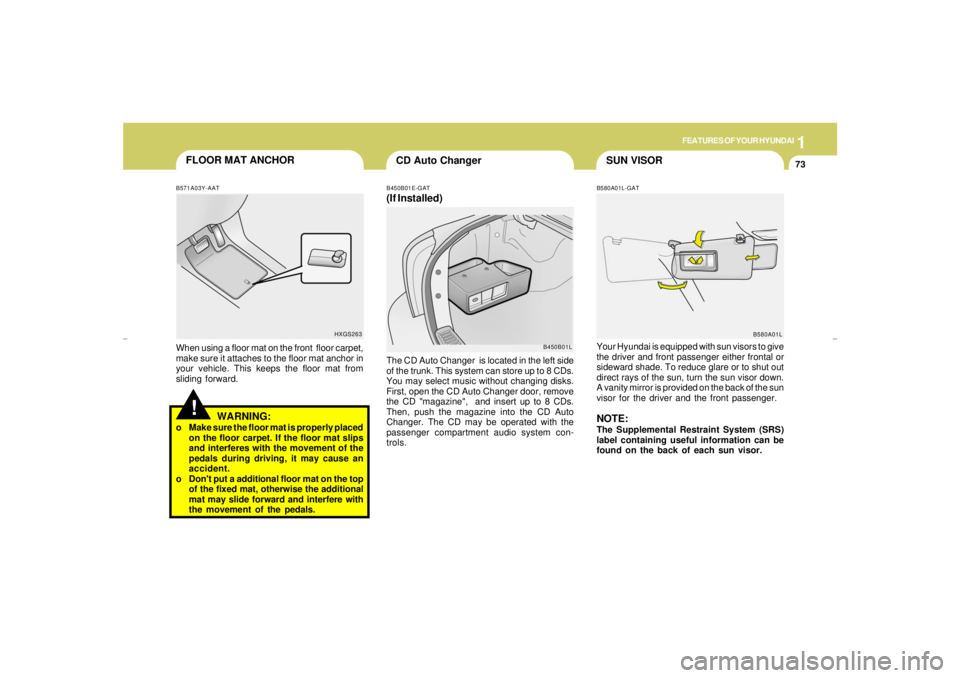
B580A01L-GATYour Hyundai is equipped with sun visors to give
the driver and front passenger either frontal or
sideward shade. To reduce glare or to shut out
direct rays of the sun, turn the sun visor down.
A vanity mirror is provided on the back of the sun
visor for the driver and the front passenger.NOTE:The Supplemental Restraint System (SRS)
label containing useful information can be
found on the back of each sun visor.
B450B01E-GAT(If Installed)The CD Auto Changer is located in the left side
of the trunk. This system can store up to 8 CDs.
You may select music without changing disks.
First, open the CD Auto Changer door, remove
the CD "magazine", and insert up to 8 CDs.
Then, push the magazine into the CD Auto
Changer. The CD may be operated with the
passenger compartment audio system con-
trols.
B450B01L
B580A01L
!
B571A03Y-AATWhen using a floor mat on the front floor carpet,
make sure it attaches to the floor mat anchor in
your vehicle. This keeps the floor mat from
sliding forward.
WARNING:
o Make sure the floor mat is properly placed
on the floor carpet. If the floor mat slips
and interferes with the movement of the
pedals during driving, it may cause an
accident.
o Don't put a additional floor mat on the top
of the fixed mat, otherwise the additional
mat may slide forward and interfere with
the movement of the pedals.
HXGS263
CD Auto Changer
xgflhma-1.p656/16/04, 3:04 PM 73
Page 86 of 247

1FEATURES OF YOUR HYUNDAI74
DOOR COURTESY LIGHT
HORNB610A01Y-AAT
B620A01L B620A01L-AAT
A red light comes on when the door is opened.
The purpose of this light is to assist when you
get in or out, and also to warn passing vehicles.
HXGS218
Working zone
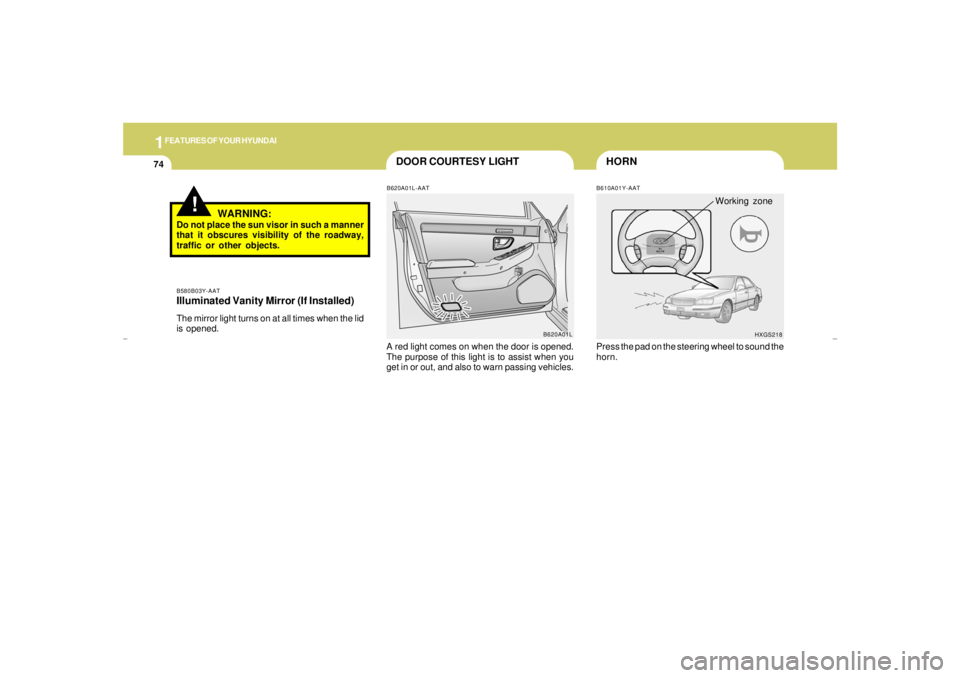
Press the pad on the steering wheel to sound the
horn.
!
WARNING:
Do not place the sun visor in such a manner
that it obscures visibility of the roadway,
traffic or other objects.B580B03Y-AATIlluminated Vanity Mirror (If Installed)The mirror light turns on at all times when the lid
is opened.
xgflhma-1.p656/16/04, 3:04 PM 74
Page 133 of 247

DRIVING YOUR HYUNDAI
32
KEY POSITIONS COMBINATION IGNITION SWITCH
BEFORE STARTING THE ENGINE
!
C020A01A-AATBefore you start the engine, you should always:
1. Look around the vehicle to be sure there are
no flat tires, puddles of oil, water or other
indications of possible trouble.
2. After entering the car, check to be sure the
parking brake is engaged.
3. Check that all windows, and lights are clean.
4. Check that the interior and exterior mirrors
are clean and in position.
5. Check your seat, seatback and headrest to
be sure they are in their proper positions.
6. Lock all the doors.
7. Fasten your seat belt and be sure that all
other occupants have fastened theirs.
8. Turn off all lights and accessories that are
not needed.
9. When you turn the ignition switch to "ON",
check that all appropriate warning lights are
operating and that you have sufficient fuel.
10.Check the operation of warning lights and all
bulbs when key is in the "ON" position.
C030A01L-AATTo Start the Engineo Place the shift lever in "P" (park) and de-
press the brake pedal fully.
o To start the engine, insert the ignition key and
turn it to the "START" position. Release it as
soon as the engine starts. Do not hold the
key in the "START" position for more than 15
seconds.NOTE:o For safety, the engine will not start if the
shift lever is not in "P" or "N" Position.
o The ignition key cannot be turned from
"ACC" position to "LOCK" position un-
less the shift lever is in the "P" (Park)
position or the negative battery terminal
is disconnected from the battery. To
remove the key, always confirm that the
shift lever is securely positioned in "P"
(Park).
o For additional information about start-
ing, see page 2-4.
C040A01A-AAT
WARNING:
The engine should not be turned off or the
key removed from the ignition key cylinder
while the vehicle is in motion. The steering
wheel is locked by removing the key.o "START"The engine is started in this position. It will crank
until you release the key.NOTE:Do not hold the key in the "START" position
for more than 15 seconds.LOCKACC
ON
START
C040A01E-1
xgflhma-2.p656/16/04, 3:00 PM 3
Page 183 of 247

6
DO-IT-YOURSELF MAINTENANCE
3
GENERAL CHECKS
G020C01L-AATVehicle InteriorThe following should be checked each time
when the vehicle is driven:
o Lights operation
o Windshield wiper operation
o Horn operation
o Defroster, heating system operation (and air
conditioning, if installed)
o Steering operation and condition
o Mirror condition and operation
o Turn signal operation
o Accelerator pedal operation
o Brake operation, including parking brake
o Automatic transaxle operation, including
"Park" mechanism operation
o Seat control condition and operation
o Seat belt condition and operation
o Sunvisor operation
If you notice anything that does not operate
correctly or appears to be functioning incor-
rectly, inspect it carefully and seek assistance
from your Hyundai dealer if service is needed.
G020B01A-AATVehicle ExteriorThe following should be checked monthly:
o Overall appearance and condition
o Wheel condition and wheel nut torque
o Exhaust system condition
o Light condition and operation
o Windshield glass condition
o Wiper blade condition
o Paint condition and body corrosion
o Fluid leaks
o Door and hood lock condition
o Tire pressure and condition (including spare
tire)
G020A01L-AATEngine CompartmentThe following should be checked regularly:
o Engine oil level and condition
o Transaxle fluid level and condition
o Brake fluid level
o Coolant level
o Windshield washer fluid level
o Accessory drive belt condition
o Engine coolant hose condition
o Fluid leaks (on or below components)
o Power steering fluid level
o Battery condition
o Air filter condition
xgflhma-6.p656/16/04, 2:58 PM 3
Page 215 of 247

6
DO-IT-YOURSELF MAINTENANCE
35
G200D01L-GATInstrument Panel Junction Box
G200D01L
FUSERATING
25A
20A
10A
15A
10A
10A
10A
15A
10A
10A
20A
10A
10A
10A
20A
10A
15A
10A
20APROTECTED COMPONENTS
Power seat
Seat warmer
EPS controls
ETS relay
(HID) Head lights, DRL controls, AQS sensor
Blower & A/C controls
Turn & Hazard controls
Not used
Cruise switch, Instrument cluster
Head light leveling switch, Rain sensor, IMS controls
Rain sensor relay, Wiper & Washer controls
Home link connector, Left (Right) vanity lights, Sunroof,
Blower & A/C controls, Electronic chrome mirror
Not used
Audio
Front (Rear) cigarette lighter, Accessory socket
IMS controls, Driver door module, Rheostat
Not used
Rear for light relay
Stop lights, Left (Right) personal lights,Left (Right) rear door lights
DESCRIPTION
P/SEAT
S/HTR
EPS
ETS
H/LP
A/CON SW
HAZARD
SPARE
CRUISE
IMS
WIPER
ETACS
SPARE
AUDIO
C/LIGHTER
MIRROR
SPARE
RR FOG
STOP LP
xgflhma-6.p656/16/04, 2:59 PM 35