2005 HYUNDAI XG350 maintenance schedule
[x] Cancel search: maintenance schedulePage 185 of 247

6
DO-IT-YOURSELF MAINTENANCE
5
!
CHANGING THE OIL AND FILTER
!
WARNING:
Be very careful when draining the engine oil
as it may be hot enough to burn you!
G040A01L-AATThe engine oil and filter should be changed at
those intervals specified in the maintenance
schedule in Section 5. If the car is being driven
in severe conditions, more frequent oil and filter
changes are required.
The procedure for changing the oil and filter is
as follows:
1. Park the car on level ground and set the
parking brake. Start the engine and let it
warm up until the needle on the coolant
temperature gauge moves above the lowest
mark. Turn the engine off and place the gear
selector lever in "P".
2. Open the hood and remove the engine oil
filler cap.
G040A02L
3. Slide underneath the car and loosen the
drain plug by turning it counterclockwise with
a wrench of the proper size. Be sure that a
drain pan is in position to catch the oil as it
drains out, then remove the drain plug.
4. When the oil has stopped draining, replace the
drain plug using a new washer and retighten by
turning it clockwise.
Oil pan drain plug tightening torque:
3.5 ~ 4.0 kgf.m
5. Remove the oil filter by turning it counterclock-
wise with a oil filter wrench of the proper size. A
certain amount of oil will come out when you
remove the filter. So be sure to have your drain
pan in place underneath it.
6. Install a new oil filter in accordance with the
instructions on the carton or on the filter itself. Do
not over-tighten.
Oil filter tightening torque:1.2 ~1.6 kgf.m
Be sure that the mounting surface on the engine
is clean and that the old gasket is removed
completely. Lubricate the new gasket on the
filter with clean engine oil before installation.
7. Remove the engine oil level dipstick.8. Refill the crankcase with the recommended
engine oil. Refer to the specification in chap-
ter 9 for engine oil capacity.
Oil filler cap
Oil fillerDrain plug9. Start the engine and check to be sure no oil
is leaking from the drain plug or oil filter.
10.Shut off the engine and recheck the oil level.
NOTE:Always dispose of used engine oil in an
environmentally acceptable manner. It is
suggested that it be placed in a sealed
container and taken to a service station for
reclamation. Do not pour the oil on the
ground or put it in with the household trash.
CAUTION
Slowly pour the recommended oil using by
a tunnel. Do not overfill not to damage
engine.
!
PROPOSITION 65 WARNING:
Used engine oil may cause irritation or can-
cer of the skin if left in contact with the skin
for prolonged periods of time. Used engine
oil contains chemicals that have caused
cancer in laboratory animals. Always protect
your skin by washing your hands thoroughly
with soap and warm water as soon as pos-
sible after handling used oil.
xgflhma-6.p656/16/04, 2:58 PM 5
Page 187 of 247

6
DO-IT-YOURSELF MAINTENANCE
7
G050D02A-AATTo Change the Engine CoolantThe engine coolant should be changed at those
intervals specified in the vehicle maintenance
schedule in Section 5.
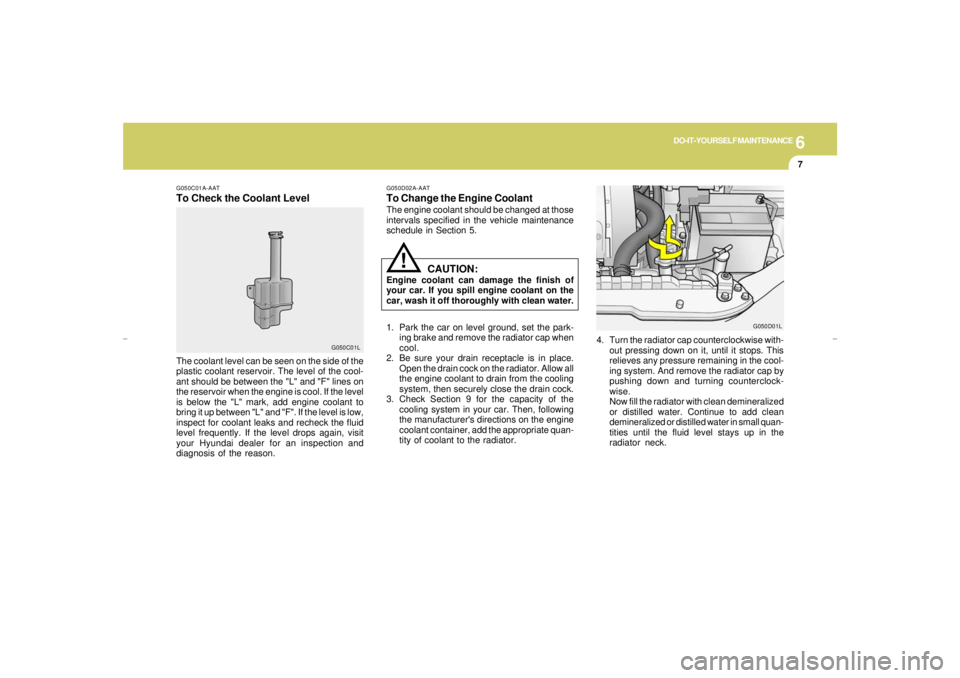
G050C01A-AATTo Check the Coolant LevelThe coolant level can be seen on the side of the
plastic coolant reservoir. The level of the cool-
ant should be between the "L" and "F" lines on
the reservoir when the engine is cool. If the level
is below the "L" mark, add engine coolant to
bring it up between "L" and "F". If the level is low,
inspect for coolant leaks and recheck the fluid
level frequently. If the level drops again, visit
your Hyundai dealer for an inspection and
diagnosis of the reason.
G050C01L
CAUTION:
Engine coolant can damage the finish of
your car. If you spill engine coolant on the
car, wash it off thoroughly with clean water.
1. Park the car on level ground, set the park-
ing brake and remove the radiator cap when
cool.
2. Be sure your drain receptacle is in place.
Open the drain cock on the radiator. Allow all
the engine coolant to drain from the cooling
system, then securely close the drain cock.
3. Check Section 9 for the capacity of the
cooling system in your car. Then, following
the manufacturer's directions on the engine
coolant container, add the appropriate quan-
tity of coolant to the radiator.
!
4. Turn the radiator cap counterclockwise with-
out pressing down on it, until it stops. This
relieves any pressure remaining in the cool-
ing system. And remove the radiator cap by
pushing down and turning counterclock-
wise.
Now fill the radiator with clean demineralized
or distilled water. Continue to add clean
demineralized or distilled water in small quan-
tities until the fluid level stays up in the
radiator neck.
G050D01L
xgflhma-6.p656/16/04, 2:58 PM 7
Page 188 of 247

6
DO-IT-YOURSELF MAINTENANCE
8
SPARK PLUGSG060A02Y-AATYour engine was originally equipped with plati-
num-tipped spark plugs.
Platinum-tipped spark plugs will last longer than
conventional type spark plugs and can be
identified by blue lines on the ceramic shell.NOTE:Do not clean or regap platinum-tipped spark
plugs.
G060A01LG060B04L-AAT
Replacing the Spark PlugsThe spark plugs should be changed at the
intervals specified in the vehicle maintenance
schedule in Section 5 or whenever engine
performance indicates they should be changed.
Symptoms that suggest poor spark plug perfor-
mance include engine misfiring under load, loss
of fuel economy, poor acceleration, etc. When
spark plugs are replaced, always use spark
plugs recommended by Hyundai. The use of
other spark plugs can result in loss of perfor-
mance, radio interference or engine damage.RC10PYP4 (CHAMPION)
RC10PYPB4 (CHAMPION)
PFR5N-II (NGK)
0.039~0.043 in. (1.0~1.1 mm)
Recommended Spark Plugs:
!
5. Start the engine, top off the radiator with
water and then add coolant to the reservoir
until the level is between "LOW" and "FULL".
6. Replace the radiator and reservoir caps and
check to be sure the drain cocks are fully
closed and not leaking.
G050D02L
WARNING:
The cooling fan is controlled by engine
coolant temperature and may sometimes
operate even when the engine is not run-
ning. Use extreme caution when working
near the blades of the coolant fan so that
you are not injured by a rotating fan blade.
As the engine coolant temperature de-
creases, the fan will automatically shut off.
This is a normal condition.(3.5V6)
xgflhma-6.p656/16/04, 2:58 PM 8
Page 191 of 247

6
DO-IT-YOURSELF MAINTENANCE
11
CHECKING THE TRANSAXLE
FLUID
!
G110A01E-AATTransaxle fluid in the automatic transaxle should
be checked at those intervals specified in the
vehicle maintenance schedule in Section 5.NOTE:Basically automatic transaxle fluid is red
color. As driving distance increases, the
fluid color turns darkish red gradually. It is
normal condition and you should not use
fluid color as a criterion for replacing the
transaxle fluid.
You must replace the automatic transaxle
fluid in accordance with intervals specified
in the vehicle maintenances schedule in
section 5.
G110B05A-AATRecommended FluidYour Hyundai automatic transaxle is specially
designed to operate with HYUNDAI GENUINE
ATF SP III, DIAMOND ATF SP III, SK ATF SP
III or other brands approved by Hyundai Motor
Co., Damage caused by a nonspecified fluid is
not covered by your new vehicle limited war-
ranty.
G110C01L-AATTransaxle Fluid CapacityThe fluid capacity of the automatic transaxle is
9.1 U.S. quarts.
WARNING:
The transaxle fluid level should be checked
when the engine is at normal operating
temperature. This means that the engine,
radiator, exhaust system etc., are very hot
so you should exercise great care not to
burn yourself during this procedure.
CAUTION:
Use of aftermarket ATF additives may cause
damage to the automatic transaxle. Only
use HYUNDAI GENUINE ATF SP III, DIA-
MOND ATF SP III, SK ATF SP III or other
brands approved by Hyundai Motor Co., If
you are having your vehicle serviced at a
facility other than a Hyundai dealer, verify
ATF is used for your vehicle.
!
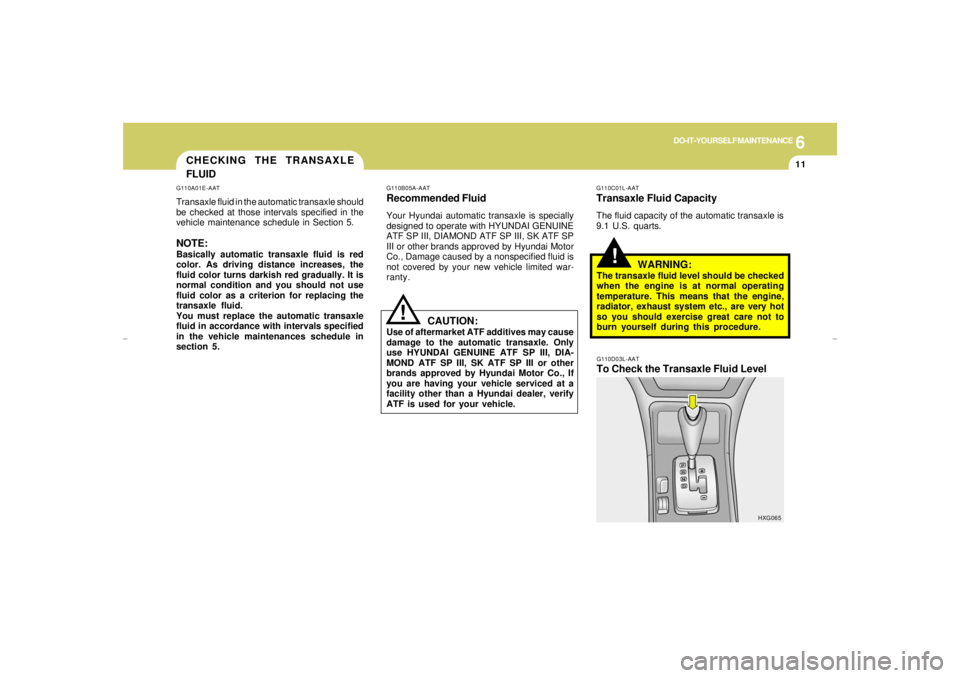
G110D03L-AATTo Check the Transaxle Fluid Level
HXG065
xgflhma-6.p656/16/04, 2:58 PM 11
Page 192 of 247

6
DO-IT-YOURSELF MAINTENANCE
12
CHECKING THE BRAKES
!
WARNING:
The cooling fan is controlled by engine
coolant temperature and may sometimes
operate even when the engine is not run-
ning. Use extreme caution when working
near the blades of the cooling fan, so that
you are not injured by a rotating fan blade.
As the engine coolant temperature de-
creases, the fan will automatically shut off.
This is a normal condition.
G110D03Y
Fluid level should be within "HOT" range
4. If the transaxle fluid level is low, use a funnel
to add transaxle fluid through the dipstick
tube until the level reaches the "HOT" range.
Do not overfill.
G120A01A-AAT
CAUTION:
Because brakes are essential to the safe
operation of the car, it is suggested that
they be checked and inspected by your
Hyundai dealer. The brakes should be
checked and inspected for wear at those
intervals specified in the vehicle mainte-
nance schedule in Section 5.
While the engine is idling, apply the brakes and
move the gear selector lever from "P" to each
of its other positions -- "R", "N", "D" -- and then
to "N" with the engine still idling:
1. Open the hood, being careful to keep hands,
long hair and clothing clear of any moving
parts.
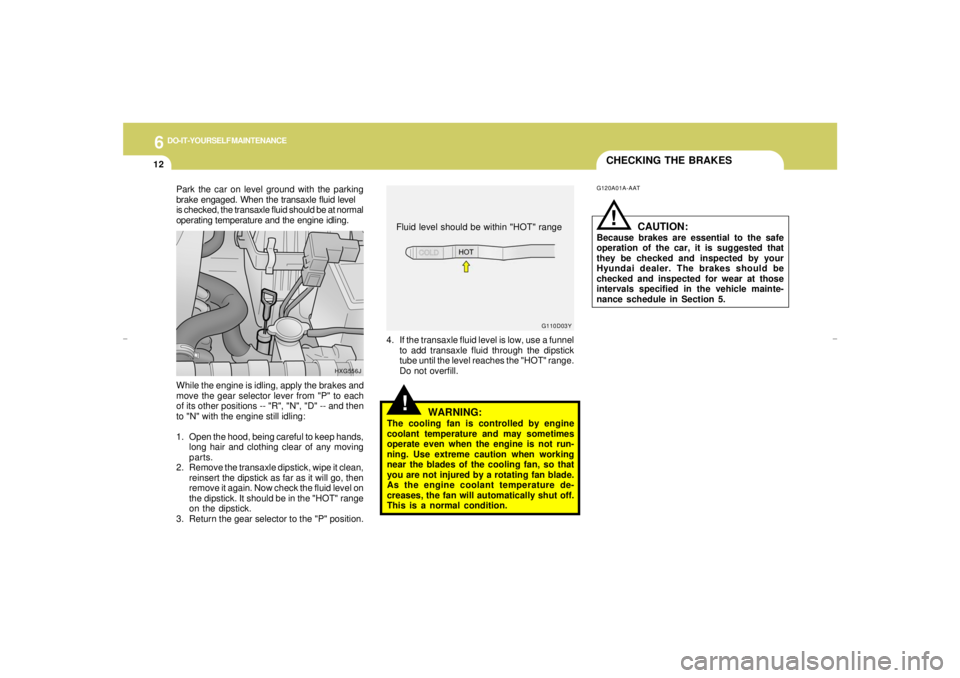
2. Remove the transaxle dipstick, wipe it clean,
reinsert the dipstick as far as it will go, then
remove it again. Now check the fluid level on
the dipstick. It should be in the "HOT" range
on the dipstick.
3. Return the gear selector to the "P" position.
HXG556J
!
Park the car on level ground with the parking
brake engaged. When the transaxle fluid level
is checked, the transaxle fluid should be at normal
operating temperature and the engine idling.
xgflhma-6.p656/16/04, 2:58 PM 12
Page 218 of 247

7
EMISSION CONTROL SYSTEMS2
EMISSION CONTROL SYSTEMH010A02L-AATYour Hyundai is equipped with an emission
control system to meet all requirements of the
U.S. Environmental Protection Agency or Cali-
fornia Air Resources Board.
There are three emission control systems which
are as follows.
(1) Crankcase emission control system
(2) Evaporative emission control system
(3) Exhaust emission control system
In order to assure the proper function of the
emission control systems, it is recommended
that you have your car inspected and main-
tained by an authorized Hyundai dealer in ac-
cordance with the maintenance schedule in this
manual.
Caution for the Inspection and Maintenance
Test (3.5 V6 Vehicle with Traction Control
System)
After dynamometer testing is completed,
erase the ABS/TCS DTC(Diagnotic Trouble
Code) with a GST (Generic Scan Tool) or Hi-
Scan Pro.
H010B01A-AAT1. Crankcase Emission Control
SystemThe positive crankcase ventilation system is
employed to prevent air pollution caused by
blow-by gases being emitted from the crank-
case. This system supplies filtered air to the
crankcase through the air intake hose. Inside
the crankcase, the fresh air mixes with blow-by
gases, which then pass through the PCV valve
and into the induction system.
H010C01S-AAT2. Evaporative Emission Control (Includ-
ing ORVR: Onboard Refueling Vapor
Recovery) SystemThe Evaporative Emission Control System is
designed to prevent fuel vapors from escaping
into the atmosphere.
(The ORVR system is designed to allow the
vapors from the fuel tank to be loaded into
a canister while refueling at the gas station,
preventing the escape of fuel vapors into
the atmosphere.)CanisterFuel vapors generated inside the fuel tank are
absorbed and stored in the onboard canister.
When the engine is running, the fuel vapors
absorbed in the canister are drawn into the
induction system through the purge control
solenoid valve.Purge Control Solenoid Valve (PCSV)The purge control solenoid valve is controlled
by the Engine Control Module (ECM); when the
engine coolant temperature is low during idling,
the PCSV closes so that evaporated fuel is not
taken into the engine. After the engine warms-
up during ordinary driving, the PCSV opens to
introduce evaporated fuel to the engine.
xgflhma-7.p656/16/04, 2:57 PM 2
Page 244 of 247

10
INDEX
4
J
Jump Starting..................................................................................... 3-3
K
Key .................................................................................................... 1-3
If you lose your keys...................................................................3-13
Positions............................................................................... 2-3 ~ 2-4
L
Lubrication Chart ................................................................................. 9-4
M
Maintenance Intervals
Explanation of scheduled maintenance items...................... 5-7 ~ 5-9
Maintenance under severe usage conditions ................................ 5-6
Scheduled maintenance........................................................ 5-4 ~ 5-5
Service requirements ..................................................................... 5-2
Mirrors
Day-night inside rear view ...........................................................1-61
Outside rearview mirror heater ....................................................1-61
O
Odometer..........................................................................................1-45
Outside rearview mirror ....................................................................1-60 H
Hazard Warning System...................................................................1-50
Headlight Aiming Adjustment ............................................................6-21
Heating and Ventilation ..........................................................1-78 ~ 1-85
Air flow control............................................. 1-80 ~ 1-82, 1-90 ~ 1-91
Air intake control ............................................................... 1-79 ~ 1-80
Bi-level heating ............................................................................1-83
Fan speed control ............................................................... 1-79, 1-88
Temperature control .....................................................................1-82
High-Mounted Rear Stop light ...........................................................1-68
Homelink Mirror................................................................................ 1-62
Hood Release...................................................................................1-72
Horn..................................................................................................1-74
I
Ignition Switch..................................................................................... 2-3
Illuminated Ignition Switch................................................................... 1-4
Instrument Cluster and Indicator Lights............................................1-38
Instrument Panel Light Control (Rheostat).......................................1-52
Intergrated Memory System (I. M. S) ...............................................1-14
Interior Light
Interior light ..................................................................................1-58
Map light ......................................................................................1-58
Personal light...............................................................................1-59
Intermittent Wiper..............................................................................1-49xgflhma-10.p656/16/04, 3:01 PM 4
Page 247 of 247

Seoul KoreaPrinting: JUN. 11, 2004
Publication No.: A39O-EU46F
Printed in Korea
SERVICE STATION INFORMATION
FUEL:UNLEADED gasoline only
Pump Octane Rating of 87 (Research Octane Number 91) or higher.FUEL TANK CAPACITYUS.gal (Imp.gal., liter) 18.5 (15.4, 70)TIRE PRESSURE:See the label on the driver's door edge.OTHER TIRE INFORMATION:See pages 8-3 through 8-14HOOD RELEASE:Pull handle under left side of dash.ENGINE OIL:API grade SH, SG or SG/CD multigrade and fuel efficient oil. Use SAE
10W-30, 10W-40 or 10W-50 if normal temperatures are above -10°F
(-23°C). For other viscosity recommendations, see page 6-4 or 9-4.
AUTOMATIC TRANSAXLE:Apply the parking brake, with the engine running, shift the selector
lever through all ranges and return to "N" (Neutral) position. Then
check the level of fluid on the dipstick. Use only HYUNDAI GENUINE
ATF SP III, DIAMOND ATF SP III, SK ATF SP III OR OTHER
BRANDS APPROVED BY HYUNDAI MOTOR CO.,QUICK INDEXo Car will not start ........................................................................ 3-2
o Flat tire ...................................................................................... 3-5
o Warning light/chime comes on ...................................... 1-40 ~ 1-43
o Engine overheats ....................................................................... 3-4
o Towing of your vehicle ............................................................. 3-11
o Starting the engine ..................................................................... 2-4
o Driving tips for first 1,200 miles (2,000 km) ............................ 1-3
o Scheduled maintenance ............................................................. 5-4
o Reporting safety defects ............................................................ 8-16
xgflhma-11.p656/16/04, 3:14 PM 2