2005 HYUNDAI TUCSON wheel torque
[x] Cancel search: wheel torquePage 162 of 273
2
DRIVING YOUR HYUNDAI
16
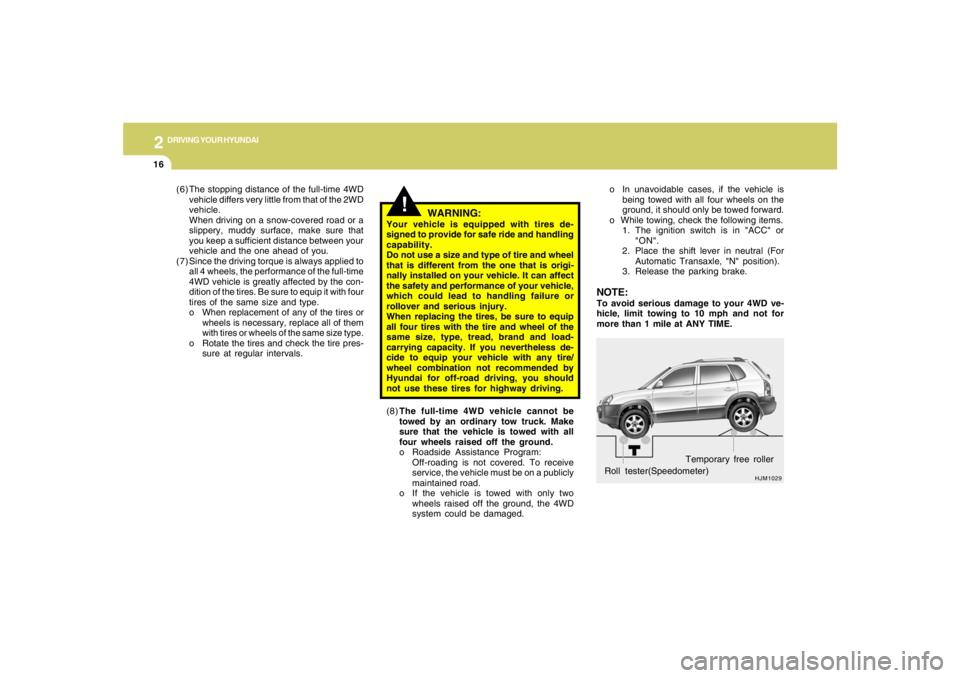
HJM1029
Roll tester(Speedometer)Temporary free roller o In unavoidable cases, if the vehicle is
being towed with all four wheels on the
ground, it should only be towed forward.
o While towing, check the following items.
1. The ignition switch is in "ACC" or
"ON".
2. Place the shift lever in neutral (For
Automatic Transaxle, "N" position).
3. Release the parking brake.NOTE:To avoid serious damage to your 4WD ve-
hicle, limit towing to 10 mph and not for
more than 1 mile at ANY TIME.
(8)The full-time 4WD vehicle cannot be
towed by an ordinary tow truck. Make
sure that the vehicle is towed with all
four wheels raised off the ground.
o Roadside Assistance Program:
Off-roading is not covered. To receive
service, the vehicle must be on a publicly
maintained road.
o If the vehicle is towed with only two
wheels raised off the ground, the 4WD
system could be damaged. (6) The stopping distance of the full-time 4WD
vehicle differs very little from that of the 2WD
vehicle.
When driving on a snow-covered road or a
slippery, muddy surface, make sure that
you keep a sufficient distance between your
vehicle and the one ahead of you.
(7) Since the driving torque is always applied to
all 4 wheels, the performance of the full-time
4WD vehicle is greatly affected by the con-
dition of the tires. Be sure to equip it with four
tires of the same size and type.
o When replacement of any of the tires or
wheels is necessary, replace all of them
with tires or wheels of the same size type.
o Rotate the tires and check the tire pres-
sure at regular intervals.
!
WARNING:
Your vehicle is equipped with tires de-
signed to provide for safe ride and handling
capability.
Do not use a size and type of tire and wheel
that is different from the one that is origi-
nally installed on your vehicle. It can affect
the safety and performance of your vehicle,
which could lead to handling failure or
rollover and serious injury.
When replacing the tires, be sure to equip
all four tires with the tire and wheel of the
same size, type, tread, brand and load-
carrying capacity. If you nevertheless de-
cide to equip your vehicle with any tire/
wheel combination not recommended by
Hyundai for off-road driving, you should
not use these tires for highway driving.
Page 187 of 273
3
WHAT TO DO IN AN EMERGENCY
11
D060I01E-AAT8. Lower Vehicle and Tighten Nuts
Lower the car to the ground by turning
the wheel nut wrench counterclock-
wise. Then position the wrench as shown
in the drawing and tighten the wheel
nuts. Be sure the socket is seated
completely over the nut. Do not stand
on the wrench handle or use an exten-
sion pipe over the wrench handle.
Go around the wheel tightening every
other nut until they are all tight. Then
double-check each nut for tightness.
HJM4016D060J02O-AAT
After Changing Wheels
If you have a tire gauge, remove the
valve cap and check the air pressure. If
the pressure is lower than recom-
D060J01JM
After changing wheels, have a techni-
cian tighten the wheel nuts to their
proper torque as soon as possible.
Wheel nut tightening torque:
Steel wheel & aluminium alloy wheel:
65-80 lb.ft (900-1,100 kg.cm)mended, drive slowly to the nearest
service station and inflate to the correct
pressure. If it is too high, adjust it until
it is correct. Always reinstall the valve
cap after checking or adjusting tire
pressure. If the cap is not replaced, air
may leak from the tire. If you lose a
valve cap, buy another and install it as
soon as possible.
After you have changed wheels, al-
ways secure the flat tire in its place and
return the jack and tools to their proper
storage locations.
Page 206 of 273
5
VEHICLE MAINTENANCE REQUIREMENTS
9
F070L01A-AATo Suspension Mounting BoltsCheck the suspension connections for loose-
ness or damage. Retighten to the specified
torque.
F070G02A-AATo Brake FluidCheck brake fluid level in the brake fluid reser-
voir. The level should be between "MIN" and
"MAX" marks on the side of the reservoir. Use
only hydraulic brake fluid conforming to DOT 3
or DOT 4.
F070K01A-AATo Exhaust Pipe and MufflerVisually inspect the exhaust pipes, muffler and
hangers for cracks, deterioration, or damage.
Start the engine and listen carefully for any
exhaust gas leakage. Tighten connections or
replace parts as necessary.
F070J01A-AATo Brake Pads, Calipers and RotorsCheck the pads for excessive wear, discs for
run out and wear, and calipers for fluid leakage.F070H01O-AATo Rear Brake Discs and Linings/
Parking BrakeCheck the rear brake discs and linings for
scoring, burning, leaking fluid, broken parts,
and excessive wear. Inspect the parking brake
system including the parking brake lever and
cables. For detailed service procedures, refer
to the Shop Manual.
F070M01A-AATo Steering Gear Box, Linkage & Boots/
Lower Arm Ball JointWith the vehicle stopped and engine off, check
for excessive free-play in the steering wheel.
Check the linkage for bends or damage. Check
the dust boots and ball joints for deterioration,
cracks, or damage. Replace any damaged
parts.
F070Q01A-AATo Air Conditioning RefrigerantCheck the air conditioning lines and connec-
tions for leakage and damage. Check air con-
ditioning performance according to the relevant
shop manual if necessary.F070P01A-AATo Driveshafts and BootsCheck the drive shafts, boots and clamps for
cracks, deterioration, or damage. Replace any
damaged parts and, if necessary, repack the
grease.F070N01A-AATo Power Steering Pump, Belt and HosesCheck the power steering pump and hoses for
leakage and damage. Replace any damaged or
leaking parts immediately. Inspect the power
steering belt for evidence of cuts, cracks, ex-
cessive wear, oiliness and proper tension.
Replace or adjust it if necessary.
Page 210 of 273
6
DO-IT-YOURSELF MAINTENANCE
4
GENERAL CHECKS
G020C01A-AATVehicle InteriorThe following should be checked each time
when the vehicle is driven:
o Lights operation
o Windshield wiper operation
o Horn operation
o Defroster, heating system operation (and air
conditioning, if installed)
o Steering operation and condition
o Mirror condition and operation
o Turn signal operation
o Accelerator pedal operation
o Brake operation, including parking brake
o Manual transaxle operation, including clutch
operation
o Automatic transaxle operation, including
"Park" mechanism operation
o Seat control condition and operation
o Seat belt condition and operation
o Sunvisor operation
If you notice anything that does not operate
correctly or appears to be functioning correctly,
inspect it carefully and seek assistance from
your Hyundai dealer if service is needed.
G020B01A-AATVehicle ExteriorThe following should be checked monthly:
o Overall appearance and condition
o Wheel condition and wheel nut torque
o Exhaust system condition
o Light condition and operation
o Windshield glass condition
o Wiper blade condition
o Paint condition and body corrosion
o Fluid leaks
o Door and hood lock condition
o Tire pressure and condition
(including spare tire)
G020A01A-AATEngine CompartmentThe following should be checked regularly:
o Engine oil level and condition
o Transaxle fluid level and condition
o Brake fluid level
o Clutch fluid level
o Engine coolant level
o Windshield washer fluid level
o Accessory drive belt condition
o Engine coolant hose condition
o Fluid leaks (on or below components)
o Power steering fluid level
o Battery condition
o Air filter condition
Page 256 of 273
8
CONSUMER INFORMATION & REPORTING SAFETY DEFECTS
9
HEF-241I070A01A-AAT
TIRE BALANCING
A tire that is out of balance may affect
handling and tire wear. The tires on your
Hyundai were balanced before the car
was delivered but may need balancing
again during the years you own the car.
Whenever a tire is dismounted for re-
pair, it should be rebalanced before
being reinstalled on the car.
!
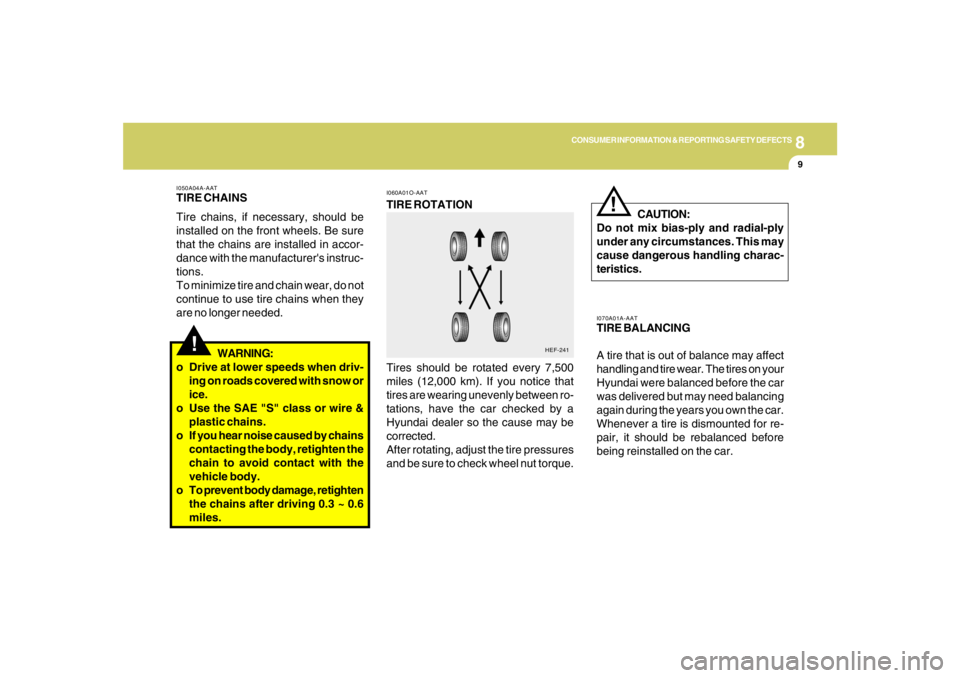
I060A01O-AATTIRE ROTATION
Tires should be rotated every 7,500
miles (12,000 km). If you notice that
tires are wearing unevenly between ro-
tations, have the car checked by a
Hyundai dealer so the cause may be
corrected.
After rotating, adjust the tire pressures
and be sure to check wheel nut torque.CAUTION:
Do not mix bias-ply and radial-ply
under any circumstances. This may
cause dangerous handling charac-
teristics.
!
I050A04A-AATTIRE CHAINS
Tire chains, if necessary, should be
installed on the front wheels. Be sure
that the chains are installed in accor-
dance with the manufacturer's instruc-
tions.
To minimize tire and chain wear, do not
continue to use tire chains when they
are no longer needed.
WARNING:
o Drive at lower speeds when driv-
ing on roads covered with snow or
ice.
o Use the SAE "S" class or wire &
plastic chains.
o If you hear noise caused by chains
contacting the body, retighten the
chain to avoid contact with the
vehicle body.
o To prevent body damage, retighten
the chains after driving 0.3 ~ 0.6
miles.