Page 480 of 539
6
OWNER MAINTENANCE
3
G010C01HP-EAT
Diesel Engine Compartment (2.9 CRDi)
1. Brake fluid reservoir
2. Clutch fluid reservoir (Not all models)
3. Engine oil level dipstick
4. Engine cover 5. Engine oil filler cap
6. Battery
7. Fuse and relay box
8. Windscreen washer fluid reservoir
9. Air cleaner filter10. Radiator cap
11. Fuel filter
12. Power steering fluid reservoir
13. Coolant reservoir capCAUTION:
When inspecting or servic-ing the engine, you shouldhandle tools and other heavy objects carefully so that the plastic cover of theengine is not damaged.
!
G010C01HP-E
Page 507 of 539

6 OWNER MAINTENANCE
30
!
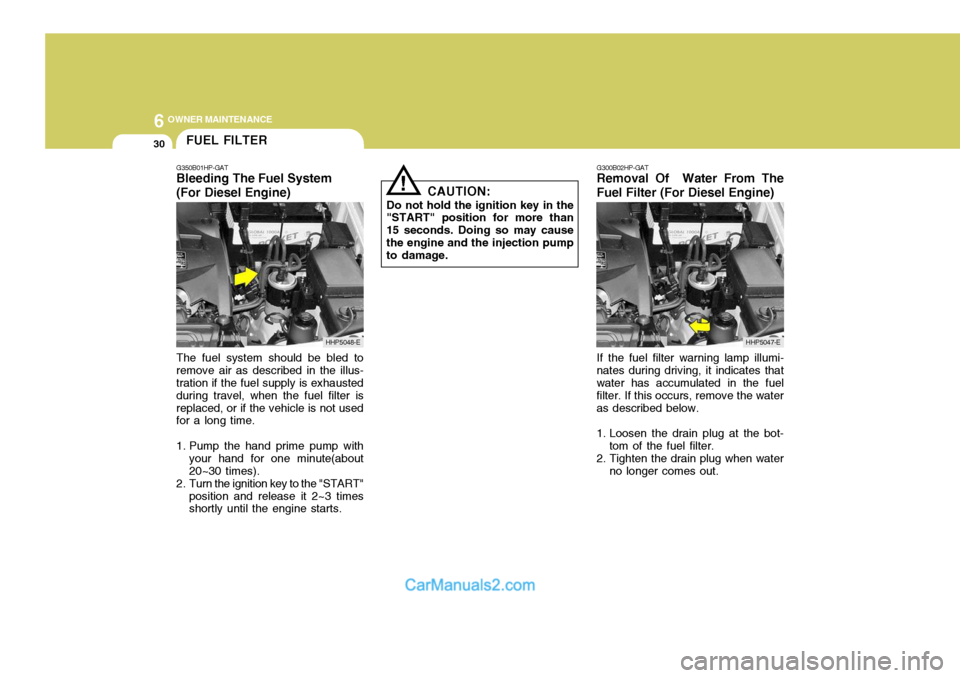
The fuel system should be bled to remove air as described in the illus- tration if the fuel supply is exhausted during travel, when the fuel filter isreplaced, or if the vehicle is not used for a long time.
1. Pump the hand prime pump with your hand for one minute(about 20~30 times).
2. Turn the ignition key to the "START" position and release it 2~3 times shortly until the engine starts. CAUTION:
Do not hold the ignition key in the
"START" position for more than 15 seconds. Doing so may causethe engine and the injection pump to damage. G300B02HP-GAT
Removal Of Water From The Fuel Filter (For Diesel Engine)
If the fuel filter warning lamp illumi-
nates during driving, it indicates that water has accumulated in the fuel filter. If this occurs, remove the wateras described below.
1. Loosen the drain plug at the bot- tom of the fuel filter.
2. Tighten the drain plug when water no longer comes out.
FUEL FILTER
G350B01HP-GAT Bleeding The Fuel System (For Diesel Engine)
HHP5048-EHHP5047-E
Page 508 of 539

6
OWNER MAINTENANCE
31
!
!
3. Check to be sure that the warning
lamp illuminates when the ignition key is turned to "ON", and that it goes off when the engine is started. If in doubt, consult your nearest authorised HYUNDAI dealer.
NOTE: It is recommended that water accu- mulated in the fuel filter should be removed by an authorised Hyundai dealer.
WARNING:
Be sure to carefully wipe away anywater drained out in this manner, because the fuel mixed in the water might be ignited and resultin a fire. Before attempting to replace a head-
light bulb, be sure the switch is turned to the "OFF" position.
The next paragraph shows how to
reach the headlight bulbs so they may be changed. Be sure to replacethe burned-out bulb with one of the same number and wattage rating.
Ensure that the replacement bulb has
the same cap configuration and watt-age as the original.
See page 6-35 for the wattage descrip-
tions.
CAUTION:
Keep the lamps out of contact with
petroleum product, such as oil, petrol, etc.
REPLACING HEADLIGHT BULBS
G260A01HP-EAT
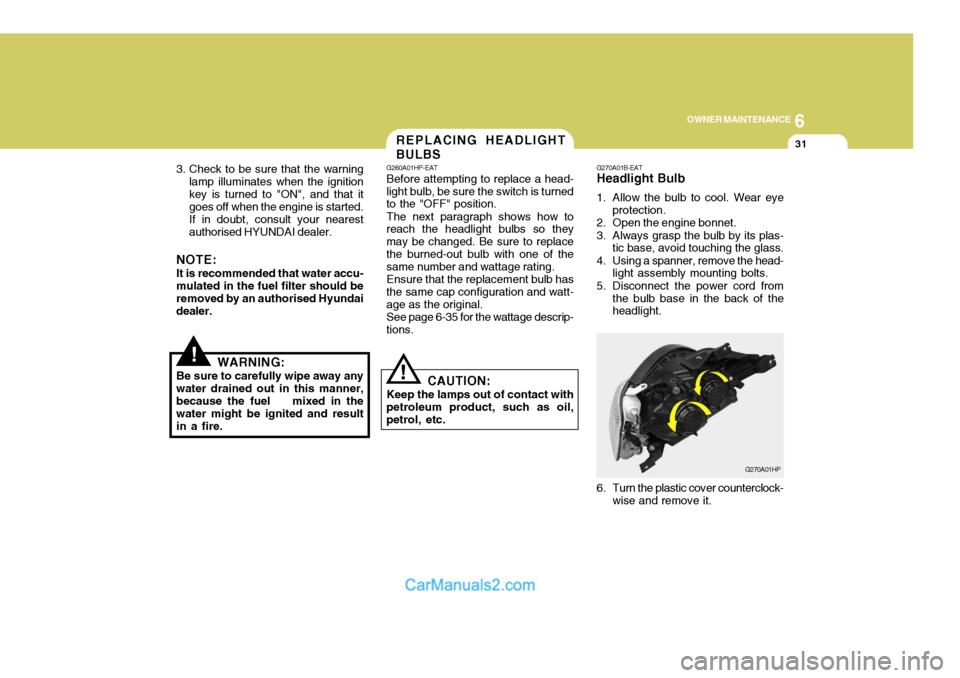
G270A01B-EAT Headlight Bulb
1. Allow the bulb to cool. Wear eye
protection.
2. Open the engine bonnet.
3. Always grasp the bulb by its plas- tic base, avoid touching the glass.
4. Using a spanner, remove the head- light assembly mounting bolts.
5. Disconnect the power cord from the bulb base in the back of the headlight.
G270A01HP
6. Turn the plastic cover counterclock- wise and remove it.