Page 149 of 539
1
FEATURES OF YOUR HYUNDAI
135
B290H03HP-GAT The CD auto changer is located in the right side of the luggage compartment.
o To use the CD auto changer.
1. Open the sliding lid of the CD auto changer.
2. To eject the compact disc maga-
zine, press the EJECT button lo- cated inside the CD auto changer.
3. Insert the discs into the magazine.
4. Push the magazine into the CD auto changer and close the sliding lid.
o The CD auto changer can be used when the ignition switch is in either"ON" or "ACC" position.
1. CD CHANGER Select Button When the CD changer magazine con- tains discs, press the "CD/CDC" but-ton and the CD changer can be used even if the radio or cassette player is being used. The Hyundai CD changercan hold up to eight discs. The disc number will be lit, and the track num- ber, and elapsed time will be displayed. 2. DISC Select Button To select the CD you want, push " " to change the disc number. 3. TRACK UP/DOWN
o The desired track on the disc cur-
rently being played can be selected using the track number.
o Press once to skip forward to the beginning of the next track. Press once to skip back to the begin-ning of the track.
4. FF/REW ( / ) If you want to fast forward or reverse through the compact disc track, push and hold in the FF ( ) or REW ( ) button.When you release the button, the com- pact disc player will resume playing. 5. REPEAT
o To repeat the track you are listening to, press the RPT button. To cancel, press again. o If you do not release RPT operation
when the track ends, it will automati-cally be replayed. This process will be continued until you push the button again.
6. SCAN Button (If Installed)
o Press the SCAN button to playback the first 10 seconds of each track.
o Press the SCAN button again within 10 sec. for the desired track.
7. EQ Button Press the EQ button to select the CLASSIC, JAZZ, ROCK and DEFEATMODE for the desired tone quality. Each press of the button changes the display as follows;
TUNE DISC
CLASSIC � JAZZ � ROCK � DEFEAT
Page 151 of 539
1
FEATURES OF YOUR HYUNDAI
137
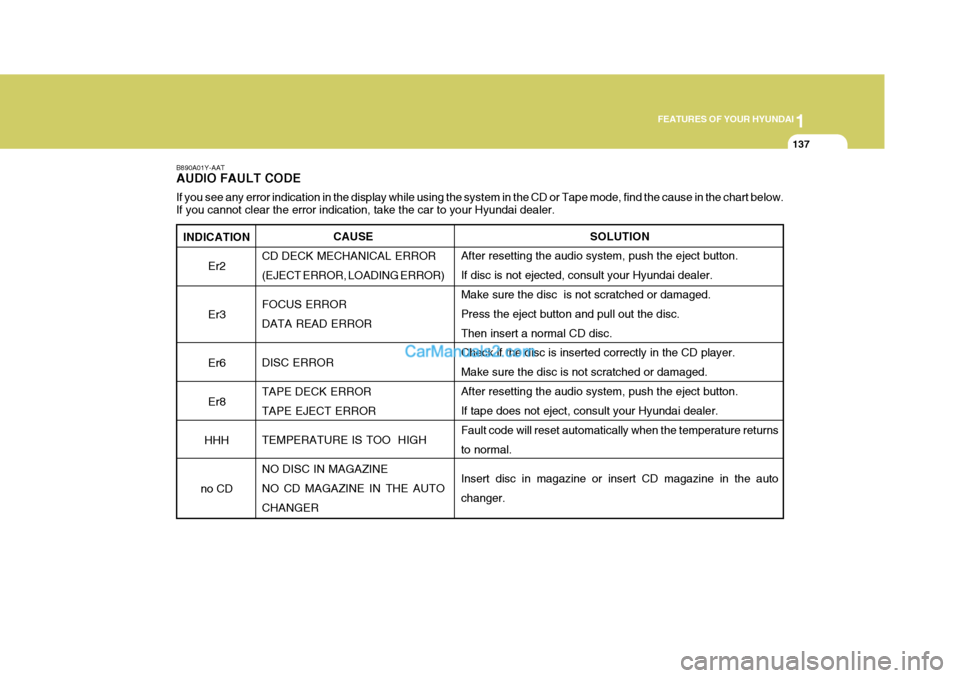
INDICATION Er2 Er3Er6 Er8
HHH
no CD
B890A01Y-AAT AUDIO FAULT CODE If you see any error indication in the display while using the system in the CD or Tape mode, find the cause in the chart below .
If you cannot clear the error indication, take the car to your Hyundai dealer.
SOLUTION
After resetting the audio system, push the eject button. If disc is not ejected, consult your Hyundai dealer.Make sure the disc is not scratched or damaged. Press the eject button and pull out the disc. Then insert a normal CD disc. Check if the disc is inserted correctly in the CD player. Make sure the disc is not scratched or damaged.After resetting the audio system, push the eject button. If tape does not eject, consult your Hyundai dealer. Fault code will reset automatically when the temperature returnsto normal. Insert disc in magazine or insert CD magazine in the auto changer.
CAUSE
CD DECK MECHANICAL ERROR(EJECT ERROR, LOADING ERROR) FOCUS ERROR DATA READ ERROR DISC ERROR TAPE DECK ERROR TAPE EJECT ERROR TEMPERATURE IS TOO HIGH NO DISC IN MAGAZINE NO CD MAGAZINE IN THE AUTO CHANGER
Page 364 of 539
1
CONTROLS AND EQUIPMENT
59
B300A01Y-EAT SPEEDOMETER Your Hyundai's speedometer is cali- brated in miles per hour or kilometers per hour. Petrol Engine
B300A01HP-E B300A03HP-E
Diesel EngineB310A02HP-EAT ODOMETER/TRIP ODOMETER Odometer The digital odometer records the total driving distance in miles, and is usefulfor keeping a record for maintenance intervals. It is normal for a new vehicle to have theodometer indicating less than 30mile. NOTE: Any alteration of the odometer may void your warranty coverage. B310A01HP-E
Trip Odometer
Odometer
B310A02HP-E
Reset Knob
Trip Odometer Pushing in the reset knob under the right side of the speedometer for less than 1 second when the ignition switch is turned "ON" displays the followingsequence:
Page 371 of 539
1CONTROLS AND EQUIPMENT
66
4.MODE - Push "MODE" button to
display a 12- or 24-hour clock. When the 12-hour clock is in use, the letters AM or PM appear with the time.
5. - The time is displayed on the LCD by pushing in on the switchand is turned off by pushing in on theswitch again.
! CAUTION:
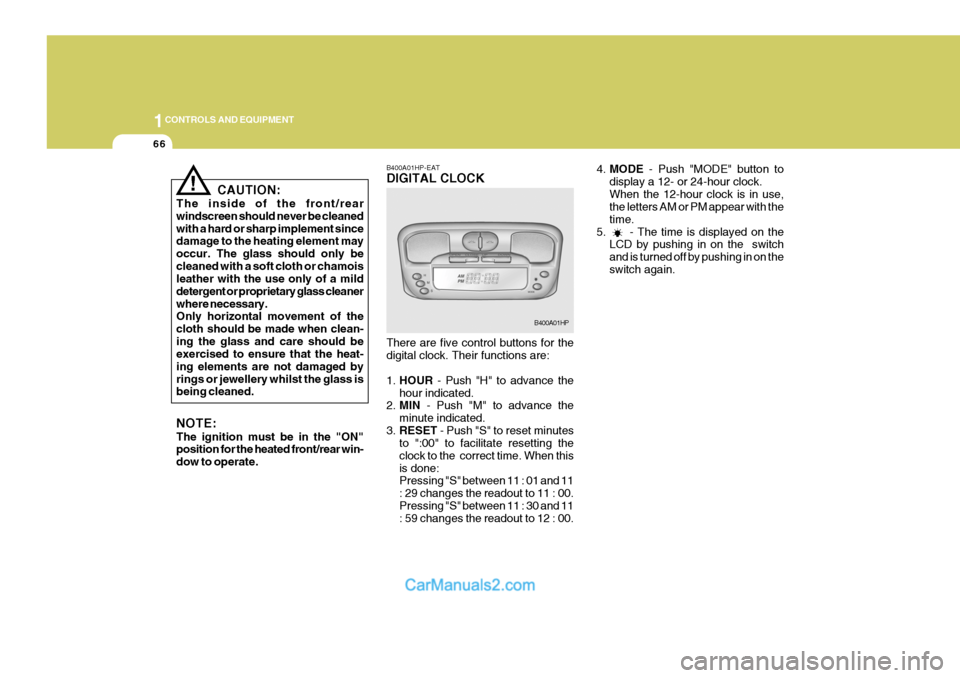
The inside of the front/rear windscreen should never be cleanedwith a hard or sharp implement since damage to the heating element may occur. The glass should only becleaned with a soft cloth or chamois leather with the use only of a mild detergent or proprietary glass cleanerwhere necessary. Only horizontal movement of the cloth should be made when clean-ing the glass and care should be exercised to ensure that the heat- ing elements are not damaged byrings or jewellery whilst the glass is being cleaned. NOTE: The ignition must be in the "ON" position for the heated front/rear win- dow to operate. B400A01HP-EAT DIGITAL CLOCK There are five control buttons for the digital clock. Their functions are: 1.
HOUR - Push "H" to advance the
hour indicated.
2. MIN - Push "M" to advance the
minute indicated.
3. RESET - Push "S" to reset minutes
to ":00" to facilitate resetting the clock to the correct time. When thisis done: Pressing "S" between 11 : 01 and 11 : 29 changes the readout to 11 : 00.Pressing "S" between 11 : 30 and 11 : 59 changes the readout to 12 : 00.
B400A01HP
Page 403 of 539
1CONTROLS AND EQUIPMENT
98
B970B01HP-GAT Heating and Cooling Controls
1. Blower Fan Control Switch
2. AUTO (Automatic Control) Switch
3. OFF Switch
4. Display Window
5. Temperature Control Button
6. Defroster Switch
7. Rear Window Defrost Switch 8. Air Flow Control Switch
9. Air Conditioning Switch
10.Ambient Temperature Switch
11. Air Intake Control Switch (Recirculation air)
12. Air Intake Control Switch (Fresh air)B970B01HPAUTOMATIC HEATING AND COOLING CONTROL SYSTEM
B970A01Y-EAT (Not aII models) Your Hyundai is equipped with an au- tomatic heating and cooling controlsystem controlled by simply setting the desired temperature.
Page 404 of 539
1
CONTROLS AND EQUIPMENT
99
2. Push the "TEMP" button to set the desired temperature. The temperature will increase to the maximum 90°F(32°C) by pushingon the button. Each push of the button will cause the temperature to increase by 1°F(0.5°C).The temperature will decrease to the minimum 62°F(17°C) by push- ing on the button. Each push ofthe button will cause the temperature to decrease by 1°F(0.5°C). NOTE: If the battery has been discharged or disconnected, the temperature mode will reset to Centigrade de- gree.This is a normal condition and you can adjust the temperature mode from Centigrade to Fahrenheit asfollows; Press the TEMP down ( ) button 3 seconds or more with the AMBbutton held down. The display shows that the unit of temperature is ad- justed to Centigrade or Fahrenheit(°C
� �
� �
� °F or °F
� �
� �
� °C).
HHP2142
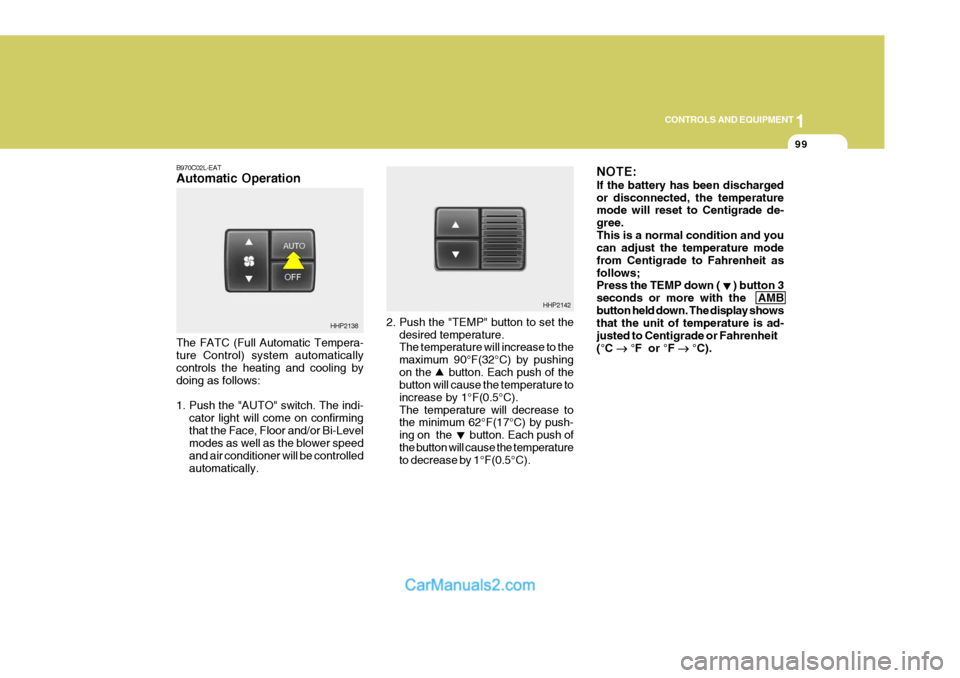
B970C02L-EAT Automatic Operation The FATC (Full Automatic Tempera- ture Control) system automatically controls the heating and cooling by doing as follows:
1. Push the "AUTO" switch. The indi-
cator light will come on confirming that the Face, Floor and/or Bi-Level modes as well as the blower speed and air conditioner will be controlledautomatically.
HHP2138
Page 405 of 539
1CONTROLS AND EQUIPMENT
100
B995A01Y-AAT AMBIENT TEMPERATURE SWITCH Pressing the AMB button displays the ambient temperature on the display. B980A01Y-AAT MANUAL OPERATION The heating and cooling system can be controlled manually as well as by pushing buttons other than the "AUTO" button. In this state, the system se-quentially works according to the order of buttons selected. The function of the buttons which arenot selected will be controlled auto- matically. Press the "AUTO" button in order toconvert to automatic control of the system.
HHP2147
NOTE: Never place anything over the sen- sor which is located in the car on the instrument panel to ensure bettercontrol of the heating and cooling system.
HHP2096
Photo sensor
Page 466 of 539
4
CORROSION PREVENTION AND APPEARANCE CARE
5
4
APPEARANCE CARE
5
JE100A1-E SEAT BELTS Seat belts should be cleaned only with a mild soap solution. Strong deter-gents, solvens or bleaches may dam- age the belt webbing and therefore reduce the effectiveness of the belt.Belts which display signs of fraying, wear or cut should be replaced.INTERIOR VALETING
JE110A1-E The soft trim and carpets should be maintained with the regular use of a vacuum cleaner. Heavy soiling should be removed with a dry cleaning agentrecommended for this purpose follow- ing the instructions of the product manufacturer. Paint thinner, solventsor other such cleaning materials should not be used since damage to the up- holstery may result. JE120A1-E WINDOWS A proprietary glass cleaner should be used to clean the inside of the win-dows. However, the rear heated windscreen must only be cleaned us- ing a light horizontal cleaning action.Care should be exercised to avoid the use of abrasive cleaners or contact with items of jewellery which may dam-age the heating elements. YE010A1-E To Clean Leather Upholstery (Not all models) In the normal course of use, leather upholstered surfaces will, like any material, pick-up dust and dirt. Thisdust and dirt MUST be cleaned off or it may work into the surface of the leather, causing damage.Fine leather needs care. This care, as with all fine things, need not be elabo- rated, but should include cleaning whennecessary. Washing leather thoroughly with soap and water will keep your leather lustrous, beautiful and ensureyou have many years of wear. Take a piece of cheese cloth and using any mild soap and lukewarm water,work up a good lather. Thoroughly wash the leather. Wipe clean with a slightly damp cloth and dry with softcloth. Do this as often as the leather becomes soiled.
Page:
< prev 1-8 9-16 17-24