2005 Hyundai Sonata turn signal
[x] Cancel search: turn signalPage 78 of 271
1
FEATURES OF YOUR HYUNDAI
65
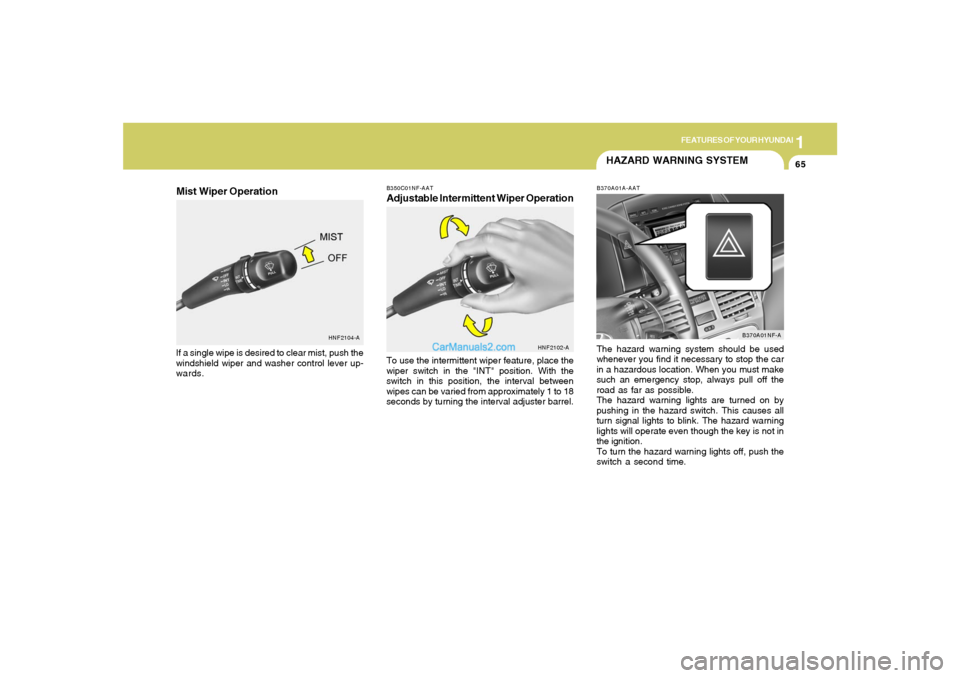
B350C01NF-AATAdjustable Intermittent Wiper OperationTo use the intermittent wiper feature, place the
wiper switch in the "INT" position. With the
switch in this position, the interval between
wipes can be varied from approximately 1 to 18
seconds by turning the interval adjuster barrel.
HNF2102-A
HAZARD WARNING SYSTEMB370A01A-AATThe hazard warning system should be used
whenever you find it necessary to stop the car
in a hazardous location. When you must make
such an emergency stop, always pull off the
road as far as possible.
The hazard warning lights are turned on by
pushing in the hazard switch. This causes all
turn signal lights to blink. The hazard warning
lights will operate even though the key is not in
the ignition.
To turn the hazard warning lights off, push the
switch a second time.
B370A01NF-A
HNF2104-A
Mist Wiper OperationIf a single wipe is desired to clear mist, push the
windshield wiper and washer control lever up-
wards.
Page 95 of 271
1FEATURES OF YOUR HYUNDAI82
!
Integrated HomeLink
® Wireless Control
System
The HomeLink
® Wireless Control System pro-
vides a convenient way to replace up to three
hand-held radio-frequency (RF) transmitters
with a single built-in device. This innovative
feature will learn the radio frequency codes of
most current transmitters to operate devices
such as gate operators, garage door openers,
entry door locks, security systems, even home
lighting. Both standard and rolling code-equipped
transmitters can be programmed by following
the outlined procedures. Additional HomeLink
®
information can be found at: www.homelink.com
or by calling 1-800-355-3515.
CAUTION:
Before programming HomeLink
® to a ga-
rage door opener or gate operator, make
sure that people and objects are out of the
way of the device to prevent potential harm
or damage. Do not use HomeLink® with any
garage door opener that lacks the safety
stop and reverse features as required by
U.S. federal safety standards (this includes
any garage door opener model manufac-
tured before April 1, 1982). A garage door
that cannot detect an object - signaling the
door to stop and reverse - does not meet
current U.S. federal safety standards. Using
a garage door opener without these fea-
tures increases the risk of serious injury or
death.Programming HomeLink
®
NOTE:o When programming a garage door
opener, it is advised to park the vehicle
outside of the garage.
o It is recommended that a new battery be
placed in the hand-held transmitter of
the device being programmed to
HomeLink
® for quicker training and ac-
curate transmission of the radio-fre-
quency signal.
o Some vehicles may require the ignition
switch to be turned to the second (or
"accessories") position for program-
ming and/or operation of HomeLink.
o In the event that there are still program-
ming difficulties or questions after fol-
lowing the programming steps listed
below, contact HomeLink
® at:
www.homelink.com or 1-800-355-3515.
Retain the original transmitter of the RF device
you are programming for use in other vehicles
as well as for future HomeLink
® programming.
It is also suggested that upon the sale of the
vehicle, the programmed HomeLink
® buttons
be erased for security purposes.
Page 96 of 271
1
FEATURES OF YOUR HYUNDAI
83
Standard Programming
To train most devices, follow these instructions:
1. For first-time programming, press and hold
the two outside buttons, HomeLink
® Channel
1 and Channel 3 Buttons, until the indicator
light begins to flash (after 20 seconds).
Release both buttons. Do not hold the but-
tons for longer than 30 seconds.
2. Position the end of your hand-held transmit-
ter 1-3 inches (5-14 cm) away from the
HomeLink
® buttons while keeping the indica-
tor light in view.
3. Simultaneously press and hold both the
HomeLink® and hand-held transmitter but-
ton. DO NOT release the buttons until step
4 has been completed.
4. While continuing to hold the buttons the red
Indicator Status LED will flash slowly and
then rapidly after HomeLink
® successfully
trains to the frequency signal from the hand-
held transmitter. Release both buttons.
5. Press and hold the just-trained HomeLink
®
button and observe the red Status Indicator
LED. If the indicator light stays on constantly,
programming is complete and your device
should activate when the HomeLink
® button
is pressed and released.
6. To program the remaining two HomeLink
®
buttons, follow steps 2 through 5.Rolling Code Programming
Rolling code devices which are "code-pro-
tected" and manufactured after 1996 may be
determined by the following:
o Reference the device owner's manual for
verification.
o The handheld transmitter appears to pro-
gram the HomeLink Universal Transceiver
but does not activate the device.
o Press and hold the trained HomeLink button.
The device has the rolling code feature if the
indicator light flashes rapidly and then turns
solid after 2 seconds.
To train rolling code devices, follow these in-
structions:
1. At the garage door opener receiver (motor-
head unit) in the garage, locate the "learn" or
"smart" button. This can usually be found
where the hanging antenna wire is attached
to the motor-head unit. Exact location and
color of the button may vary by garage door
opener brand. If there is difficulty locating the
training button, reference the device owner's
manual or please visit our Web site at
www.homelink.com.
2. Firmly press and release the "learn" or
"smart" button (which activates the "training
light").
NOTE:There are 30 seconds in which to initiate
step3.
3. Return to the vehicle and firmly press, hold
for two seconds and then release the de-
sired HomeLink
® button. Repeat the "press/
hold/release" sequence a second time to
complete the programming. (Some devices
may require you to repeat this sequence a
third time to complete the programming.)
4. Press and hold the just-trained HomeLink
®
button and observe the red Status Indicator
LED. If the indicator light stays on constantly,
programming is complete and your device
should activate.
5. To program the remaining two HomeLink
®
buttons, follow either steps 1 through 4
above for other Rolling Code devices or
steps 2 through 5 in Standard Programming
for standard devices.
Gate Operator & Canadian Programming
During programming, your handheld transmit-
ter may automatically stop transmitting. Con-
tinue to press the Integrated HomeLink
® Wire-
less Control System button (note steps 2 through
4 in the Standard Programming portion of this
document) while you press and re-press
("cycle") your handheld transmitter every two
seconds until the frequency signal has been
learned. The indicator light will flash slowly and
Page 143 of 271
1FEATURES OF YOUR HYUNDAI
130
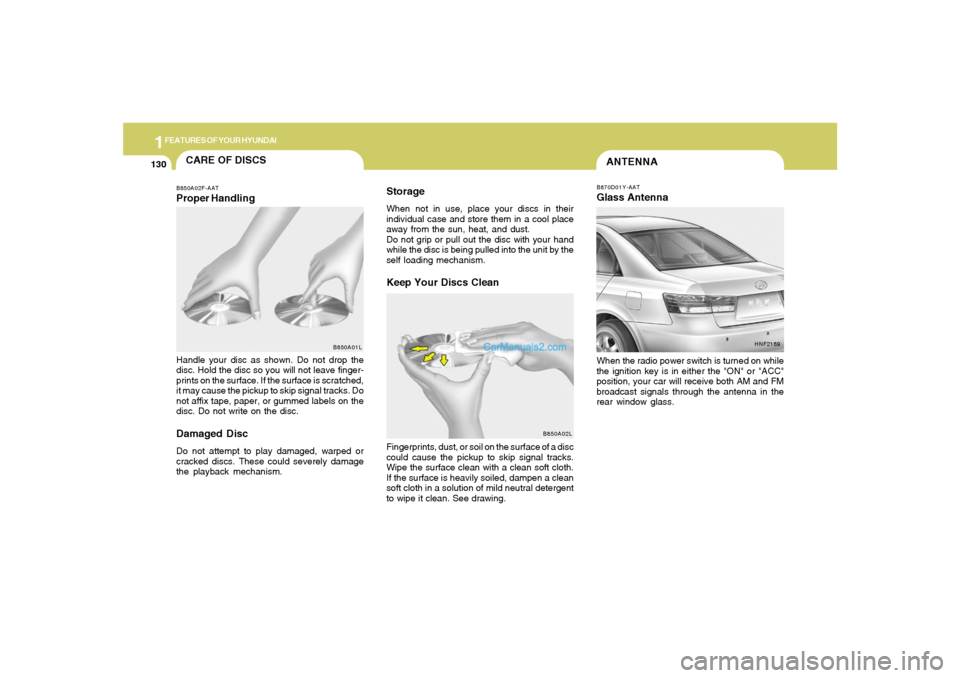
ANTENNAB870D01Y-AATGlass AntennaWhen the radio power switch is turned on while
the ignition key is in either the "ON" or "ACC"
position, your car will receive both AM and FM
broadcast signals through the antenna in the
rear window glass.
HNF2189
CARE OF DISCS
B850A02L B850A02F-AAT
Proper HandlingStorage
When not in use, place your discs in their
individual case and store them in a cool place
away from the sun, heat, and dust.
Do not grip or pull out the disc with your hand
while the disc is being pulled into the unit by the
self loading mechanism.Keep Your Discs Clean
Handle your disc as shown. Do not drop the
disc. Hold the disc so you will not leave finger-
prints on the surface. If the surface is scratched,
it may cause the pickup to skip signal tracks. Do
not affix tape, paper, or gummed labels on the
disc. Do not write on the disc.Damaged DiscDo not attempt to play damaged, warped or
cracked discs. These could severely damage
the playback mechanism.Fingerprints, dust, or soil on the surface of a disc
could cause the pickup to skip signal tracks.
Wipe the surface clean with a clean soft cloth.
If the surface is heavily soiled, dampen a clean
soft cloth in a solution of mild neutral detergent
to wipe it clean. See drawing.
B850A01L
Page 165 of 271
2
DRIVING YOUR HYUNDAI
21
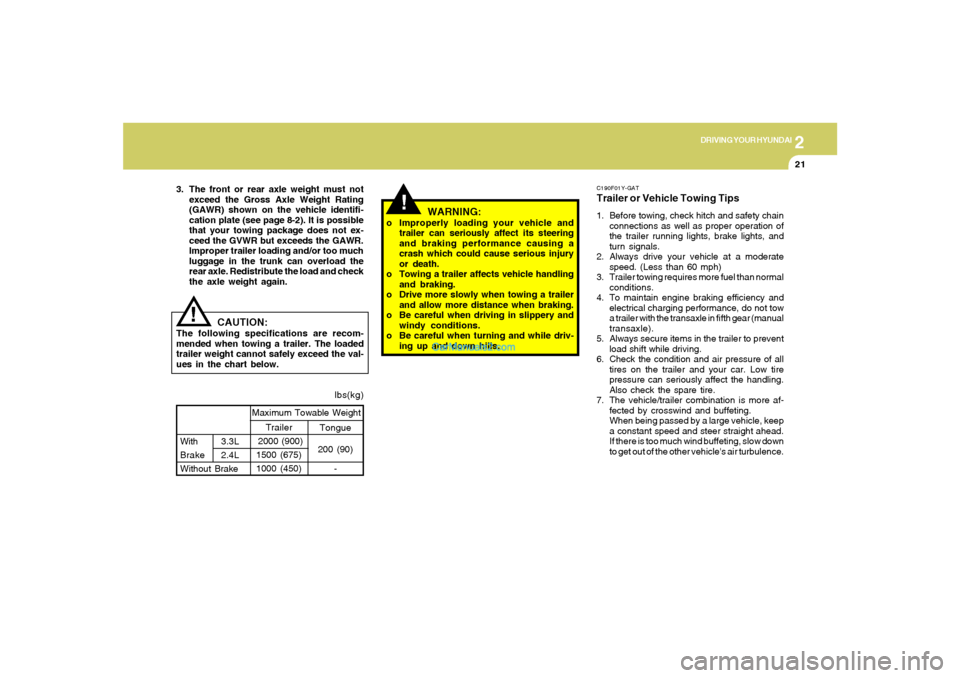
C190F01Y-GATTrailer or Vehicle Towing Tips1. Before towing, check hitch and safety chain
connections as well as proper operation of
the trailer running lights, brake lights, and
turn signals.
2. Always drive your vehicle at a moderate
speed. (Less than 60 mph)
3. Trailer towing requires more fuel than normal
conditions.
4. To maintain engine braking efficiency and
electrical charging performance, do not tow
a trailer with the transaxle in fifth gear (manual
transaxle).
5. Always secure items in the trailer to prevent
load shift while driving.
6. Check the condition and air pressure of all
tires on the trailer and your car. Low tire
pressure can seriously affect the handling.
Also check the spare tire.
7. The vehicle/trailer combination is more af-
fected by crosswind and buffeting.
When being passed by a large vehicle, keep
a constant speed and steer straight ahead.
If there is too much wind buffeting, slow down
to get out of the other vehicle's air turbulence.
!
lbs(kg)
!
Tongue
200 (90)
- With3.3L
Brake 2.4L
Without BrakeMaximum Towable Weight
Trailer
2000 (900)
1500 (675)
1000 (450)
CAUTION:
The following specifications are recom-
mended when towing a trailer. The loaded
trailer weight cannot safely exceed the val-
ues in the chart below.
WARNING:
o Improperly loading your vehicle and
trailer can seriously affect its steering
and braking performance causing a
crash which could cause serious injury
or death.
o Towing a trailer affects vehicle handling
and braking.
o Drive more slowly when towing a trailer
and allow more distance when braking.
o Be careful when driving in slippery and
windy conditions.
o Be careful when turning and while driv-
ing up and down hills. 3. The front or rear axle weight must not
exceed the Gross Axle Weight Rating
(GAWR) shown on the vehicle identifi-
cation plate (see page 8-2). It is possible
that your towing package does not ex-
ceed the GVWR but exceeds the GAWR.
Improper trailer loading and/or too much
luggage in the trunk can overload the
rear axle. Redistribute the load and check
the axle weight again.
Page 202 of 271

6
DO-IT-YOURSELF MAINTENANCE
4
G020C01A-AATVehicle InteriorThe following should be checked each time
when the vehicle is driven:
o Lights operation
o Windshield wiper operation
o Horn operation
o Defroster, heating system operation (and air
conditioning, if installed)
o Steering operation and condition
o Mirror condition and operation
o Turn signal operation
o Accelerator pedal operation
o Brake operation, including parking brake
o Manual transaxle operation, including clutch
operation
o Automatic transaxle operation, including
"Park" mechanism operation
o Seat control condition and operation
o Seat belt condition and operation
o Sun visor operation
If you notice anything that does not operate
correctly or appears to be functioning correctly,
inspect it carefully and seek assistance from
your Hyundai dealer if service is needed.
G020B01A-AATVehicle ExteriorThe following should be checked monthly:
o Overall appearance and condition
o Wheel condition and wheel nut torque
o Exhaust system condition
o Light condition and operation
o Windshield glass condition
o Wiper blade condition
o Paint condition and body corrosion
o Fluid leaks
o Door and hood lock condition
o Tire pressure and condition
(including spare tire)
GENERAL CHECKSG020A01NF-AATEngine CompartmentThe following should be checked regularly:
o Engine oil level and condition
o Transaxle fluid level and condition
o Brake fluid level
o Engine coolant level
o Windshield washer fluid level
o Accessory drive belt condition
o Engine coolant hose condition
o Fluid leaks (on or below components)
o Power steering fluid level
o Battery condition
o Air filter condition
o Engine vibration
Page 229 of 271

6
DO-IT-YOURSELF MAINTENANCE
31
SPECIFICATION:"H"
Horizontal center line of headlights from ground
: 26.73 in. (679mm)
"W"
Distance between each headlight center :
51.41 in. (1,306mm)
"L"
Distance between the headlights and the wall
that the lights are tested against : 118.11 in.
(3,000 mm)
REPLACEMENT OF LIGHT BULBSG260A01L-GATBefore attempting to replace a light bulb, be sure
the switch is turned to the "OFF" position.
The next paragraph shows how to reach the
light bulbs so they may be changed. Be sure to
replace the burned-out bulb with one of the
same number and wattage rating.
See page 6-38 for the wattage descriptions.
!
CAUTION:
o Keep the lights out of contact with pe-
troleum products, such as oil, gasoline,
etc.
o Be sure to replace the LED type equipped
bulbs with an assembly.
Replacement instructions:
1. Allow the bulb to cool. Wear eye protection.
2. Open the engine hood.
3. Always grasp the bulb by its plastic base,
avoid touching the glass.G270A01NF-AATHEADLIGHT, FRONT TURN SIGNAL
LIGHT AND FRONT FOG LIGHT
Headlight and Front Turn Signal Light
Headlight
(High beam)Headlight
(Low beam)
Turn signal light
(Front position light)
G260A01NF-A
Front Fog Light
Page 231 of 271

6
DO-IT-YOURSELF MAINTENANCE
33
12. To replace the front turn signal light bulb
(front position light), remove it from the bulb
holder and install the new bulb.
!
WARNING:
This halogen bulb contains gas under pres-
sure and if impacted could shatter, result-
ing in flying fragments. Always wear eye
protection when servicing the bulb. Protect
the bulb against abrasions or scratches
and against liquids when lighted. Turn the
bulb on only when installing in a headlight.
Replace the headlight if damaged or cracked.
Keep the bulb out of the reach of children
and dispose of the used bulb with care.
HNF5028
G270A03O
Front Fog Light
NOTE:
It is recommended that the front fog light
bulb should be replaced by an authorized
Hyundai dealer.
G270D01NF-AATREAR COMBINATION LIGHT
Stop/Tail Light, Rear Turn Signal Light,
Back-up Light and Rear Side Marker
Light1. Open the trunk lid.
2. Remove the cover on the inside of the rear
luggage trim by turning the knob counter-
clockwise.
HNF5029