2005 Hyundai H-1 (Grand Starex) warning
[x] Cancel search: warningPage 91 of 205

3
STARTING AND OPERATING
23
!
D140A02P-GAT ANTI-LOCK BRAKE SYSTEM (ABS) (If installed) The Anti-Lock Brake System (ABS) is designed to prevent wheel lock-upduring sudden braking or on hazard- ous road surfaces. A computer moni- tors the wheel speed and controls thepressure applied to each brake. Thus, in emergency situations or on slick roads, your ABS will increase vehiclecontrol during braking. NOTE: During ABS operation, a slight pul- sation may be felt in the brake pedalwhen the brakes are applied. Also, a noise may be heard in the engine compartment while driving. Theseconditions are normal and indicate that the anti-lock brake system is functioning properly. WARNING:
ABS will not prevent accidents dueto improper or dangerous driving maneuvers. Even though vehicle control is improved during emer-gency braking, always maintain a safe distance between you and ob- jects ahead. Vehicle speeds shouldalways be reduced during extreme road conditions. The braking distance for carsequipped with an anti-lock braking system may be longer than for those without it in the following road con-ditions. During these conditions, the ve- hicle should be driven at reducedspeeds:
o On rough, gravel or snow-cov- ered roads.
o With tire chains installed.
o On roads where the road surface
is pitted or has different surface height.
o Use caution when parking on a hill.
Engage the parking brake and place the gear selector lever in "P"(automatic transmission) or in first or reverse gear (manual trans-mission). If your vehicle is facing downhill, turn the front wheels away from the curb to help keep thevehicle from rolling. If there is no curb or if it is required by other conditions to keep the vehicle fromrolling, block the wheels.
o Under some conditions your park-
ing brake can freeze in the engagedposition. This is most likely to hap- pen when there is an accumulation of snow or ice around or near therear brakes or if the brakes are wet. if there is a risk that the parking brake may freeze, apply it only tem-porarily while you put the gear se- lector lever in "P" (automatic trans- mission) or in first or reverse gear(manual transmission) and block the rear wheels so the vehicle cannot roll. Then release the parking brake.
Page 92 of 205

3 STARTING AND OPERATING
24
The safety features of an ABS equipped vehicle should not be tested by high speed driving or cornering. This could endanger thesafety of yourself or others.
BACK WARNING SYSTEM
NOTE:
o Back warning system should onlybe considered as a supplemen- tary function. The driver mustcheck the rear view.
o The audible warning signal can
be different depending on theobjects.
o The audible warning signal might
not activate in case the sensor isfrozen or stained with dirt or mud.
o There is a chance of malfunction
of the back warning system whendriving in uneven surfaces such as woods, gravel road, jagged road, or gradient.
o Do not push, or scratch the sur- face of the sensor. This will likelydamage the covering.
o The sensor system might not rec- ognize sharp objects, thick win-ter clothes or sponges whichabsorb the frequency.
o Clean dirty sensors with a soft
sponge and clean water.
o When more than two objects are sensed at the same time, the clos-est one will be recognized first.
C400A01P-GAT (If installed)
The back warning system assists the driver during backward movement ofthe vehicle by chiming if any object is sensed within the distance of 1200 mm (47 in.) behind the vehicle. Thissystem is only a supplemental system. Sensor
HSRFL160
Page 93 of 205

3
STARTING AND OPERATING
25
!
o Such objects may not be detected
by the system at very close range (approximately 300 mm).
WARNING:
If you don't hear an audible warn- ing sound or if the buzzer sounds intermittently when shifting the gearto "R" position, this indicate a mal- function in the back warning sys- tem. If this occurs, have your ve-hicle checked your Hyundai dealer as soon as possible. C400B01P-GAT Operation of the back warning system Operating condition: o The back warning system switch is
pushed with the ignition key "ON".
o Sensing distance in backing up is approximately 1200 mm (47 in.).
1st Warning
approx. 1200 mm
to 810 mm fromthe rear bumper Buzzer beeps intermittently.
SensingDistance Warning Sound 2nd Warning
approx. 800 mmto 410 mm fromthe rear bumperBuzzer soundsbeeps morefrequently. 3rd Warning
approx. 400 mm Buzzer sounds continously.
DRIVING FOR ECONOMY
C140A01P-GAT You can save fuel and get more kilo- meters from your car if you follow these suggestions:
o Drive smoothly. Accelerate at a moderate rate. Don't make "jack- rabbit" starts or full-throttle shiftsand maintain a steady cruising speed. Don't race between stop- lights. Try to adjust your speed tothat of the other traffic so you don't have to change speeds unneces- sarily. Avoid heavy traffic wheneverpossible. Always maintain a safe distance from other vehicles so you can avoidunnecessary braking. This also re- duces brake wear.
o Drive at a moderate speed. The faster you drive, the more fuel yourcar uses. Driving at a moderate speed, especially on the highway, isone of the most effective ways to reduce fuel consumption.
Page 111 of 205

44IN CASE OF EMERGENCY
10
!
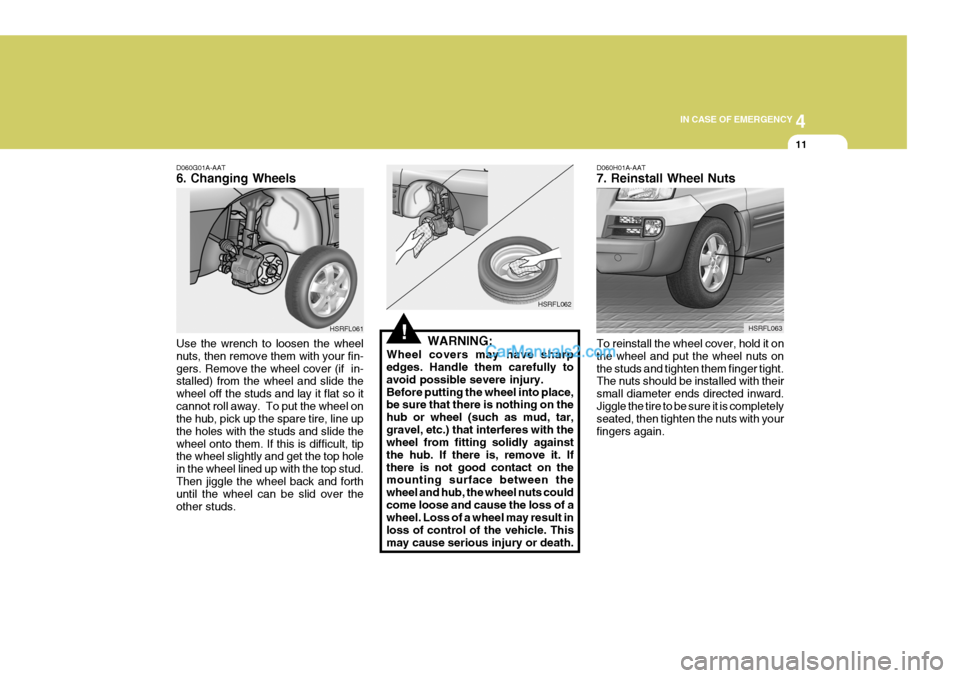
Raise the car high enough so that the fully inflated spare tire can be installed.To do this, you will need more ground clearance than is required to remove the flat tire. Using the jack handle, turn the release valve counterclockwise slow to lower the ram, and then take out the jack.Press the piston down all the way and turn the release valve clockwise as far as possible. HAUT407
HAUT409
CAUTION:
o Use only the jack included with the vehicle and use it only for changing a wheel.
o Position the jack on a hard level
surface.
o If the release valve is loosened
by turning it 2 or more times in the counterclockwise direction, the jack’s oil will leak and the jack cannot be used.
o This jack is hydraulic, and the ram is a two-stage type. Whenboth rams are raised and the stopmark(Green paint) of the upper
! Stop mark
ram becomes visible, stop jack- ing immediately.Further extension of the ram may damage the jack.
o When the jack is used, be sure
that there is no one in or underthe vehicle.
o When jacking up the vehicle, do so only until the tires are slightlylifted from the ground. It is dan- gerous to jack up the vehiclemore than that much.
o It is very dangerous if the jack
somehow slips, so never leavethe vehicle in the jacked-up posi- tion, and never shake the vehicle while it is raised.
WARNING:
Do not get under the car when it is supported by the jack! This is very dangerous as the vehicle could falland cause serious injury or death. No one should stay in the car while the jack is being used.
Page 112 of 205

4
CORROSION PREVENTION AND APPEARANCE CARE
11
4
IN CASE OF EMERGENCY
11
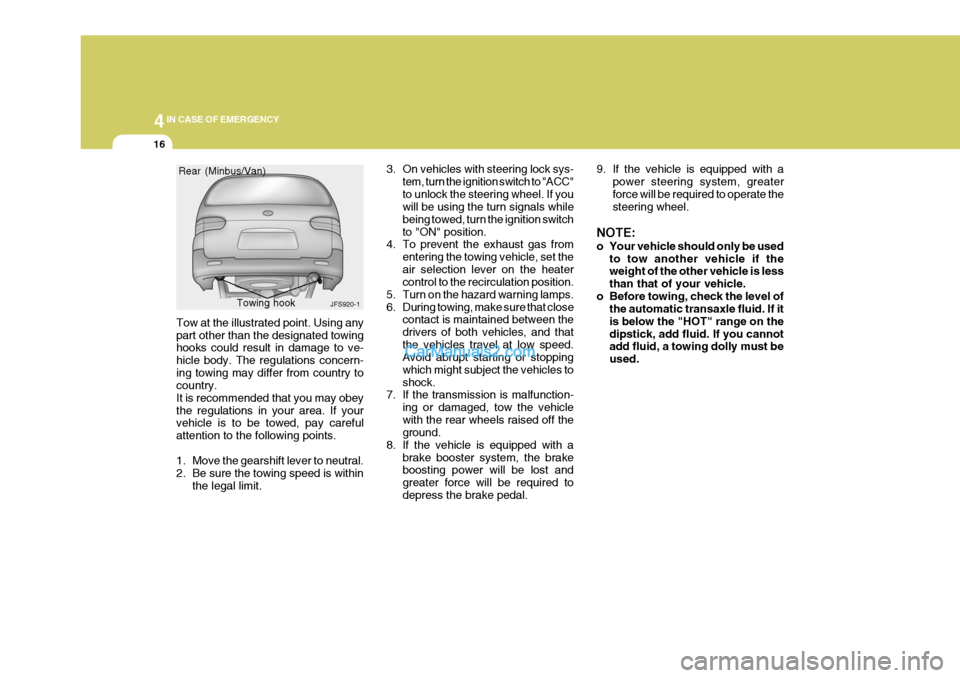
D060G01A-AAT 6. Changing Wheels Use the wrench to loosen the wheel nuts, then remove them with your fin-gers. Remove the wheel cover (if in- stalled) from the wheel and slide the wheel off the studs and lay it flat so itcannot roll away. To put the wheel on the hub, pick up the spare tire, line up the holes with the studs and slide thewheel onto them. If this is difficult, tip the wheel slightly and get the top hole in the wheel lined up with the top stud.Then jiggle the wheel back and forth until the wheel can be slid over the other studs. HSRFL061
!
HSRFL062
WARNING:
Wheel covers may have sharp edges. Handle them carefully to avoid possible severe injury.Before putting the wheel into place, be sure that there is nothing on the hub or wheel (such as mud, tar,gravel, etc.) that interferes with the wheel from fitting solidly against the hub. If there is, remove it. Ifthere is not good contact on the mounting surface between the wheel and hub, the wheel nuts couldcome loose and cause the loss of a wheel. Loss of a wheel may result in loss of control of the vehicle. Thismay cause serious injury or death. D060H01A-AAT 7. Reinstall Wheel Nuts To reinstall the wheel cover, hold it on the wheel and put the wheel nuts onthe studs and tighten them finger tight. The nuts should be installed with their small diameter ends directed inward.Jiggle the tire to be sure it is completely seated, then tighten the nuts with your fingers again.
HSRFL063
Page 117 of 205

44IN CASE OF EMERGENCY
16
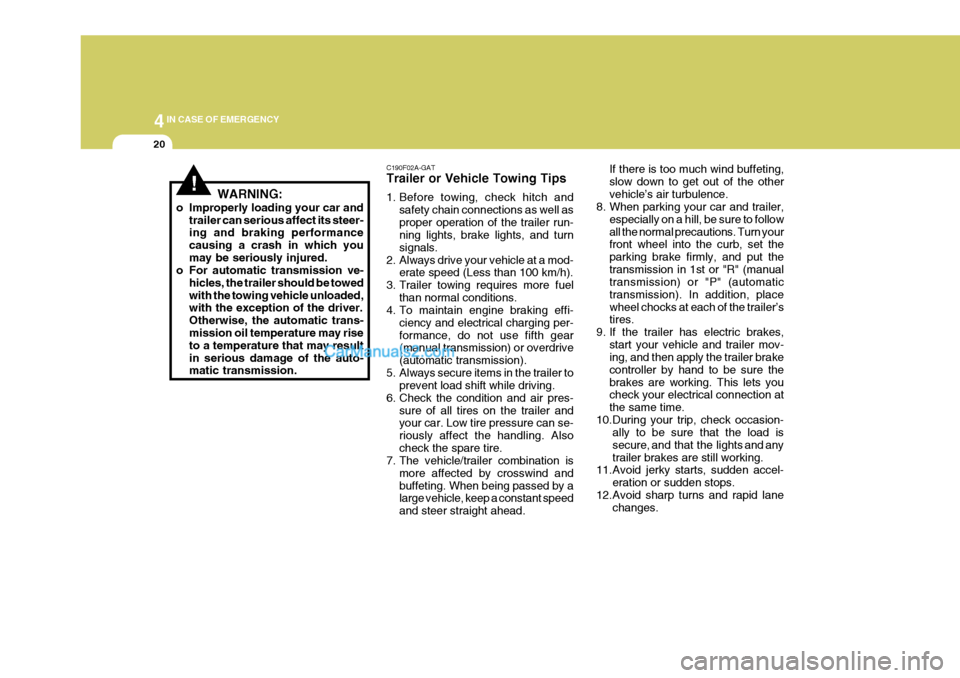
Tow at the illustrated point. Using any part other than the designated towing hooks could result in damage to ve- hicle body. The regulations concern-ing towing may differ from country to country. It is recommended that you may obeythe regulations in your area. If your vehicle is to be towed, pay careful attention to the following points.
1. Move the gearshift lever to neutral.
2. Be sure the towing speed is within
the legal limit. 3. On vehicles with steering lock sys-
tem, turn the ignition switch to "ACC"to unlock the steering wheel. If you will be using the turn signals while being towed, turn the ignition switchto "ON" position.
4. To prevent the exhaust gas from
entering the towing vehicle, set theair selection lever on the heater control to the recirculation position.
5. Turn on the hazard warning lamps.
6. During towing, make sure that close contact is maintained between thedrivers of both vehicles, and thatthe vehicles travel at low speed. Avoid abrupt starting or stopping which might subject the vehicles toshock.
7. If the transmission is malfunction-
ing or damaged, tow the vehiclewith the rear wheels raised off the ground.
8. If the vehicle is equipped with a brake booster system, the brakeboosting power will be lost and greater force will be required todepress the brake pedal.
JFS920-1
Rear (Minbus/Van)
Towing hook
9. If the vehicle is equipped with apower steering system, greater force will be required to operate the steering wheel.
NOTE:
o Your vehicle should only be used to tow another vehicle if the weight of the other vehicle is less than that of your vehicle.
o Before towing, check the level of the automatic transaxle fluid. If itis below the "HOT" range on thedipstick, add fluid. If you cannot add fluid, a towing dolly must be used.
Page 121 of 205

44IN CASE OF EMERGENCY
20
!WARNING:
o Improperly loading your car and trailer can serious affect its steer- ing and braking performance causing a crash in which youmay be seriously injured.
o For automatic transmission ve-
hicles, the trailer should be towedwith the towing vehicle unloaded, with the exception of the driver. Otherwise, the automatic trans-mission oil temperature may rise to a temperature that may result in serious damage of the auto- matic transmission. C190F02A-GAT Trailer or Vehicle Towing Tips
1. Before towing, check hitch and
safety chain connections as well as proper operation of the trailer run- ning lights, brake lights, and turn signals.
2. Always drive your vehicle at a mod- erate speed (Less than 100 km/h).
3. Trailer towing requires more fuel than normal conditions.
4. To maintain engine braking effi-
ciency and electrical charging per-formance, do not use fifth gear (manual transmission) or overdrive (automatic transmission).
5. Always secure items in the trailer to prevent load shift while driving.
6. Check the condition and air pres- sure of all tires on the trailer and your car. Low tire pressure can se- riously affect the handling. Alsocheck the spare tire.
7. The vehicle/trailer combination is
more affected by crosswind andbuffeting. When being passed by a large vehicle, keep a constant speed and steer straight ahead. If there is too much wind buffeting,slow down to get out of the othervehicle’s air turbulence.
8. When parking your car and trailer,
especially on a hill, be sure to followall the normal precautions. Turn your front wheel into the curb, set the parking brake firmly, and put thetransmission in 1st or "R" (manual transmission) or "P" (automatic transmission). In addition, placewheel chocks at each of the trailer’s tires.
9. If the trailer has electric brakes, start your vehicle and trailer mov-ing, and then apply the trailer brake controller by hand to be sure thebrakes are working. This lets you check your electrical connection at the same time.
10.During your trip, check occasion- ally to be sure that the load issecure, and that the lights and anytrailer brakes are still working.
11.Avoid jerky starts, sudden accel-
eration or sudden stops.
12.Avoid sharp turns and rapid lane changes.
Page 123 of 205

44IN CASE OF EMERGENCY
22
2. Pump the hand pump until there are
no more bubbles in the fuel coming out of the air plug. When doing this,place a cloth around the air plug to prevent the escaping fuel from spew- ing about.
3. Tighten the air plug when there are no more bubbles in the fuel.
4. Continue pumping until the hand pump becomes stiff.
5. Finally, check to be sure that there
is no leakage of fuel.If in doubt, consult your nearest authorized HYUNDAI dealer. E090A02P
REMOVAL OF WATER FROM THE FUEL FILTER
E100A02P-GAT (Diesel Motor) If the fuel filter warning lamp illumi- nates during driving, it indicates that water has accumulated in the fuel fil-ter. If this occurs, remove the water as described below.
1. Loosen the drain plug at the bottom
of the fuel filter. Drain plug
!WARNING:
o Do not smoke or have any other open flame near the vehicle while bleeding the fuel system.
o Be sure to carefully clean away
any fuel which spilled ontonearby parts coming out of the air plug, because such accumu- lations of fuel might ignite andcause a fire.
GS40310A