2005 Hyundai H-1 (Grand Starex) check engine light
[x] Cancel search: check engine lightPage 95 of 205

3
STARTING AND OPERATING
27
D170B01P-GAT (1) Speed Avoid rapid acceleration, sudden starts, and maximum speed driving; suchoperation will result in more fuel con- sumption. D170C01P-GAT (2) Shifting Shift only at an appropriate vehicle speed and engine rpm.Always use the highest gear possible. Fuel consumption depends largely on the manner in which vehicle is drivenbut it is also affected by other driving conditions. D170D01P-GAT (3) City traffic Frequent starting and stopping in- creases the average fuel consump- tion. Use roads with smooth traffic flowwhenever possible. When driving on congested roads, avoid use of a low gear at high engine rpm. D170G01P-GAT (6) Tire inflation pressure Check the tire inflation pressure at regular intervals. Low tire inflation pres- sures increase road resistance and fuel consumption. In addition, low tirepressures adversely affect tire wear and driving control.D170H01P-GAT (7) Load Do not drive with unnecessary articles in the luggage compartment.Especially during city driving where frequent starting and stopping is nec- essary, the increased weight of thevehicle will greatly affect fuel consump- tion. Also avoid driving with unnecessaryluggage, etc., on the roof; the increased air resistance will cause more fuel consumption.
D170I01P-GAT (8) Cold engine starting Starting of a cold engine consumes more fuel. Unnecessary fuel consump- tion is also caused by keeping a hot engine running. After the engine isstarted, begin driving soon.
D170E01P-GAT (4) Idling The vehicle consumes fuel even dur- ing idling. Avoid extended idling when-ever possible. D170F01P-GAT (5) High speed The higher the vehicles speed, the more fuel consumed. Avoid driving at full speed. Even a slight release of the accelerator pedal will save significant amount of fuel.
Page 102 of 205

4
Tools and Jack ............................................................. 4-2
Spare Tire ..................................................................... 4-3
If You Have a Flat Tire ................................................. 4-6
Changing a Flat Tire ..................................................... 4-7Towing........................................................................ 4-13
Bleeding the Fuel System .......................................... 4-18
Removal of Water from the Fuel Filter ....................... 4-19
If the Engine Will Not Start ......................................... 4-20
Jump Starting ............................................................. 4-21
If the Engine Overheats ............................................. 4-22
Checking and Replacing Fuses ................................. 4-24
Headlight Aiming Adjustment ..................................... 4-26
Replacement of Light Bulbs ....................................... 4-27
Bulb Wattage .............................................................. 4-35
Fuse Panel Description .............................................. 4-37
IN CASE OF EMERGENCY
4
Page 121 of 205

44IN CASE OF EMERGENCY
20
!WARNING:
o Improperly loading your car and trailer can serious affect its steer- ing and braking performance causing a crash in which youmay be seriously injured.
o For automatic transmission ve-
hicles, the trailer should be towedwith the towing vehicle unloaded, with the exception of the driver. Otherwise, the automatic trans-mission oil temperature may rise to a temperature that may result in serious damage of the auto- matic transmission. C190F02A-GAT Trailer or Vehicle Towing Tips
1. Before towing, check hitch and
safety chain connections as well as proper operation of the trailer run- ning lights, brake lights, and turn signals.
2. Always drive your vehicle at a mod- erate speed (Less than 100 km/h).
3. Trailer towing requires more fuel than normal conditions.
4. To maintain engine braking effi-
ciency and electrical charging per-formance, do not use fifth gear (manual transmission) or overdrive (automatic transmission).
5. Always secure items in the trailer to prevent load shift while driving.
6. Check the condition and air pres- sure of all tires on the trailer and your car. Low tire pressure can se- riously affect the handling. Alsocheck the spare tire.
7. The vehicle/trailer combination is
more affected by crosswind andbuffeting. When being passed by a large vehicle, keep a constant speed and steer straight ahead. If there is too much wind buffeting,slow down to get out of the othervehicle’s air turbulence.
8. When parking your car and trailer,
especially on a hill, be sure to followall the normal precautions. Turn your front wheel into the curb, set the parking brake firmly, and put thetransmission in 1st or "R" (manual transmission) or "P" (automatic transmission). In addition, placewheel chocks at each of the trailer’s tires.
9. If the trailer has electric brakes, start your vehicle and trailer mov-ing, and then apply the trailer brake controller by hand to be sure thebrakes are working. This lets you check your electrical connection at the same time.
10.During your trip, check occasion- ally to be sure that the load issecure, and that the lights and anytrailer brakes are still working.
11.Avoid jerky starts, sudden accel-
eration or sudden stops.
12.Avoid sharp turns and rapid lane changes.
Page 125 of 205

44IN CASE OF EMERGENCY
24
D010B01A-AAT If Engine Doesn't Turn Over or Turns Over Slowly
1. If your car has an automatic
transaxle, be sure the gear selector lever is in "N" or "P" and the emer-gency brake is set.
2. Check the battery connections to be
sure they are clean and tight.
3. Turn on the interior light. If the light dims or goes out when you operatethe starter, the battery is discharged.
4. Check the starter connections to be sure they are securely tightened.
5. Do not push or pull the vehicle to start it. See instructions for "Jump Starting". D010B02P
D010D01A-AAT If the Engine Stalls While Driving
1. Reduce your speed gradually, keep-ing a straight line. Move cautiously off the road to a safe place.
2. Turn on your emergency flashers.
3. Try to start the engine again. If your
vehicle will not start, contact a Hyundai dealer or seek other quali- fied assistance.
JUMP STARTING
!
HA1FL4001
WARNING:
The gas produced by the battery during the jump-start operation is highly explosive. If these instruc-tions are not followed exactly, seri- ous personal injury and damage to the vehicle may occur! If you arenot sure how to follow this proce- dure, seek qualified assistance. Automobile batteries contain sul-furic acid. This is poisonous and highly corrosive. When jump start- ing, wear protective glasses and becareful not to get acid on yourself, your clothing or on the car. E110A02P-GAT
Discharged battery
Booster battery
D010C01A-AAT If Engine Turns Over Normally but Does Not Start 1. Check fuel level. 2. With the key in the "OFF" position,check all connectors at ignition coils and spark plugs(For Gasoline En- gine) or check all connectors atglow plug and glow plug relay(For Diesel Engine). Reconnect any that may be disconnected or loose.
3. Check fuel line in the engine room. 4. If engine still refuses to start, call a
Hyundai dealer or seek other quali- fied assistance.
Page 130 of 205

4
CORROSION PREVENTION AND APPEARANCE CARE
29
4
IN CASE OF EMERGENCY
29
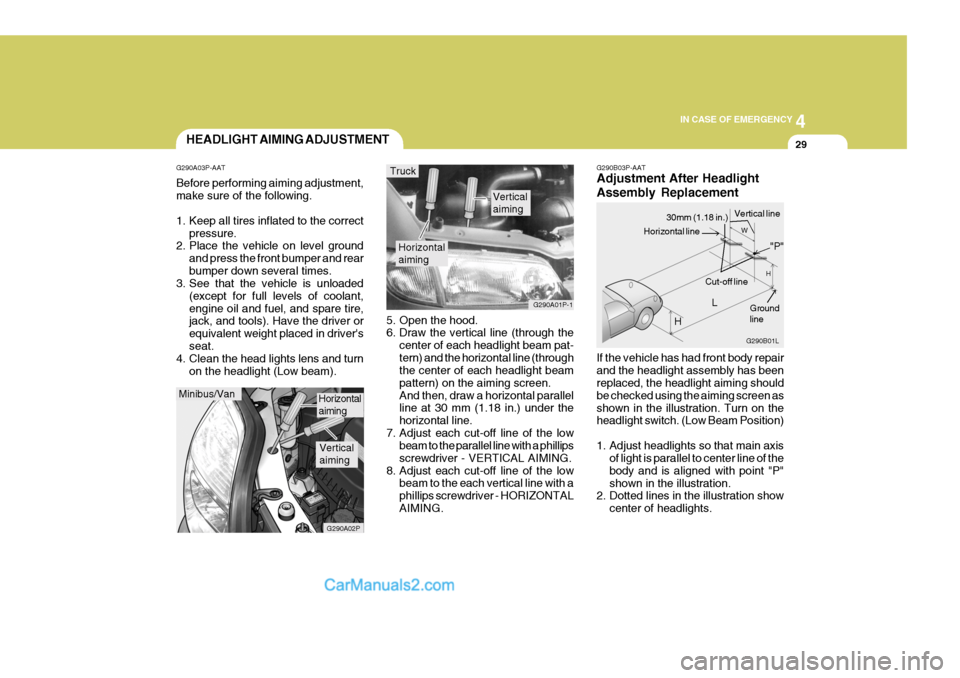
G290B03P-AAT Adjustment After Headlight Assembly Replacement If the vehicle has had front body repair and the headlight assembly has been replaced, the headlight aiming should be checked using the aiming screen asshown in the illustration. Turn on the headlight switch. (Low Beam Position)
1. Adjust headlights so that main axis
of light is parallel to center line of the body and is aligned with point "P"shown in the illustration.
2. Dotted lines in the illustration show
center of headlights.
5. Open the hood.
6. Draw the vertical line (through the
center of each headlight beam pat- tern) and the horizontal line (through the center of each headlight beam pattern) on the aiming screen.And then, draw a horizontal parallel line at 30 mm (1.18 in.) under the horizontal line.
7. Adjust each cut-off line of the low beam to the parallel line with a phillipsscrewdriver - VERTICAL AIMING.
8. Adjust each cut-off line of the low beam to the each vertical line with aphillips screwdriver - HORIZONTALAIMING.
Horizontal aiming
Verticalaiming
G290A01P-1
Truck
G290B01L
LW
H
H Cut-off line
Ground line
"P"
Horizontal line
30mm (1.18 in.) Vertical line
HEADLIGHT AIMING ADJUSTMENT
G290A03P-AAT Before performing aiming adjustment, make sure of the following.
1. Keep all tires inflated to the correct pressure.
2. Place the vehicle on level ground
and press the front bumper and rear bumper down several times.
3. See that the vehicle is unloaded
(except for full levels of coolant,engine oil and fuel, and spare tire, jack, and tools). Have the driver or equivalent weight placed in driver'sseat.
4. Clean the head lights lens and turn
on the headlight (Low beam).
Minibus/Van
G290A02P
Horizontal aiming
Verticalaiming
Page 175 of 205

8DO-IT YOURSELF MAINTENANCE
6GENERAL CHECKS
I020A03P-GAT Engine Compartment The following should be checked regu- larly:
o Engine oil level and condition
o Transmission fluid level and condi- tion
o Brake fluid level
o Clutch fluid level
o Engine coolant level
o Windshield washer fluid level
o Accessory drive belt condition
o Coolant hose condition
o Fluid leaks
(on or below components)
o Power steering fluid level and con-
dition
o Battery condition
o Air filter condition I030A03P-GAT Vehicle Exterior The following should be checked monthly:
o Overall appearance and condition
o Wheel condition and wheel nut tight-
ness
o Air cleaner filter condition
o Exhaust system condition
o Light condition and operation
o Windshield glass condition
o Wiper blade condition
o Paint condition and corrosion
o Fluid leaks
o Door and hood lock condition
o Tire pressure and condition
(including spare) I040A01P-GAT Vehicle Interior The following should be checked each time when the vehicle is driven:
o Light operation
o Windshield wiper operation
o Horn operation
o Defroster, heater operation
(and air conditioning, if equipped)
o Steering operation and condition
o Mirror condition and operation
o Turn signal operation
o Accelerator pedal operation
o Brake operation, including parking brake
o Manual transmission operation, in-
cluding clutch operation
o Automatic transmission operation,
including "Park" mechanism opera-tion
o Seat control condition and opera-
tion
o Seat belt condition and operation
o Sunvisor operation
Page 180 of 205

8
DO-IT YOURSELF MAINTENANCE
11
A translucent coolant reservoir tank is
in the engine compartment.
The coolant level in this tank should
be kept between the "L" and "F" marks when measured while the engine iswarm and idling.
The cooling system is a closed sys-
tem and normally the loss of coolant should be very slight. A noticeable drop in the coolant level could indi-cate leakage. If this occurs, have the system
checked at an authorized HYUNDAIdealer as soon as possible. If the level should drop below the "L"
level on the reservoir tank, add cool- ant.
Also, if the reservoir tank is com-
pletely empty, remove the radiatorcap and add coolant until the level reaches the filler neck.
!WARNING:
Do not open the reservoir tank lid
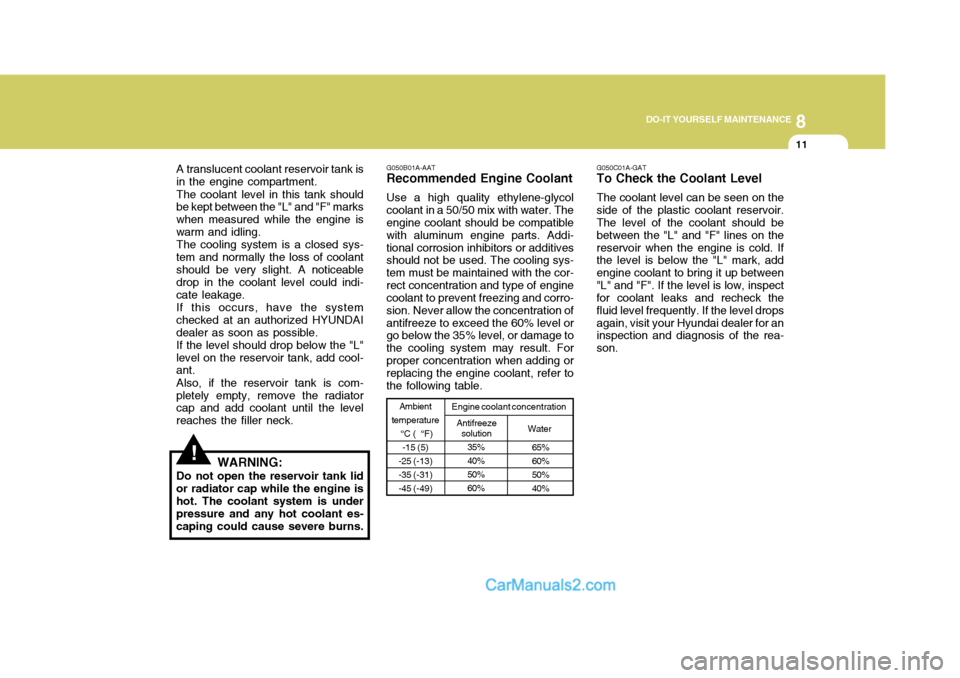
or radiator cap while the engine is hot. The coolant system is under pressure and any hot coolant es-caping could cause severe burns. G050B01A-AAT Recommended Engine Coolant Use a high quality ethylene-glycol coolant in a 50/50 mix with water. The engine coolant should be compatible with aluminum engine parts. Addi-tional corrosion inhibitors or additives should not be used. The cooling sys- tem must be maintained with the cor-rect concentration and type of engine coolant to prevent freezing and corro- sion. Never allow the concentration ofantifreeze to exceed the 60% level or go below the 35% level, or damage to the cooling system may result. Forproper concentration when adding or replacing the engine coolant, refer to the following table.
Water
65% 60%50%40%
35%40%50%60%
Ambient
temperature °C ( °F)-15 (5)
-25 (-13) -35 (-31)-45 (-49) Engine coolant concentration
Antifreezesolution G050C01A-GAT To Check the Coolant Level The coolant level can be seen on the side of the plastic coolant reservoir. The level of the coolant should be between the "L" and "F" lines on thereservoir when the engine is cold. If the level is below the "L" mark, add engine coolant to bring it up between"L" and "F". If the level is low, inspect for coolant leaks and recheck the fluid level frequently. If the level dropsagain, visit your Hyundai dealer for an inspection and diagnosis of the rea- son.
Page 190 of 205

8
DO-IT YOURSELF MAINTENANCE
21TAIL GATE WINDOW WASHER FLUID
I140A02P-GAT (Minibus/Van) (If installed) After opening the cover of quarter trim panel which is located on the left side of quarter trim, check the fluid level. If the fluid level is low, refill thewasher fluid. HSRFL140CHECKING THE FREEPLAY
G150A01A-GAT Steering Wheel To check the steering wheel freeplay, stop the car with the wheels pointed straight ahead and gently move the steering wheel back and forth. Usevery light finger pressure and be sen- sitive to changes in resistance that mark the limits of the freeplay. If thefreeplay is greater than specified, have it inspected by your Hyundai dealer and adjusted or repaired if necessary. 30 mm (1.18 in.)
G160A01A-GAT Clutch Pedal With the engine off, press lightly on the clutch pedal until you feel a change in resistance. This is the clutch pedal freeplay. The freeplay should be withinthe limits specified in the illustration. If it is not, have it inspected by your Hyundai dealer and adjusted or re-paired if necessary. 6 ~ 13 mm (0.24 ~ 0.51 in.)
HSROM109 G160A01E