2005 Hyundai Azera ABS
[x] Cancel search: ABSPage 17 of 297

YOUR VEHICLE AT A GLANCE
B255A01TG-GAT INDICATOR SYMBOLS ON THE INSTRUMENT CLUSTER
High Beam Indicator Light Door Ajar Warning Light
Seat Belt Warning Light
Turn Signal Indicator LightsPassenger's Front Airbag OFF Indicator Light (If Installed)
ABS Service Reminder Indicator (SRI)
Low Oil Pressure Warning Light Parking Brake/Low Brake Fluid Level Warning Light Charging System Warning Light
SRS (Airbag) Service Reminder Indicator (SRI)
Cruise Indicator Light (If Installed)
Malfunction Indicator Light
Electronic Stability Program Indicator Lights (If Installed)
Low Windshield Washer Fluid Level Warning Light
Front Fog Indicator Light
Cruise SET Indicator Light (If Installed)
* More detailed explanations of these items will be found beginning on page 1-62.Low Fuel Level Warning Light
Trunk Lid Open Warning Light Immobilizer Warning Light (If Installed)
Page 21 of 297

1FEATURES OF YOUR HYUNDAI
4KEYS
B030A01NF-GAT For greater convenience, your Hyundai has two master keys and a sub key.The master keys will open all locks on your vehicle. The sub key will only function in the ignition and the doorlocks. Leaving your sub key with a parking attendant will ensure that your vehicle's trunk, trunk lid release, glove box com- partment and rear trunk access maynot be unlocked in your absence. NOTE: Before leaving your sub key with a parking attendant, make sure that the lock knobs of the rear seat backlock and the trunk lid lock are switched to the "LOCK" position.
B030A01TG
Master key
Sub key
B031A01LZ-GAT Before leaving sub key with park- ing attendant When leaving sub key with parking attendant, the following procedures will ensure that your vehicle's trunk and glove box can not be unlocked in yourabsence. 1. Unlock the glove box with the master
key and open it.
2. Set the trunk lid control button in the
glove box to the "OFF" position (not depressed). In the "OFF" position, the trunk can not be unlocked with either the trunk release lever or trunkopen button of transmitter.
B541A01TG
Page 23 of 297

1FEATURES OF YOUR HYUNDAI
6
!
2) Sub key
Similar to the master key, this key will only function in the ignition and the door locks, but it will not operate the trunk and the glove box. Oneside of the key has the Hyundai logo and the other side has an "S" sym- bol.Leaving your sub key with a parking attendant will ensure that your vehicle's trunk, trunk lid release,glove box compartment and rear trunk access may not be unlocked in your absence.
NOTE:
o Before leaving your sub key with a parking attendant, make sure that the lock knobs of the seatback lock and the trunk lid lock are switched to the "LOCK" posi- tion.
o If you make your own duplicate key, you will not be able to cancelthe system or start the engine. CAUTION:
When staring the engine, do not use the key with other immobilizer keys around. Otherwise the enginemay not start or may stop soon after it starts. Keep each key separately not tohave any malfunction after you re- ceive your new vehicle.
B031A01LZ-GAT Before leaving sub key with park- ing attendant When leaving sub key with parking attendant, the following procedures will ensure that your vehicle's trunk and glove box can not be unlocked in yourabsence. 1. Unlock the glove box with the master key and open it.
2. Set the trunk lid control button in the
glove box to the "OFF" position (not depressed). In the "OFF" position, the trunk can not be unlocked with either the trunk release lever or trunkopen button of transmitter.
B541A01TG
Page 53 of 297

1FEATURES OF YOUR HYUNDAI
36
o Lock the metal tab (a) and the
buckle (b) immediately after fold- ing rear seatbacks up.
o To disconnect the metal tab (a) from the buckle (b), insert a nar- row-ended tool into the groove located on the buckle (b). B220A03TG
!WARNING:
o When using the rear seat center belt, you must lock all metal tabs and buckles. If any metal tab or buckle is not locked, it will in- crease the chance of injury in theevent of collision.
o Never unlock the metal tab (a)
and the buckle (b) with the fol-lowing exceptions.
(1) In case of folding rear seatbacks down.
(2) If transporting an object on the rear seat may cause damage to the rear seat center belt. B180A01NF-E
B220A02TG
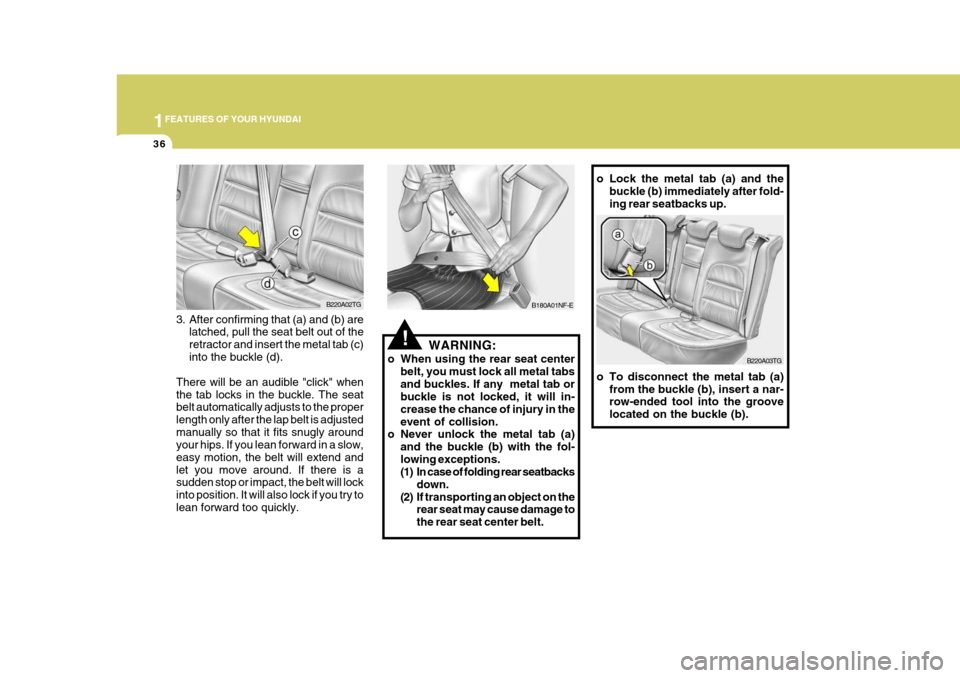
3. After confirming that (a) and (b) are latched, pull the seat belt out of the retractor and insert the metal tab (c)into the buckle (d).
There will be an audible "click" whenthe tab locks in the buckle. The seat belt automatically adjusts to the proper length only after the lap belt is adjustedmanually so that it fits snugly around your hips. If you lean forward in a slow, easy motion, the belt will extend andlet you move around. If there is a sudden stop or impact, the belt will lock into position. It will also lock if you try tolean forward too quickly.
Page 59 of 297

1FEATURES OF YOUR HYUNDAI
42
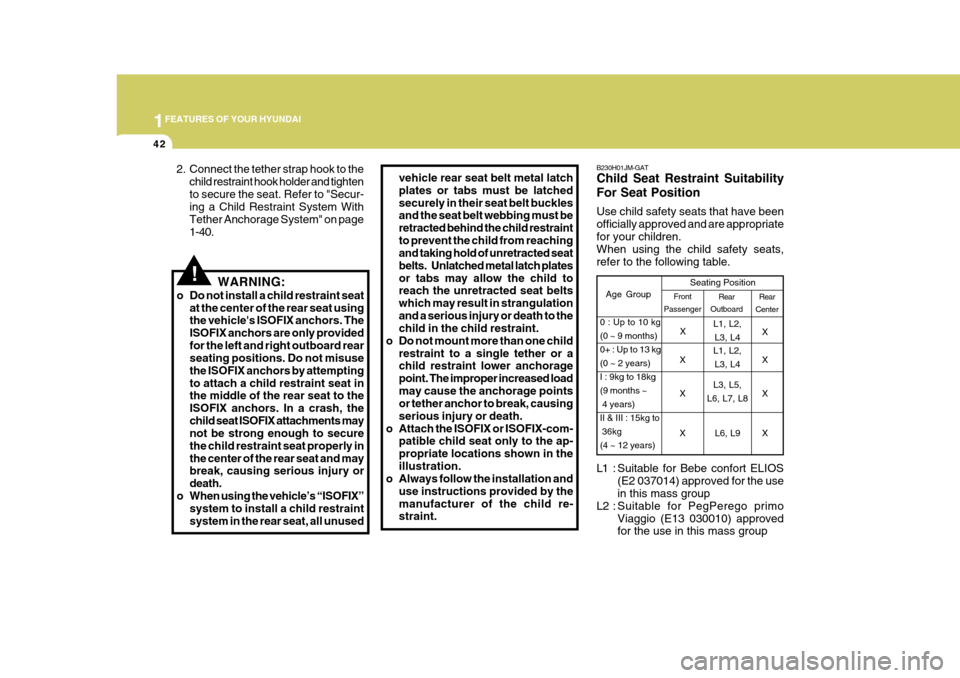
B230H01JM-GAT Child Seat Restraint Suitability For Seat Position Use child safety seats that have been officially approved and are appropriatefor your children. When using the child safety seats, refer to the following table.
Rear
Center
Age Group Seating Position
L1, L2,
L3, L4 X
XX XX XX Rear
Outboard
Front
Passenger
0 : Up to 10 kg (0 ~ 9 months)0+ : Up to 13 kg(0 ~ 2 years)I : 9kg to 18kg(9 months ~ 4 years)II & III : 15kg to 36kg(4 ~ 12 years) X
L1, L2,
L3, L4
L3, L5,
L6, L7, L8
L6, L9
L1 : Suitable for Bebe confort ELIOS (E2 037014) approved for the use in this mass group
L2 : Suitable for PegPerego primo Viaggio (E13 030010) approvedfor the use in this mass group
vehicle rear seat belt metal latch plates or tabs must be latchedsecurely in their seat belt buckles and the seat belt webbing must be retracted behind the child restraintto prevent the child from reaching and taking hold of unretracted seat
belts. Unlatched metal latch platesor tabs may allow the child to reach the unretracted seat belts which may result in strangulationand a serious injury or death to the child in the child restraint.
o Do not mount more than one child
restraint to a single tether or achild restraint lower anchorage point. The improper increased loadmay cause the anchorage points or tether anchor to break, causing serious injury or death.
o Attach the ISOFIX or ISOFIX-com- patible child seat only to the ap-propriate locations shown in theillustration.
o Always follow the installation and
use instructions provided by themanufacturer of the child re- straint.
!WARNING:
o Do not install a child restraint seat at the center of the rear seat using the vehicle's ISOFIX anchors. The ISOFIX anchors are only providedfor the left and right outboard rear seating positions. Do not misuse the ISOFIX anchors by attemptingto attach a child restraint seat in the middle of the rear seat to the ISOFIX anchors. In a crash, thechild seat ISOFIX attachments may not be strong enough to secure the child restraint seat properly inthe center of the rear seat and may break, causing serious injury or death.
o When using the vehicle’s “ISOFIX” system to install a child restraintsystem in the rear seat, all unused
2. Connect the tether strap hook to the
child restraint hook holder and tightento secure the seat. Refer to "Secur- ing a Child Restraint System With Tether Anchorage System" on page1-40.
Page 76 of 297

1
FEATURES OF YOUR HYUNDAI
59
1. Malfunction Indicator Light (MIL)
2. Low Oil Pressure Warning Light
3. Charging System Warning Light
4. Passenger's Front Airbag OFF Indicator Light (If Installed)
5. SRS (Airbag) Service Reminder Indicator (SRI)
6. Tachometer
7. Turn Signal Indicator Lights
8. High Beam Indicator Light
9. Electronic Stability Program (ESP) Indicator Light (If Installed)
10. Automatic Transaxle Position Indicator Light
11. CRUISE Indicator Light (If Installed)
12. Front Fog Indicator Light 13. Cruise SET Indicator Light (If Installed)
14. Speedometer
15. Low Windshield Washer Fluid Level Warning Light
16. Trunk Lid Open Warning Light
17. Immobilizer Warning Light (If Installed)
18. Coolant Temperature Gauge
19. ABS Service Reminder Indicator (SRI)
20. Door Ajar Warning Light
21. Seat Belt Warning Light (Driver's Side)
22. Odometer/ Trip Computer
23. Parking Brake/Low Brake Fluid Level Warning Light
24. Low Fuel Warning Light
25. Fuel Gauge
Page 78 of 297

1
FEATURES OF YOUR HYUNDAI
61
1. Tachometer
2. High Beam Indicator Light
3. Turn Signal Indicator Lights
4. Speedometer
5. Front Fog Indicator Light
6. Coolant Temperature Gauge
7. Fuel Gauge
8. Charging System Warning Light
9. Passenger's Front Airbag OFF Indicator Light (If Installed)
10. Parking Brake/Low Brake Fluid Level Warning Light
11. Seat Belt Warning Light (Driver's Side)
12. Door Ajar Warning Light
13. SRS (Airbag) Service Reminder Indicator (SRI) 14. Malfunction Indicator Light (MIL)
15. Low Oil Pressure Warning Light
16. Low Windshield Washer Fluid Level Warning Light
17. ABS Service Reminder Indicator (SRI)
18. CRUISE Indicator Light (If Installed)
19. Trunk Lid Open Warning Light
20. Immobilizer Warning Light (If Installed)
21. Cruise SET Indicator Light (If Installed)
22. Automatic Transaxle Position Indicator Light
23. Odometer/Trip Computer/Warning Text
24. Electronic Stability Program (ESP) Indicator Light
(If Installed)
25. Low Fuel Warning Light
Page 85 of 297

1FEATURES OF YOUR HYUNDAI
68
!
B260P01TG-GAT
ABS Service Reminder
Indicator (SRI)
When the key is turned to the "ON" position, the Anti-Lock Brake SystemSRI will come on and then go off in a few seconds. If the ABS SRI remains on, comes on while driving, or does notcome on when the key is turned to the "ON" position, this indicates that there may be a problem with the ABS.If this occurs, have your vehicle checked by your Hyundai dealer as soon as possible. The normal brakingsystem will still be operational, but without the assistance of the anti-lock brake system.
WARNING:
If the both ABS SRI and Parking Brake/Low Brake fluid level warn- ing lights remain "ON" or come on while driving, there may be a prob-lem with E.B.D. (Electronic brake force distribution). If this occurs, avoid sudden stopsand have your vehicle checked by your Hyundai dealer as soon as pos- sible.
CAUTION:
If there is a malfunction of the passenger's front airbag ON/OFF switch, the passenger's front airbagOFF indicator will not illuminate and the passenger's front airbag will inflate in frontal impact crasheseven if the passenger's front airbag ON/OFF switch is set to the "OFF" position.If the passenger's front airbag OFF indicator will not illuminate when the passenger's front airbag ON/OFF switch is set to the "OFF" po- sition, have an authorized Hyundai dealer inspect the passenger's frontairbag ON/OFF switch and the SRS airbag system as soon as possible.
!
B230T02NF-GAT
Passenger's Front Airbag
OFF Indicator Light
(If Installed)
The passenger's front airbag OFF in- dicator illuminates for about 4 seconds after the ignition key is turned to the"ON" position or after the engine is started, and then it will go off in 3 seconds.The passenger's front airbag OFF in- dicator also comes on when the passenger's front airbag ON/OFFswitch is set to "OFF" position and turns off when the passenger's front airbag ON/OFF switch is set to "ON"position.