Page 341 of 414
Use a wrench to remove the
mounting bolt f rom the underbody
through the hole in the splash
shield.
Remove the f og light assembly
f rom the bumper by pulling its
inner edge f irst, then the whole
assembly out of the bumper.Remove the electrical connector
f rom the bulb by pushing on the
tab and pulling the connector
down.
Remove the bulb f rom the f og
light assembly by turning it one-
quarter turn counterclockwise.Push the electrical connector onto
the new bulb.
Turn on the f og lights to test the
new bulb.
Reinstall the f og light assembly
into the bumper. Tighten the
mounting bolt. Insert the new bulb into the
assembly and turn it one-quarter
turn clockwise to lock it in place.
1.
2. 3.
4.5.
6.
7.
8.
Touring model only
Lights
Replacing a Front Fog L ight Bulb
340
Page 360 of 414

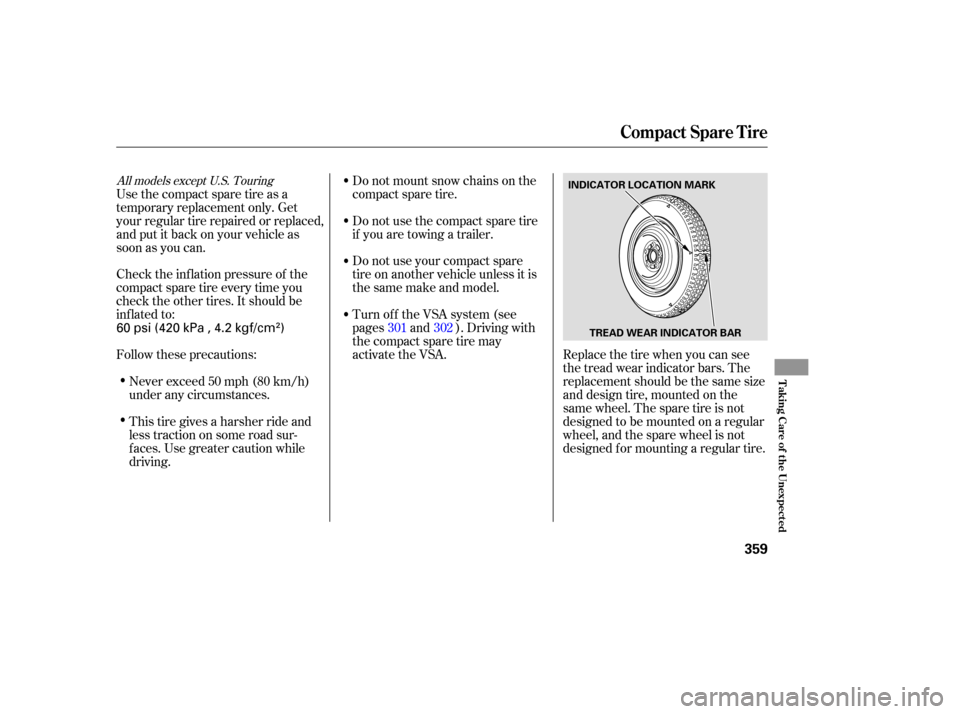
Replace the tire when you can see
the tread wear indicator bars. The
replacement should be the same size
and design tire, mounted on the
same wheel. The spare tire is not
designed to be mounted on a regular
wheel, and the spare wheel is not
designed f or mounting a regular tire.
Do not mount snow chains on the
compact spare tire.
Turn of f the VSA system (see
pages and ). Driving with
thecompactsparetiremay
activate the VSA. Do not use your compact spare
tire on another vehicle unless it is
thesamemakeandmodel. Do not use the compact spare tire
if you are towing a trailer.
This tire gives a harsher ride and
less traction on some road sur-
f aces. Use greater caution while
driving. Never exceed 50 mph (80 km/h)
under any circumstances.
Follow these precautions: Check the inf lation pressure of the
compact spare tire every time you
check the other tires. It should be
inf lated to: Use the compact spare tire as a
temporary replacement only. Get
your regular tire repaired or replaced,
and put it back on your vehicle as
soon as you can.
301 302
All models except U.S. Touring
Compact Spare T ire
T aking Care of t he Unexpect ed
359
INDICATOR LOCATION MARK
TREAD WEAR INDICATOR BAR
60 psi (420 kPa , 4.2 kgf/cm)
Page 363 of 414
Use the extension and the wheel
nut wrench as shown to raise the
vehicle until the f lat tire is of f the
ground.
Remove the wheel nuts, then
remove the f lat tire. Handle the
wheel nuts caref ully; they may be
hot f rom driving. Place the f lat tire
on the ground with the outside
surface facing up.Do not attempt to forcibly pry the
wheel cover of f with a screwdriver or
other tool. The wheel cover cannot
be removed without f irst removing
the wheel nuts.
Bef ore mounting the spare tire,
wipe any dirt of f the mounting
surface of the wheel and hub with
a clean cloth. Wipe the hub
carefully;itmaybehotfrom
driving.
11. 10. 12.On LX model
Changing a Flat T ire
362
WHEEL
WRENCH
EXTENSION
WHEEL COVER
HAB
Page 364 of 414
Tighten the wheel nuts securely in
the same crisscross pattern. Have
the wheel nut torque checked at
the nearest automotive service
f acility.
Tighten the wheel nuts to:Remove the bracket from the jack
storageareabyunscrewingthe
bracket mounting bolt.
Put the f lat tire in the supplied
vinyl bag. This bag is in the jack
storage area. You will f ind a u-shaped slit on the
carpet behind the seat bottom of
the third seat. Pull up the carpet at
the slit, and remove the plastic
screw with a coin.
Lower the vehicle to the ground,
and remove the jack. Put on the spare tire. Put the
wheel nuts back on f inger-tight,
then tighten them in a crisscross
pattern with the wheel nut wrench
until the wheel is f irmly against
the hub. Do not try to tighten
them f ully.
13.
14. 15.17.
18.
16.
CONT INUED
Changing a Flat T ire
T aking Care of t he Unexpect ed
363
BRACKET BRACKET MOUNTING BOLT
94 lbf·ft (127 N·m , 13 kgf·m)
Page 365 of 414

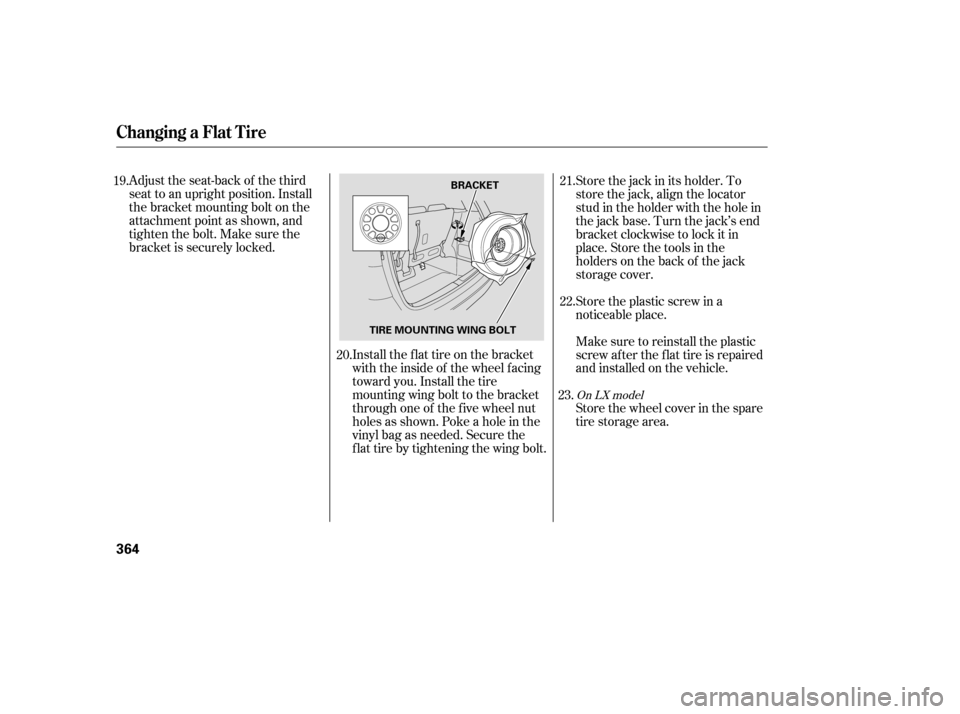
Adjust the seat-back of the third
seat to an upright position. Install
thebracketmountingboltonthe
attachment point as shown, and
tighten the bolt. Make sure the
bracket is securely locked.Install the flat tire on the bracket
with the inside of the wheel facing
toward you. Install the tire
mounting wing bolt to the bracket
through one of the f ive wheel nut
holes as shown. Poke a hole in the
vinyl bag as needed. Secure the
flat tire by tightening the wing bolt.Store the jack in its holder. To
store the jack, align the locator
stud in the holder with the hole in
the jack base. Turn the jack’s end
bracket clockwise to lock it in
place. Store the tools in the
holders on the back of the jack
storage cover.
Store the plastic screw in a
noticeable place.
Make sure to reinstall the plastic
screw af ter the f lat tire is repaired
andinstalledonthevehicle.
Store the wheel cover in the spare
tire storage area.
19.
20.21.
22.
23.
On LX model
Changing a Flat T ire
364
BRACKET
TIRE MOUNTING WING BOLT
Page 366 of 414
Place the flat tire face down on the
attachment point. Put the tire
mountingwingboltinthe
attachment point through one of
the f ive wheel nut holes as shown.
Poke holes in the vinyl bag. Secure
the f lat tire by tightening the wing
bolt.
Follow step 21 through 24 on page.
When the third seat is f olded, the
f lat tire is secured to the f loor on top
of the f olded seat.
Pull up the U-shaped carpet piece,
f old it, and tack the end under the
carpet.
Remove the plastic screw as
described in the previous
procedure.
Install the spare tire storage cover.
1.
3.
4.
2.
364
24.
Changing a Flat T ire
St oring a Flat T ire on t he Folded
Third Seat
T aking Care of t he Unexpect ed
365
Loose items can fly around the
interior in a crash and could
seriously injure the occupants.
Store the wheel, jack, and tools
securely before driving.